Data Protection
Under the Policies node, you can protect collected event data at the folder level.
Select a folder in the Policies node list to view the following two protection types available for it:
-
Permissions – Control the ability of Threat Prevention users to View Data or Manage Policies for the selected folder.
-
View Data checkbox – Affects the ability to see events data for these policies in the policy’s Recent Events Tab and the Investigate Interface.
Only users granted the View Data permission on the folder where the object is protected can view any results of events that include the object. See the Protect Objects section for instructions on protecting policies or objects.
-
Manage Policies checkbox – Affects the ability to change policy configuration settings. See the Protect Policies section for instructions on protecting policies or objects.
-
-
Protected Objects – Monitors the selected Select Active Directory Contexts Window within the policy folder
The system hides protected objects from the following types of data no matter what policy monitored or blocked them:
- Recent Events Tab data
- Investigate Interface data
These protections only apply to viewing event data within the Administration Console and don't carry over to the Netwrix Threat Manager Reporting Module application.
Protect Policies
Policies can be protected at the folder level under the Policies node. When you assign a user permission on a folder, all policies and subfolders within that folder receive protection from other users not in the Permissions list.
To protect policies:
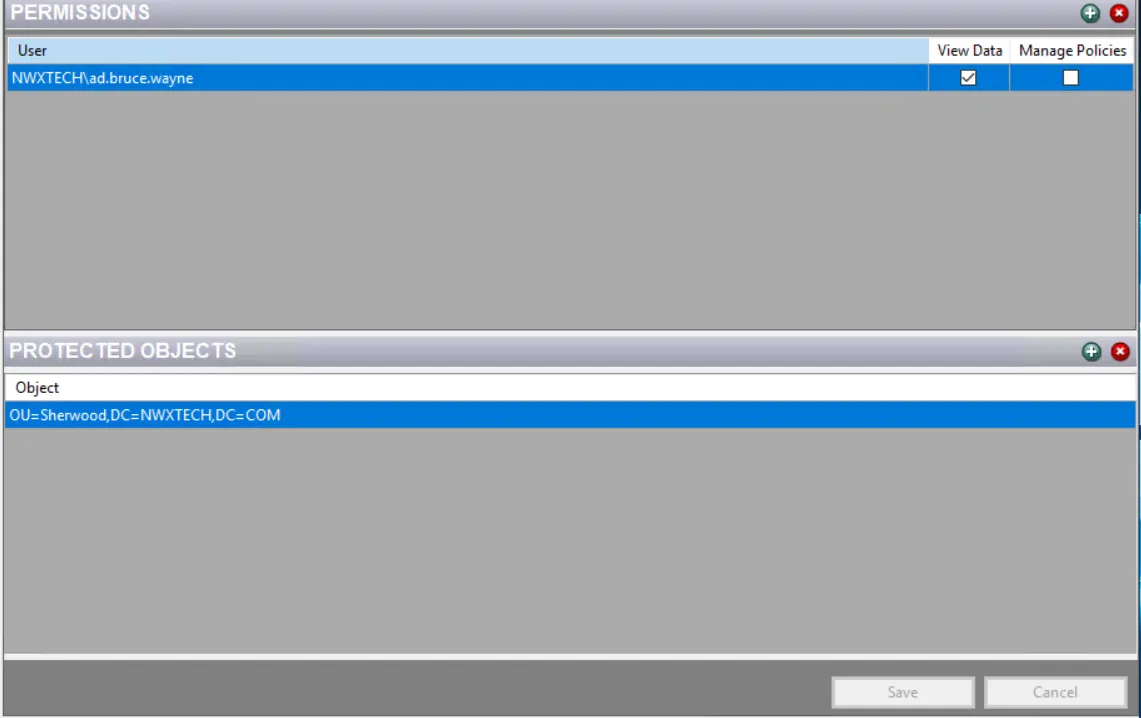
Step 1 – Select a folder under the Policies node in the Navigation pane. The system displays the Policies interface.
Step 2 – In the Permissions ribbon, click the Add (+) button.

Step 3 – On the Select User window, select the user to be granted permission on this folder and the policies within it.
Only users with rights assigned in the Users and Roles Window are available in the list.
Step 4 – The window closes and the system displays the user in the Permissions list with the View Data permission granted by default. To add the Manage Policies permission, check the box for that user. Only those users specifically granted permission to this folder can view event data or configure the policies within this folder or its subfolders.
- Select a user in the Permissions list and click the Remove (x) button to delete it from the list.
Step 5 – Click Save when the permissions are set as desired.
Protect Objects
In addition to protecting policies, objects being monitored or blocked by policies can also be protected. This feature ensures regulatory compliance. Any object granted protection is protected across all policies and reports, including its child objects. That means if a policy from another folder monitors or blocks a change affecting the protected object, the resulting event isn’t included in any result data. Only users granted permissions on the folder where the object is protected can view event data for that object. This protection applies to a policy’s Recent Events tab and the Investigate interface.
To protect objects:
Step 6 – Select a folder under the Policies node in the Navigation pane. The system displays the Policies interface.
Step 7 – In the Protected Objects ribbon, click the Add (+) button.
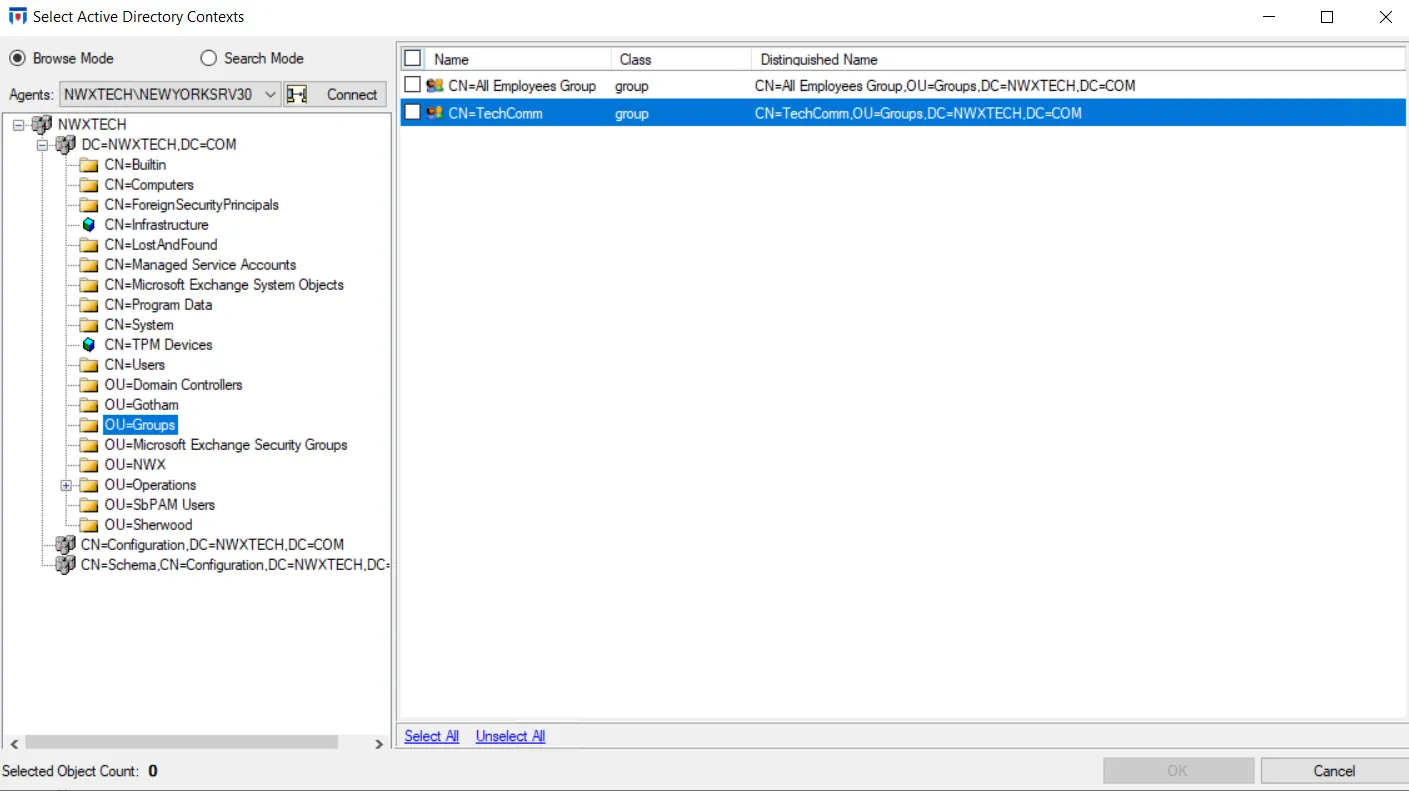
Step 8 – On the Select Active Directory Contexts window, select an Agent from the dropdown menu and click Connect. Expand the domain tree in the Navigation pane. Select an item in the Results pane on the right and click OK. See the Selection Windows topic for additional information.
Step 9 – The window closes and the system displays the object in the Protected Objects list. Only those users specifically granted permission to this folder can view event data for the protected object or its children.
- Select a user in the Protected Objects list and click the Remove (x) button to delete it from the list.
Step 10 – Click Save when the permissions are set as desired.
Protected objects have now been added to the Policies interface.