SAML Authentication Provider
The Security Assertion Markup Language (SAML) provides an XML framework for exchanging authentication and authorization information. It describes and transmits security-related information, which lets you use one set of credentials to log in to many different websites. Managing one login per user is much easier than managing separate logins for email, Customer Relationship Management (CRM) software, Active Directory, and more.
After you add an authentication provider, as discussed in the Add an Authentication Provider topic, the next step is to configure the provider for use with a supported authentication provider type: OpenID, RADIUS, or SAML.
Use the gear icon in the upper right corner of the console to open the Configuration menu. Then select Integrations to open the Integrations interface.
On the Integrations interface, select an authentication provider under the Authentication Provider node in the navigation pane or from the table to configure, view, or modify its details.
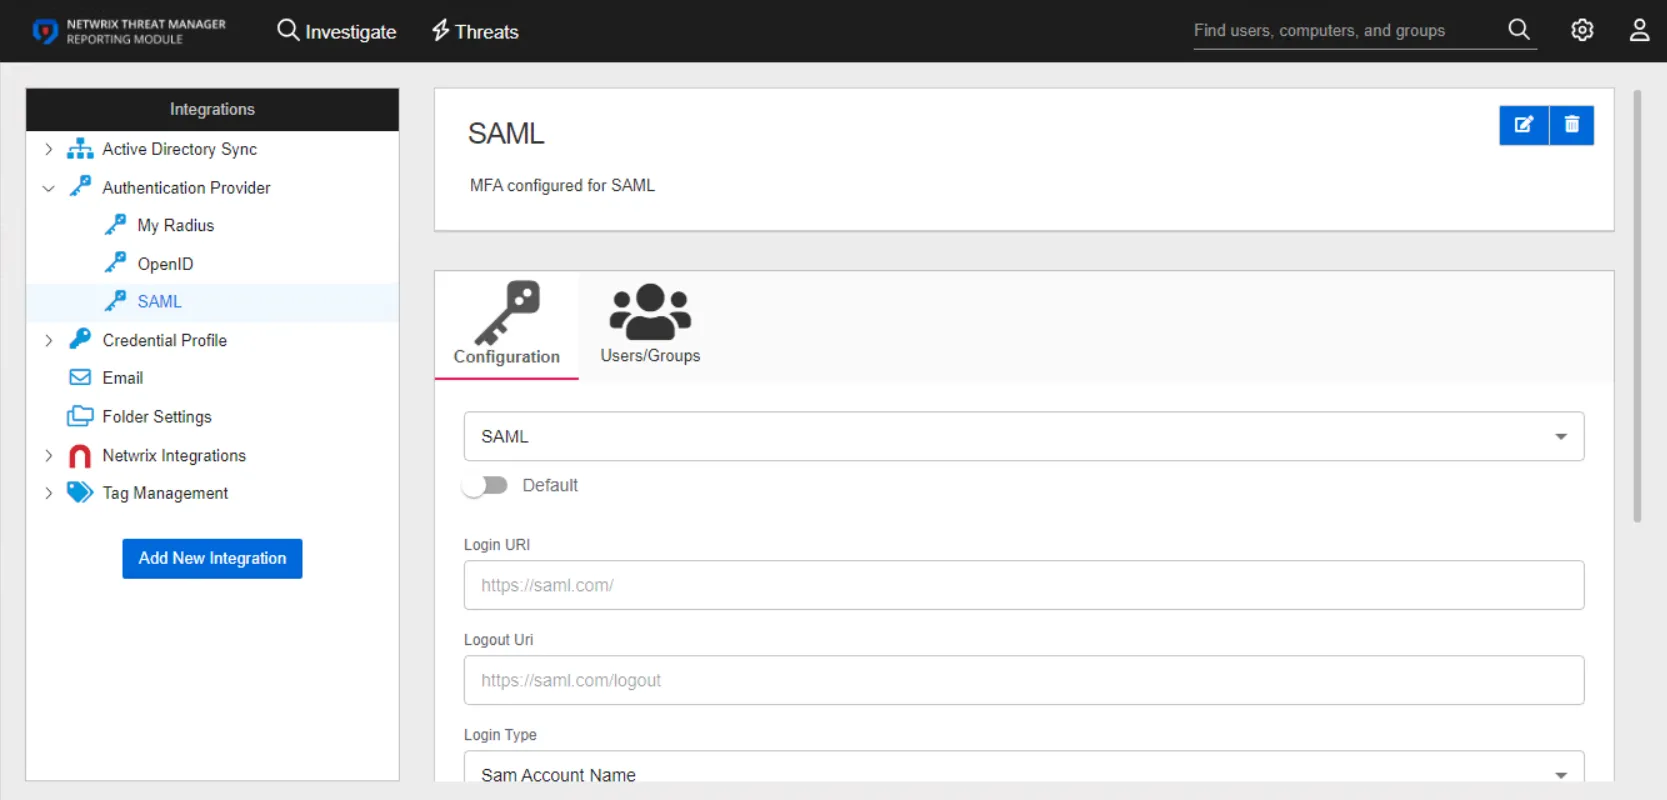
The details page for a SAML authentication provider has two tabs:
- Configuration
- Users/Groups
Prerequisites
For users to be able to use SAML, "SMTP" must be set up and an email address must be stored with the respective users.
Configuration Tab
Configure the following settings for a SAML provider on the Configuration tab:
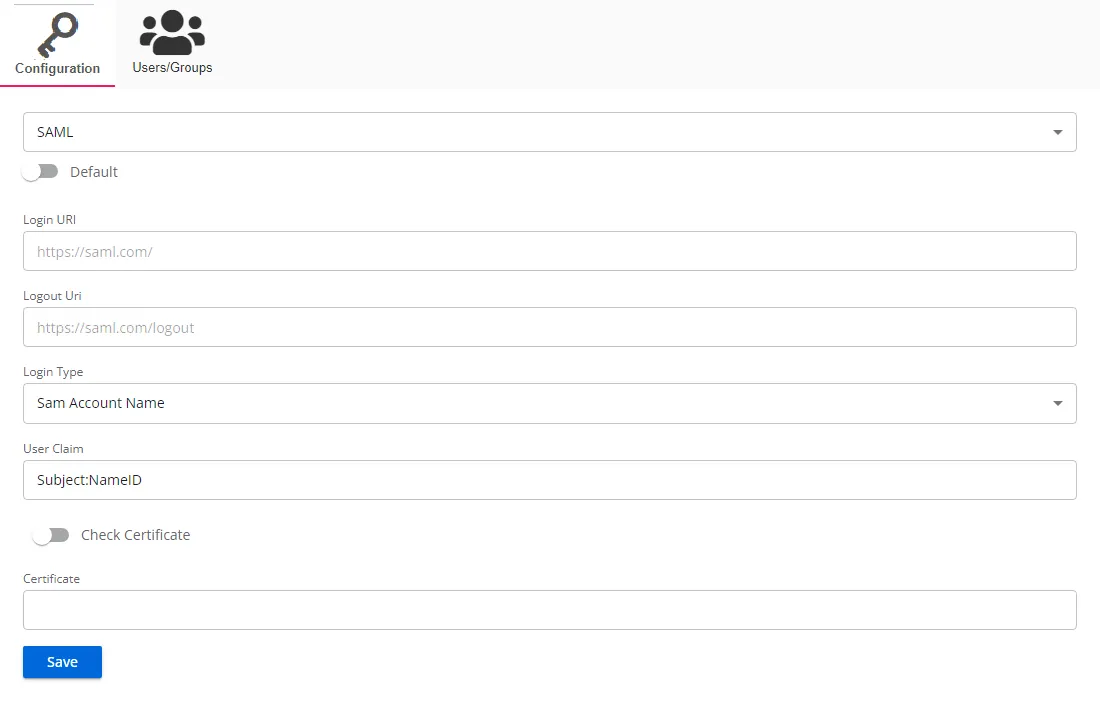
- Default – The default profile applied when a user is assigned multiple authentication profiles. When off, the profile will be determined in alphabetical order of the profile name. Toggle off and on as desired.
- Login URI — The web address where users authenticate to access a web application or service.
- Logout URI — The web address where users go to end their authenticated session.
- Login Type — The login type to use to log into the account. Use the dropdown menu to select one of the following: SAM Account Name, User Principal Name, Email Address, or SID.
- User Claim — An assertion from the identity provider about a user, such as their name, role, or email, that the service provider can use for authorization decisions.
- Check Certificate – If enabled, this validates the response certificate to the certificate provided in the Certificate field. Use the toggle button to enable and disable this setting.
- Certificate — A digital credential that validates the identity of parties and secures communications between an Identity Provider (IdP) and a Service Provider (SP).
Click Save to commit the configuration settings.
Users/Groups Tab
The Users/Groups tab displays users and groups assigned to this authentication profile. To grant new users access, click the New Access button, which opens the Add Console Access window. To assign this authentication provider to existing users, go to System Settings > User Access Page.
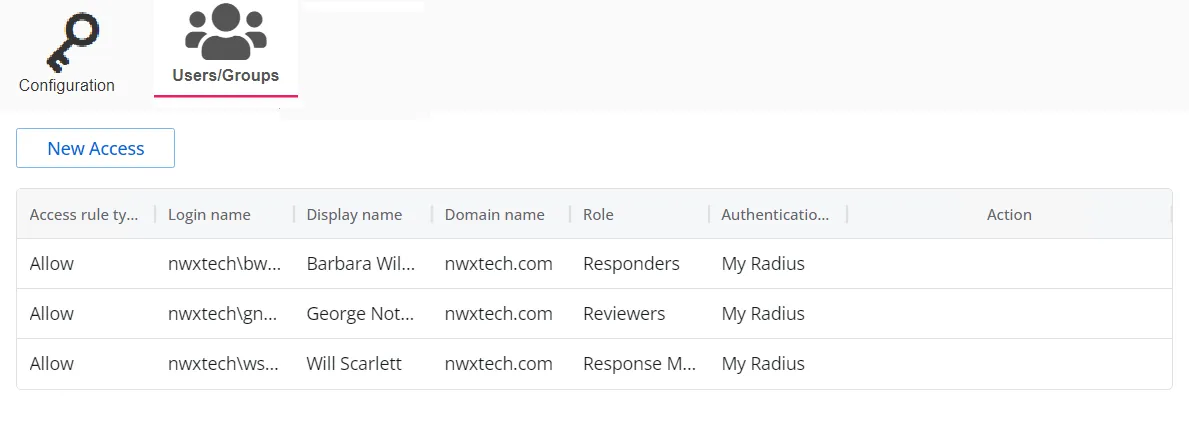
The table displays the following information:
-
Access rule type – Indicates the access type as Allow, which enables console access, or Deny, which disables console access.
-
Login name — The NTStyle domain name for the user or group account.
-
Display name — The display name for the user or group account.
-
Domain name — Name of the domain, either the domain DNS name or domain controller hostname.
-
Role — The role assigned to the user or group for accessing this application.
-
Authentication Type — Type of Multi-Factor Authentication (MFA) assigned to the user or group.
-
Action — This column has the following icons for conducting actions on the user or group:
- Edit icon — You can edit the columns in the selected row by enabling dropdown menus. The edit icon changes to a save icon while in edit mode.
- Trash icon — Opens a Warning window to confirm deleting the user or group. Removing a user or group removes console access for it.
- Reset MFA button — Forces the user or every user in the group to reconfigure MFA on the next login. This option is only available if an MFA authentication type is applied to the user or group.
See the User Access Page topic for additional information.