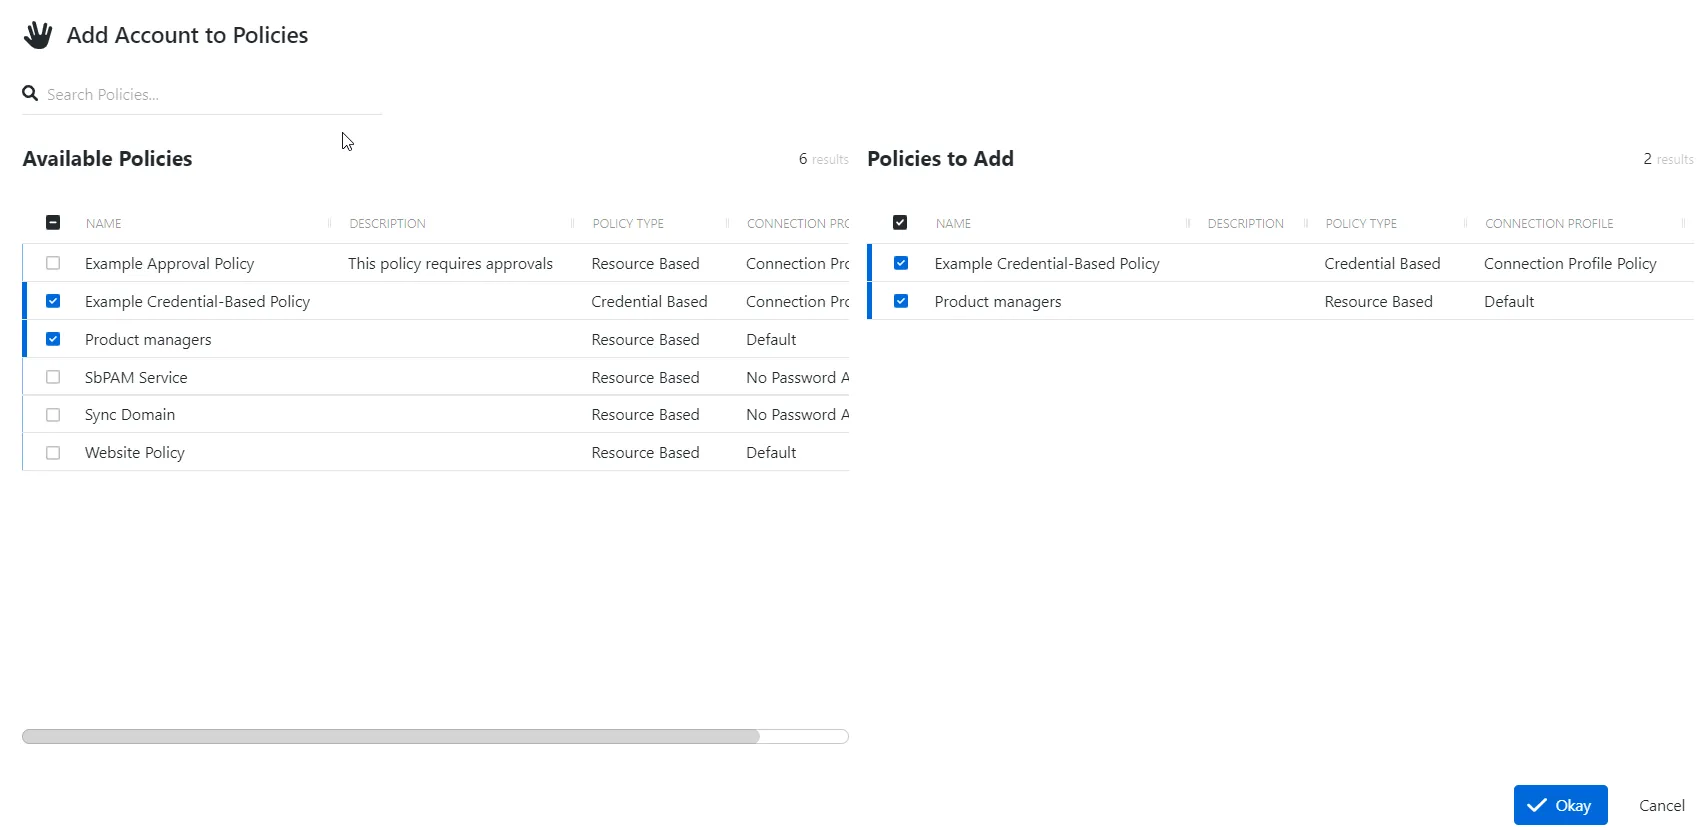
Add Account to Policies Window
The Add Account to Policies window provides a list of Policies that have been created. Policies are created in the Policy Interface.

The window has the following features:
- Search — Searches the table or list for matches to the search string. When matches are found, the table or list is filtered to the matching results.
- Available Policies — Shows all available policies
- Policies s to Add — Shows selected policies
- Arrow icons — Use the arrows to move selection in and out of the Policies to Add section
- Okay button — Closes the window
Both tables have the following columns:
- Checkbox — Check to select one or more items
- Name — Displays the name of the policy
- Description — Description of the policy
- Policy Type — Icon indicates the type of object
- Connection Profile — Displays the name of the connection profile associated to the access policy
Add Policies
Follow the steps below to add a policy to the present account.
Step 1 – Navigate to the Users & Groups page.
Step 2 – In the Users & Groups list, click the name of the desired account to open the User page.
Step 3 – Select the Policies tab.
Step 4 – Click Add to open the Add Account to Policies window.
Step 5 – Select a policy in the Available Policies table and click the right arrow to move it to the Policies to Add table.
Step 6 – Click Okay to add policies to the role.
The new policy is added to the applicable account.