Add Resources and Groups Window
The Add Resources And Groups window provides a list of resources that have been onboarded. Resources are onboarded in the Resources Page.
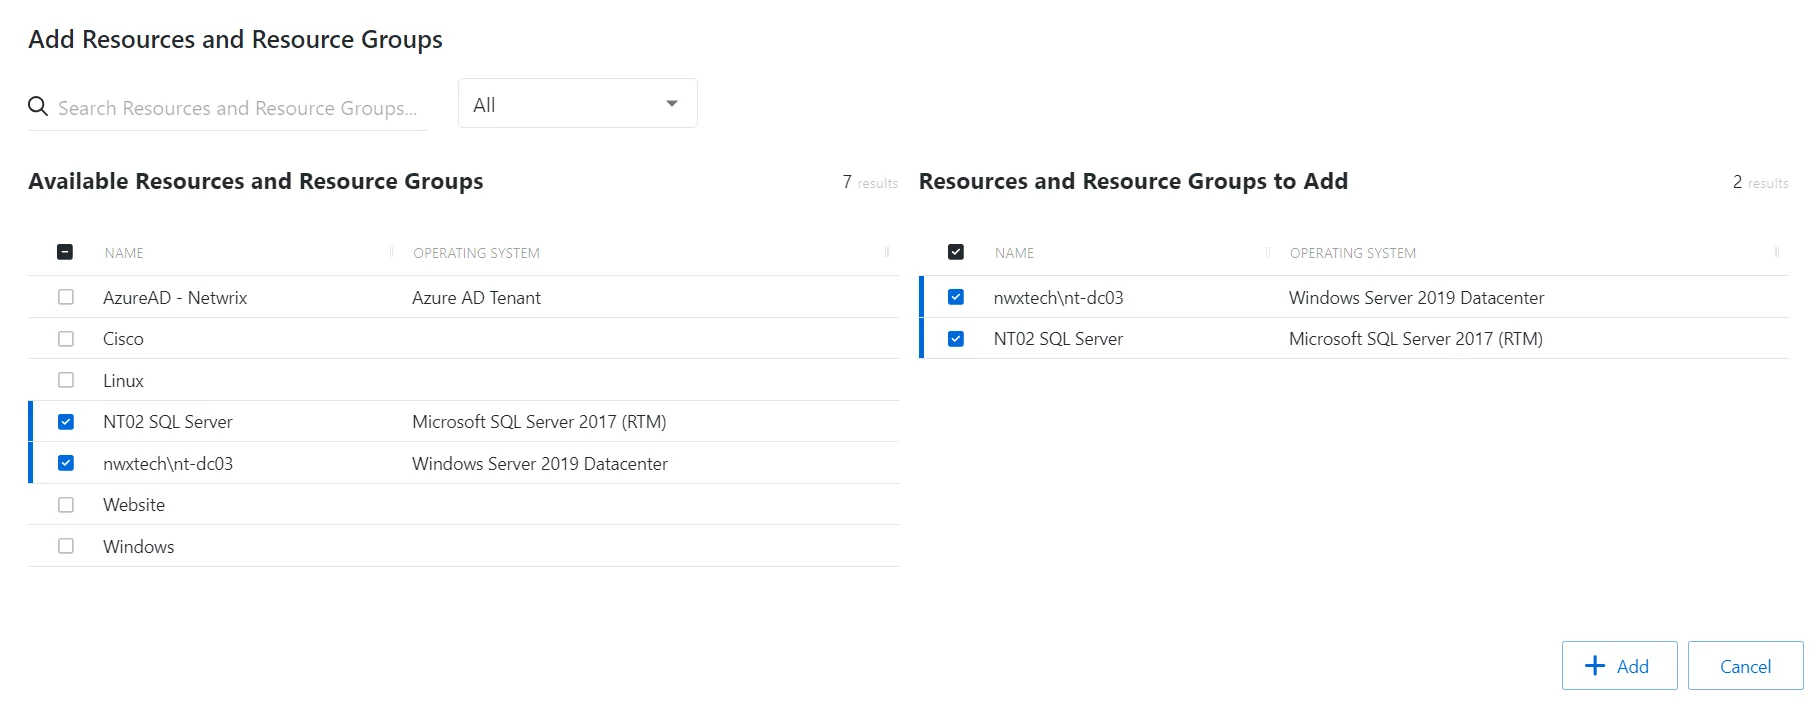
The window has the following features:
- Search — Searches the table or list for matches to the search string. When matches are found, the table or list is filtered to the matching results.
- Filter — Provides options to filter results based on a chosen criterion: Resource or Resource Group
- Available Resources And Resource Groups— Shows all available resources and resource groups that have been onboarded
- Resources And Resource Groups to Add — Shows selected resources and resource groups
- Add button — Adds modifications and closes window
- Cancel — Closes the window
Both tables have the following columns:
- Checkbox — Check to select one or more items
- Type — Classification of the activity
- Name — Displays the name of the resource. Click the link to view additional details. See the Resources Page topic for addition information.
- Operating System— Displays the operating system of the resource
Add Resources
Follow the steps to add resources and resource groups to the selected access policy or custom role.
Step 1 – Navigate to the Policy > Access Policies page or Users & Groups > Role Management page.
Step 2 – Select the name of the access policy or custom role and select the Resources tab.
Step 3 – Click Add to open the Add Resources window.
Step 4 – Select the checkbox for the desired resources in the Available Resources And Resource Groups table.
Step 5 – Click Add to add one or more Resources or Resource Groups.
The new resource(s) and resource group(s) are added to the custom role.