Add a Resource Group
Follow the steps to add resource groups to the console.
Step 1 – Navigate to the Policy > Resources > Resource Groups page.
Step 2 – In the Resource Groups list, click the Plus icon.
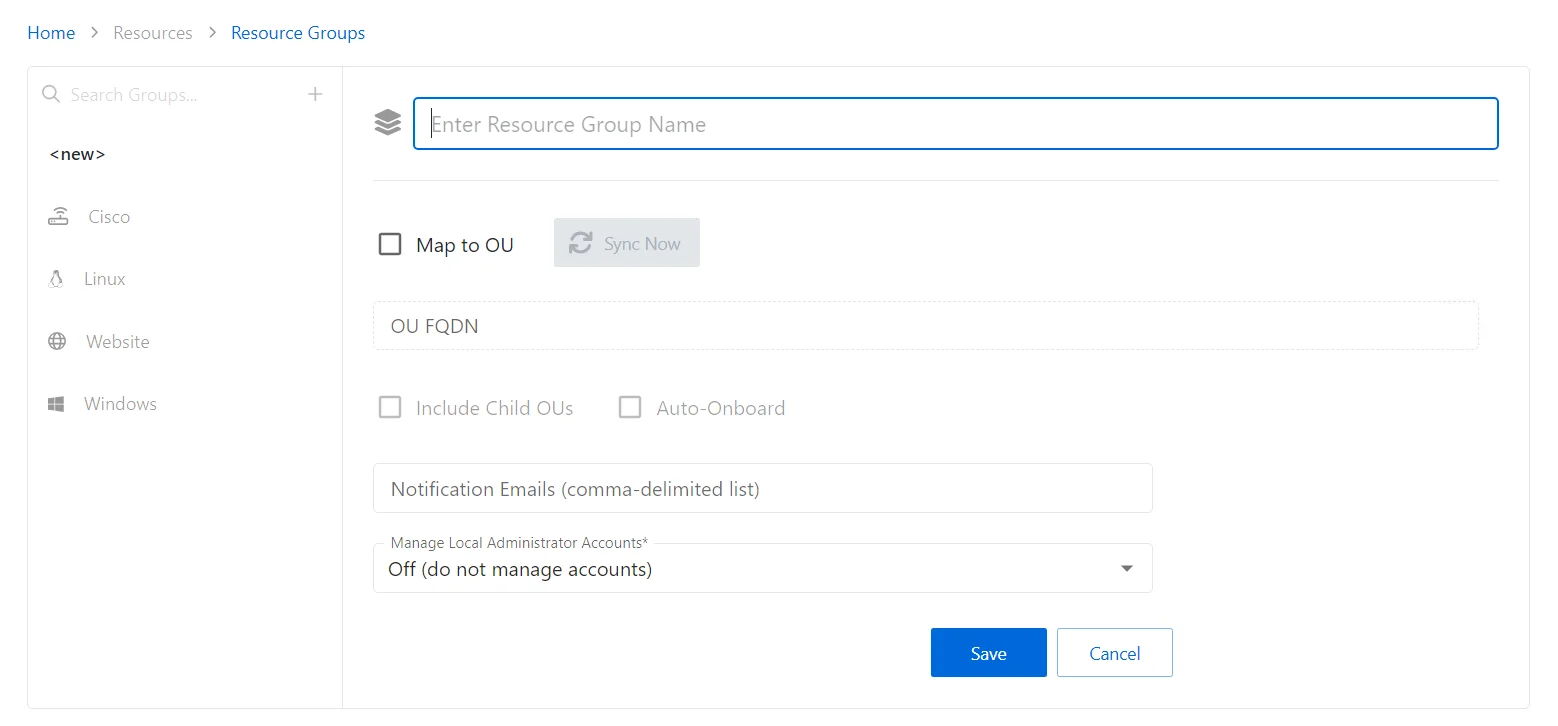
Step 3 – Enter or select the following information:
-
Name — Displays the name of the group
-
Map to OU checkbox — Indicates if the group is mapped to an OU. The following settings are enabled when checked:
- Sync Now button — Maps the specified OU to the group. A confirmation dialog is displayed to allow the user the option to either Sync Now or Cancel.
- OU FQDN — Displays the fully qualified domain name of the OU if mapping is enabled
- Include Child OUs checkbox — Indicates if child OUs of the specified OU are included in the mapping
- Auto-Onboard checkbox — Indicates if Privilege Secure automatically manages any resources found in the OU
-
Notification Emails — Displays a comma-delimited list email recipients to notify of events on the resources in the selected group
-
Manage Local Administrator Accounts — Displays a comma-delimited list email recipients to notify of events on the resources in the selected group:
- Off (Do Not Manage Accounts) — Do not manage any Local Administrator accounts on the resources in the selected group
- On (Manage All Accounts) — Manage all Local Administrator accounts on the resources in the selected group
- Per Individual Resource — Set whether the Local Administrator accounts will be managed on a per resource basis
Step 4 – Click Save to create the new resource group.
Step 5 – With the new resource group selected, configure the following settings:
- Add resources to the resource group. See the Add Resources Window for Resource Group topic for additional information.
The new resource group is added to the console and is shown in the Resource Groups list.