CyberArk Integration
Privilege Secure contains a built-in vault for credential management, but can uniquely map to a CyberArk vault. CyberArk connectors can be used for the following purposes:
- Service Accounts – Use to perform Active Directory synchronization
- Activities – Use to configure the target account for the activity
CyberArk connectors use the Central Credential Provider. The Central Credential Provider provides a REST interface that allows applications to check out passwords from a CyberArk vault. The accounts are identified by a safe, folder, address and username. For service accounts, the username, address, safe and folder are provided directly in the service account definition. For activities, provide the username and address in the LoginAccountName format. The safe and folder information is provided directly in the activity definition.
Add a Vault Connector for CyberArk
Follow the steps to add the CyberArk Connector.
Step 1 – Navigate to the Configuration > Integration Connectors page.
Step 2 – In the Integration Connectors list, click the Add Integration Connector icon.
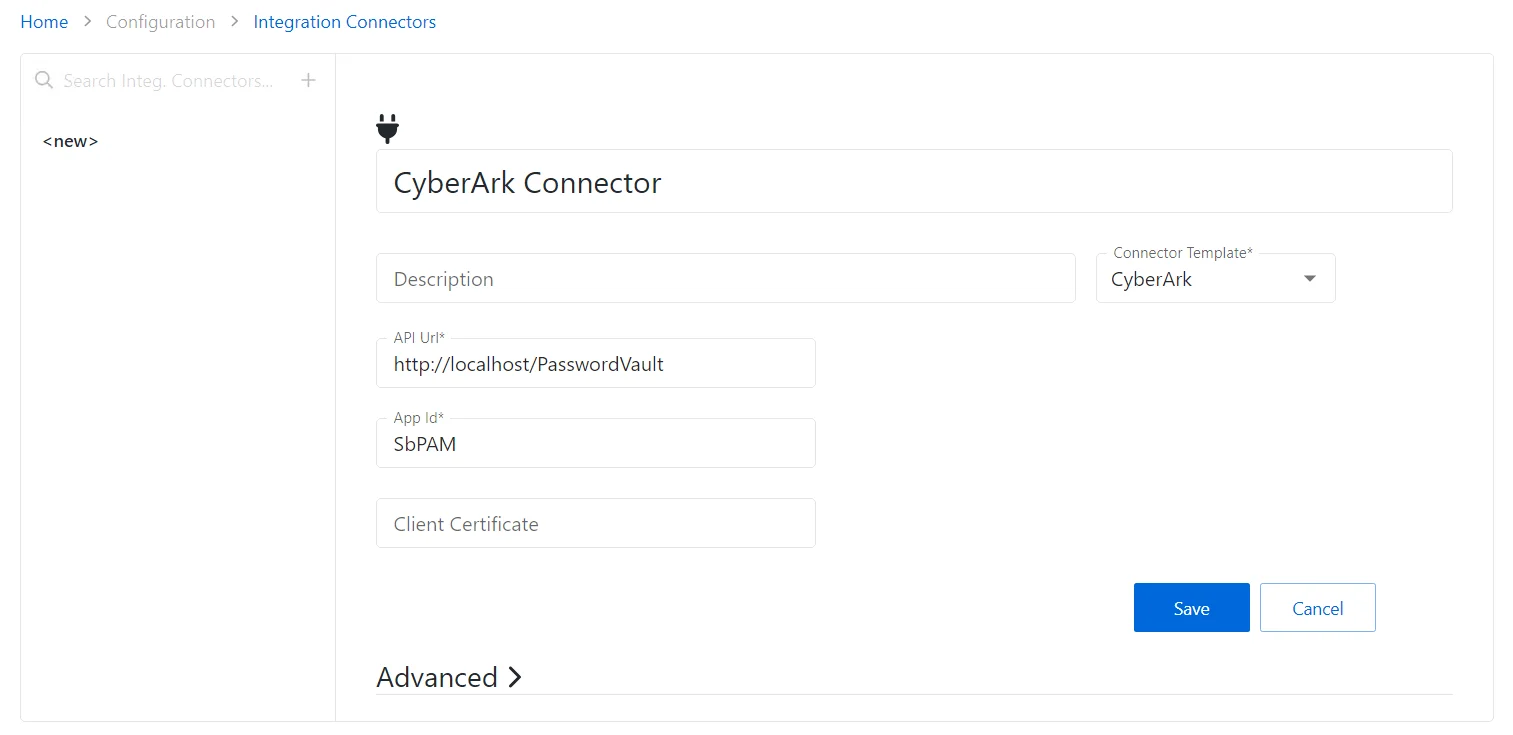
Step 3 – Enter the following information:
- Connector Name – Enter a name to uniquely identify the connector
- Connector Description (Optional) – Enter a brief description to identify the service account
- Connector Template – A selection of templates for connector configurations. Select CyberArk from the drop-down list.
- API Url – The base url for the CyberArk Common Credential provider. https://cyberarkhost.example.com
- App ID – The application identifier to use when requesting accounts from the CyberArk Common Credential Provider
- Client Certificate – The base64 text from the certificate file needed to authenticate to the CyberArk Common Credential Provider
Step 4 – Click the Save icon to create the new integration connector.
The next step is to import the data from CyberArk.