Getting Started
After you install Privilege Secure, complete the following configuration sections so that users can create activity-based sessions on defined resources.
Enable additional capabilities such as Access Certification, email notifications, and SIEM service integration on their respective configuration pages.
Configure MFA
Privilege Secure requires a multi-factor authentication (MFA) solution (Authenticator, DUO, Symantec VIP, etc.) for all user accounts. First-time users must register an MFA to use with their Active Directory credentials:
- Configure multi-factor authentication (MFA). See the First Launch topic for additional information.
- Log in to the Privilege Secure Console. See the Log Into the Privilege Secure Console topic for additional information.
Update the License
Netwrix Privilege Secure includes a temporary 30-day license. Contact the organization’s Netwrix sales representative to purchase a license:
- Import the license file. See the Import the License File topic for additional information.
Privilege Secure licensing follows the user count. Any user provisioned access to Privilege Secure consumes a license after their first login. This applies to all users, regardless of role (Administrator, Reviewer, User, or Custom Role).
Access Policies
The goal when using Netwrix Privilege Secure is to gain secure access to remote devices or secrets in the vault. Access Policies deliver this access. Access Policies are divided into resource (access to remote devices) and credential (access to credentials and files in the vault).
Resource-based Access Policies
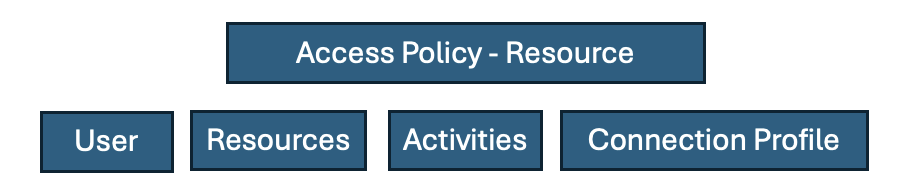
A resource-based Access Policy connects users to resources and performs activities to facilitate that connection. The following components make up a resource-based Access Policy:
-
User is a person or service logged into NPS-AM, but that isn't necessarily the account used to log in to the remote device. The documentation refers to that account as the “login account” and it can be:
-
Requestor – the user's account is also the login account.
-
Managed Account - a permanent account that NPS controls.
-
Activity Token (also known as Ephemeral) - an account that NPS creates just for this session and then destroys when the session ends.
-
Vault – managed accounts in other vaults that serve as login accounts. Netwrix calls this ability to use other vaults, even PAM competitors, Bring Your Own Vault (BYOV).
-
Resources are the remote devices the user wants to access. This includes Windows and Linux servers and PCs, databases, and network appliances.
-
Activities include creating or promoting the login account so that it has the privileges needed to do your task. This means enabling RDP/SSH and adding them to the Domain Admins group. It also often includes rotating the credentials for the session. Define activities before, during, and after the session. For example, if the login account must be added to the Domain Admins group, NPS adds it before the session and then removes the login account and rotates the password when the session ends.
-
Add users and resources manually, or bring them in with a directory synchronization like Active Directory or EntraID. Set up the corresponding service accounts. For AD, use an account with the privileges that allow AD sync; create, disable/enable, and delete accounts; and add and remove other accounts from groups. For non-AD joined Linux machines, use a local account NPS-AM can use to connect via SSH with sudo/wheel access.
-
Connection policies include details on how to access the proxy, how long sessions last and whether users can extend them, any command restrictions, how NPS handles credentials, and approval workflows.
The following process takes you through this process from the bottom-up. After NPS has MFA and proper licensing set up, start adding service accounts and directory syncs, then onboard users and resources, create activities and connection parameters, and finally create Access Policies.
Add Service Accounts & Domains
Before using Privilege Secure, add the service accounts and domains that contain the users, groups, and resources:
- Service Accounts Page — Add the account credentials that grant access to the required resources
- Add New Domain — Add the Active Directory domains that contain the users, groups, resources, and service accounts that Privilege Secure uses to grant access
Add Users, Resources & Activities
Before users can create sessions, set up an access policy. A user must be part of an access policy to create a session. The access policy determines what activities the users can perform and on what resources. An Access Policy consists of three parts to configure first:
- Users & Groups Page — Add the Users and Groups from AD that use the Privilege Secure Console
- Resources Page — Add the resources such as Windows or Linux servers that the users access through the Privilege Secure Console
- Activities Page — Add the actions that Privilege Secure performs before, during, and after a session, such as temporarily adding the user to a local admins group
Configure Access Policies
After you add the users, groups, and resources to the console, create access policies to control privileged access:
- Connection Profiles Page — Add the connection profile to use with the access policy
- Access Policy Page — Create the access policies to control privileged access to resources
Create Sessions
Privilege Secure is configured and ready to use:
- Create My Activity Session — Create a session to grant temporary privileges and gain access to the resources defined by the previously created access policy
- Browser Extension Interface — Access all of your previously created activities from within an internet browser
Credential-based Access Policies
A credential-based Access Policy lets users access credentials or files from the vault.
A credential-based Access Policy requires the following:

- Users are the people or services logged in to NPS-AM.
- Credentials are usernames and secrets stored in the vault.
- Files are any type of file stored in the vault.
- Activities here aren't editable. They provide access to credentials or files.
- Connection policy includes details on how long sessions last, whether users can extend them, and approval workflows.
To add a vault, see Adding a vault. Then, to add credentials or files to the vault, see Vault Details.
To grant users access to credentials or files in the vault, see Access Policy and create an Access Policy that is Credential based. Then see Credential-based Access Policy.