Privilege Secure End User Overview
This topic and its subtopics address users assigned the Privilege Secure User role. Every NPS-AM user receives this role during onboarding. The Auditor, Approver, and Reviewer roles share most of the same tasks because they are also Users. The specific differences are in these three locations:
- Approvers at Approvers Dashboard: Approvers
- Auditors at Historical Dashboard: Auditors
- Reviewers at Audit and Reporting: Reviewer
New users added to the Console must complete the MFA registration process before they log in. Privilege Secure requires a multi-factor authentication (MFA) solution (Authenticator, DUO, Symantec VIP, etc.) for all user accounts. On initial login, the user must complete MFA registration to proceed with using Privilege Secure. Check with the organization's Administrators for login requirements.
Privilege Secure users can also install a Browser Extension. See the Browser Extension App topic for additional information.
First-Time Login
After you install Privilege Secure, users can launch the application from the desktop icon or through the URL provided by a Privilege Secure Administrator, for example:
Privilege Secure is a browser-based application, so you can access the web interface
remotely. In most environments, enter the URL for the host on which Privilege Secure is installed
into a supported browser address bar. For example, if Privilege Secure is installed on server
ExampleServer01, then the address is:
Depending on the organization’s network environment, use the NetBIOS name, fully qualified domain name (FQDN), or IP Address of the server in the browser. Firewalls can also restrict access.
To log in to Privilege Secure:
Step 1 – Open Privilege Secure in a browser window. The Login screen shows the Authentication Connector set as the default.
Privilege Secure requires a multi-factor authentication (MFA) solution (Authenticator, DUO, Symantec VIP, etc.) for all user accounts unless an Administrator configures otherwise. If required, first-time users must register with an MFA to use with their login credentials.

Step 2 – Click the default authentication connector button, or click Log In with a Different Account to display all authentication connectors registered with Privilege Secure.
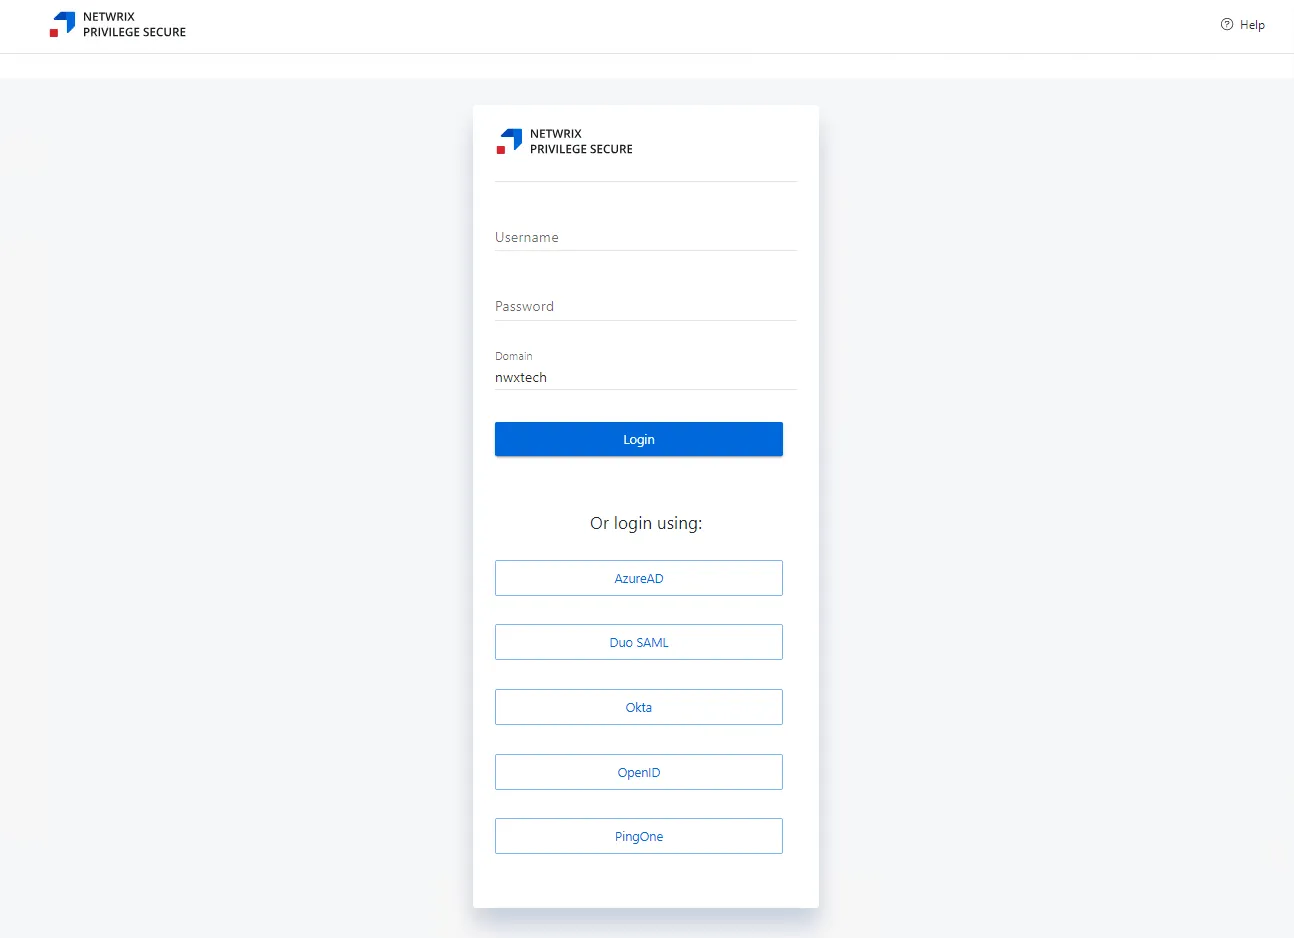
Step 3 – Log in to Privilege Secure with a configured authentication connector, or enter the user credentials.
- When using an authentication connector, there's no 'username' or 'password' field to enter. Instead, there's just a single button to log in.

- Clicking the authentication connector redirects the user to the IdP login screen, which logs the user in (with whatever MFA the IdP uses) and then returns the user to the Privilege Secure dashboard after authentication. IdP login skips Steps 4–7.
Step 4 – Click Log In to proceed.
Step 5 – A QR code displays to register with an authenticator application.
Step 6 – Enter the code provided by the registered multi-factor authenticator (MFA).
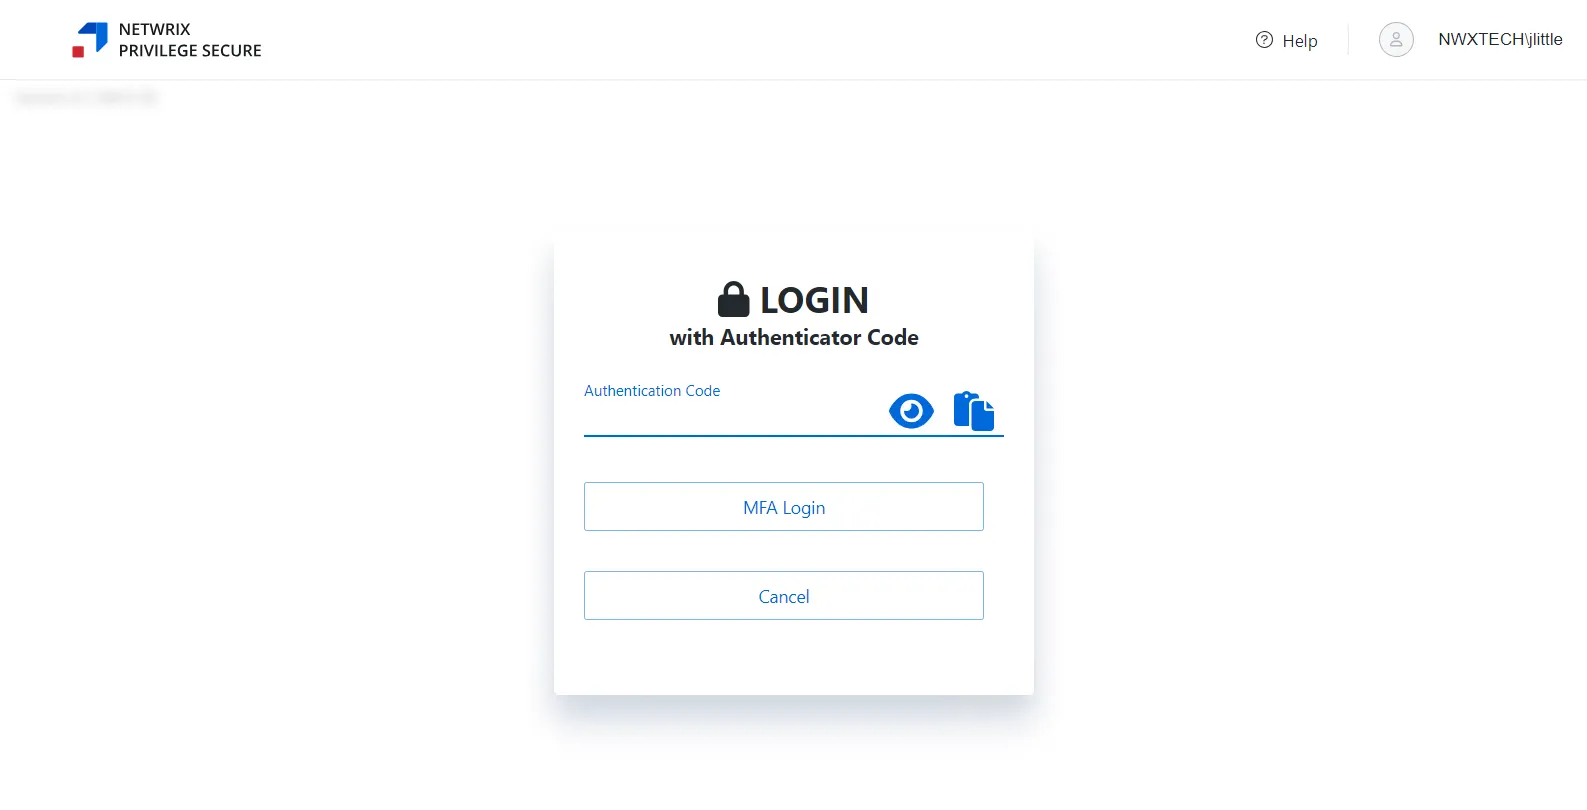
Step 7 – Click MFA Login. Privilege Secure opens on the Dashboard Interface.
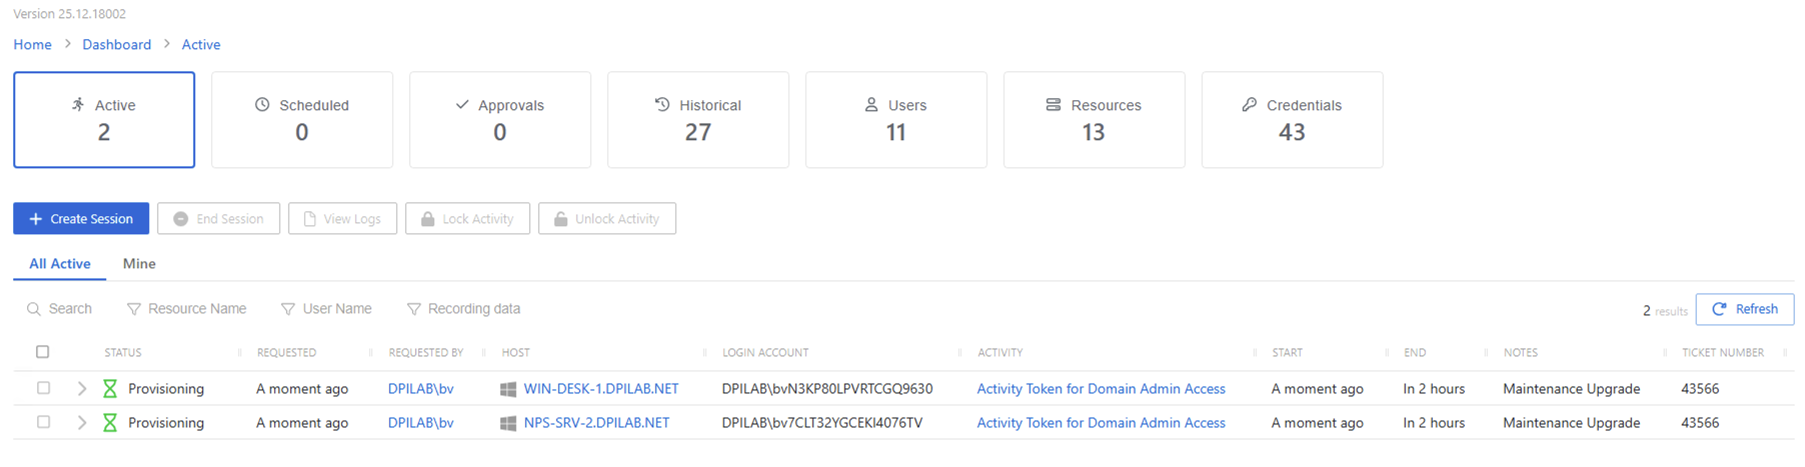
Privilege Secure is ready to use.