Add Auditor Permissions and Users
Auditors are granted the ability to view recordings of historical sessions by users or resources. There are also custom auditor roles. One way to orgnize might be to make the built-in auditor role capabile of viewing historical sessions of all users and all resources. Then create custom auditor roles to enable viewing of only certain users and/or resources.
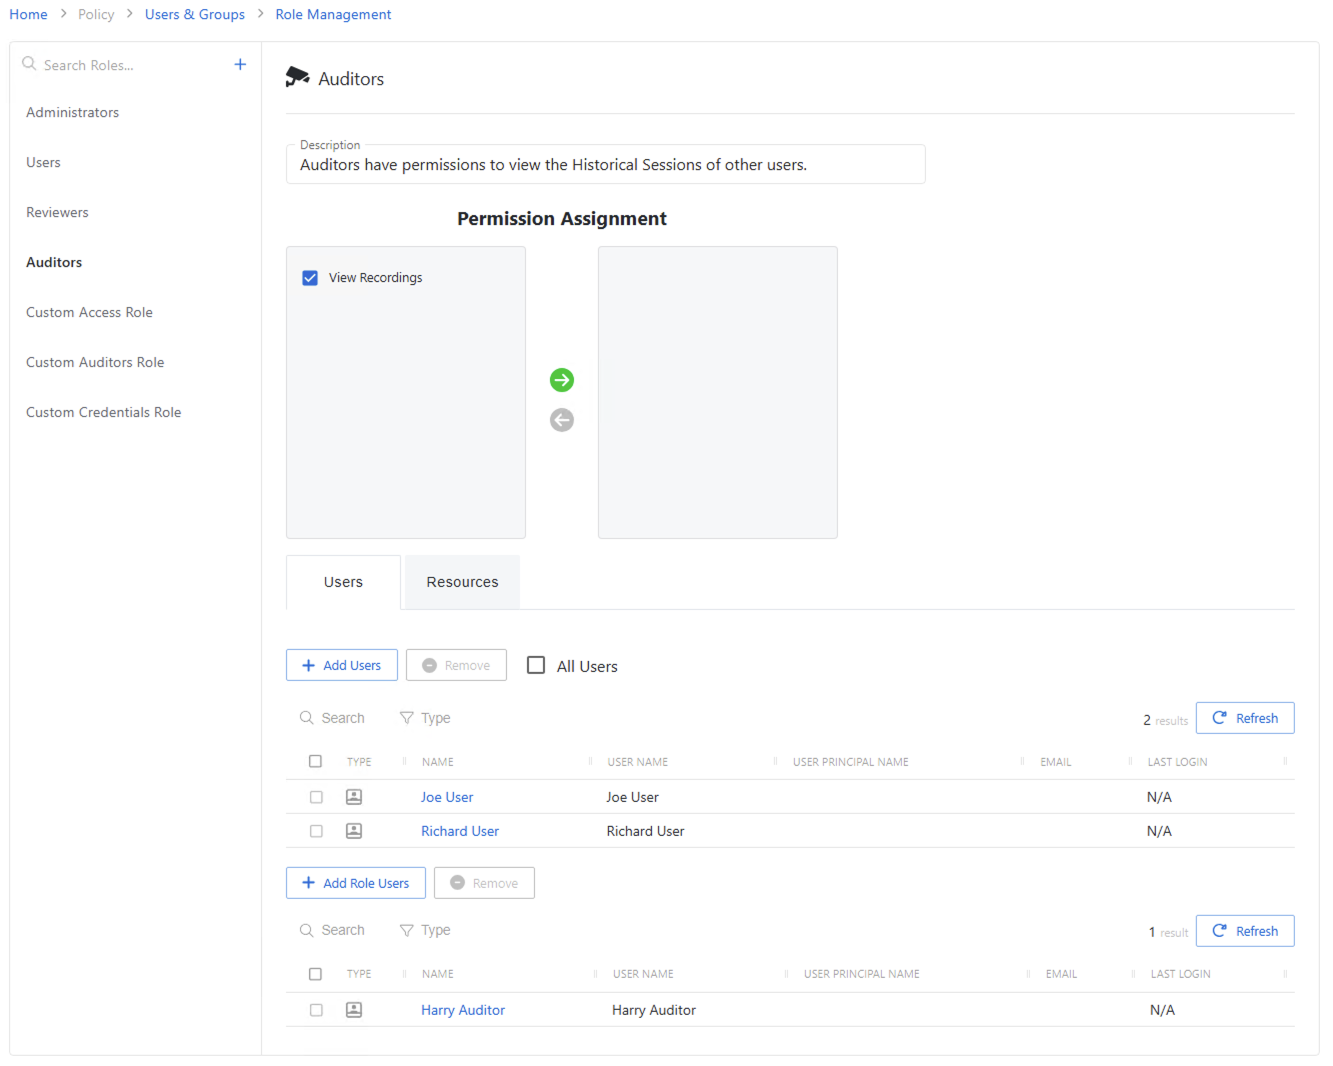
The window has the following features:
- Description — Optional field to describe the auditor role.
- Permission Assignment - Add or remove permissions.
The Users tab is where users to be monitored by the Auditor are added.
All users can be selected by the checkbox. If that is selected, then the user list is grayed-out
- Checkbox — Check to select one or more items
- Type — Icon indicates the type of object
- Name — Displays the name of the account
- User Name — Displays the sAMAccountName for the account
- Email — Displays the associated email address, if available
The Resources tab is where users to be monitored by the Auditor are added.
All resources can be selected by the checkbox. If that is selected, then the resource list is grayed-out
- Checkbox — Check to select one or more items
- Type — Icon indicates the type of object
- Name — Displays the name of the account
- User Name — Displays the sAMAccountName for the account
- Email — Displays the associated email address, if available
Assign Auditor Role to Users
To grant users the Auditor role.
Step 1 – Click Add Role User to open the Add Reviewers window.
Step 2 – Select the checkbox for the account you want from the Available Accounts table.
Step 3 – Click Add to add the account to the role.
The selected users are now Privilege Secure Reviewers.