PolicyPak and PowerShell
Netwrix PolicyPak has a PowerShell module that can perform some key tasks. As of the writing of this manual, the PowerShell cmdlets can perform licensing steps and discover PolicyPak items within a Group Policy Object (GPO). The PolicyPak PowerShell module is located in the PolicyPak Extras folder you downloaded.
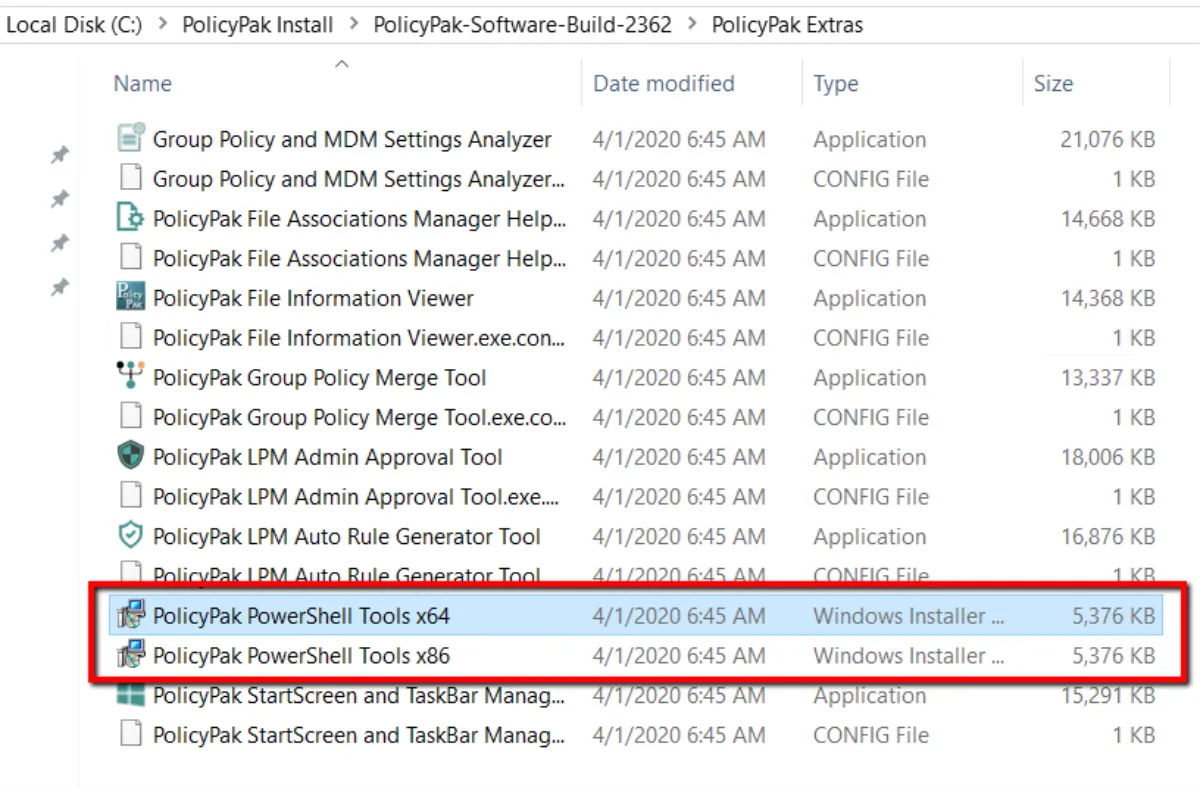
Run the PolicyPak PowerShell Tools installer. The installer places the PolicyPak PowerShell modules
in >c:\Program Files\PolicyPak1\Tools\Modules\PolicyPak.
At a Powershell prompt run the command >Import-Module endpointpolicymanager.psd1. If you add the
>-verbose command you will see all of the available cmdlets.
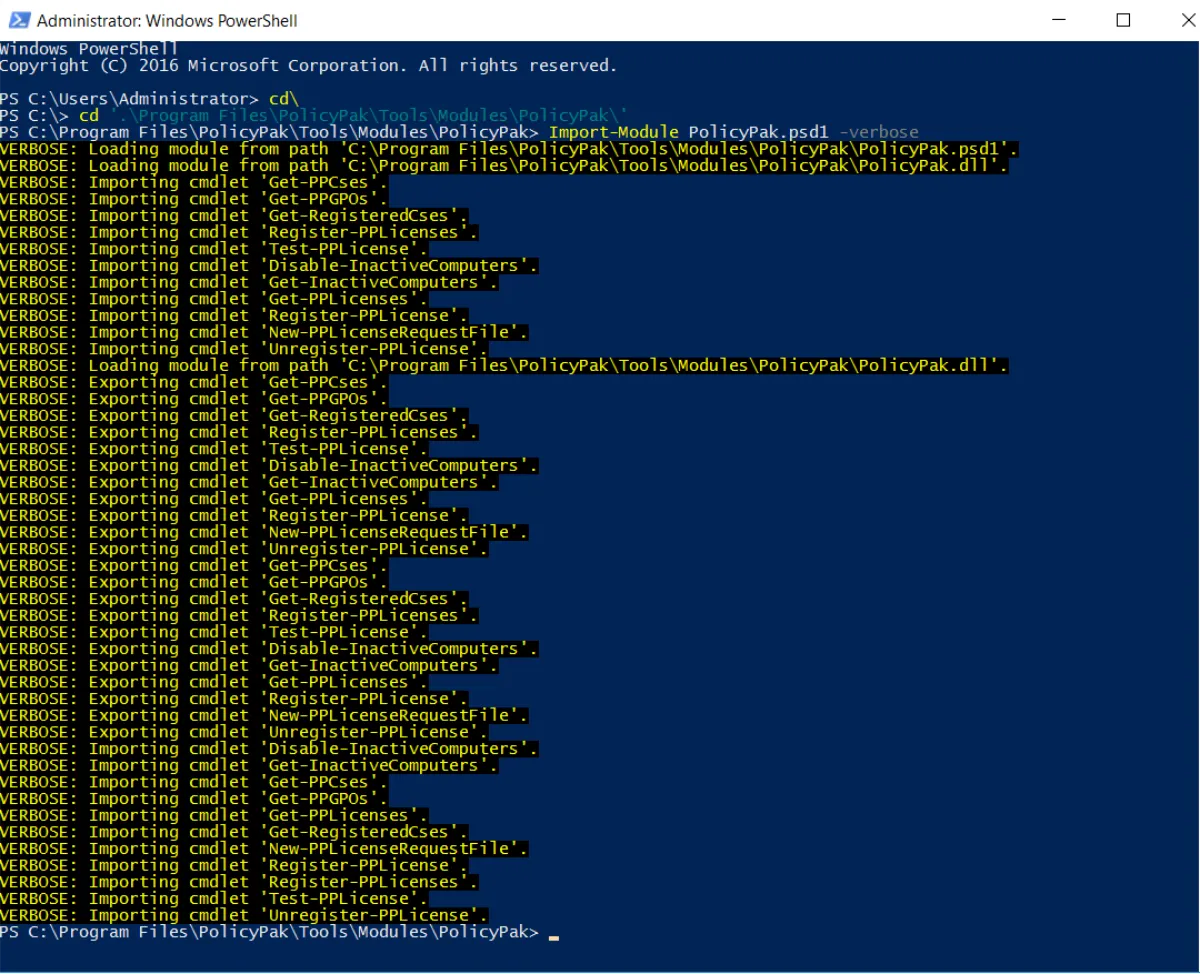
PolicyPak PowerShell and Licensing PolicyPak
To import a module, you need to call >Import-Module PolicyPak in PowerShell. At the
time of the publication of this manual, all PolicyPak cmdlets are for a licensing
component that requires the following commands:
- Importing cmdlet '
Get-PPCses' - Importing cmdlet '
Get-PPGPOs' - Importing cmdlet '
Get-RegisteredCses' - Importing cmdlet '
Register-PPLicenses' - Importing cmdlet '
Test-PPLicense' - Importing cmdlet '
Disable-InactiveComputers' - Importing cmdlet '
Get-InactiveComputers' - Importing cmdlet '
Get-PPLicenses' - Importing cmdlet '
Register-PPLicense' - Importing cmdlet '
New-PPLicenseRequestFile'
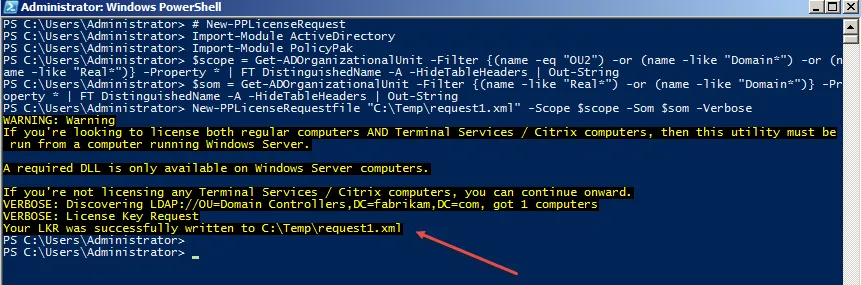
To generate a new PolicyPak license request, there are two methods. Method 1 uses the existing Microsoft cmdlet Get-ADOrganizationalUnit, as the following example shows.
># New-PPLicenseRequest
>Import-Module ActiveDirectory
>Import-Module PolicyPak
>$scope = Get-ADOrganizationalUnit -Filter {(name -eq "OU2") -or (name -like "Domain*") -or (name -like "Real*")} -Property * | FT DistinguishedName -A -HideTableHeaders | Out-String
>$som = Get-ADOrganizationalUnit -Filter {(name -like "Real*") -or (name -like "Domain*")} -Property * | FT DistinguishedName -A -HideTableHeaders | Out-String
>New-PPLicenseRequestfile "C:\Temp\request1.xml" -Scope $scope -Som $som -Verbose
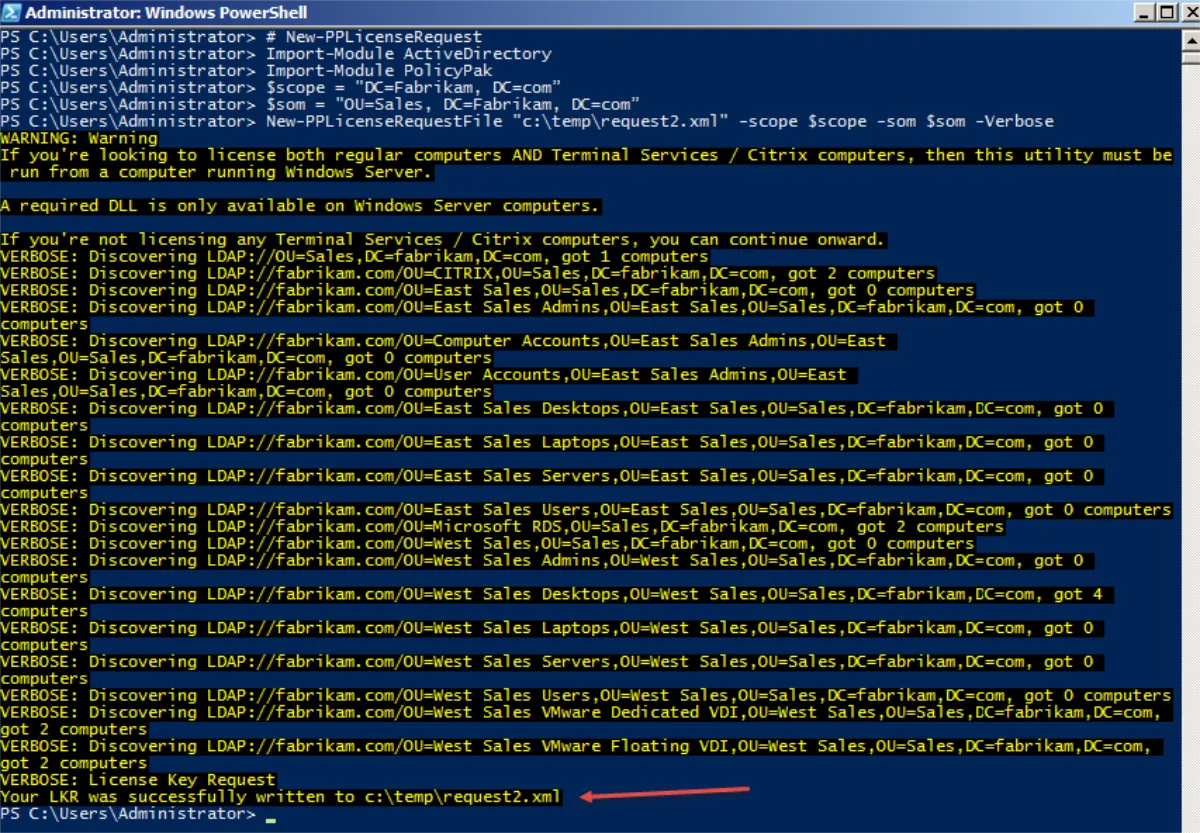
The following image shows the request output.
To understand scope versus SOM, see How the License Tool determines scope and Scope of Management (SOM).
Method 2 requires indicating specific organizational units (OUs). In this example, the scope is the whole domain, but the SOM is the Sales OU within the Fabrikam.com domain. The following is an example script that requests a new license file from a specific SOM and scope.
># New-PPLicenseRequest
>Import-Module ActiveDirectory
>Import-Module PolicyPak
>$scope = "DC=Fabrikam, DC=com"
>$som = "OU=Sales, DC=Fabrikam, DC=com"
>New-PPLicenseRequestFile "E:\Downloads\adcomputer.text.new.xml" -scope $scope -som $som -Verbose
>#---
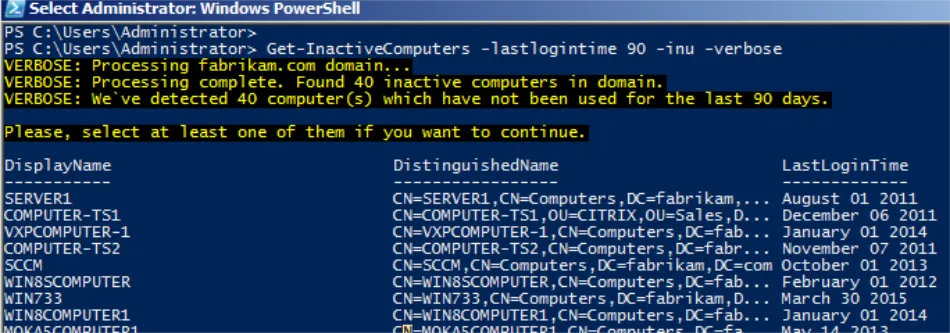
Use the following cmdlet to determine how many computers aren't active.
># Get-InactiveComputers
>Import-Module PolicyPak
>Get-InactiveComputers -LastLoginTime 90 -inu -Verbose
>#---
The following image shows the result from this cmdlet.
>The next cmdlet disables inactive computers.># Disable-InactiveComputers
>Import-Module PolicyPak
>Disable-InactiveComputers -LastLoginTime 900 -Verbose
>#---
You can then see the machines are disabled:

When you run the following cmdlet, you can see if the license file you got from PolicyPak was valid.
You might have to run the cmdlet on each PolicyPak license file you get.
># Test-PPlicense>Import-Module PolicyPak
>Test-PPlicense
>"C:\Users\server\Desktop_licenses\license_1.xml" -verbose
>Test-PPlicense
>"C:\Users\server\Desktop_licenses\license1.xml" -verbose
>Test-PPlicense
>"C:\Users\server\Desktop_licenses\license2.xml" -verbose
>Test-PPlicense
>"C:\Users\server\Desktop_licenses\FIRSTLicense-Request-Key.xml" -verbose
>#---
You can then see that the license is valid:

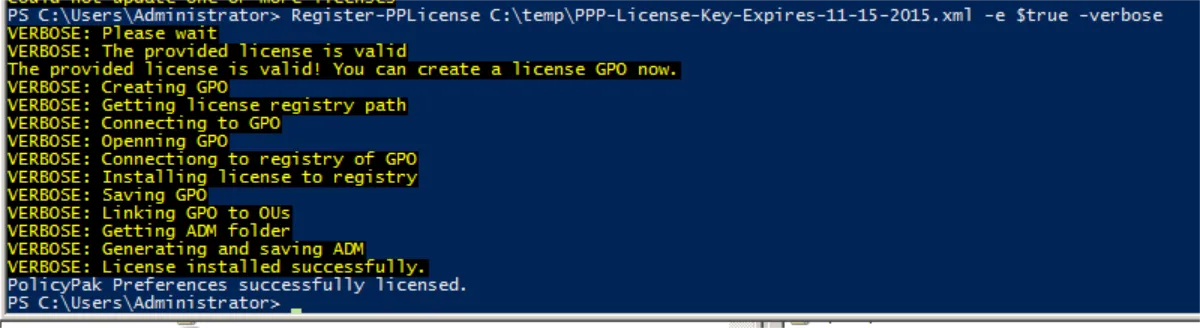
When you run the following cmdlet, you can create a new GPO and link it to the scope.
># Register-PPlicense>Import-Module PolicyPak
>Register-PPlicense
>"C:\Users\server\Desktop_licenses\license1.xml" -e $True -verbose
You can then see the successful installation:
The following cmdlet specifies a GPO by GUID.
>#Register-PPlicense >"C:\Users\server\Desktop_licenses\license1.xml" -e $True -mgpo "96A61654-8363-444B-97AC-47D466FE12EE" -verbose
>#---
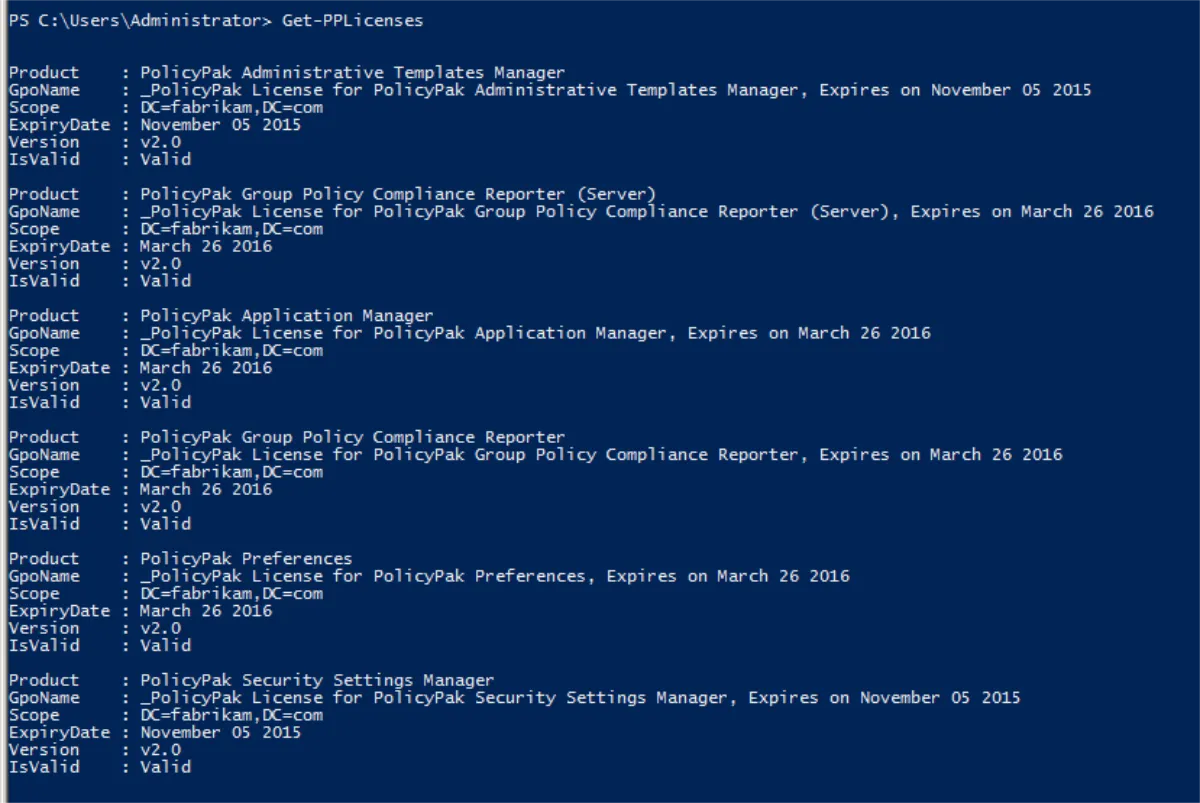
># Get-PPlicenses
>Import-Module PolicyPak
>Get-PPlicenses -Verbose
>#---
The following image shows the result. You can see the GPO name, scope, expiration date of the license, PolicyPak license version type, and validation status of the license.
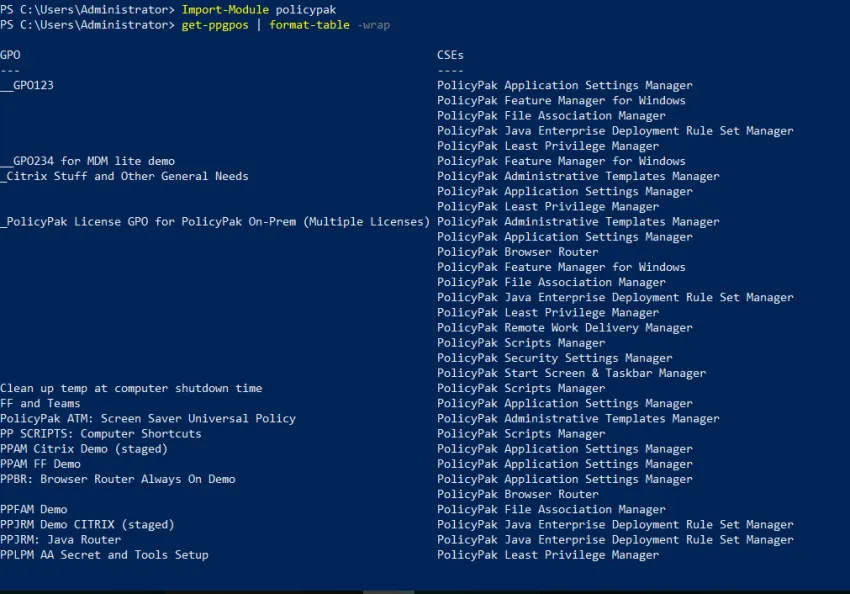
PolicyPak PowerShell and Discovery
PolicyPak can help you discover which GPOs contain PolicyPak directives. After you import the PolicyPak module with Import-Module PolicyPak, you can use cmdlets like the following examples:
>Get-PPCses: shows PolicyPak client-side extension (CSE) names and guids>Get-PPGPOs -cse "Security": same as above, but searches for CSEs with "security" in the name (case insensitive)>Get-RegisteredCses: shows CSEs registered in the system>Get-PPGPOs | Format-Table -wrap: shows all GPOs with any PolicyPak product as a table (You can see this in Figure 26 below.)>Get-PPGPOs | Select -ExpandProperty "GPO": shows all GPOs with PolicyPak products as names only>Get-PPGPOs -cse "Security" | Select -ExpandProperty "GPO": shows all GPOs with any PolicyPak products with "security" in the title>Get-PPGPOs -cse "E0088A46-AB54-4FBD-A733-303C58244C5E": shows all GPOs based on CSE GUID