How do I use PolicyPak Remote Work Delivery Manager to update the Client Side Extension?
If you do not have an existing software distribution solution, delivery of software and updates can be a bit of a hassle. Remote Work Delivery Manager (RWDM) can assist you in getting your software out to your endpoints. This includes keeping Netwrix PolicyPak up to date on all your endpoints.
Prerequisites
- As the CSE is required to perform an installation or update, it must already be installed on the endpoints and at version 2536 or higher.
- RWDM must properly be licensed or computer in trial mode.
- The Installation MSI file is stored on a file share accessible to all endpoints that require the update.
Creating the Policy
As with most applications, the PolicyPak CSE come in two varieties – 64 and 32 bit. This article will cover creating a policy to cover both.
Step 1 – Create a new Group Policy Object and edit it.
Step 2 – Expand Computer Configuration -> PolicyPak -> Apps and Patch Management and click on
Remote Work Delivery Manager.
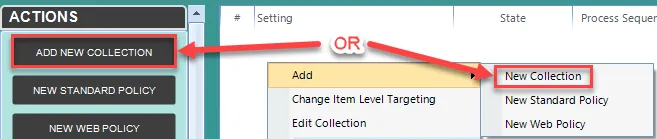
Step 3 – Add a New Collection, rename it, enable and click OK.
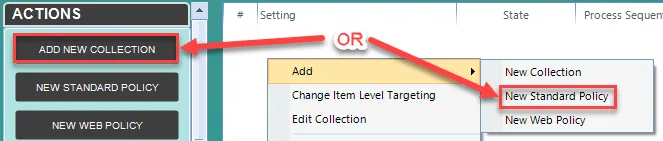
Step 4 – Add a New Standard Policy.
Step 5 – Select Copy a single File and click Next.
Step 6 – Select Apply this policy to all users who log on to the computer (switched mode) and click Next.
Step 7 – Enter the UNC path to the MSI file (32 or 64 bit) and click Next.
![]()
Step 8 – Set the directory that you want to place the downloaded file and ensure the file name is correct. Click Next.

You can use Environment Variables.
Step 9 – Select Access both source and destination as User and click Next.
Step 10 – Select Always. This will allow the application to stay up to date as the source file is updated and replaced. Click Next.

Step 11 – Under Post-copy actions, select Run process and Type/copy in the installation
command (msiexec.exe /qb /i %destination%). Click Next.

%Destination% = destination path + filename (%Systemdrive\temp\CSE\PPx54.MSI)
Step 12 – Under Revert actions, select Do Nothing (the application cannot uninstall itself). Click Next.

Step 13 – Rename the Policy if desired (e.g. Update PolicyPak CSE – 64bit)
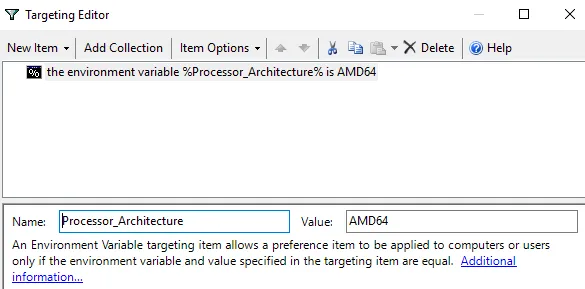
Step 14 – Enable Item Level Targeting and click Edit.

- Click on New Item and select Environment Variable
- Name = Processor_Architecture
- Value = AMD64 (for 64-bit) OR x86 (for 32-bit)
- Click OK to close
Step 15 – Click Finish.
Step 16 – If required, repeat steps 4 – 16 for 32-bit, making the necessary changes along the way.