Deployments
Your deployments can be documented across your test environment(s) to your production environment(s). Each step in the deployment process complies with your policies and a comprehensive approval process. Deployments are blocked if approvals are not complete. A full audit trail of the entire deployment process is maintained.The process is:
Create a Change Request
Create a Deployment Record
Deploy the Changes
Complete the Process
Create a Change Request
- Open Change Requests > New Change Request
- Enter a meaningful Name and Change Overview
- Modify the Change Type as needed. Add any other supporting information, change sets, package manifests, or customizations.
- Save the change request.
- Click Submit for Approval
Create a Deployment Record
These steps can be completed after the change request is approved.
-
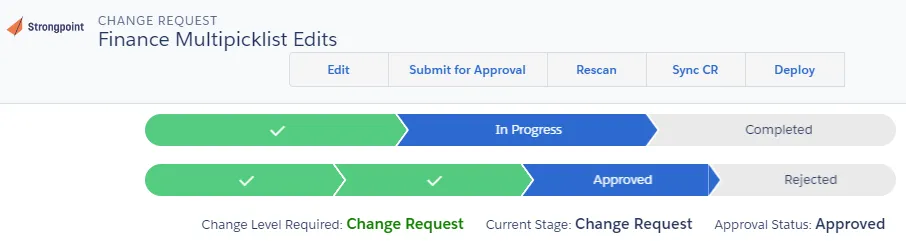
Open Change Requests and select the approved change request.
-
Click Deploy in the tool bar. Deploy is only available for approved change requests.
-
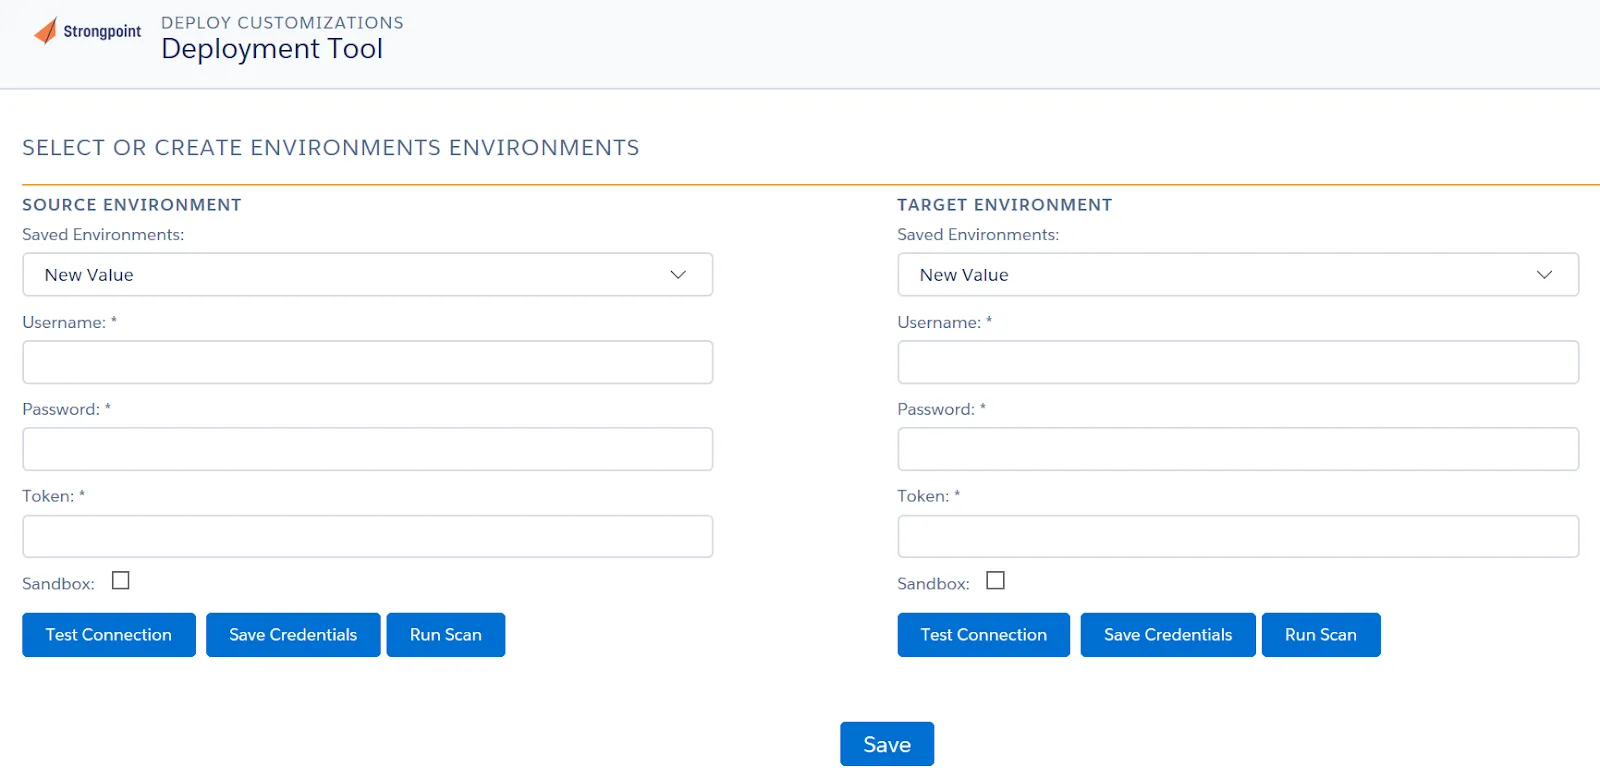
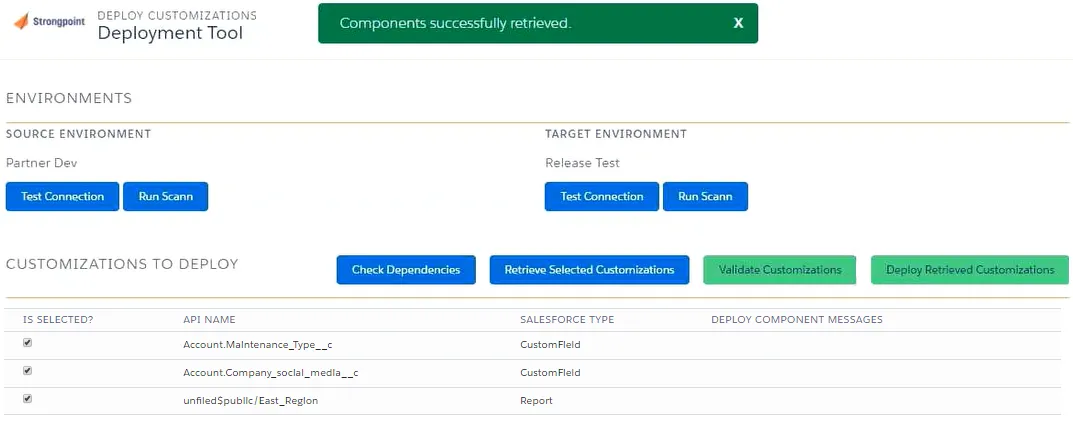
Select the Source (from) environment and Target (to) environment.
-
Enter your credentials for both environments.
-
Click Test Connection for both environments to ensure your credentials are correct. If your credentials are not correct, you can click on Save Credentials and edit.
-
Click Run Scan on both environments to ensure the customizations on the change request are up to date.
-
Save the Deployment Record.
-
Click Submit for Approval
Deploy the Changes
These steps can be completed after the deployment record is approved.
-
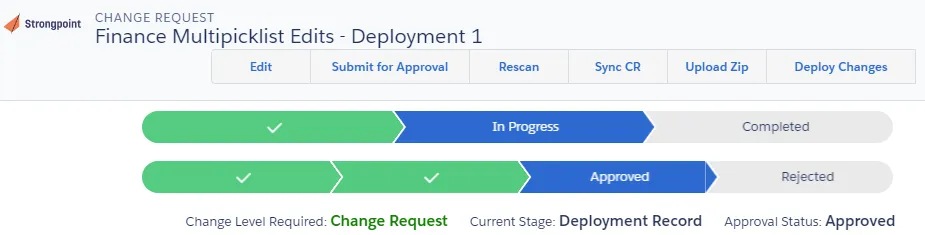
Open Change Requests and select the approved deployment record.
-
Click Deploy Changes
-
Click Retrieve Selected Customizations
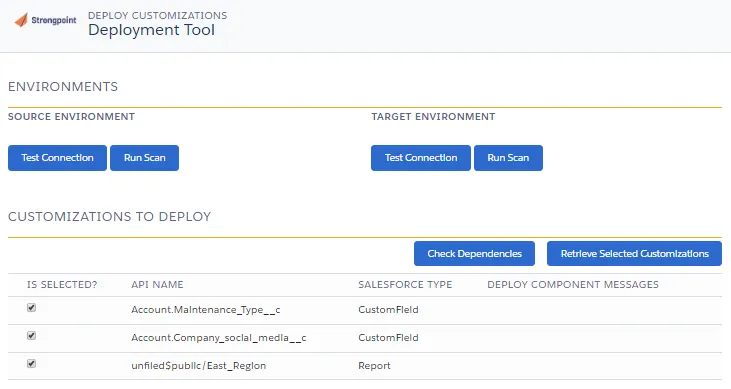
This creates a package to:
- Check Dependencies: Use to check what has been referenced.
- Validate Customizations: Use to check the deployment is going to work. It simulates your deployment.
- Deploy Retrieved Customizations: Use to deploy your customizations when you are ready to proceed.
-
Check your dependencies and validate your customizations.
-
Click Deploy Retrieved Customizations to start the deployment. This may take some time, since it runs the test cases into the target environment.
Complete the Process
When the deployment process is finished:
-
Check the Deployment Logs.
-
Fix any errors and repeat the deployment if needed.
-
Once the deployment is successful, open the change request and set the status to Completed.
