Overview
Platform Governance for Salesforce's Change Management capabilities are integrated with Zendesk, one of the most popular customer service and issue ticketing systems. Customers can look for and include Salesforce Customizations, assess impacts for requested changes, and push Zendesk change tickets into a Change Request. This enables change management, tracking of compliant changes and automating the reconciliation of change logs during an audit.
User benefits include:
- Avoid duplicate effort of creating tickets in two different systems.
- Pull Customizations into Zendesk for scope of changes.
- Perform impact analysis assessment.
- Approve requests in either Zendesk or Salesforce.
- Automatic ticket reconciliation between Zendesk and Salesforce.
- Enable automatic synchronization of Zendesk and Salesforce change tickets.
Prerequisites
- Salesforce org with Platform Governance (FLODocs) package installed
- Zendesk account with admin access
- Consumer Key and Consumer Secret from Salesforce Connected App
- Platform Governance for Salesforce Zendesk App installed from Marketplace
To set up the Zendesk integration:
- Install the App
- Set up Approvals
Install the App
Here are the steps to install the Zendesk app. You must have Admin privileges to install the app.
-
Open your Zendesk dashboard.
-
Click the Admin icon in the left panel.
-
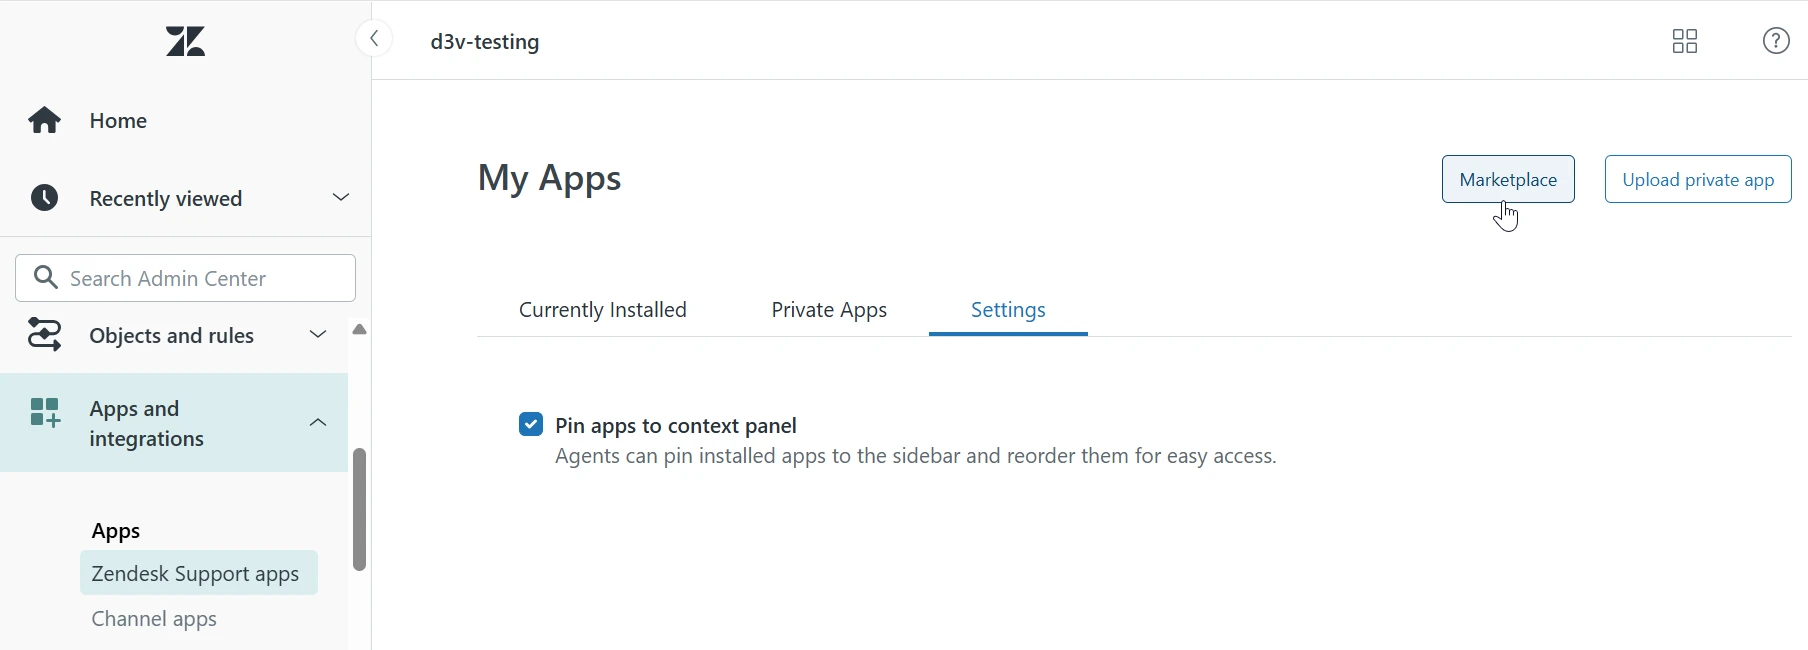
Navigate to Apps and integrations > Zendesk Support apps > Marketplace.
-
Search for Platform Governance for Salesforce.
-
Click Platform Governance for Salesforce when it appears.
-
Click Install. When installation is complete, you are prompted to sign in to your Zendesk dashboard to continue.
-
Click the Admin icon in the left panel.
-
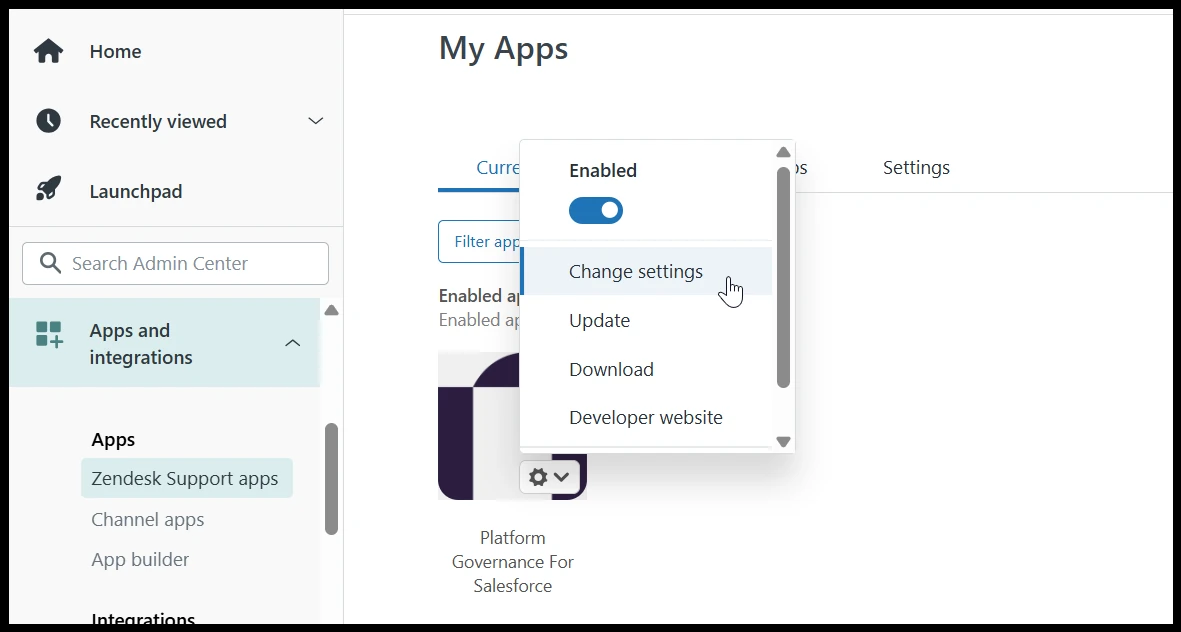
Navigate to Apps and integrations > Zendesk Support apps.
-
Hover on the Platform Governance for Salesforce tile to access the Settings menu.
-
Click Change settings.
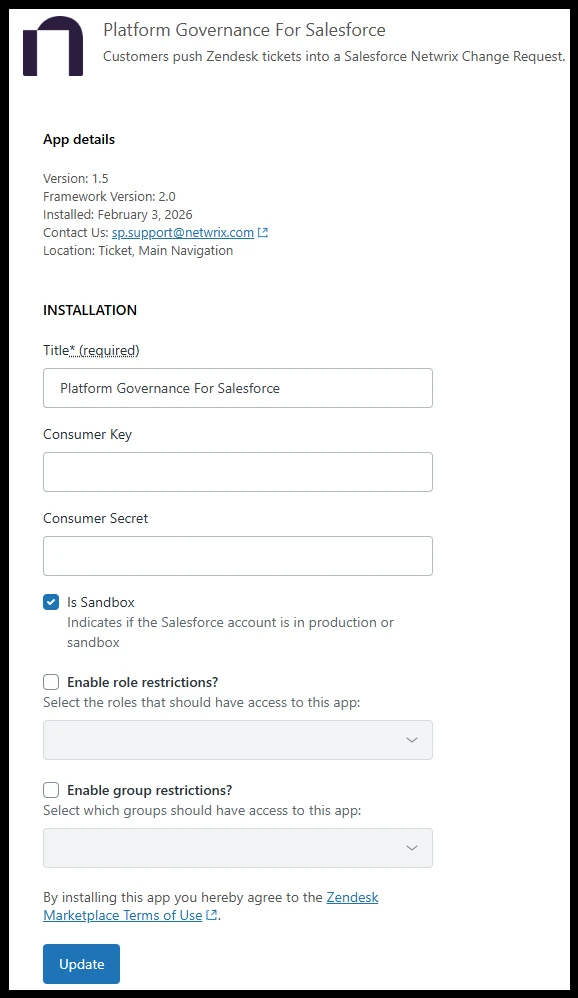
- Title: the name associated with the app. The default is Platform Governance for Salesforce.
- Consumer Key: Enter the Consumer Key from your Salesforce Connected App.
- Consumer Secret: Enter the Consumer Secret from your Salesforce Connected App.
- Sandbox: Check this option if connecting to a Salesforce sandbox org.
noteOAuth authentication is required by Salesforce. You need to create a Connected App in Salesforce first:
-
Go to https://test.salesforce.com/ for sandbox or https://login.salesforce.com/ for production.
-
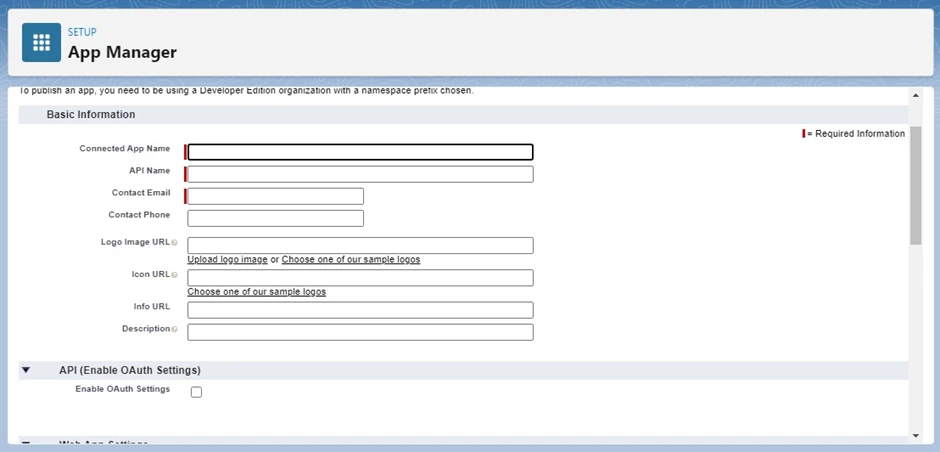
Go to Setup > Apps > App Manager > New Connected App.
-
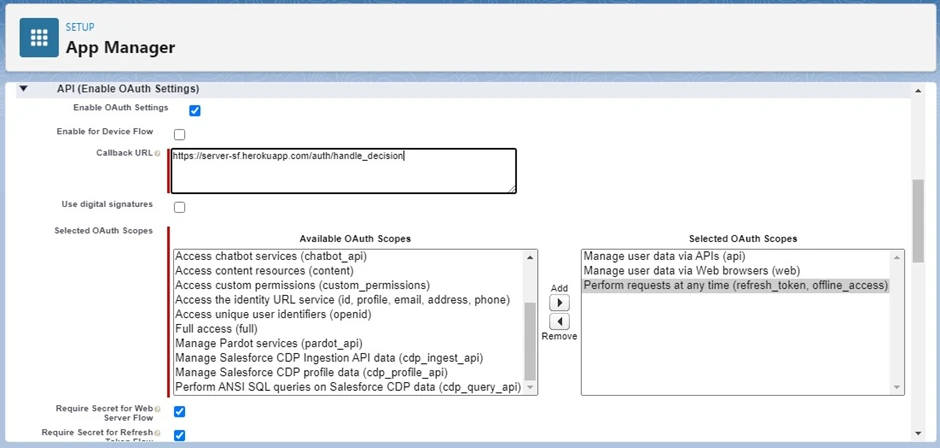
Fill in the required fields and enable API (Enable OAuth Settings).
-
Set the Callback URL: https://server-sf.herokuapp.com/auth/handle_decision.
-
Select OAuth Scopes: 'api, web, refresh_token'.
-
Save the new app.
-
In App Manager, open the app > Manage > Edit policies:
- OAuth Policies: Relax IP restrictions.
- Refresh Token Policy: 'Refresh token is valid until revoked'.

-
Copy the Consumer Key and Consumer Secret for use in the Zendesk app configuration.
Only administrators can view the Consumer Key and Consumer Secret information.
- Enable role restrictions: Check this option to restrict access to the app based on roles. Enter the roles allowed to access the app.
- Enable group restrictions: Check this option to restrict access to the app based on group membership. Enter the groups allowed to access the app.
-
Click Install. The Consumer Key and Secret information is hidden when it is saved.
Authorize Salesforce Connection
This step is only for Zendesk Admins.
After installation, you need to authorize the connection to Salesforce:
- Click the new Platform Governance for Salesforce icon in the left panel.
- Click the Salesforce Credentials option.
- Click the Login button.
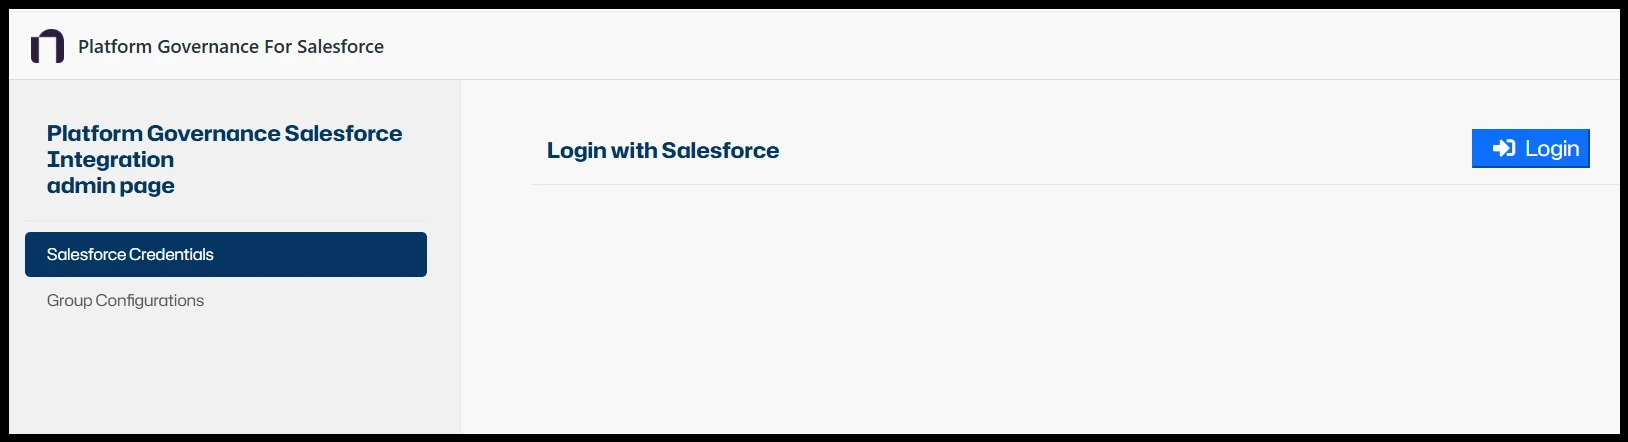
- A popup window opens, redirecting to the Salesforce OAuth 2.0 authorization screen.
- Log in with your Salesforce credentials.
- Authorize Platform Governance for Salesforce to access data in your org.
- Once authorized, the app securely stores the access and refresh tokens and links the Salesforce org with Zendesk.

Set up Approvals
This step is only for Zendesk Admins.
After you install the Zendesk app, set up the approvals.
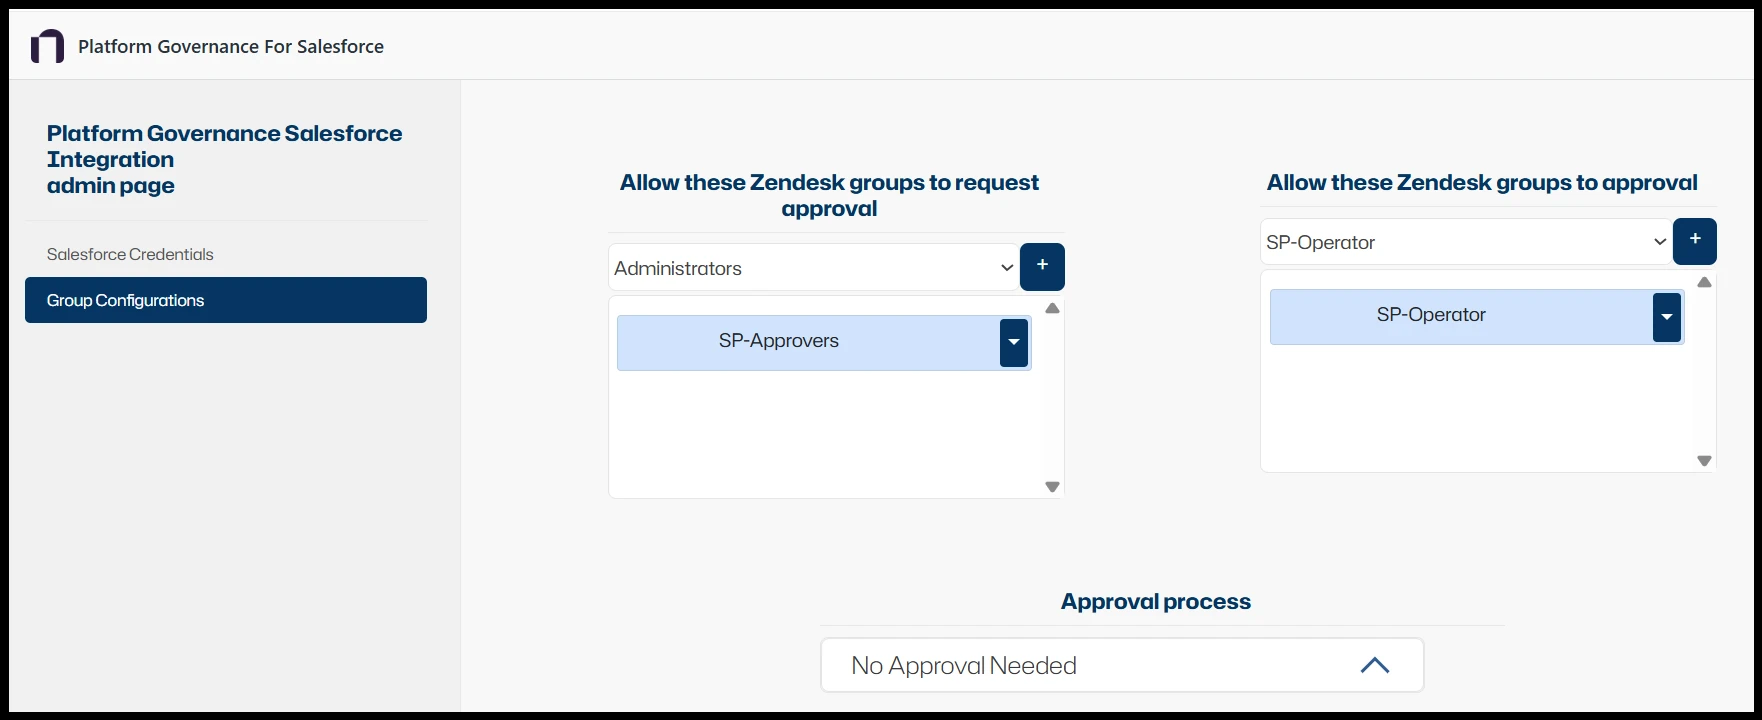
Click the new Platform Governance for Salesforce icon in the left panel. The Group Configurations page opens.
Enter the group and approval information:
- Allow these Zendesk groups to request approval: one or more groups who can request approval for a change request. Select a group from the dropdown list. Click +. Repeat as needed.
- Allow these Zendesk groups to approve: one or more groups who can approve a change request. Select a group from the dropdown list. Click +. Repeat as needed.
- Approval process: select the approval process to use:
- Approval in Zendesk: Approvals managed directly in Zendesk.
- Approval in Salesforce: Approval continues in Salesforce.
- No Approval Needed: Direct push of changes without approval.
Using the App in Tickets
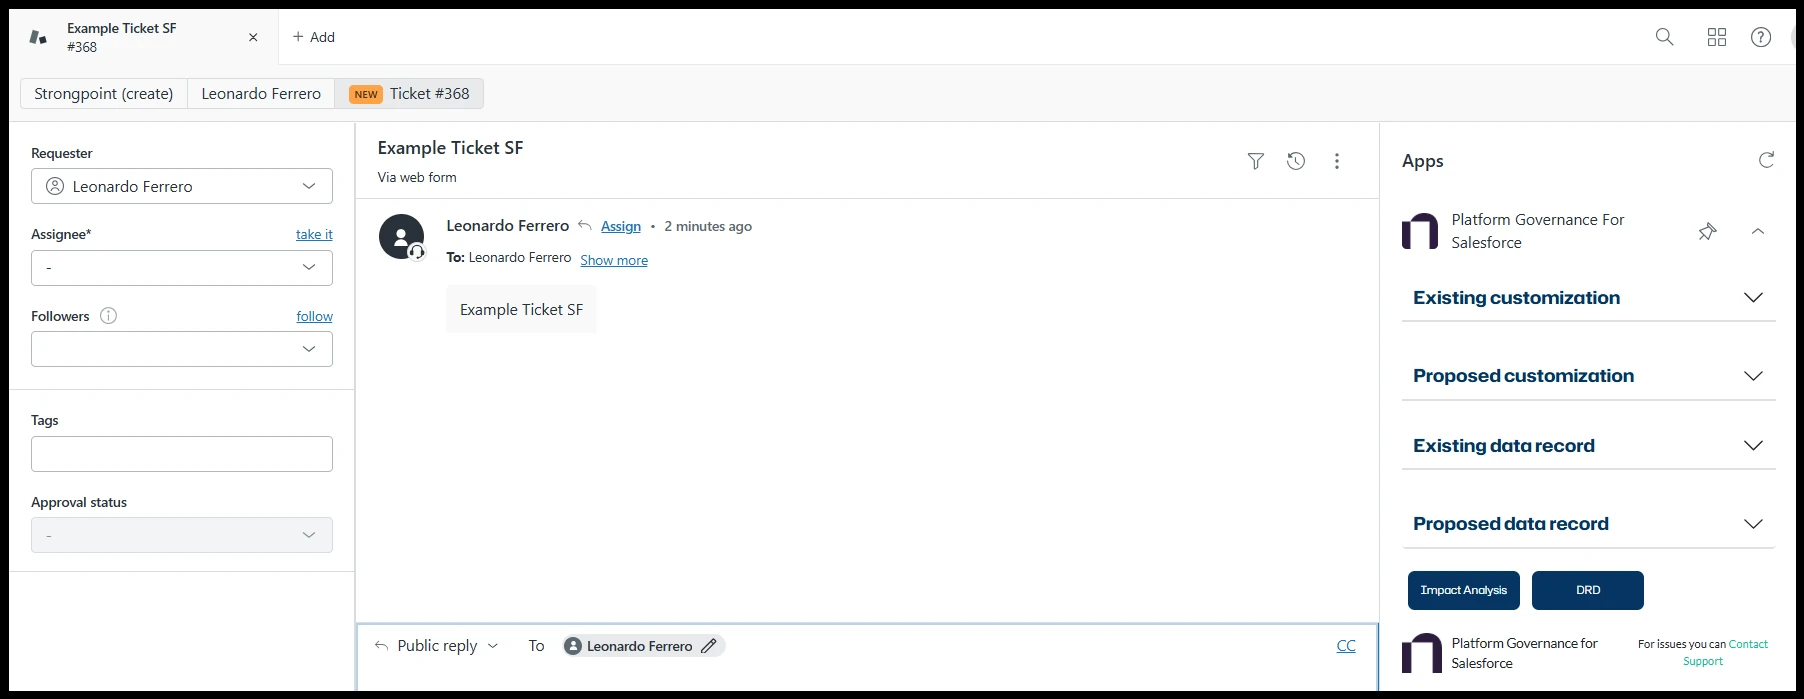
In the ticket sidebar, the Platform Governance app displays Change Request (CR) information, action buttons, and accordions for existing/proposed customizations and data records. External links to Impact Analysis and Dependency Relationship Diagram (DRD) views in Salesforce are also available.
The integration only appears in the ticket sidebar after the Zendesk ticket has been created.
Approval Flow
The approval flow depends on the selected approval process:
Approval in Zendesk
- Operators can Request Approval when CR is in Draft.
- Admins can Approve or Reject when CR is Pending Approval.
- Admins can Complete when CR is Approved.
Approval in Salesforce
- Operators can Request Approval, which moves the process to Salesforce.
- Admins only see Complete once Salesforce approves.
No Approval Needed
- Admins can Push the change request directly.
- Complete becomes available once approved/pushed.
Troubleshooting
- Buttons not visible: Verify group configuration and approval process.
- Authentication errors: Token expired; re-login from configuration page.