Named Credential Setup
This guide explains how to configure Platform Governance for Salesforce using an External Client App for authentication. This configuration uses OAuth authentication exclusively to call Salesforce APIs and document all Salesforce metadata types.
Overview
The new configuration uses an External Client App with Named Credentials to access Salesforce APIs, providing a more secure and MFA-compatible authentication method than the legacy Session ID approach.
Why Use Named Credentials
Named Credentials with External Client App OAuth authentication are recommended over user Session IDs for several critical reasons:
High Assurance Compatibility
This is the primary reason for using Named Credentials. When Salesforce organizations have High Assurance enabled—which is increasingly required by Salesforce and security best practices—user Session IDs don't work properly for API calls. The Session ID authentication method fails because:
- Enabling High Assurance Session on the Named Credential ensures that only Named Credentials work for authentication, providing an additional security layer that ensures MFA compliance
Enhanced Security
- Session IDs inherit all permissions of the authenticated user, creating potential security risks
- External Client Apps with OAuth let you define specific scopes and limit API access to only what's needed
- Named Credentials provide better audit trails and can be monitored independently
- Salesforce stores credentials securely and never exposes them in code or logs
Automation and Scheduled Jobs
- Automated processes and scheduled jobs can't rely on user Session IDs
- Named Credentials provide persistent authentication that works independently of user sessions
- Ideal for background processes, scheduled scans, and continuous monitoring
Prerequisites
- Salesforce Administrator access
- Access to the Salesforce Setup menu
Step 1: Create an External Client App
If this isn't a new installation and your org already has an existing Connected App named Netwrix or Strongpoint, you don't need to create a new one.
You can use the existing app and continue to Step 2: Create an Auth Provider.
If you don't have the Consumer Key and Consumer Secret saved, go to Retrieve Consumer Key and Secret, obtain the credentials, and then continue with Step 2: Create an Auth Provider.
Create a new External Client App to enable OAuth authentication:
-
In Salesforce, open Setup > Apps > App Manager
-
Click New External Client App
-
Configure the following settings:
- External Client App Name:
Netwrix - API Name:
Netwrix(auto-populated) - Contact Email: Enter your administrator email
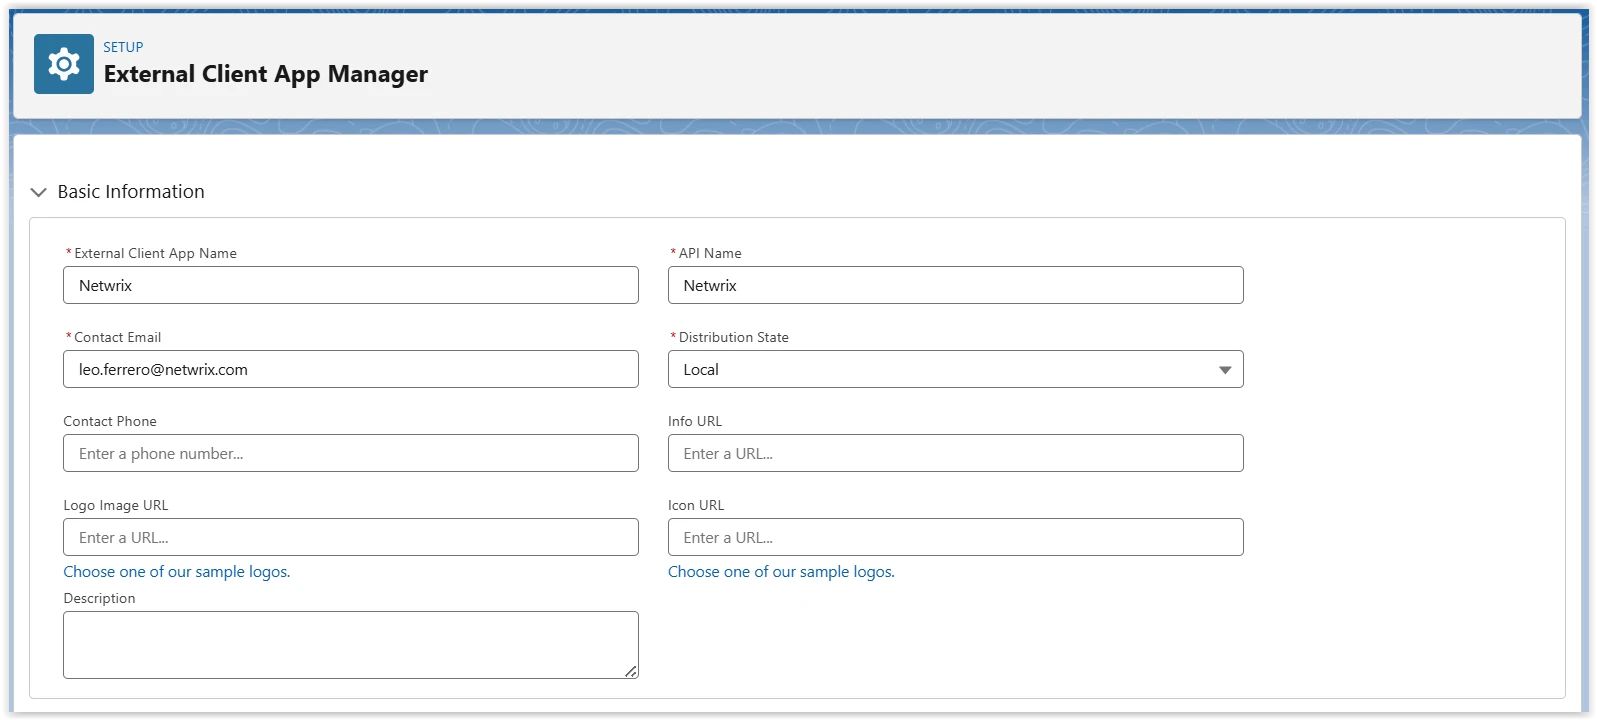
- External Client App Name:
-
Under API (Enable OAuth Settings):
- Callback URL:
https://www.localhost.com(update this value in a later step) - Selected OAuth Scopes: Add the following scopes:
- Full access (full)
- Perform requests at any time (refresh_token, offline_access)
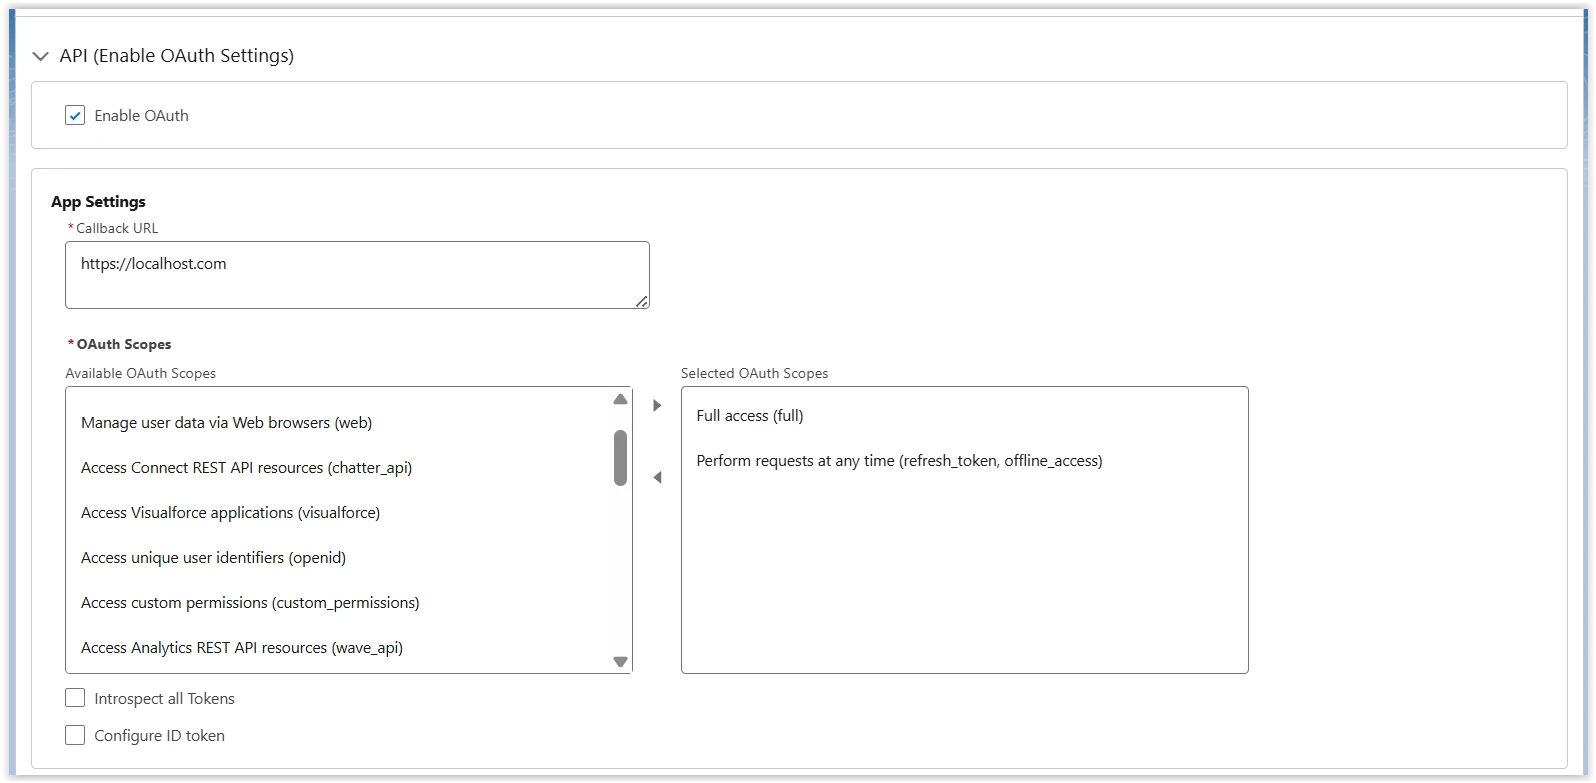
- Callback URL:
-
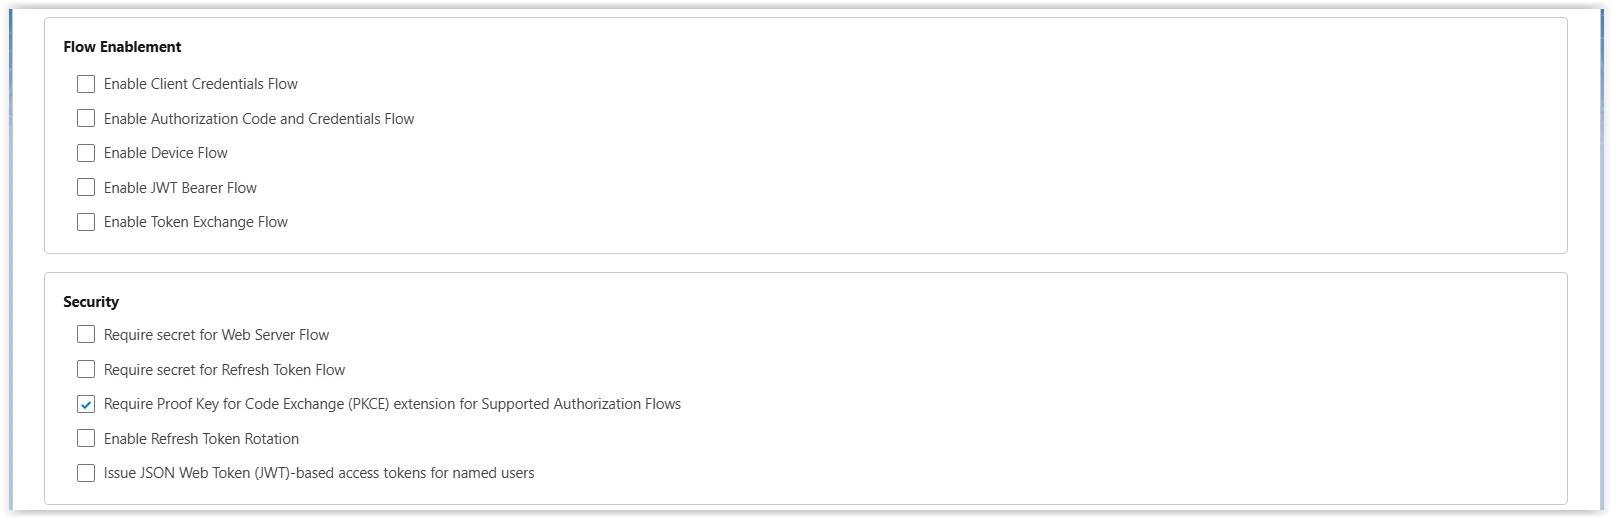
Uncheck the following options:
- Require Secret for Web Server Flow
- Require Secret for Refresh Token Flow
-
Click Create
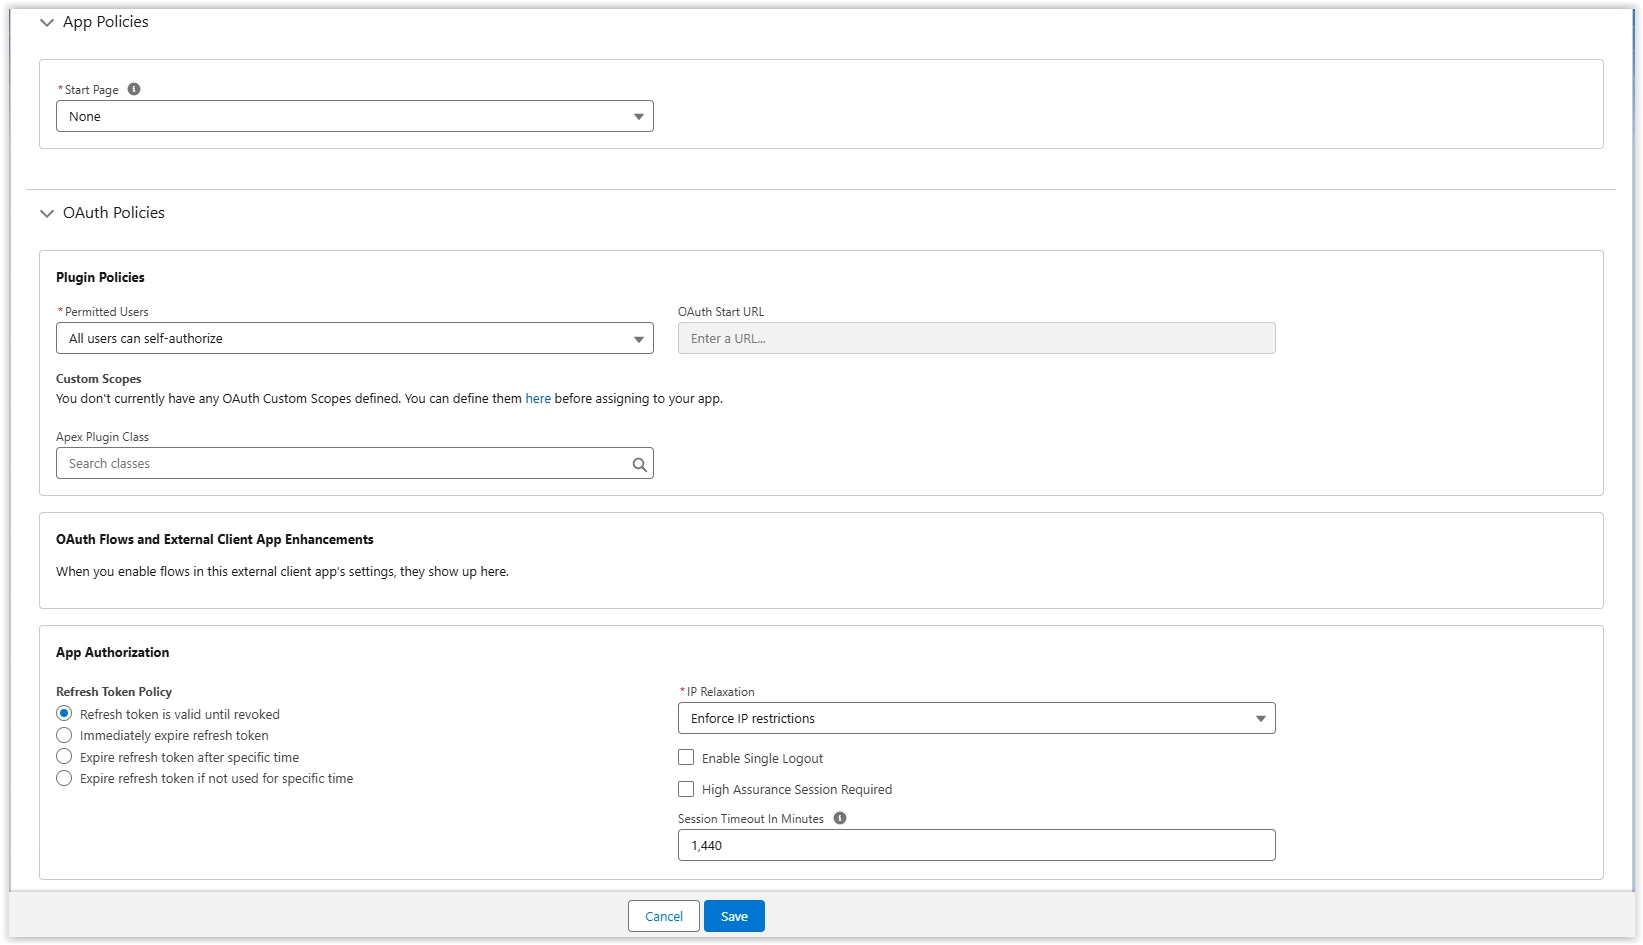
Configure Session and Token Policies
After creating the External Client App:
-
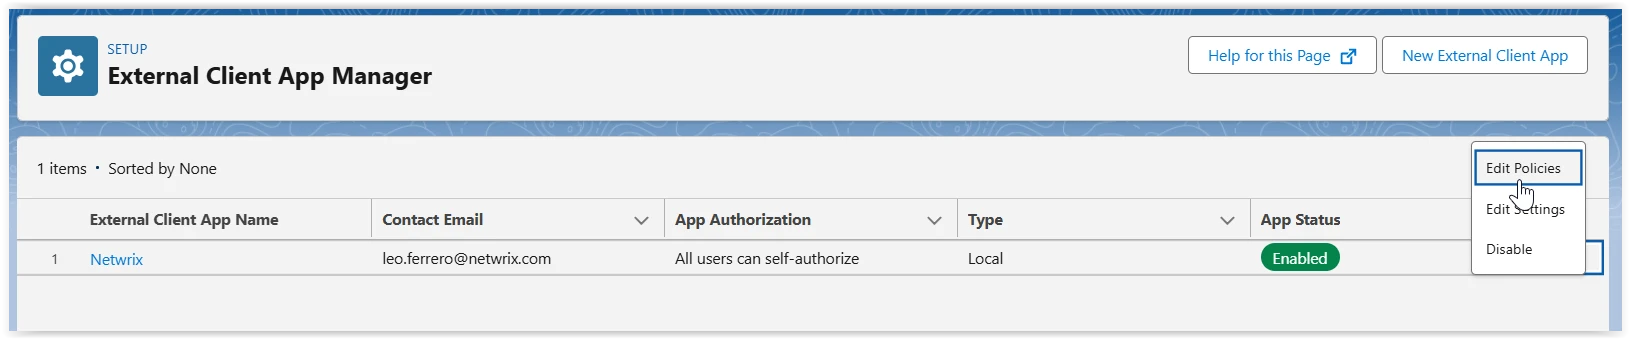
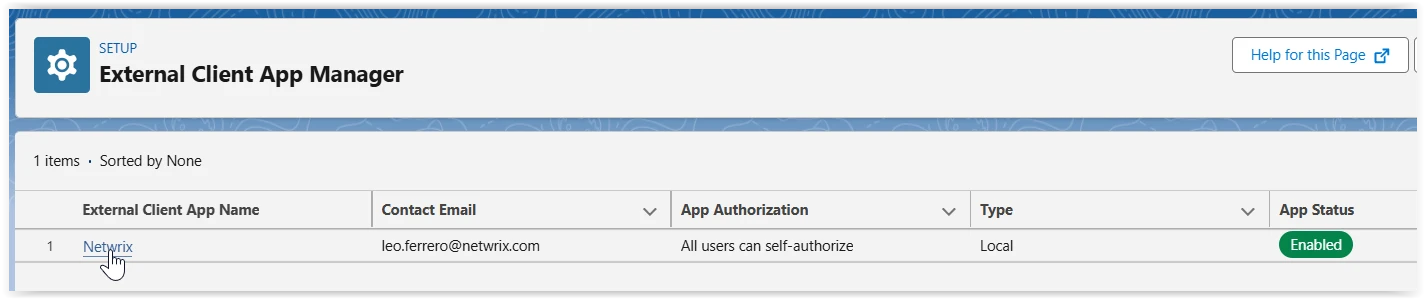
From the External Client Apps Menu, locate the Netwrix External Client App
-
Click the dropdown and select Edit Policies
-
Configure the following:
- Refresh Token Policy: Set to Refresh token is valid until revoked
- IP Relaxation: Set to Enforce IP restrictions
- Session Timeout In Minutes: Set to 1440
-
Click Save
Retrieve Consumer Key and Secret
- From the Netwrix External Client App detail page
- Click Consumer Key and Secret From the OAuth Settings section
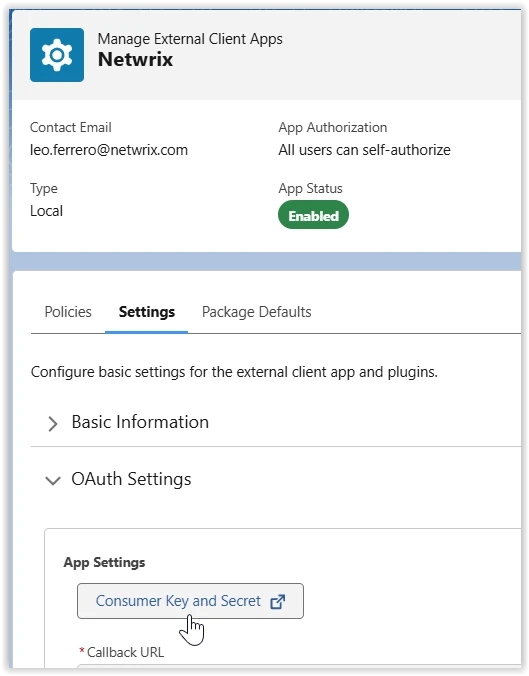
- Verify your identity (you may need to enter a verification code)
- Copy and save the Consumer Key and Consumer Secret — you need these in the next step.
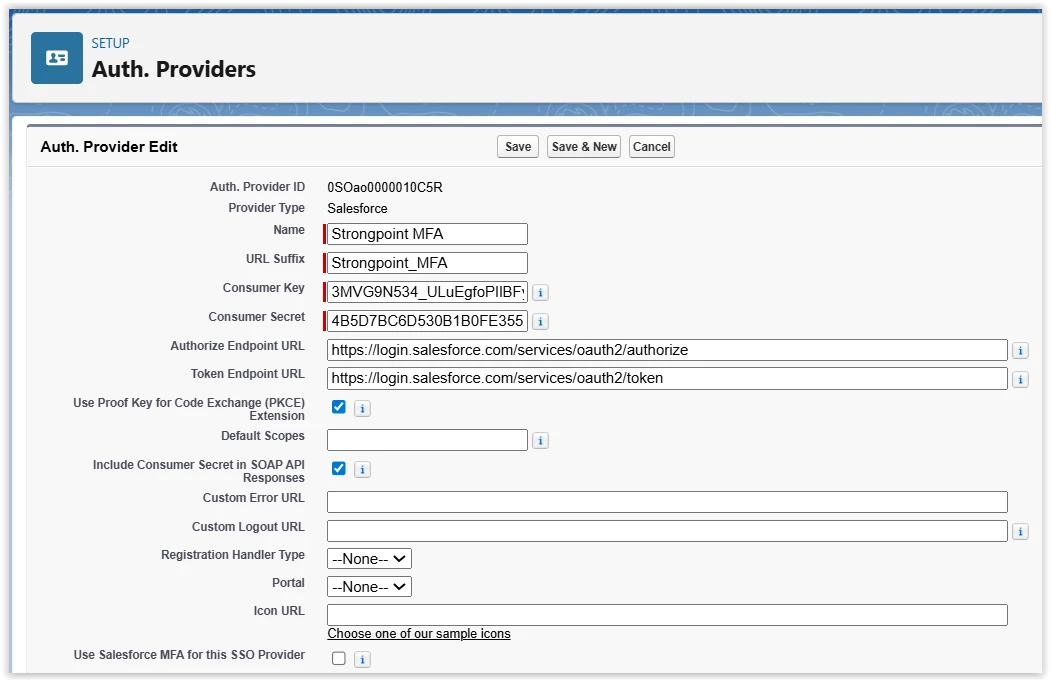
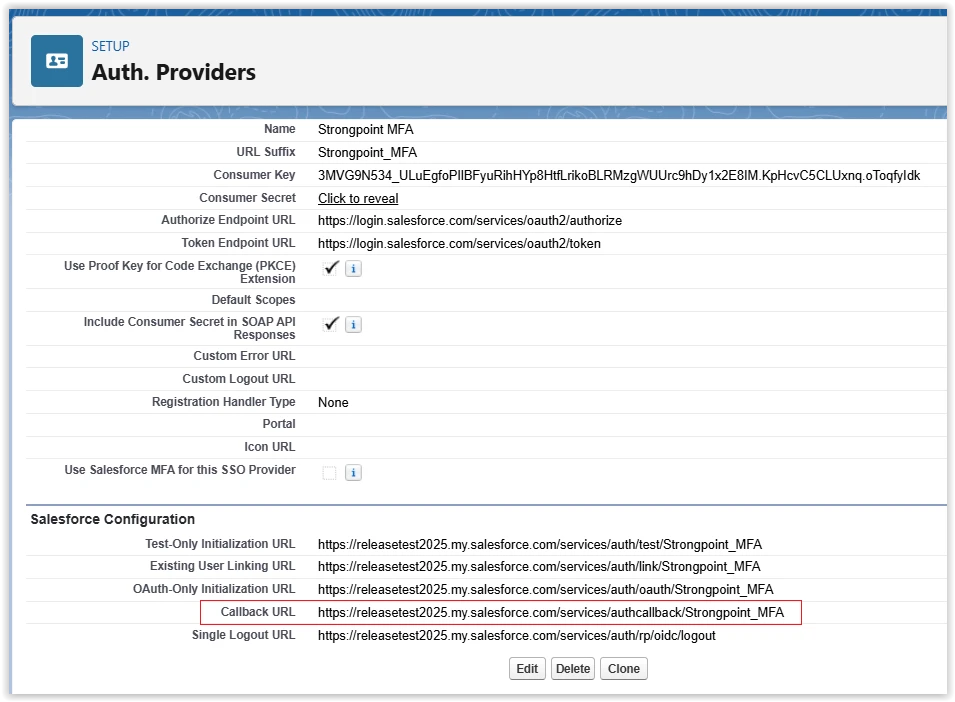
Step 2: Create an Auth Provider
Create a new Authentication Provider to enable OAuth authentication:
-
In Salesforce, open Setup > Identity > Auth. Providers
-
Click New
-
Configure the following settings:
- Provider Type: Salesforce
- Name:
Strongpoint MFA(this exact name is required) - Consumer Key: Enter the Consumer Key from the External Client App created in Step 1
- Consumer Secret: Enter the Consumer Secret from the External Client App created in Step 1
- Authorize Endpoint URL:
- For Sandbox:
https://test.salesforce.com/services/oauth2/authorize - For Production:
https://login.salesforce.com/services/oauth2/authorize
- For Sandbox:
- Token Endpoint URL:
- For Sandbox:
https://test.salesforce.com/services/oauth2/token - For Production:
https://login.salesforce.com/services/oauth2/token
- For Sandbox:
-
Leave all other fields at their default values
-
Click Save
Update External Client App Callback URL
After creating the Auth Provider:
- Copy the Callback URL displayed on the Auth Provider detail page
- In Salesforce, open Setup > External Client Apps > External Client App Manager
- Locate the Netwrix External Client App
- Click the dropdown and select Edit Settings
- Replace the Callback URL with the URL copied from the Auth Provider
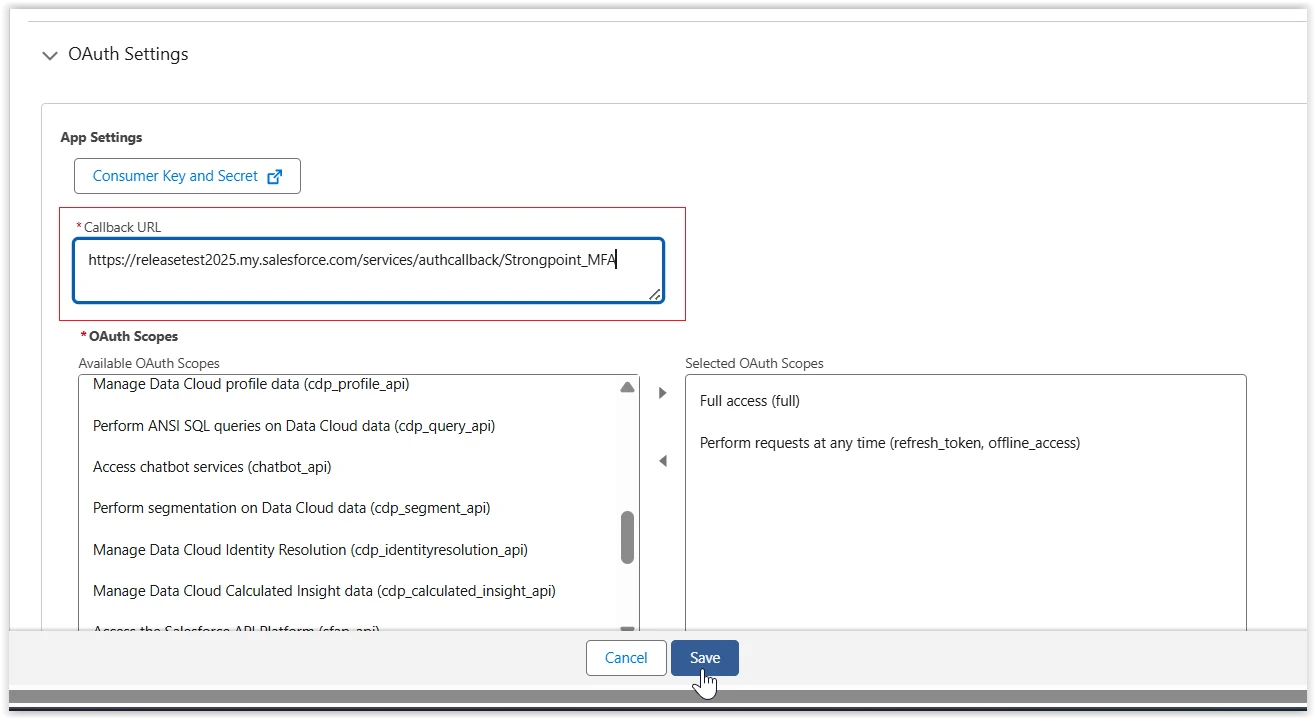
- Click Save
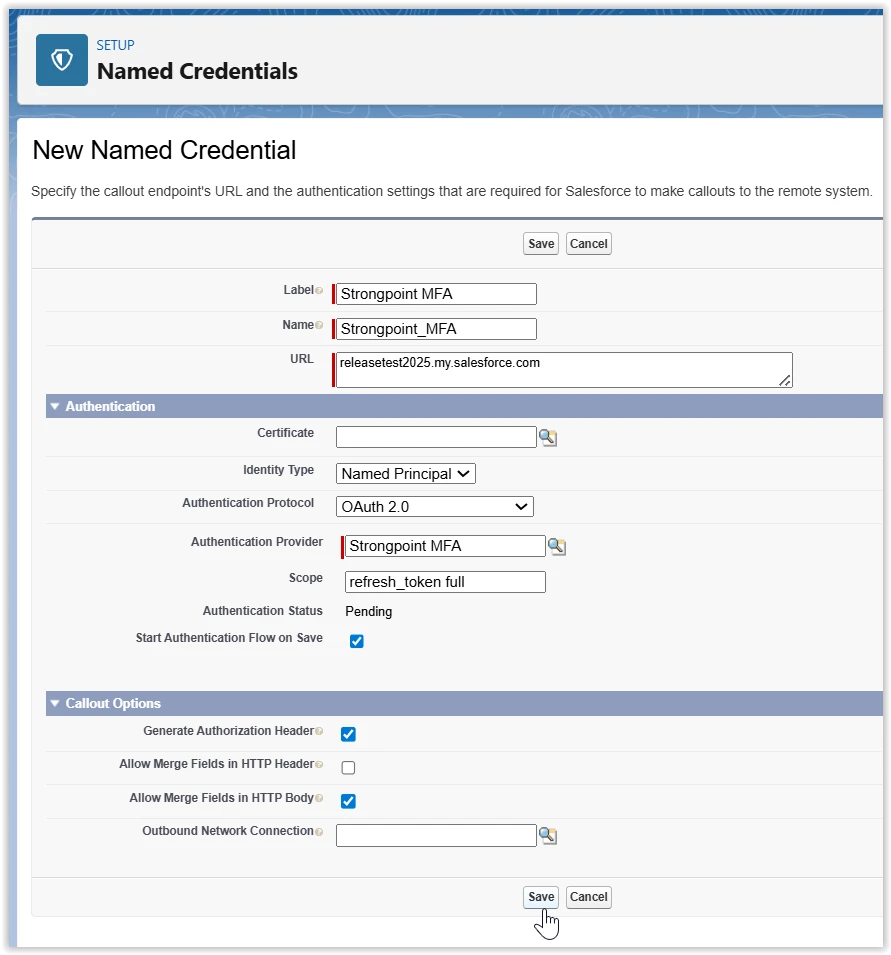
Step 3: Create a Named Credential
Create a Named Credential to establish the authentication connection:
- In Salesforce, open Setup > Security > Named Credentials
- Click New Named Credential (or New Legacy if using Enhanced Named Credentials)
- Configure the following settings:
- Label:
Strongpoint MFA - Name:
Strongpoint_MFA(auto-populated) - URL: Enter your Salesforce base URL
- You can find this in Setup > Company Settings > My Domain
- Identity Type: Named Principal
- Authentication Protocol: OAuth 2.0
- Authentication Provider: Select
Strongpoint MFA(created in Step 2) - Scope:
refresh_token full - Start Authentication Flow on Save: Checked
- Generate Authorization Header: Checked
- Allow Merge Fields in HTTP Body: Checked
- Label:
- Click Save
Enabling Require High Assurance Session ensures that the Named Credential can only be used after a high-assurance authentication event. This setting enforces the use of Named Credentials and provides an additional layer of security. See Salesforce High Assurance Sessions documentation.
Authenticate the Named Credential
After saving:
- Salesforce redirects you to the login page.
- Log in with your credentials.
- Click Allow to grant access.
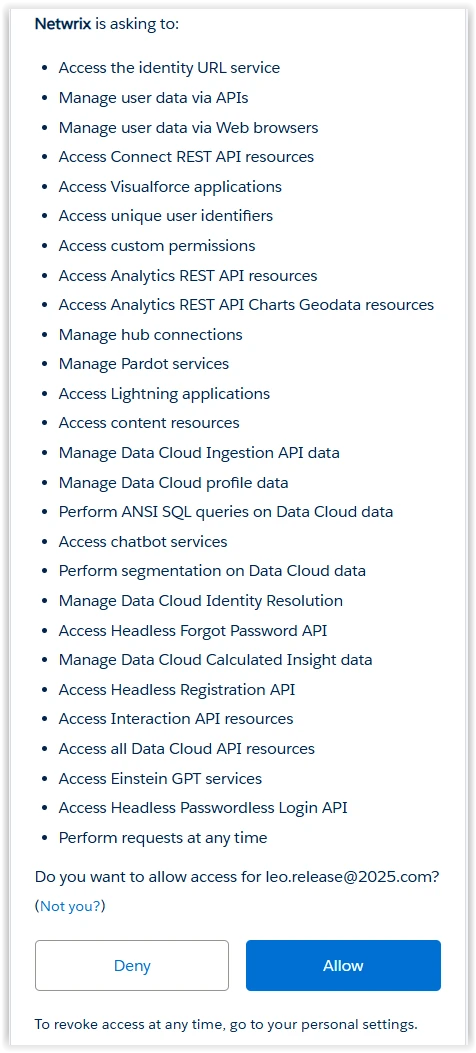
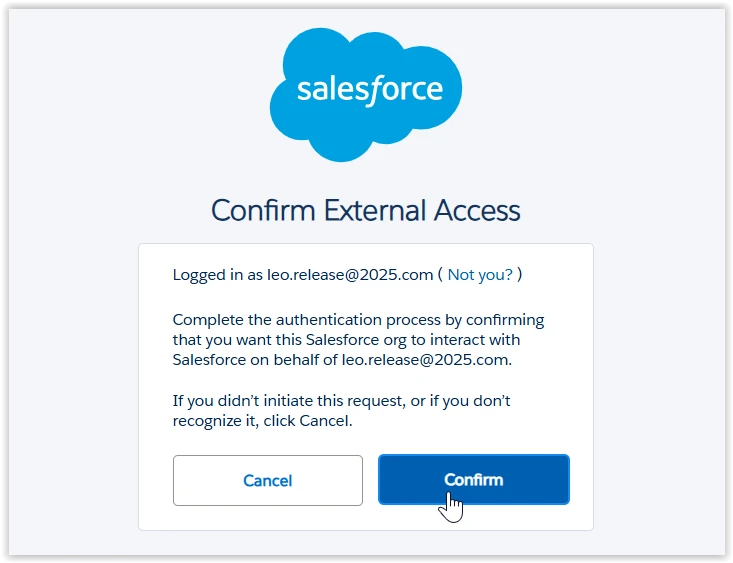
- Salesforce redirects you back to the Named Credential record.
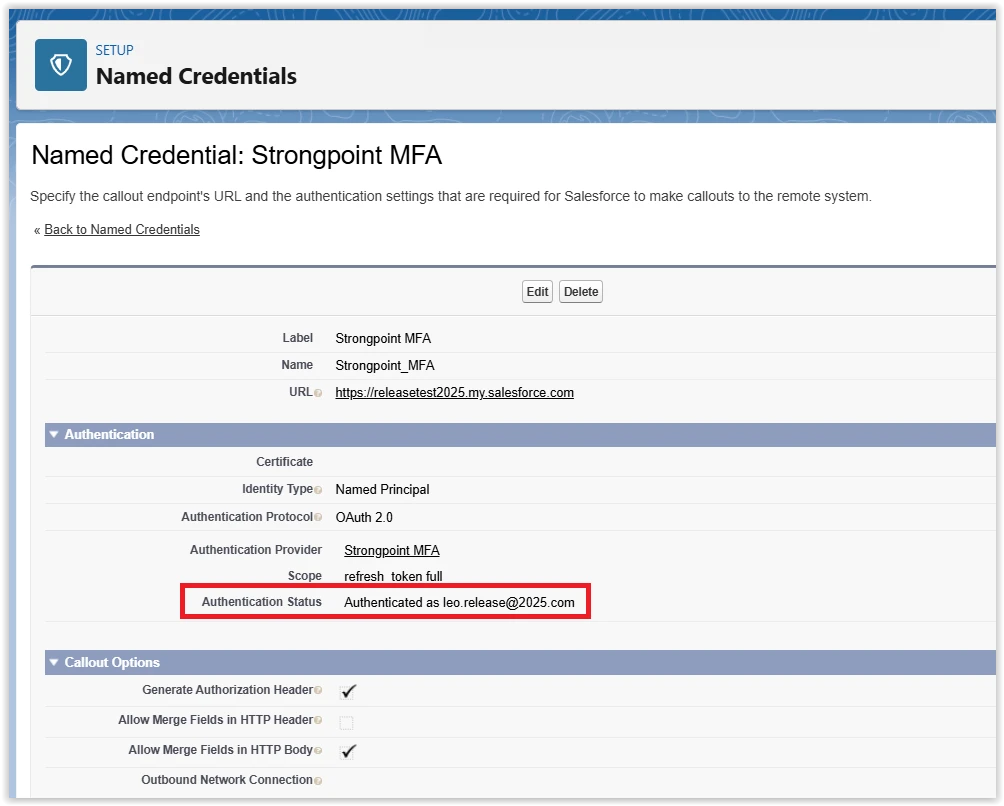
- Verify that the Authentication Status shows as Authenticated
Verification
After completing all steps, verify the following:
- The External Client App has OAuth enabled with the correct scopes.
- The Auth Provider is configured with the correct endpoints.
- The Named Credential shows an Authenticated status.
Your Platform Governance for Salesforce is now configured to use External Client App authentication with Named Credentials.
Troubleshooting
If you encounter authentication issues:
- Verify that the Consumer Key and Consumer Secret match between the External Client App and Auth Provider
- Ensure the Callback URL in the External Client App matches the one from the Auth Provider
- Check that the Named Credential shows an Authenticated status
- Verify that the correct endpoint URLs are used (Sandbox vs. Production)
- Ensure all required OAuth scopes are selected in the External Client App
- Confirm that My Domain is properly configured in your Salesforce org
- Verify that IP Relaxation is enabled in the External Client App policies
Next Steps
After completing the credentials setup, proceed to: