Run the Getting Started Wizard
The Getting Started Wizard helps you set up Platform Governance for Salesforce after you have done the basic installation and configuration.
To use the Getting Started Wizard:
- Open Netwrix Dashboard.
- Open Settings> Getting Started Wizard
The Getting Started Wizard opens to help you finish the configuration and set up.
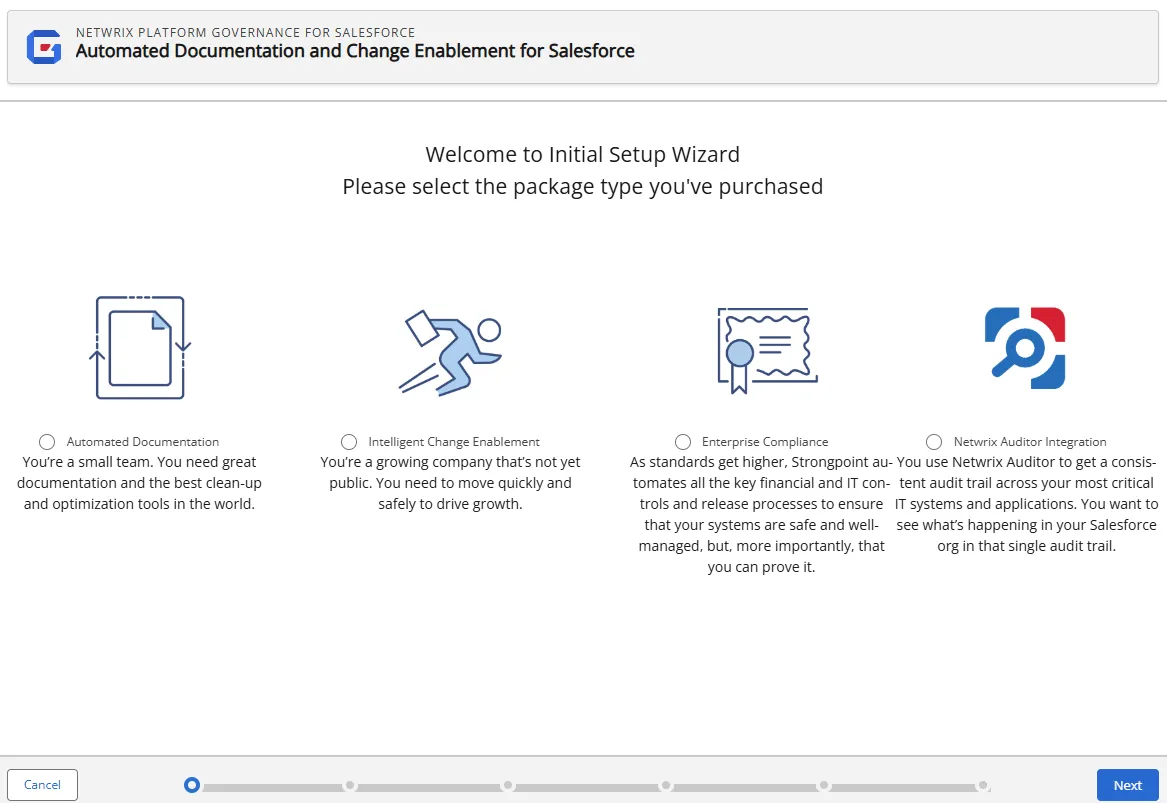
Choose Your License Type
On the Initial Setup Wizard page, choose the package type you have purchased. If you have an Intelligent Change Management or Enterprise Compliance License, enter the Input Authorization Token sent to you. Click Next.
Add your Credentials
Once you have chosen your license type, you need to add your credentials. If your credentials change, an alert is sent to update the saved credentials. Expired credentials can cause auto scanners to fail. Use Netwrix Dashboard > Settings> SP Credentials to update your credentials.
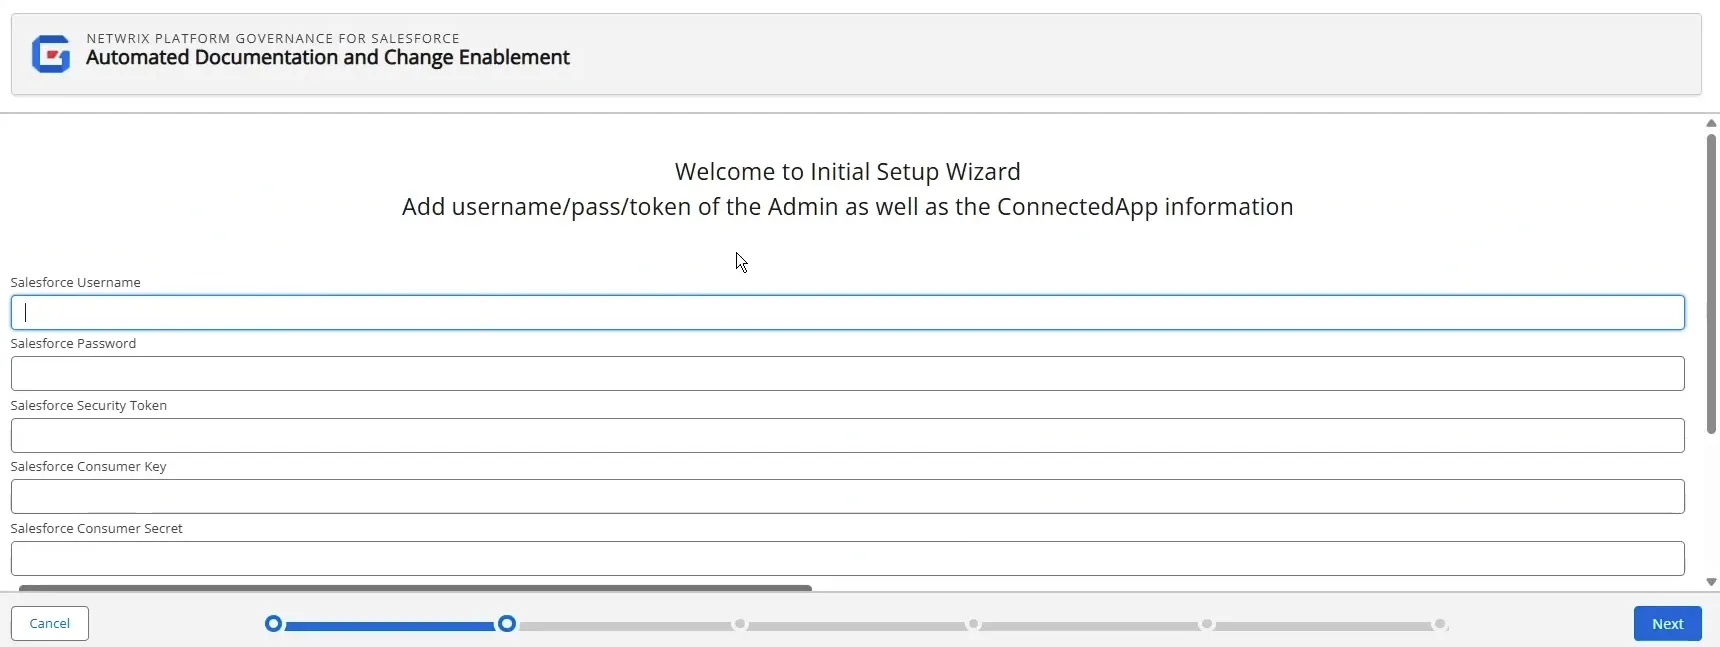
- On the Credentials page, add the following values:
- Salesforce Username
- Salesforce Password
- Salesforce Security Token
- Salesforce Consumer Key Extracted when you created the Strongpoint Connected App
- Salesforce Consumer Secret Extracted when you created the Strongpoint Connected App
- Click Next
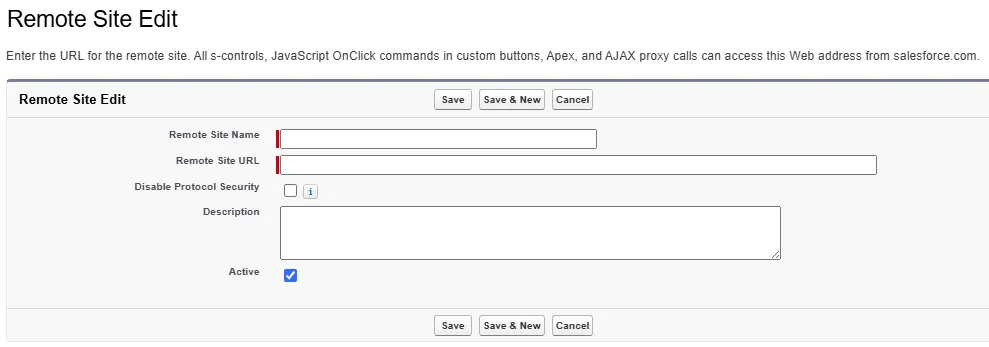
Test Your Connection
Once you have set up your credentials, you need to configure the remote site settings.

-
Open Salesforce Setup > Security > Remote Site Settings.
-
Click New Remote Site.
-
Copy/paste the information from the wizard to create the remote sites.
-
Click on Test Connection. Test connection was Successful is displayed if the connection succeeds. If the connection fails, the wizard suggests troubleshooting steps to resolve the issue.
-
Click Next.
Next Step: Set Up the Initial Scan