Manual Scanners
When the initial scan is complete, you can run additional on demand scans as required.
When you add or change a specific customization, you can choose to run an on demand scan of only the Metadata type of the affected customization, instead of scanning the entire environment. This type of scan reduces the run time. For example if you change a Report, pick reports as the Metadata type and Platform Governance for Salesforce only scans reports.
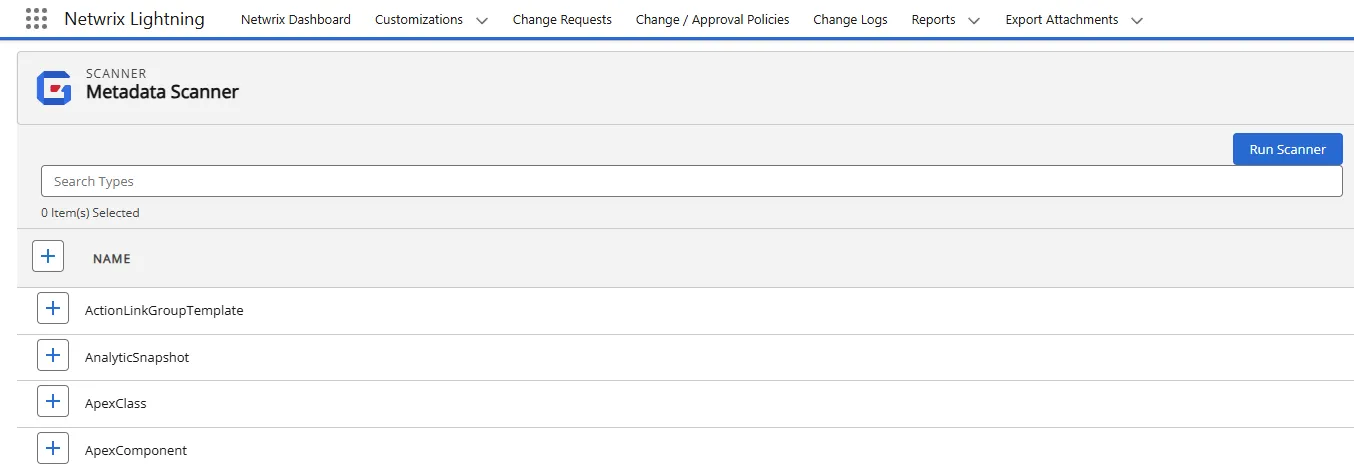
The scanner is only available to Administrators.
To run the scanner:
-
Open Netwrix Dashboard > Scanner > Manual Scanners
-
Use the optional Search Types to narrow the focus of the list if you are looking for a specific type.
-
You can select + beside one or more types to scan or you can scan the whole environment by clicking + on the Name row to select all the types.
-
Click Run Scanner.
-
The batch runs in the background. You receive an email notification when the scan is complete.
You can create your own Salesforce view for the scanners.
- Open Salesforce Setup.
- Search for apex jobs or navigate to Environments > Jobs > Apex Jobs.
- Click Create New View.
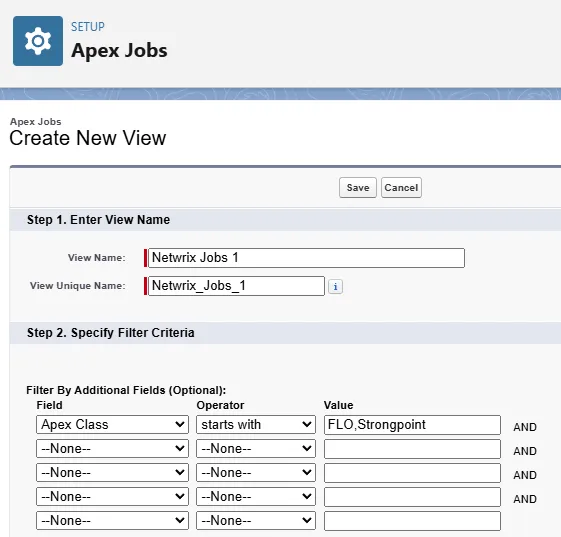
- Enter a View Name. The system assigns View Unique Name. Netwrix Jobs1 is used in this example.
- Select Apex Class for the Field.
- Select starts with for the Operator.
- Assign FLO, Strongpoint for the Value.
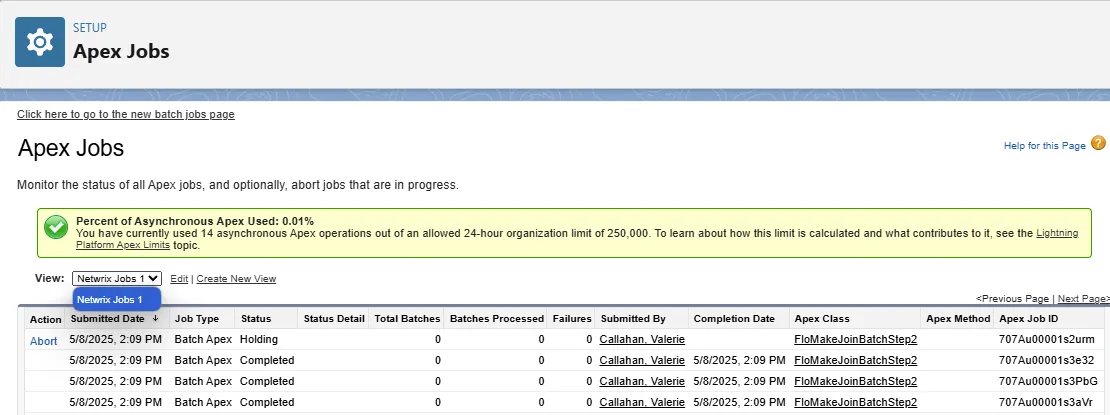
- Click Save. You can now see the status of all of the Strongpoint jobs.
-
From the Netwrix Dashboard: click Configuration and Stats in the Resources section, or open Settings > Configuration and Stats.
Next Step: Validate the Data