Setting Tab Access
Platform Governance for NetSuite tab access is managed like any other tab in NetSuite.
By default, access is granted to the following roles:
- Administrator
- Full Access
- Strongpoint Developer Role
Access to the Strongpoint tab must be granted to other users or roles:
- Open Customization > Centers and Tabs > Center Tabs
- Click Edit by Strongpoint
The Label should be Strongpoint. - Click the Audience tab.
- Grant access to the appropriate users and roles. Refer to NetSuite’s Help for more details on Role and Tab Access.
- Click Save > Save a Copy
There are two options where to set permissions:
- If the user role is under the Classic Center tab, you can grant access within the Audience tab. However, the access is removed and must be reset after every bundle update. If you choose this option, skip to Setting the Audience
- If you want to avoid granting access after every bundle update, continue with the Creating a Copy of Strongpoint Classic Center steps before Setting Permissions.
Creating a Copy of Classic Center
This procedure makes a copy of the Strongpoint Classic Center tab that is preserved through bundle updates. After you create the copy, you must add all of the appropriate category links prior to Setting Permissions.
-
Open Customization > Centers and Tabs > Center Tabs
-
Click Edit by Strongpoint
-
Select a different Center
-
Click Save a Copy
Leave this window open so you can see all of the categories.
This example shows Engineering as the new Center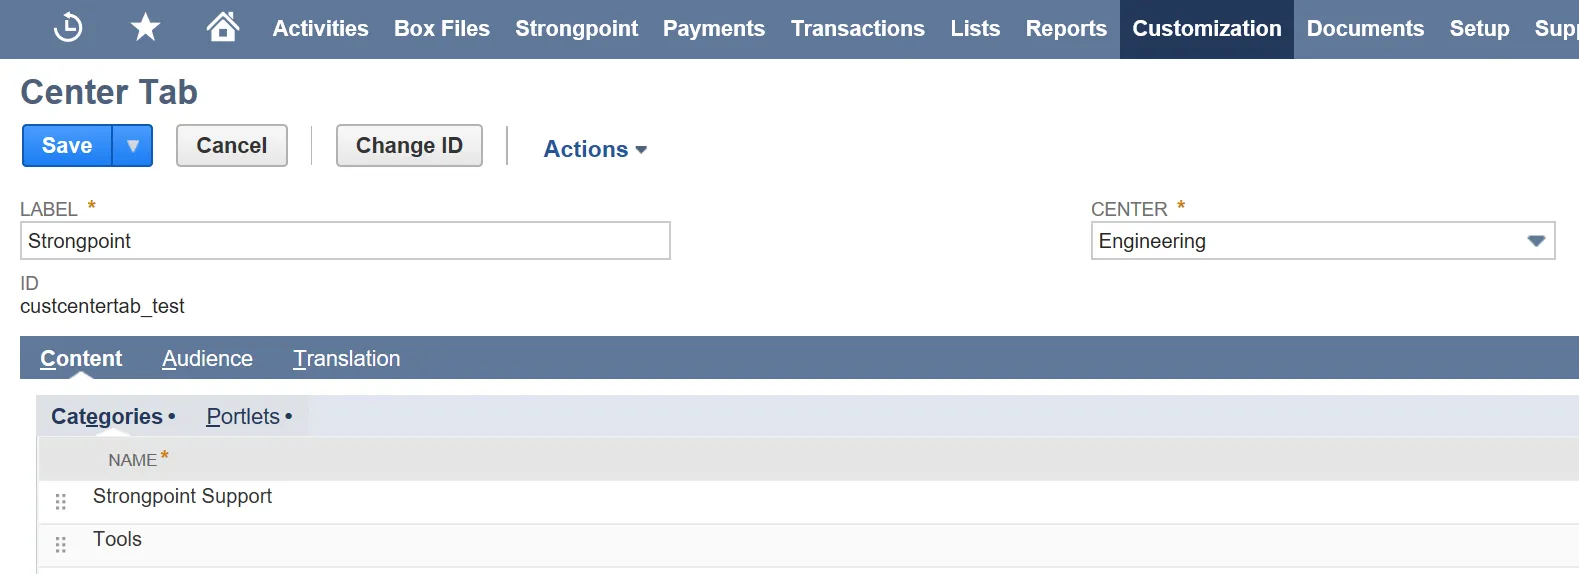
-
Create the Category links:
-
Open Customization > Centers and Tabs > Center Categories in a new window.
Click Edit by the Label of your first category (Strongpoint Support in the example) and your selected Center Type (Engineering in the example).
-
Open Customization > Centers and Tabs > Center Categories in a second new window.
Click Edit by the Label of the same category and the Classic Center version. -
Add each Link and Label in your new Center, using the Classic Center version as a guide. A drop down completion list is shown as you type. Click Add after each addition.
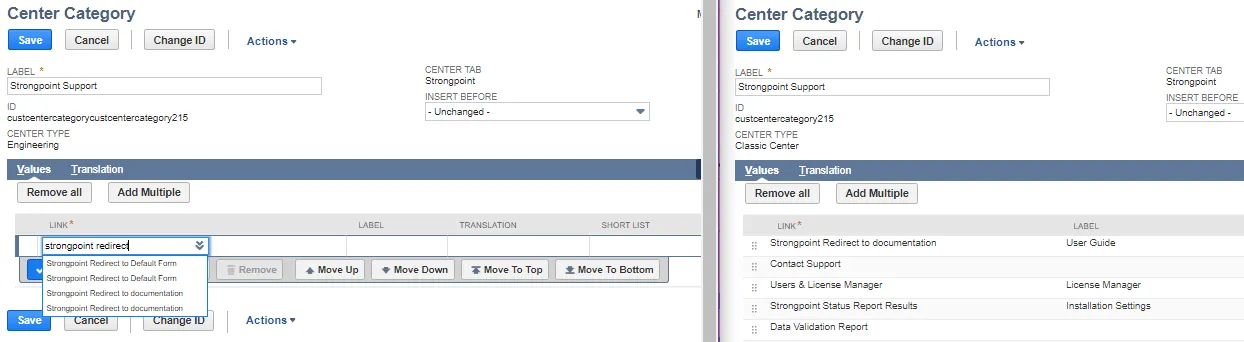
-
When complete, click Save in your new Center and Cancel in the Classic Center.
-
Click Edit by the next Category in your new Center and the corresponding Category in the Classic Center and continue adding the links.
-
When you are done with all Categories and associated links, continue with Setting Permissions.
-
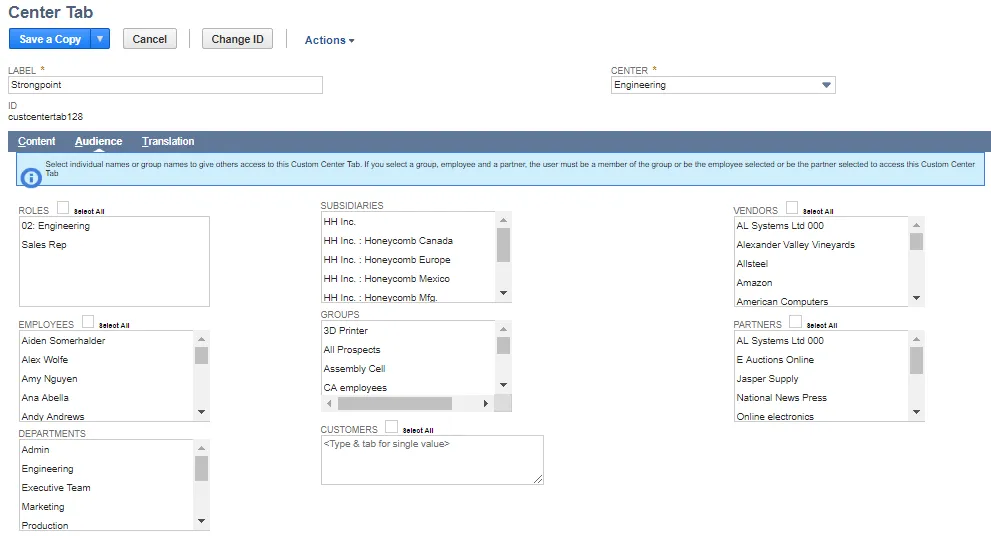
Setting the Audience
-
Open Customization > Centers and Tabs > Center Tabs
-
Click Edit by Strongpoint and the correct Center Type (Engineering in this example).
-
Open the Audience tab.
-
Assign the audience. This can be role(s) or specific employees.
-
Click Save
Next Step: Setting Role Permissions