Set Up the Archive Folder
Advanced Change Management allows data within customization to be archived during the Clean Up process. An archive folder must be created before the Clean Up process.
Create the Archive Folder
-
Open NetSuite Home > Set Preferences
-
Under Defaults, make sure Show Internal IDS is checked on the General tab.
-
Click Save
-
Open Documents > Files > File Cabinet > New
-
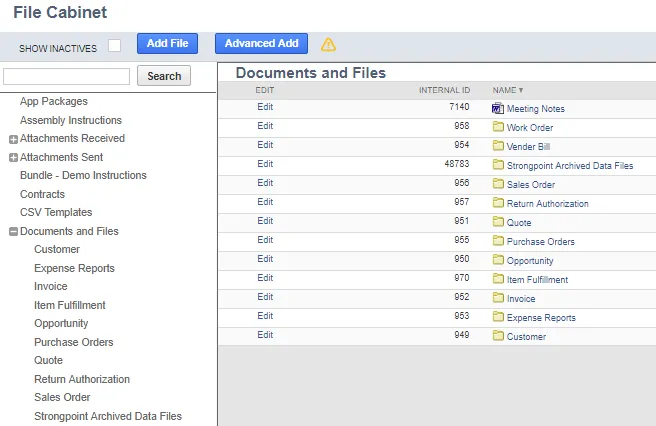
Name the folder Strongpoint Archived Data Files.
-
Enter Documents and Files in Sub-Folder Of
-
Best practice is to add a meaningful description.
-
Click Save
-
Note the Internal ID for your new Strongpoint Archived Data Files folder. 48783 in this example.
Assign the Internal ID to the Deployed Script
To assign the internal ID to a deployed script:
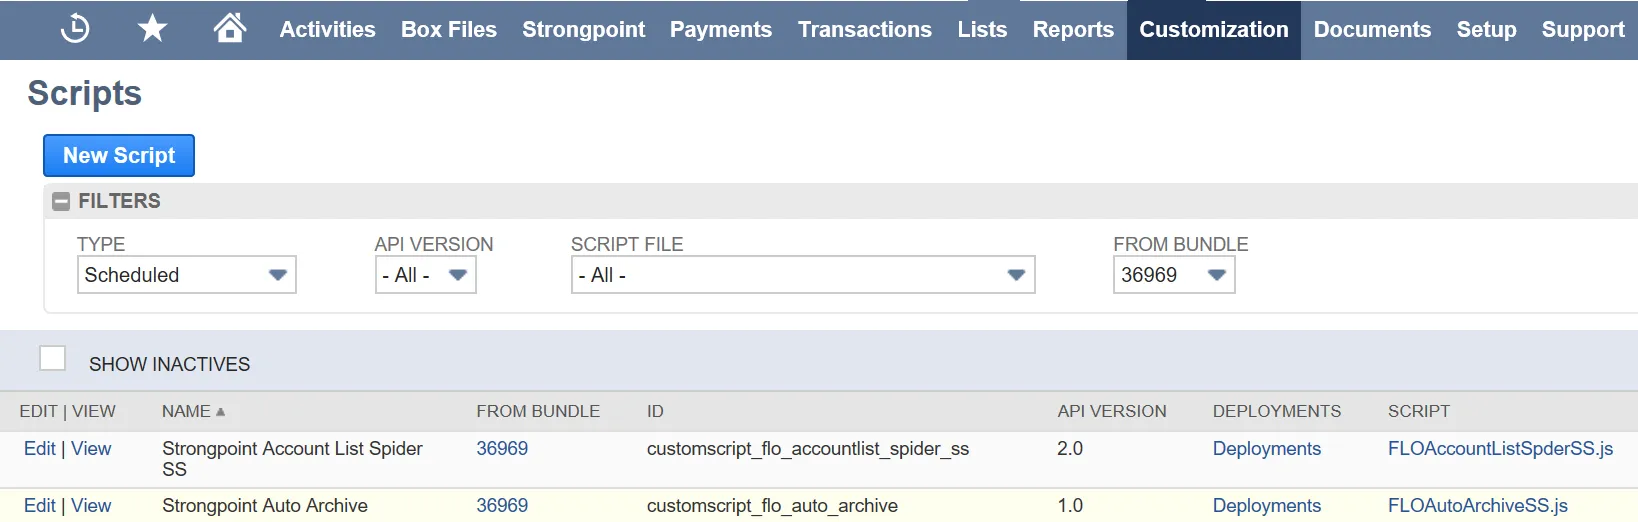
- Open Customization > Scripting > Scripts
- Change the Type Filter to Scheduled and From Bundle to 294336
- Click View by the Strongpoint Auto Archive
-
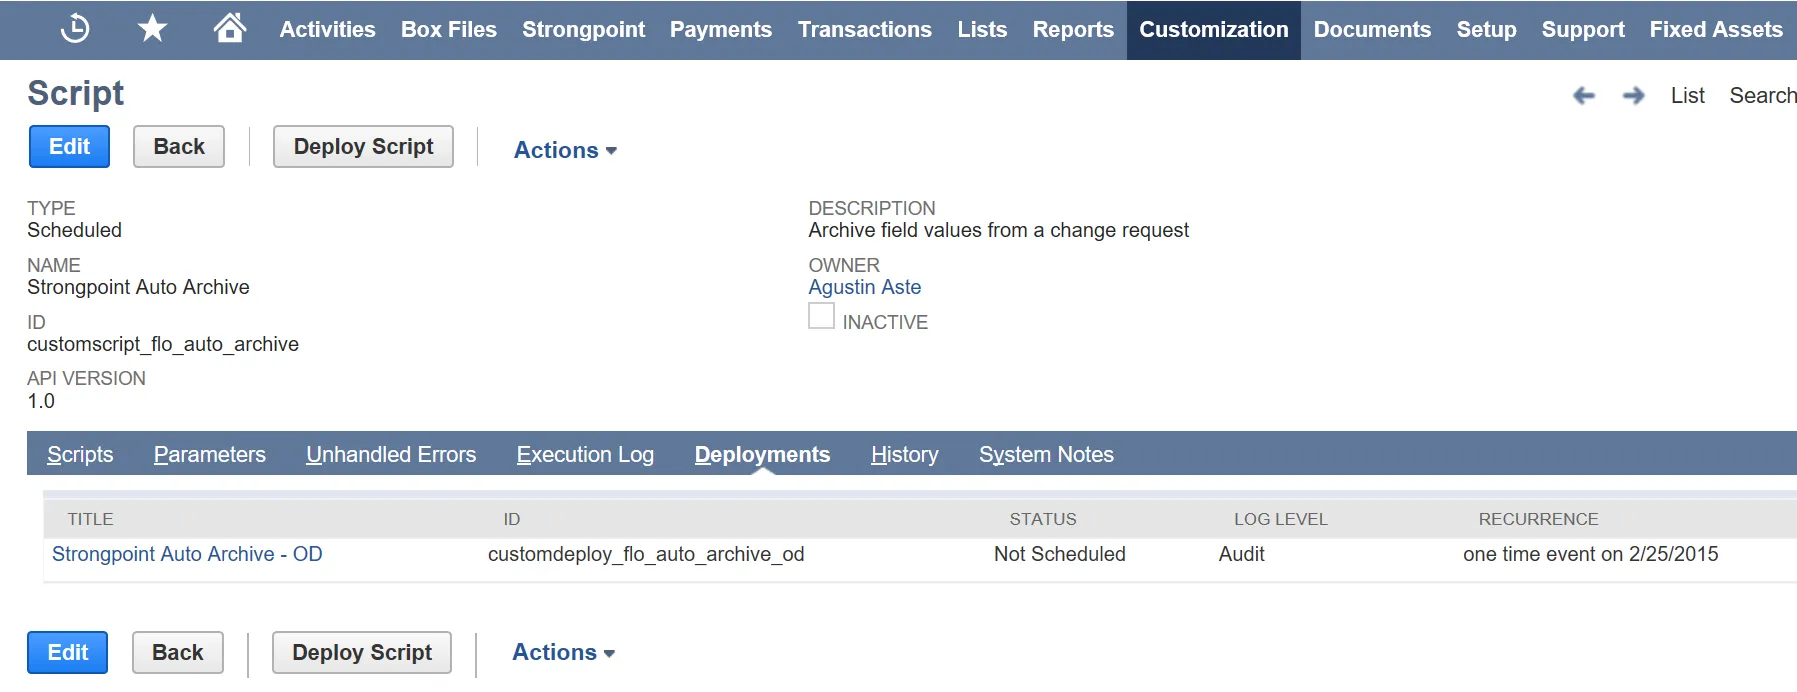
Open the Deployments tab.
-
Click on Strongpoint Auto Archive – OD.
-
Click Edit
-
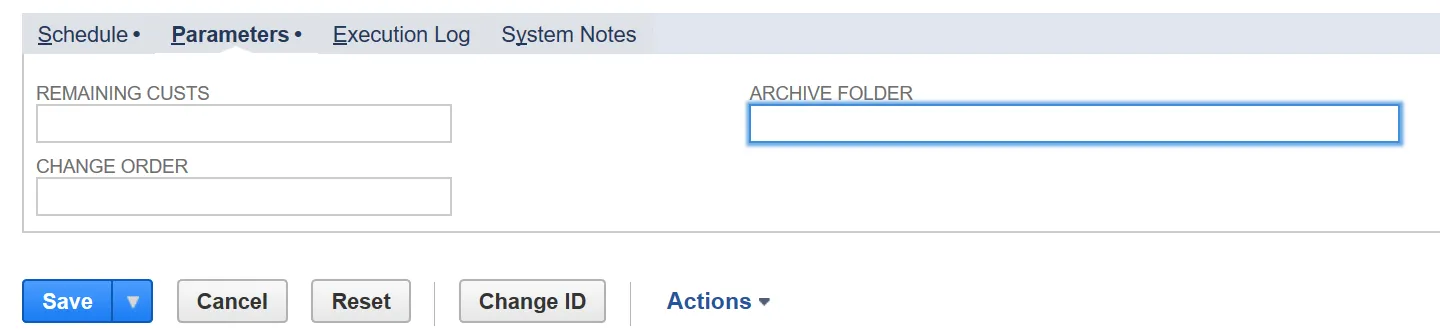
Open the Parameters tab, add the internal ID of your Archive Folder
-
Click Save
The archiving function on Change Requests is now set up and ready to use.