Creating Two Mass Updates
First Mass Update
The first mass update flags all the bundle components to be cleaned up and set the status on the Customization to To Be Cleaned Up. It identifies everything needing removal.
To create the first mass update:
-
Open Lists > Mass Update > Mass Updates.
-
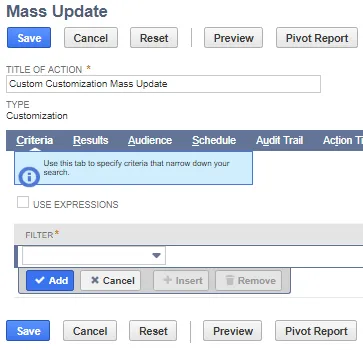
Open General Updates > Custom Records > Customization.
-
Check Use Expressions on the Criteria tab.
-
Add the following filters on the Criteria tab: | | Parens | Filter | Description | Parens | And/Or | | --- | --- | --- | --- | --- | --- | | Filter 1 | | Inactive | Is false | | and | | Filter 2 | ( | Bundle | Bundle ID | | or | | Filter 3 | | Bundle | Bundle ID | ) | |
You can remove more than one bundle at a time.

-
Open the Mass Update Fields tab.
-
Scroll down and check the box for Clean Up Status.
-
Enter the Clean Up Status: To Be Cleaned Up.

-
Click Save.
Second Mass Update
The second mass update flags all the objects related to the bundle and sets a status on the Customization to To Be Investigated. It identifies everything needing investigation.
- Open Lists > Mass Update > Mass Updates
- Open General Updates > Custom Records > Customization
- Check Use Expressions on the Criteria tab.
- Add the following filters on the Criteria tab: | | Parens | Filter | Description | Parens | And/Or | | --- | --- | --- | --- | --- | --- | | Filter 1 | | Inactive | Is false | | and | | Filter 2 | | Clean-Up Status | Is Not To Be Cleaned Up | | and | | Filter 3 | ( | Data Sources: Clean-Up Status | Is To Be Cleaned Up | | or | | Filter 4 | | Scripts: Clean-Up Status | Is To Be Cleaned Up | | or | | Filter 5 | | Forms: Clean-Up Status | Is To Be Cleaned Up | | or | | Filter 6 | | Workflows: Clean-Up Status | Is To Be Cleaned Up | | or | | Filter 7 | | List: Clean-Up Status | Is To Be Cleaned Up | | or | | Filter 8 | | Searches/Mass Updates: Clean-Up Status | Is To Be Cleaned Up | ) | |

- Open the Mass Update Fields tab.
- Scroll down and check the box for Clean Up Status
- Enter the Clean Up Status: Under Investigation
- Click Save
Next Step: Creating a Custom List and Fields