Installing Password Policy Client
The Password Policy Client is compatible with Windows 8, 8.1, 10, or 11. It is also compatible with Windows Server 2016, 2019, and 2022. The Password Policy Client can be used with Remote Desktop Services on these operating systems.
NOTE: The Password Policy Client is also compatible with Windows XP, Vista, and 7. However, Netwrix no longer provides technical support for these versions.
System Requirements
- Windows 8, 8.1, 10, or 11.
- Windows Server 2016, 2019, and 2022
- One Megabyte free disk space.
- 256 Kilobytes free RAM (per session if using Remote Desktop Services).
You can install the Password Policy Client manually by running the Password Policy Enforcer installer (PPE10.2.exe) and choosing the Express Setup option if you only need to install it on a few computers. If you have many computers, then follow the instructions below to perform an automated installation with Group Policy, or use your regular software distribution tool to do the same.
Create a Distribution Point
A distribution point can either be a UNC path to a server share, or a DFS (Distributed File System) path. You can use the distribution point you created earlier for Password Policy Enforcer to distribute the Password Policy Client. See the Installation topic for additional information.
If you did not create a distribution point for Password Policy Enforcer, then create one now.
Follow the steps below to create a Password Policy Client distribution point.
Step 1 – Log on to a server as an administrator.
Step 2 – Create a shared network folder to distribute the files from.
Step 3 – Give the Domain Computers security group read access to the share, and limit write access to authorized personnel only.
Copy PPECIt10.2.msi into the Distribution Point
Follow the steps below to copy the .msi file into the distribution point.
Step 1 – Start the Password Policy Enforcer installer (PPE10.2.exe).
Step 2 – Read the license agreement, and then click Yes if you accept all the license terms and conditions.
Step 3 – Select the Advanced option, then click Next.
Step 4 – Right-click the PPEClt10.2.msi icon, click Copy, and then paste the file into the distribution point.
Step 5 – Give the Domain Computers security group read access to the PPEClt10.2.msi file in the distribution point.
Step 6 – Click Finish.
Create a Group Policy Object
Follow the steps below to create a group policy object.
Step 1 – Start the Group Policy Management Console (gpmc.msc).
Step 2 – Expand the forest and domain items in the left pane.
Step 3 – Right-click the domain root node in the left pane, and then click Create a GPO in this domain, and Link it here....
Step 4 – Enter Password Policy Client in the provided field, then press ENTER.
Edit the Group Policy Object
Follow the steps below to edit a group policy object.
Step 1 – Right-click the Password Policy Client GPO, then click the Edit... edit.
Step 2 – Expand the Computer Configuration, Policies, and Software Settings items in the left pane.
Step 3 – Right-click the Software installation item, then select New > Package....
Step 4 – Enter the full UNC path to PPEClt10.2.msi in the Open dialog box.
NOTE: You must enter a UNC path so that other computers can access this file over the network.
For example, \\file server\distribution point share\PPEClt10.2.msi
Step 5 – Click Open.
Step 6 – Select the Assigned deployment method, then click OK.
Step 7 – Close the Group Policy Management Editor.
Complete the Installation
Restart each computer to complete the installation. Windows installs the Password Policy Client during startup.
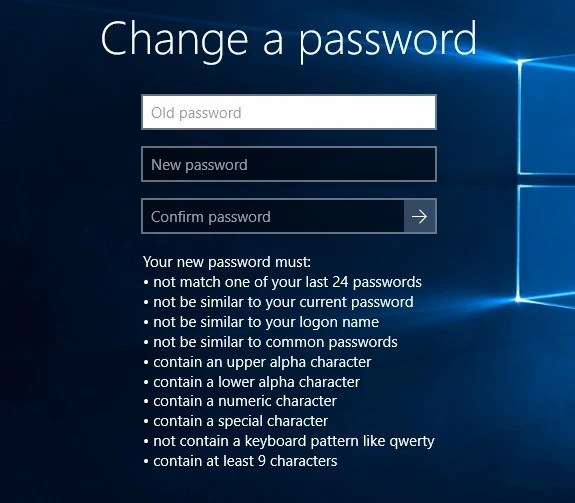
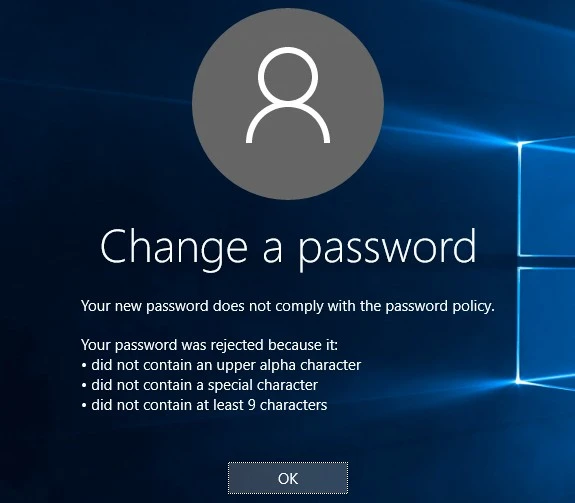
Testing the Password Policy Client
Test the Password Policy Client by logging on to a computer and pressing the CTRL + ALT + DEL keys and clicking the Change a password item. If you do not see the password policy, it could be because a Password Policy Enforcer policy has not been assigned to you, or because the firewall rules have not been created.
NOTE: The Password Policy Client does not store or send passwords or password hashes over the network. An attacker cannot determine user passwords by sniffing the communication protocol. The protocol is also encrypted by default for additional protection.
Creating Firewall Rules for the Password Policy Client
You may need to create firewall rules for the Password Policy Client if your domain controllers are running a software (host) firewall, or if the Password Policy Client and Password Policy Server communicate through a firewall. Firewall rules are not necessary for local policies because the Password Policy Client and Password Policy Server are on the same computer.
Windows Firewall
If Windows Firewall is enabled on your domain controllers, then you must create a port exception to allow connections to the Password Policy Server. Windows Firewall is enabled by default on Windows Server 2008 and later.
Follow the steps below to create the port exception on all domain controllers.
Step 1 – Use the Group Policy Management Console (gpmc.msc) to display the GPOs linked to the Domain Controllers OU.
Step 2 – Right-click the Password Policy Enforcer GPO, and then click Edit....
NOTE: You need to create the GPO if you chose the Express Setup option.
Step 3 – Expand the Computer Configuration, Policies, Administrative Templates, Network, Network Connections, and Windows Firewall items.
Step 4 – Click Domain Profile in the left pane then double-click Windows Firewall: Define inbound port exceptions in the right pane.
Step 5 – Select the Enabled option, and then click Show....
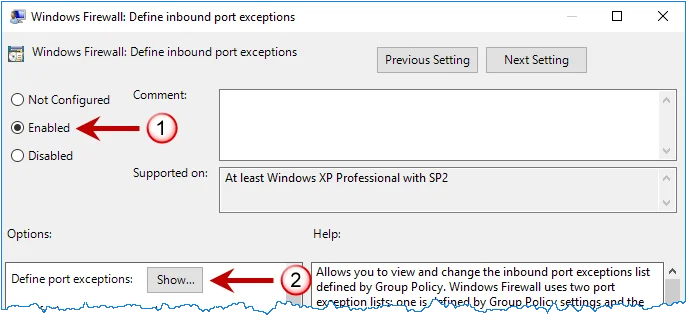
Step 6 – Select the Enabled option, and then click Show....

Step 7 – Click OK until you return to the Group Policy Management Editor.
Step 8 – Close the Group Policy Management Editor.
Other Firewalls
Use the information on this page to create appropriate rules for your firewall that allow the Password Policy Client and Password Policy Server to communicate through the firewall.
The Password Policy Client initiates a request by sending a datagram with the following attributes to the Password Policy Server:
| Attribute | Result |
|---|---|
| Protocol | UDP |
| Source Address | Client Computer IP address |
| Source Port | Any |
| Destination address | Domain controller IP address |
| Destination port | 1333 |
The Password Policy Server responds by sending a datagram with the following attributes back to the Password Policy Client:
| Attribute | Result |
|---|---|
| Protocol | UDP |
| Source Address | Domain controller IP address |
| Source Port | Any |
| Destination address | Client Computer IP address |
| Destination port | Any |
NOTE: If your firewall performs Stateful Packet Inspection, then only create a rule for the request datagram as the firewall will automatically recognize and allow the response datagram.