Configure the Pool and Site
This guide shows how to configure the application pool and website via IIS.
Overview
IIS provides a platform for hosting and managing websites. See Microsoft's introduction to IIS architecture for details.
To install the production agent, a website must be created and configured correctly, as part of an application pool.
This page describes the optimal configuration in IIS to prepare the production agent's installation.
Configure the Application Pool and Site
Configure the application pool and site by proceeding as follows:
- Open IIS and remove the default site and pool.
IIS can usually be found in Windows' search menu, or from Server Manager by accessing the Tools menu.
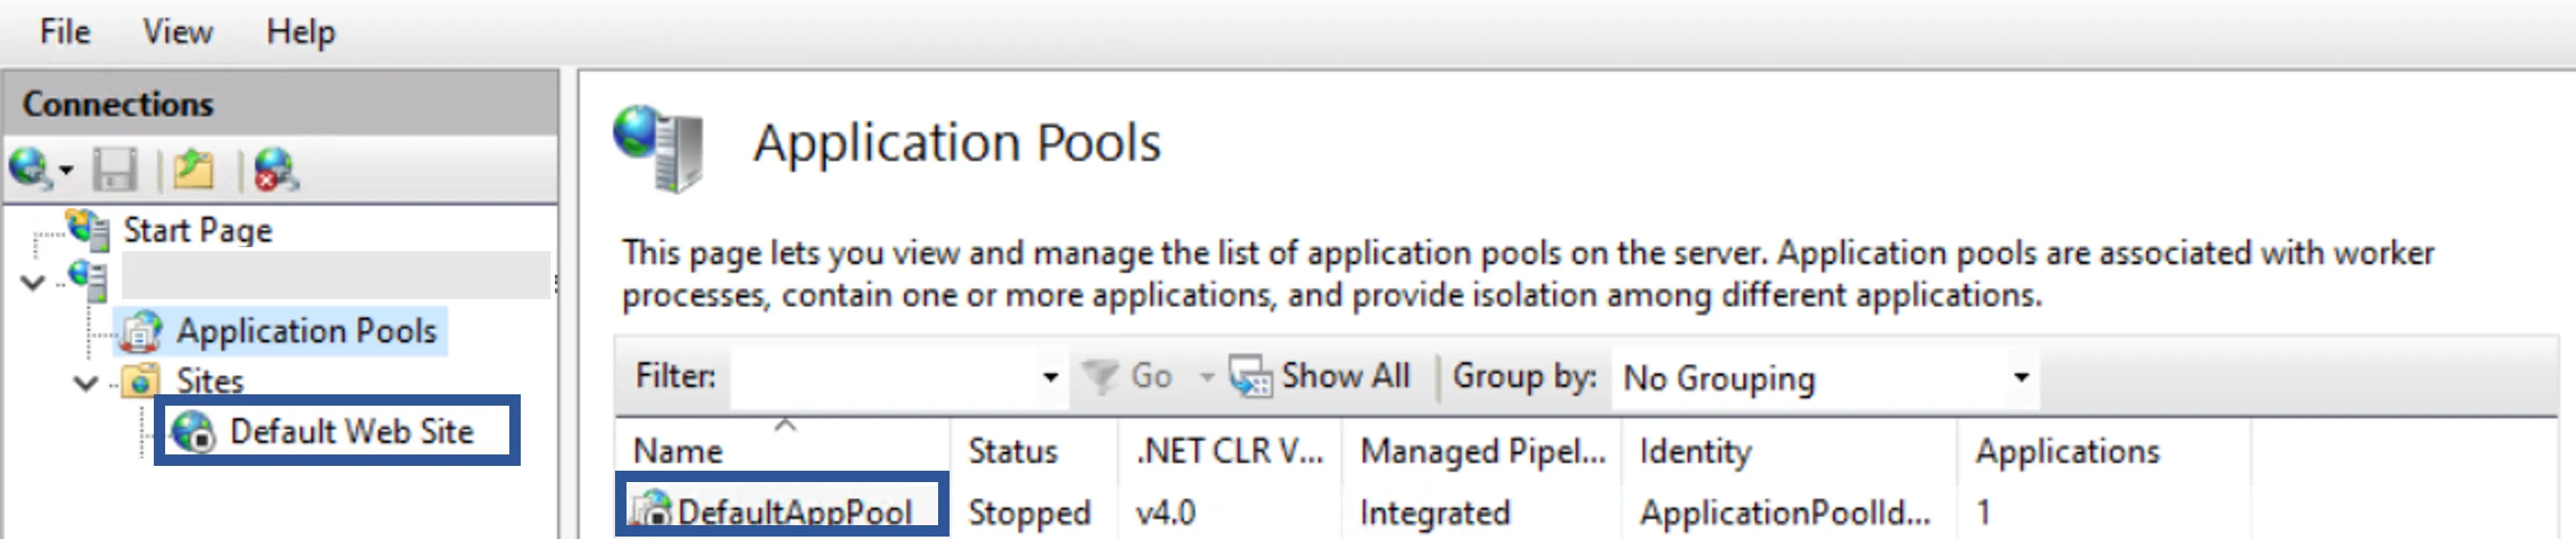
-
Right-click Application Pools to add a new pool named
Usercube.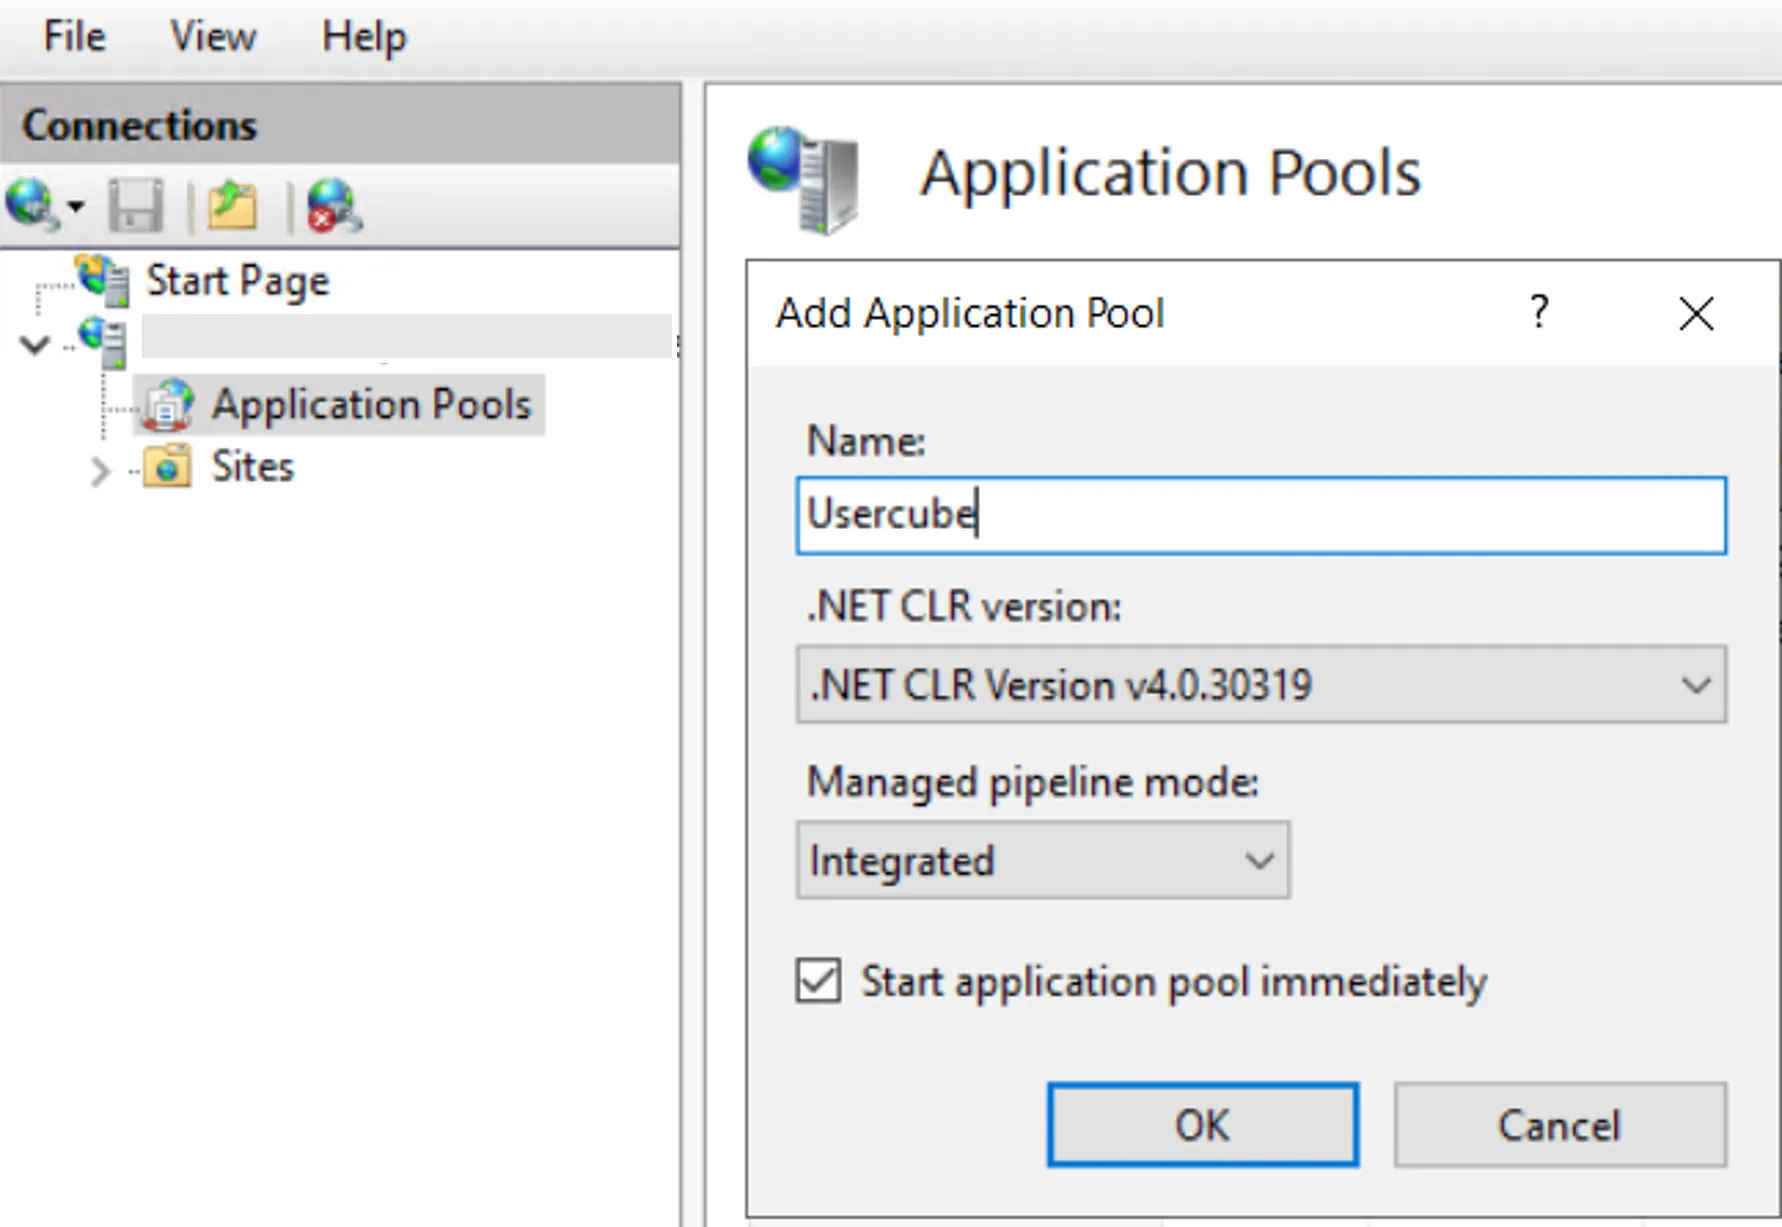
-
Right-click Sites to add a new site named
Usercube<Organization>, ensure that the selected application pool isUsercubeand set thepathfield to theRuntimefolder.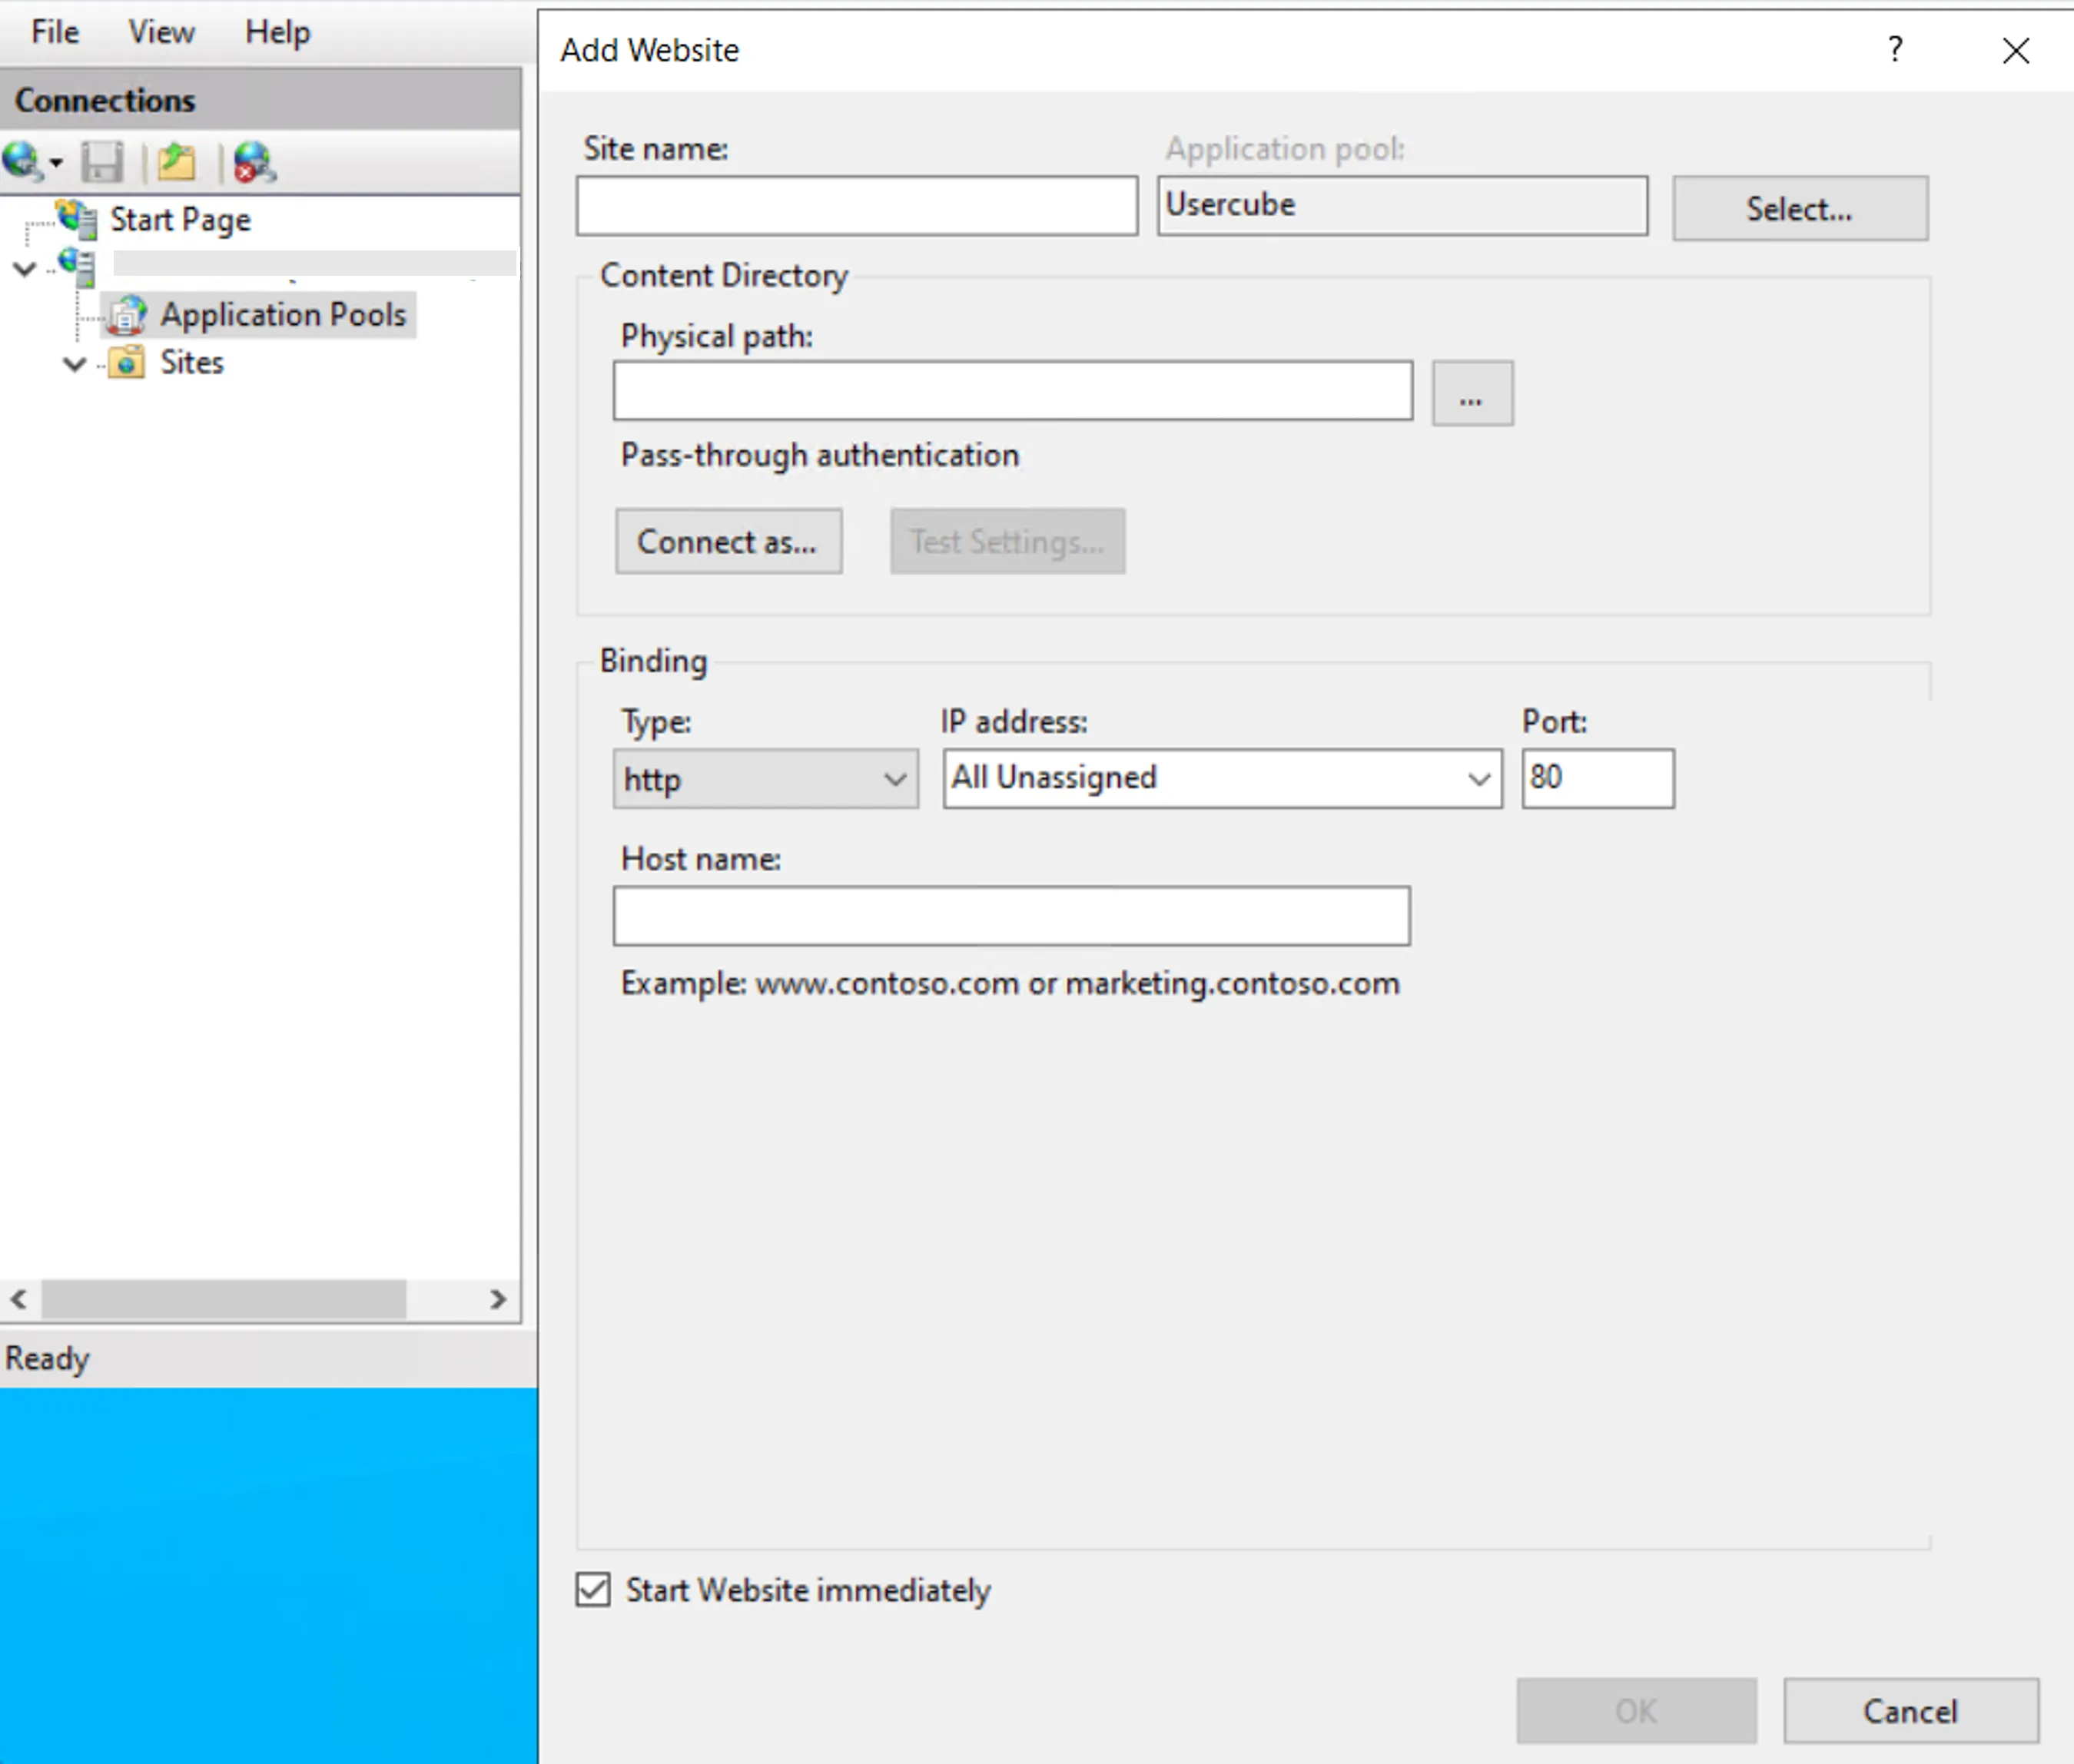
-
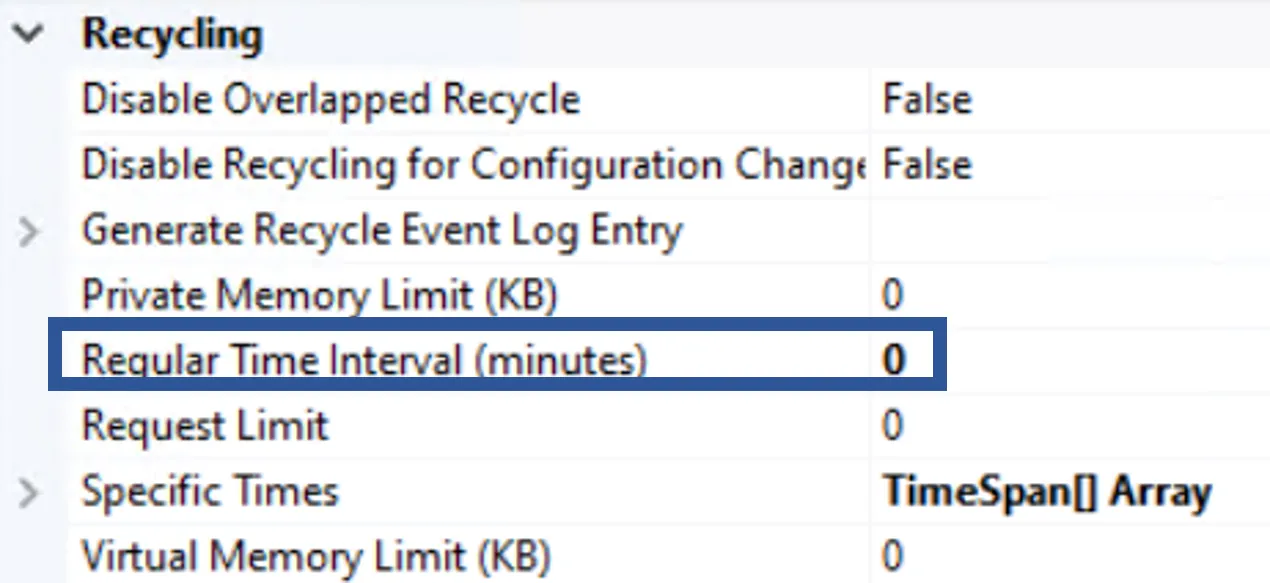
Right-click the application pool to open its advanced settings and ensure that the following parameters are set as such:
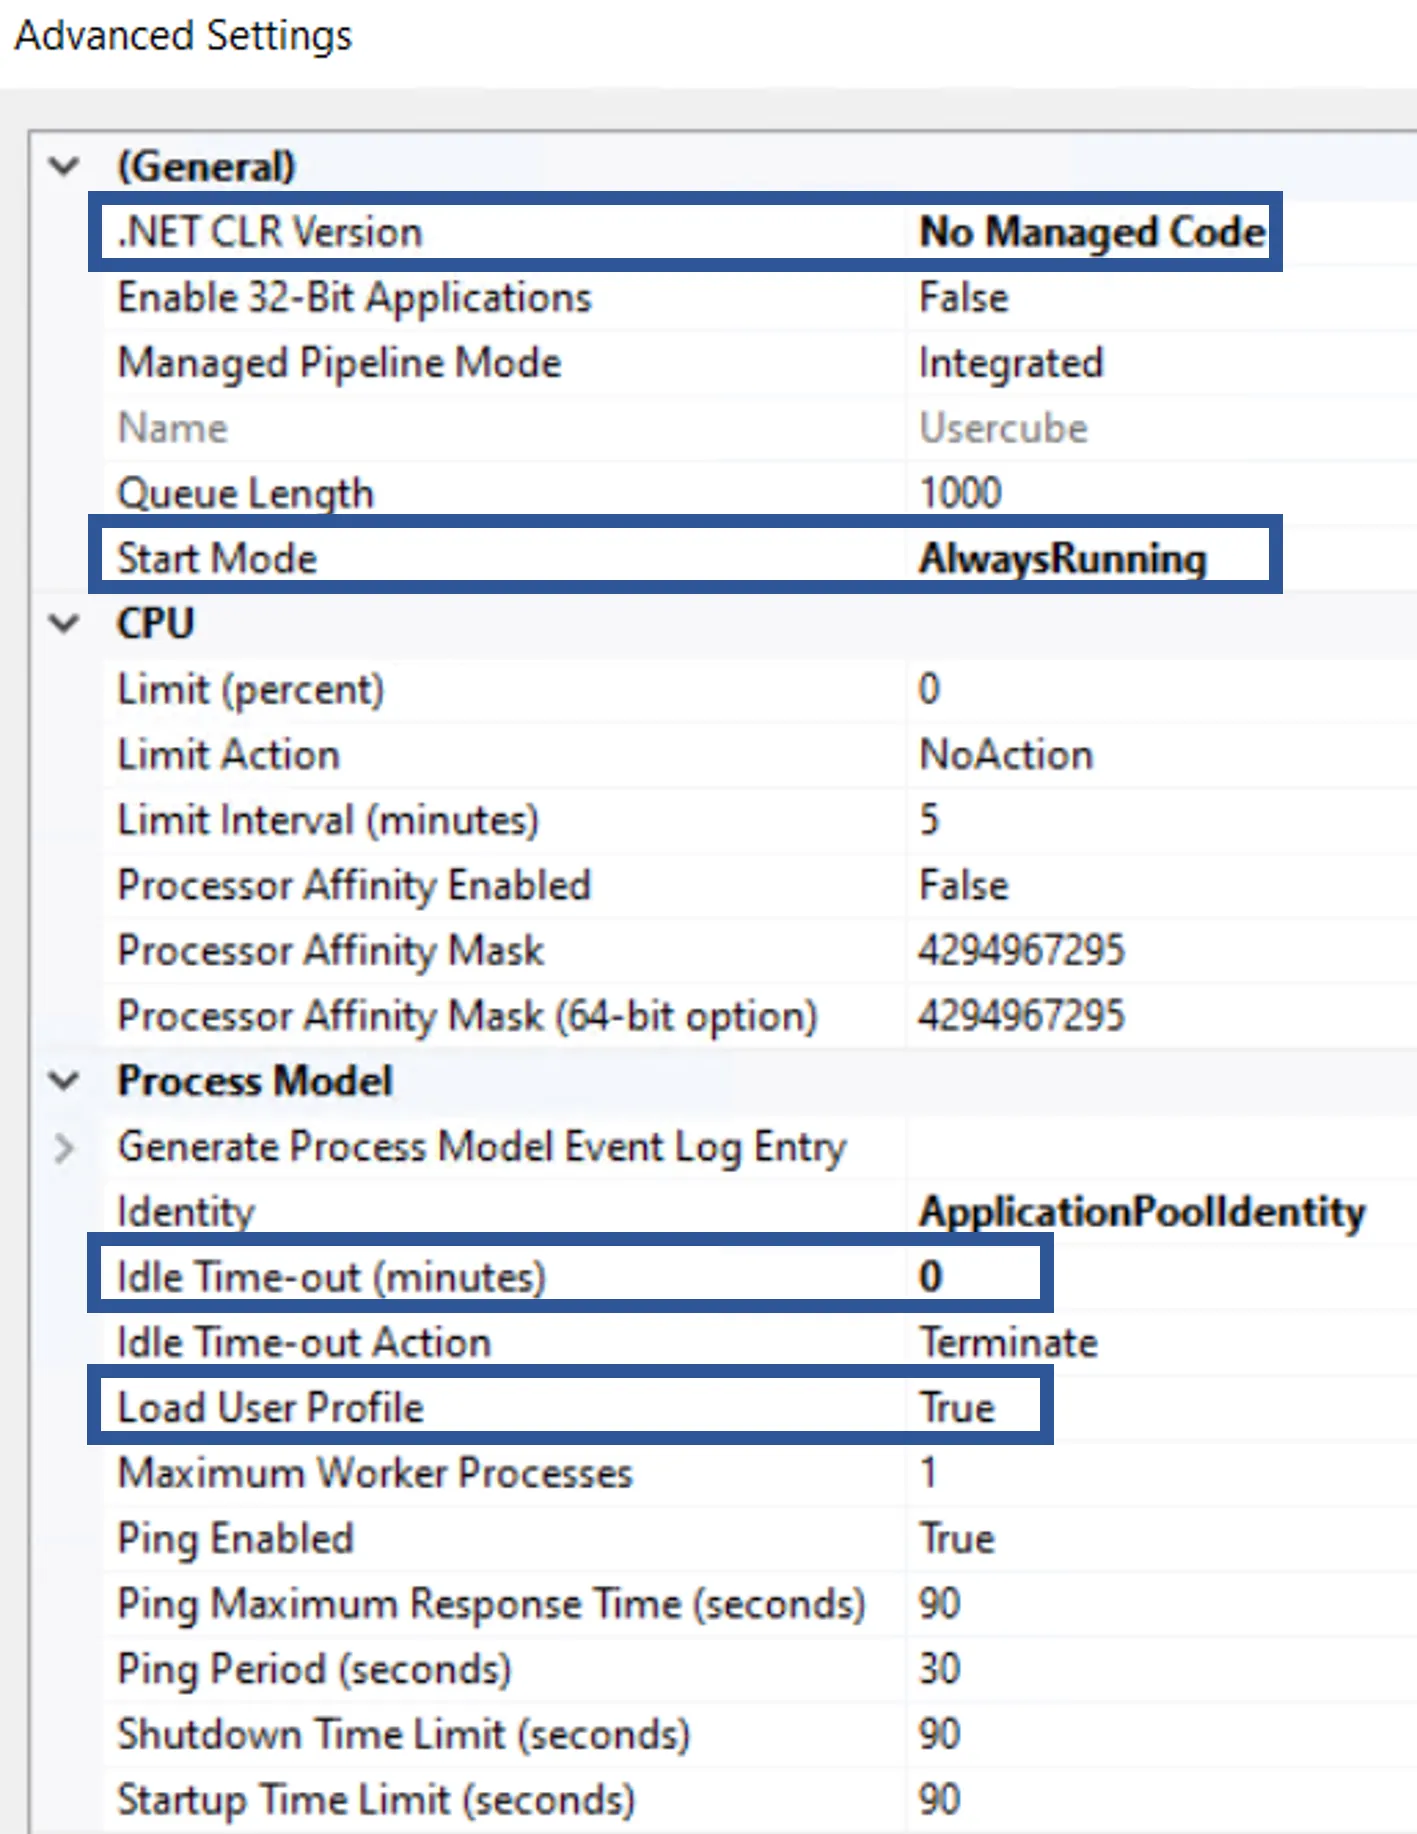
-
ensure that IIS contains an SSL certificate, by accessing the home page of IIS server and double-clicking on Server Certificates.
If the certificate isn't ready yet, generate an auto-signed certificate.
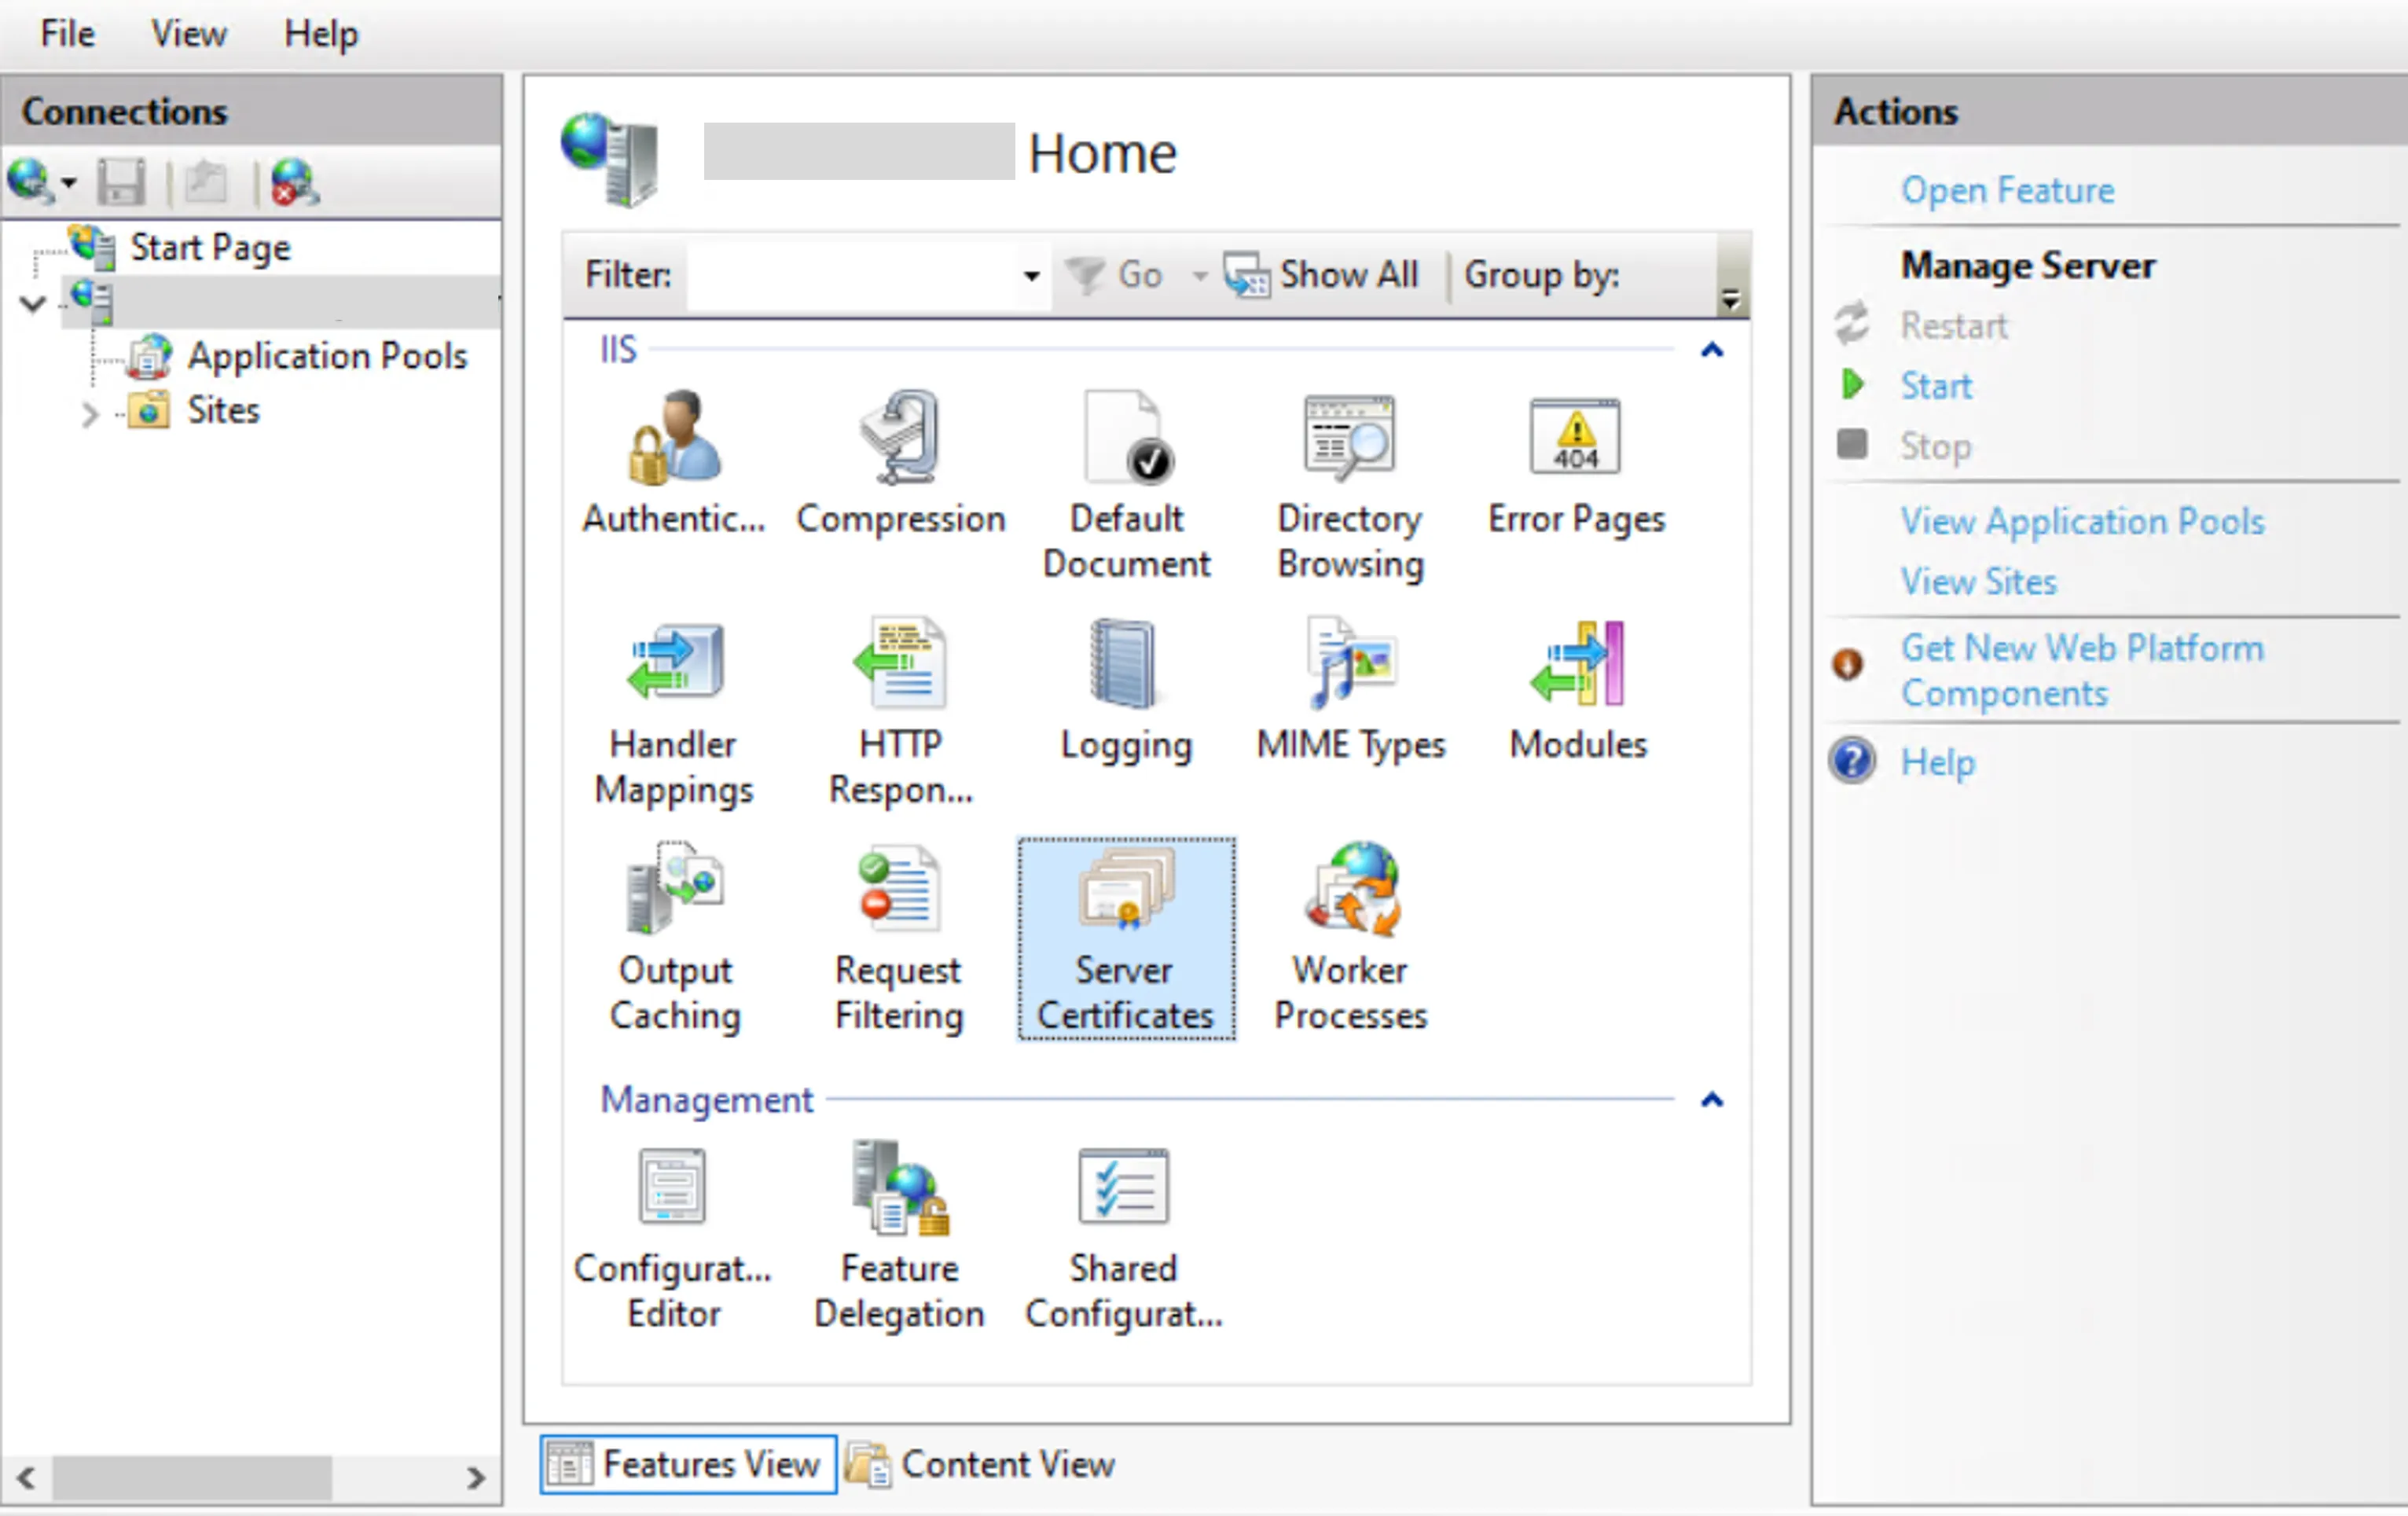
If the certificate isn't there yet, import it by clicking on Import in the right-side menu, and specify the certificate's path and password.

-
Add the certificate's URL to the site by right-clicking on the site, selecting Edit Bindings and clicking on Add, then choosing
httpsas type,443as port, specifying the server's URL (without thehttpspart) as host name, and finally selecting the server certificate.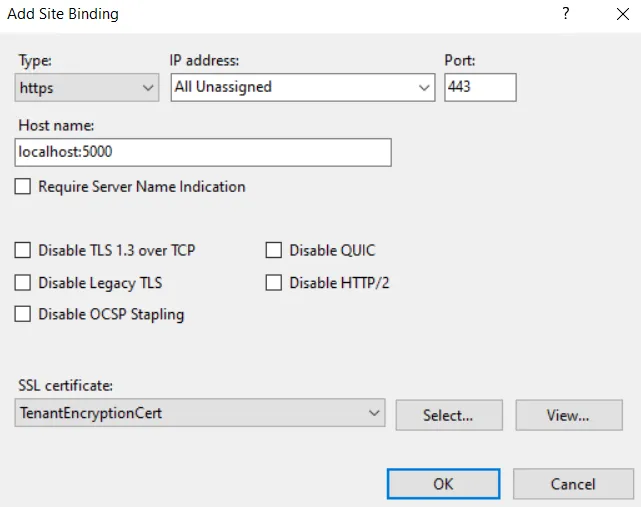
Click OK.
If the server's certificate isn't available at this point, then ensure it was correctly imported in the previous step.
Next Steps
To continue, Set the Working Directory's Permissions.