Register for Microsoft Entra ID
This guide shows how to register Identity Manager as an application, i.e. grant Identity Manager a service account, with Microsoft Identity Platform to authenticate to a Microsoft Entra ID (formerly Azure Active Directory), and how to grant Identity Manager the directory permissions for reading the data to be exported via the Microsoft Graph API.
Create a New Registration
Create a new registration for Identity Manager with Microsoft Identity Platform by proceeding as follows:
-
Go to the Microsoft portal.
-
Log in using the organization's credentials.
-
Find the Microsoft Entra ID menu on the left panel.
-
Go to App Registrations in the left panel.
-
Click the + New Registration button in the top menu.

A new registration form is displayed:
-
Name: display name of your application for the currently created registration. It is used to identify this registration within Microsoft Entra ID. In the case at hand, it won't be displayed to the end-user since Identity Manager doesn't access the Microsoft Entra ID using end-user identity but its own.
Netwrix Identity Manager (formerly Usercube) recommends using a mnemonic name resembling Identity Manager Organization in order to remember it as the registration of Identity Manager within the target Microsoft Entra ID, for example Identity Manager Contoso.
-
Supported account types: select Accounts in this organizational directory only (... - Single tenant).
Identity Manager uses its own identity to access the API. It doesn't access the data on behalf of a user. To authenticate, it uses credentials of a service account granted by this registration, in the form of an ApplicationId and a secret Client Secret.
See how to get ApplicationId and ApplicationKey.
This service account is stored in the organizational directory, and hence using the Principle of Least Privilege, only Accounts in this organizational directory are supported for authentication within this registration scope.
-
Redirect URI:
- The left combo box represents the type of application. It influences the authorization protocol exchanges. Identity Manager is of type Web.
- The right line edit isn't applicable to our case and should be left blank. It is used for end-user authentication, but doesn't apply to Identity Manager.
-
-
Confirm the registration with the Register button at the bottom of the page.
Get the application's identifier
ApplicationId is available in the registration overview. Get it by proceeding as follows:
-
Go to App Registrations in the left panel.
-
Select Owned applications > Identity Manager.
-
Go to Overview in the left panel.
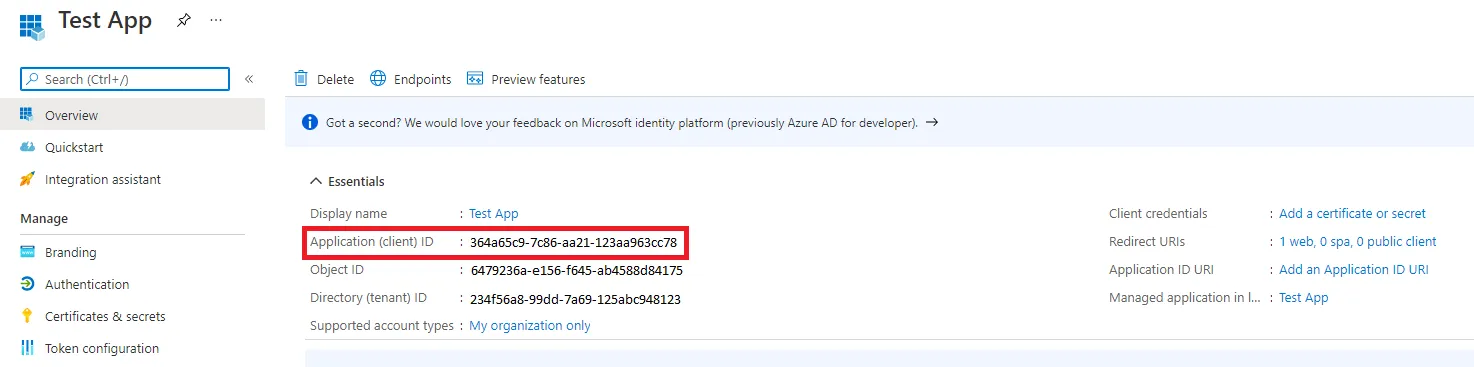
The Essentials top panel displays the Application (client) ID required by the Identity Manager Agent. The same page also displays the Directory (tenant) ID that will also be needed by the Identity Manager Agent.
Get the application's secret key
A Client Secret key needs to be generated. Get it by proceeding as follows:
-
Go to App Registrations in the left panel.
-
Select Owned applications > Identity Manager.
-
Go to Certificate & Secrets in the left panel.
-
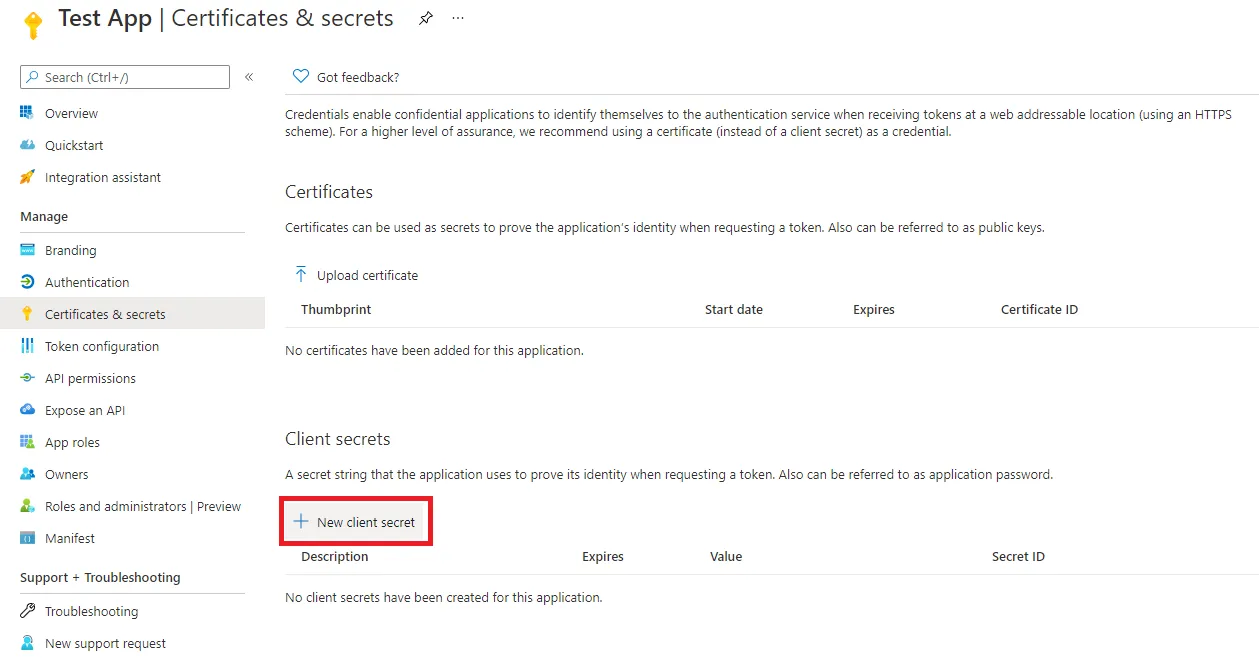
Click the + New client secret button in the bottom panel Client Secrets.
-
Input a mnemonic name such as Identity Manager Organization Secret.
-
It is recommended to use a short expiration period such as 1 year.
-
Confirm the creation with the Add button.
The Client Secret is now listed in the bottom panel Client Secrets. The Client Secret value is needed by the Identity Manager Agent settings file.
The Client Secret value is only displayed in the UI in plain text at first. After a while, it is only displayed as
**************. It should hence be stored in the appsettings.agent.json file or an environment variable as soon as it is created, to be used subsequently by Identity Manager. If the key is lost, a new key can be created to replace the lost one.
Grant Directory Permissions
Grant Identity Manager directory permissions by proceeding as follows:
-
Go to App Registrations in the left panel.
-
Select Owned applications > Identity Manager.
-
Go to API Permissions in the left panel.
-
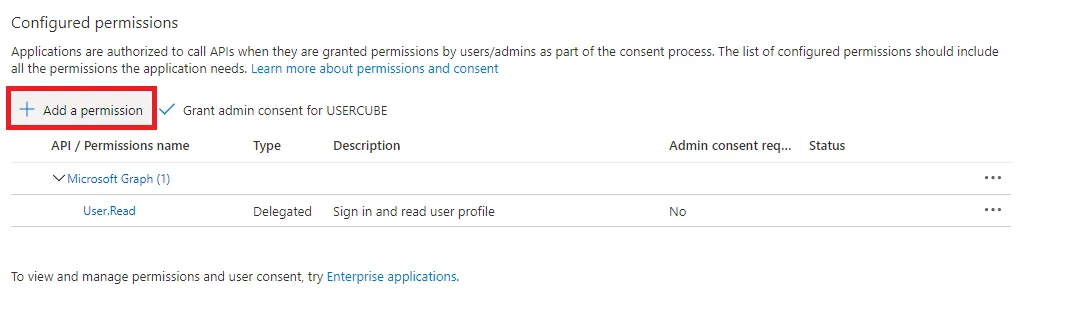
Click on the + Add a permission button.
-
Go to Microsoft graph > Application permissions.
-
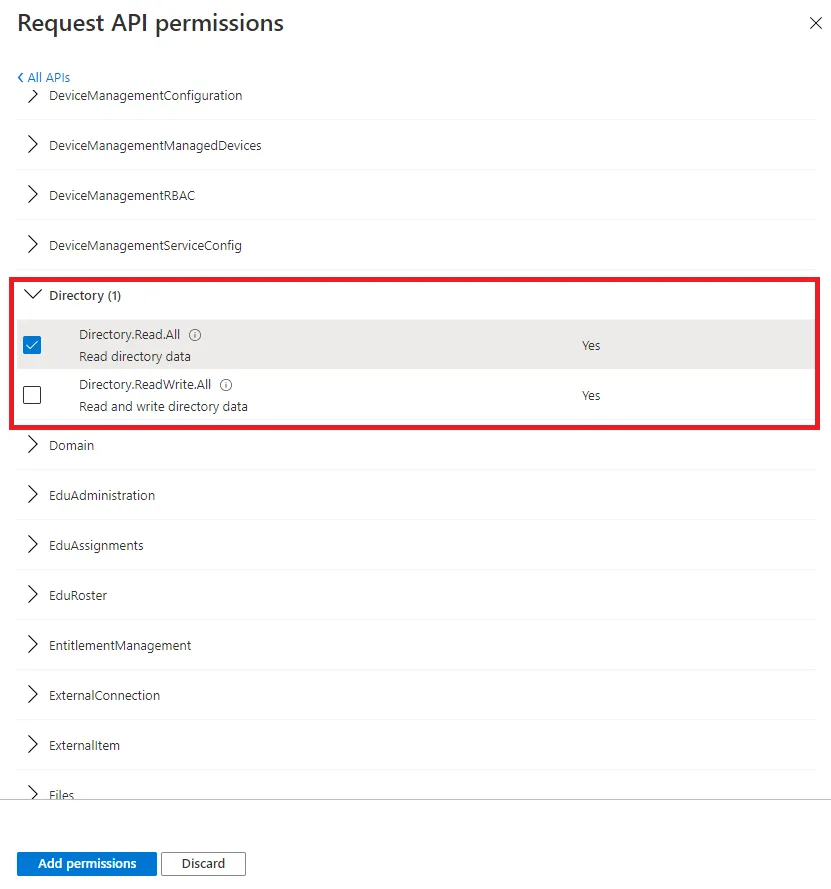
Search and open the Directory category.
-
Check the Directory.Read.All permission.
If you plan on configuring fulfillment too, you must only check the Directory.ReadWrite.All permission.
-
Confirm with the Add permissions button at the bottom of the page.
You now see the Directory.Read.All or Directory.ReadWrite.All permission in the Configured permissions list with a ⚠ Not granted for ... status.
-
Grant admin consent by clicking on √ Grant admin consent for name of the organization.
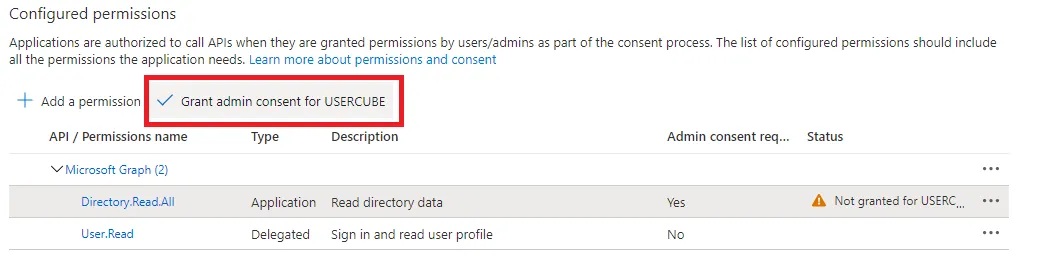
You should now see the status displayed as √ Granted for name of the organization.