Configure Okta for Usercube Authentication
This guide shows how to configure the OIDC to set up the authentication to Usercube.
Create the Application
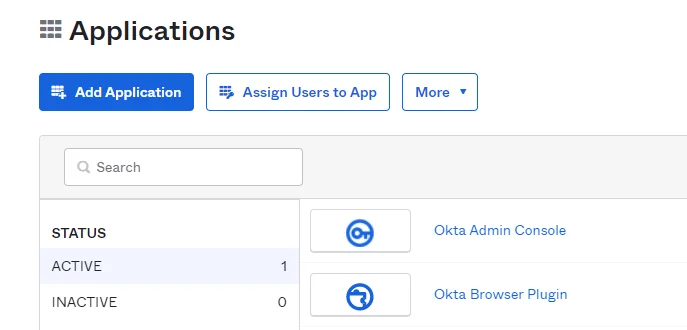
On the Okta dashboard, select the Applications section. Click on the Add Application button.
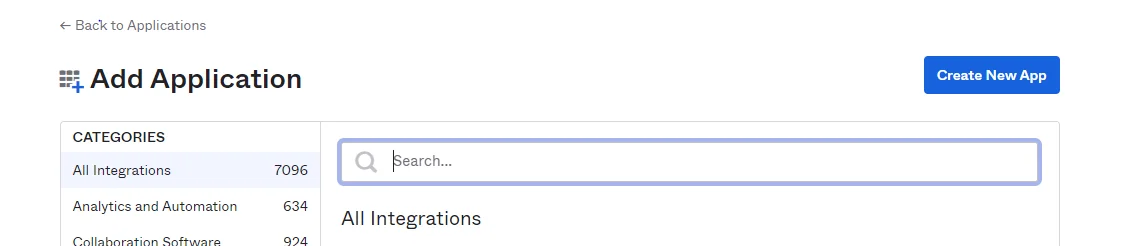
Then click on the Create New App button.
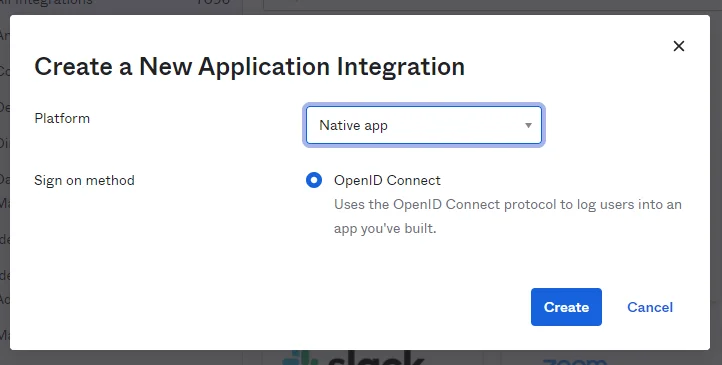
Select the platform "Native app". The only sign-on method is the OpenID Connect. Click on Create.
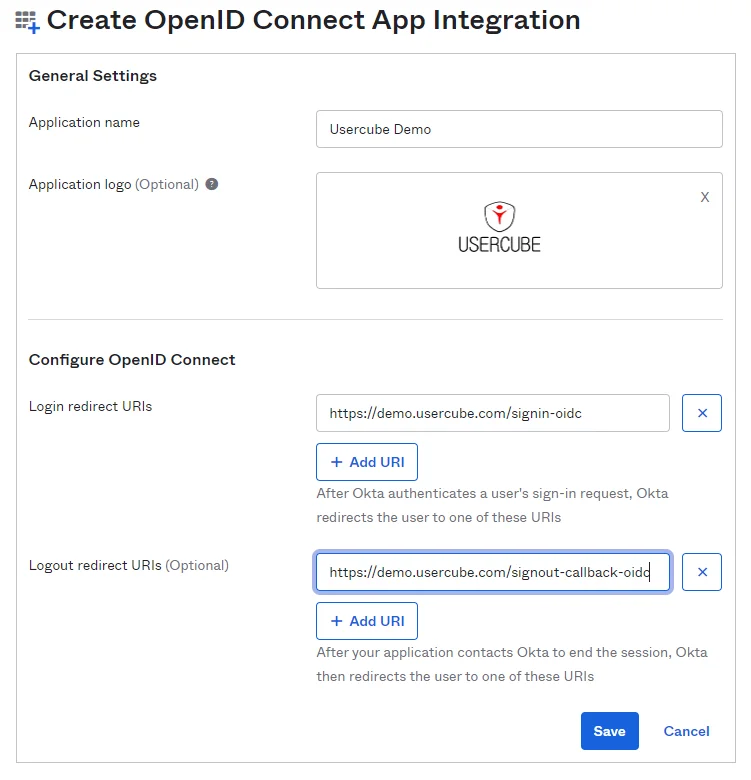
In General Settings, name your Application. You can also add a logo.
In the Configure OpenID Connect section, enter the connection redirection URL in the part: Login redirect URLs. To find out this URL, just take the URL of the Usercube application and add: "/signin-oidc". The Usercube disconnection redirection URL is also necessary. To construct it, take Usercube's URL again and, at the end, add: "/signout-callback-oidc".
The Logout redirect URLs section is marked as optional but it is mandatory for Usercube.
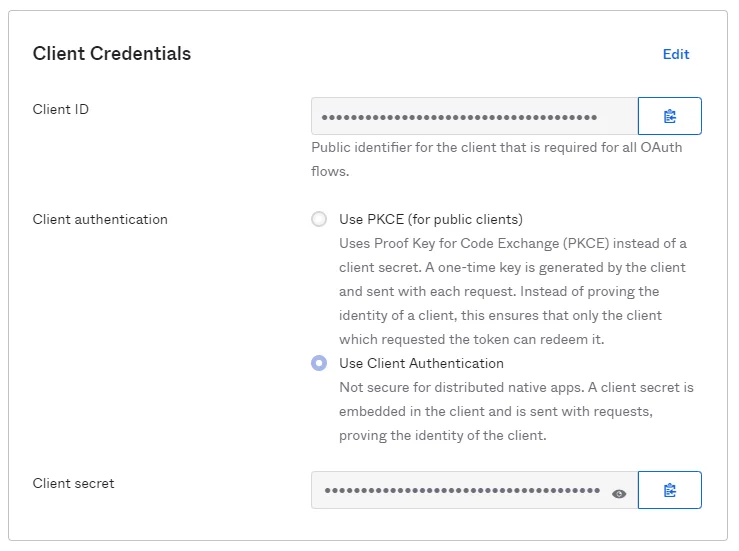
Configure the Client Credentials
The client secret in Usercube is required for the OIDC connection. You must therefore configure this OIDC connection option in the application. In the Application Dashboard, click on Edit in the Client Credentials section. Select the option Use Client Authentication and save the changes.
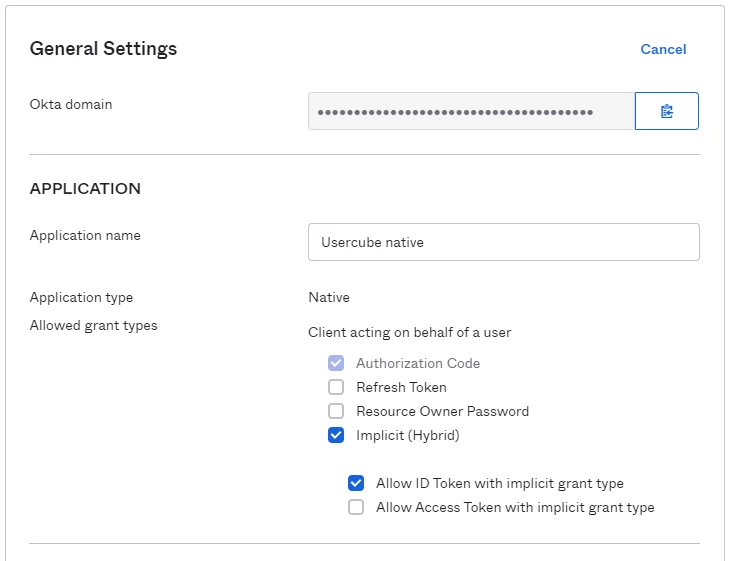
Configure the Application Settings
In the Application section, check the box Implicit (Hybrid) so that the connection with Usercube can operate correctly. Allow ID Token with implicit grant type is optional.
Configure the appsettings.json
In the authentication section of your appsettings file, the OpenId section must be configured with the following information:
- ClientId: Client ID found in the Okta Client Credentials section
- ClientSecret: Client secret found in the Okta Client Credentials section
- Authority: Okta Domain found in the Okta General Settings section
- SaveToken: True
appsettings.json
{
  ...
  "OpenId": {
    "Enabled": true,
    "Okta": {
      "AuthenticationScheme": "Okta authentication",
      "DisplayName": "Okta authentication",
      "ClientId": "Client ID",
      "ClientSecret": "Client secret",
      "Authority": "Okta Domain",
      "SaveToken": true
    }
  }
}