Single Sign On (SSO) Configuration with Auth0
Single Sign On (SSO) is a powerful authentication process that enhances security and improves user experience by allowing users to access multiple applications with a single set of login credentials. In this guide, we focus on configuring SSO using Auth0, a leading identity management service, to streamline user access and secure your system effectively.
Configuring SSO with Auth0
Configuring Single Sign-On with Auth0 involves several key steps that integrate your server with Auth0’s authentication framework. Begin by activating SSO within your system’s configuration settings, selecting a failover user, and preparing for provider selection. This section will guide you through the precise steps required to establish a secure and efficient SSO connection, including application integration in Auth0, SAML settings configuration, and the necessary data synchronization between your server and Auth0. Follow the steps below to ensure a successful setup.
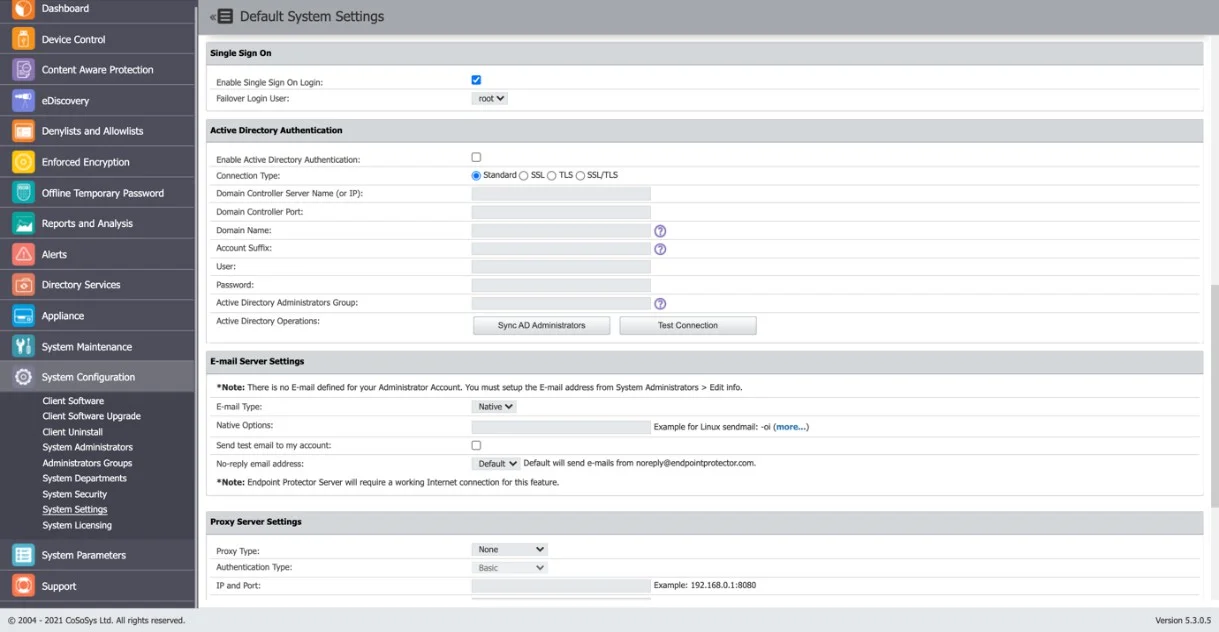
Step 1 – To activate Single Sign-On, navigate to System Configuration > System Settings > Single Sign-On. Once activated, select a Failover Login User from the drop-down menu. The Root user is selected by default.
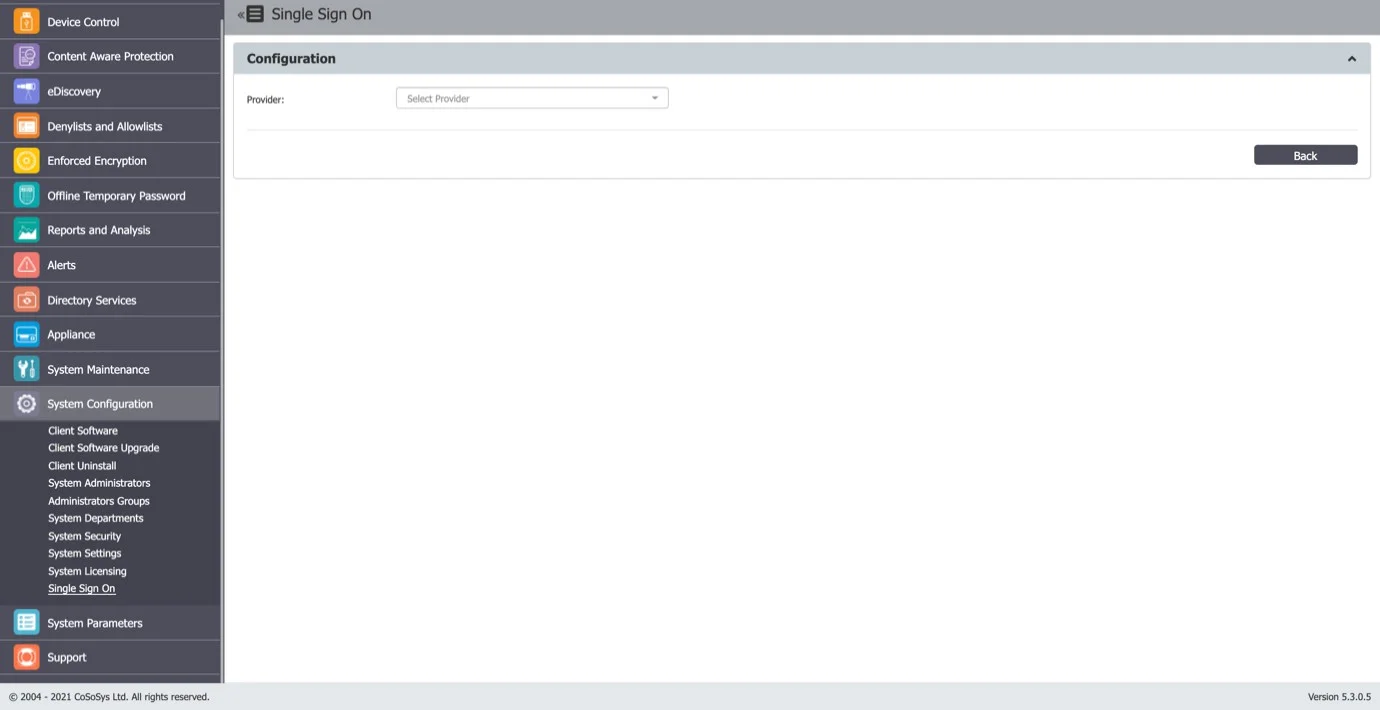
After completing the above steps, a Single Sign-On subsection will appear in the System Configuration section.
Step 2 – Select the Provider in order for Single Sign On subsection to be displayed.
Step 3 – Create an Application in Auth0
- Log in to the Auth0 Dashboard.
- Navigate to Applications → Applications.
- Click Create Application.
- Enter a name such as EndpointProtector or MyEPPApp.
- Select Regular Web Application.
- Click Create.
- Go to Login Experience tab and make sure that for the Types of Users, there is "Both" checked (Individuals or Business Users), with either “Prompt for Credentials” or “Prompt for Organization” as options.
Note: “Prompt for Organization” will require you to have an organization created with your connections enabled for it. It will prompt for an organizational email, then redirect you to the password field. “Prompt for Credentials” will prompt for a email and password and then redirect you to the application.
This application will represent Endpoint Protector on the Auth0 side.

Step 4 – Enable the SAML2 Web App add-on
- Open the application you created for Endpoint Protector.
- Go to the Add-ons tab.
- Enable the SAML2 Web App add-on.
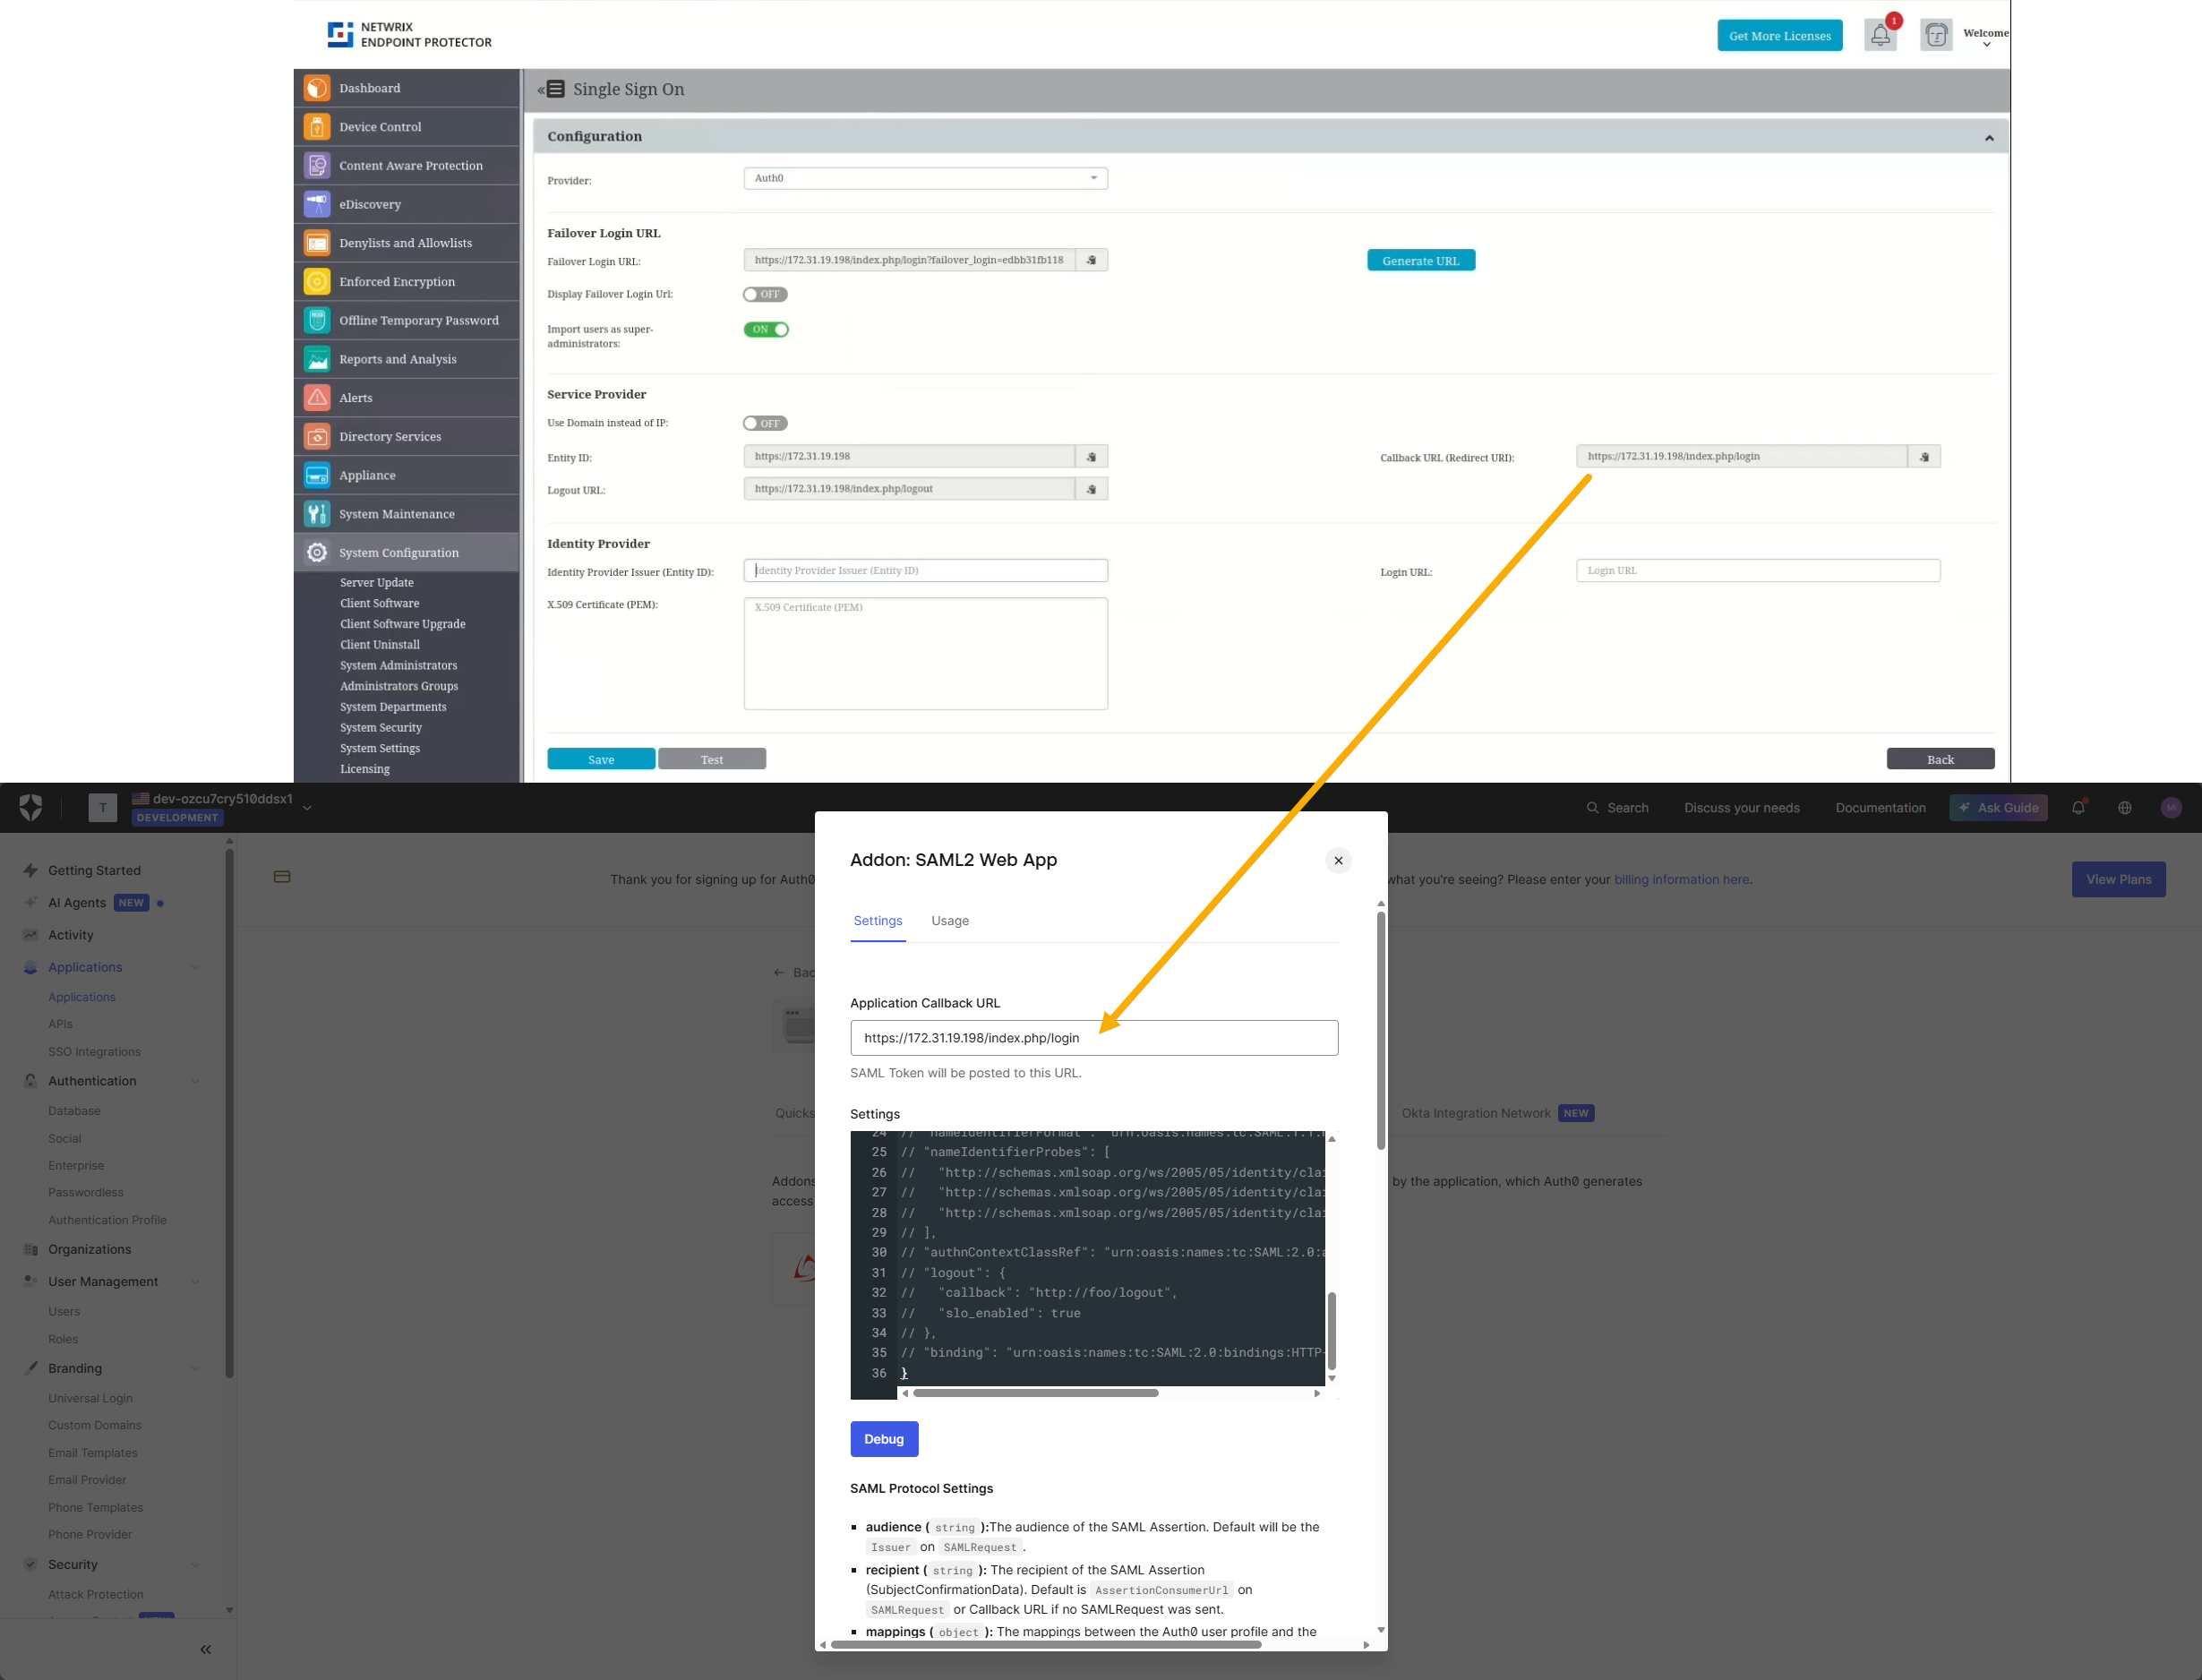
- Click Settings on the SAML2 Web App tile.
- Add the Callback URL displayed in Endpoint Protector at Step 2 when opening the Auth0 provider settings.
- Scroll down and click Enable to activate the add-on for the application.
Step 5 – Obtain SAML Values from Auth0
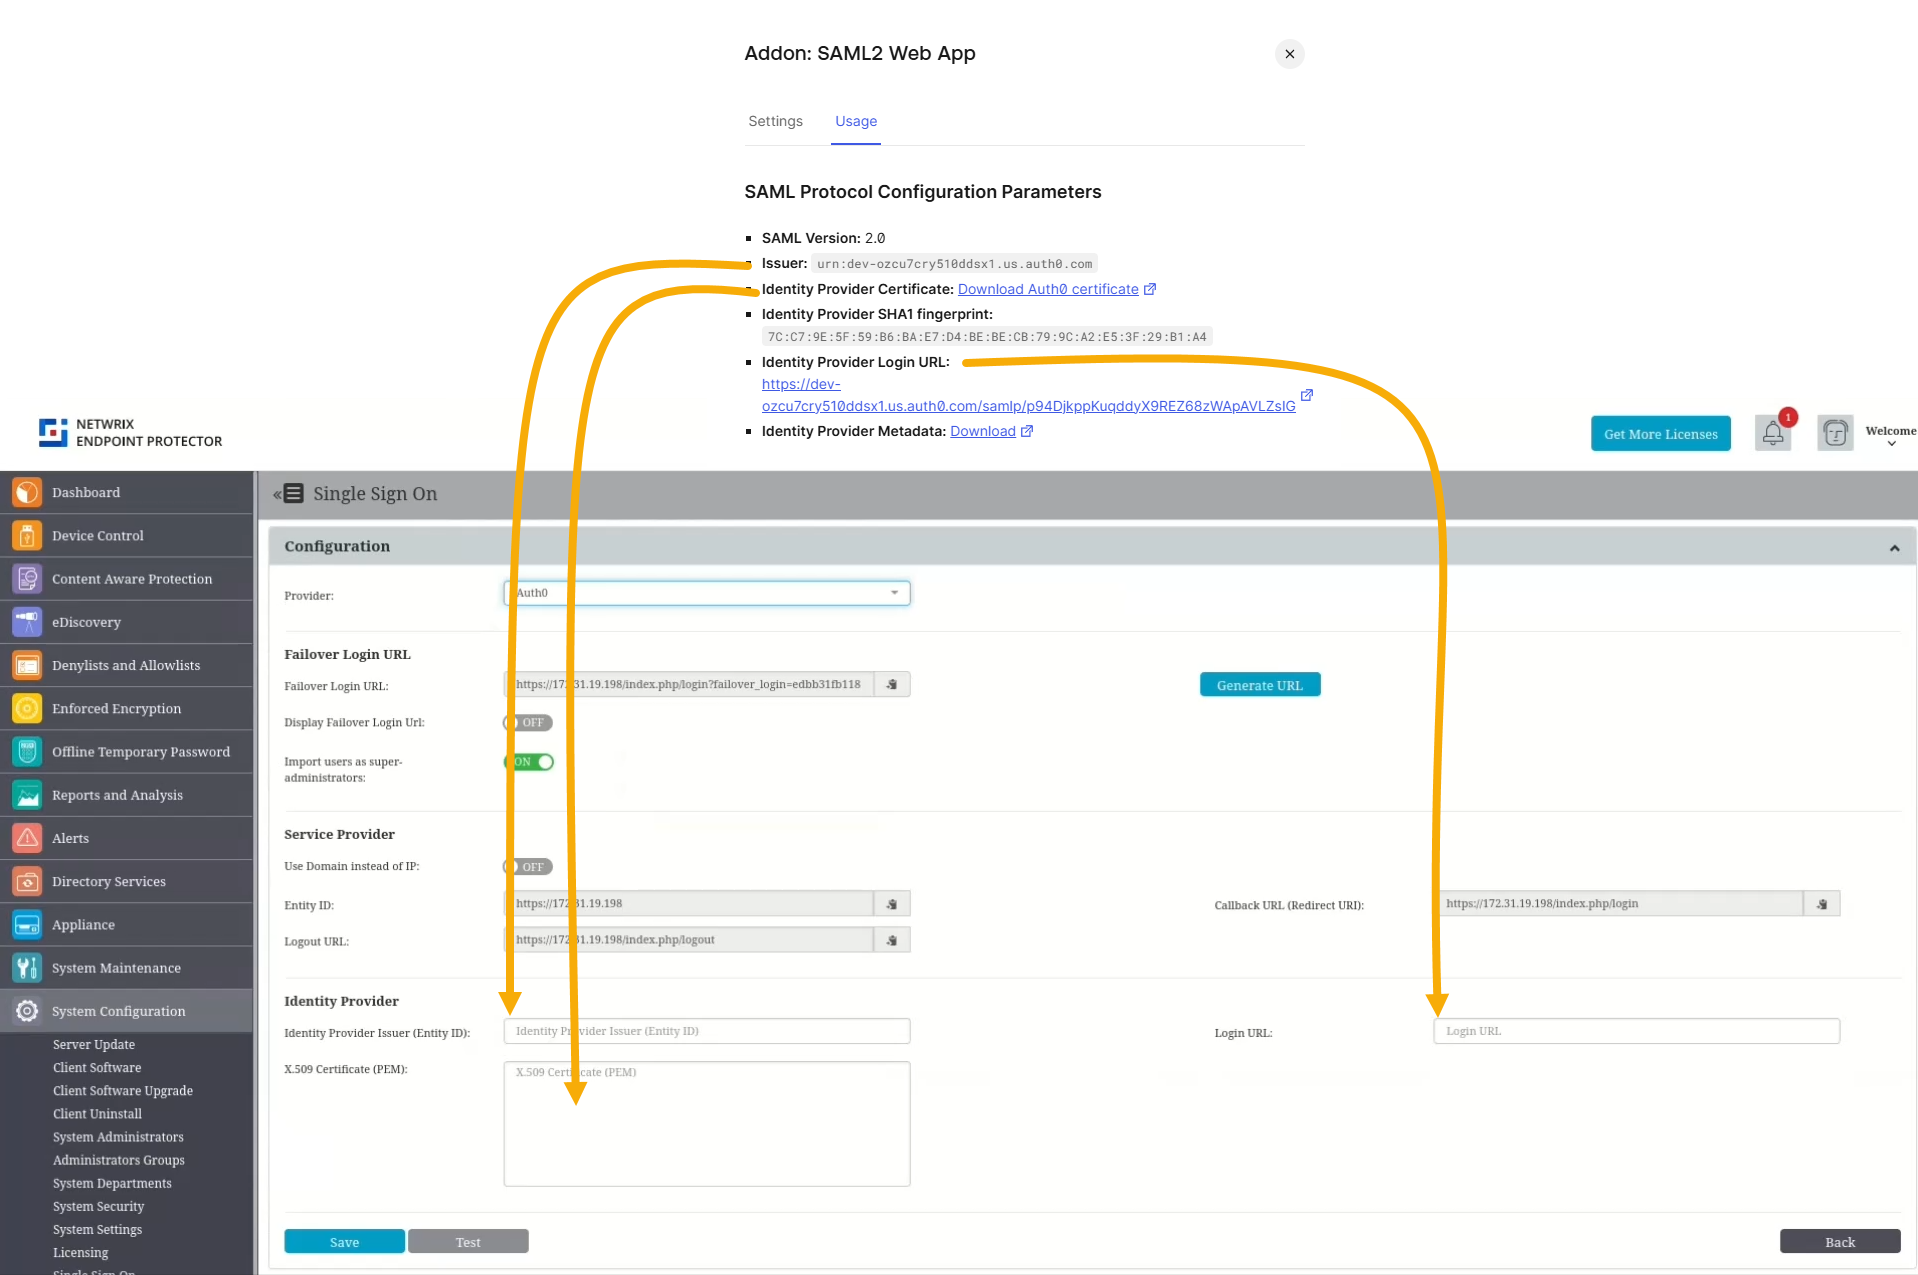
You now need three pieces of information from Auth0 to complete the configuration in Endpoint Protector:
•Issuer (Identity Provider Issuer)
•Identity Provider Login URL (SAML 2.0 Endpoint / Login URL)
•X.509 certificate
To obtain them, after enabling the add-on go to the Usage tab to copy these details and paste them to EPP.
- Issuer matches the Entity ID from Endpoint Protector.
- Identity Provider Login URL matches the Login URL from Endpoint Protector.
- Identity Provider Certificate matches the X.509 Certificate from Endpoint Protector. Click to download the certificate file then open it in a text editor and copy its contents.
Click Save in Endpoint Protector at the end to save the configuration.
Step 6 – Enable the Connection for the Endpoint Protector Application
Go back to Auth0. Auth0 controls which applications may use a given Connection. To allow users to log in to Endpoint Protector through Auth0:
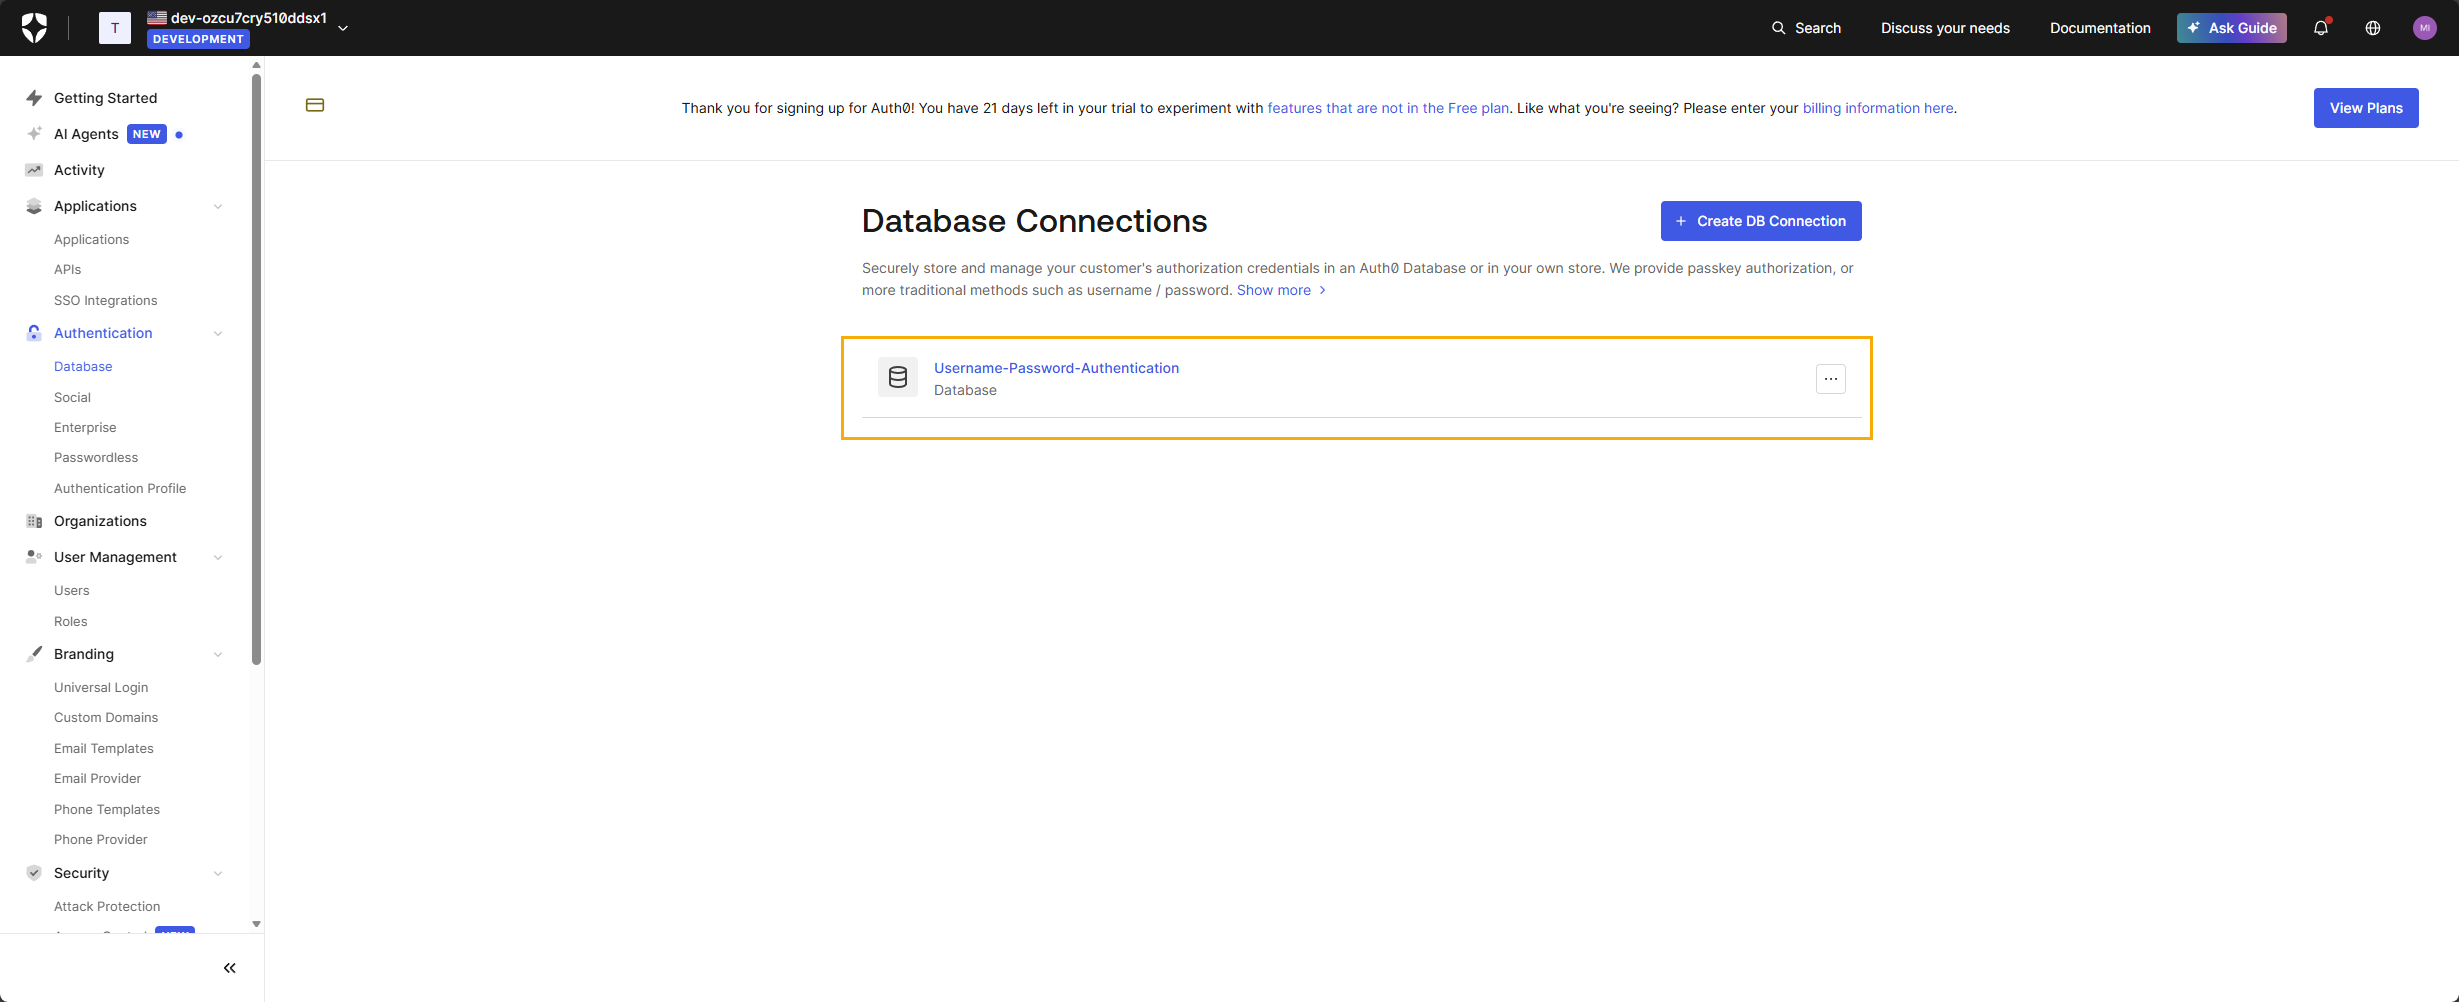
- In the Auth0 Dashboard, navigate to Authentication → Database
- Select the connection you want to use (for example, Username-Password-Authentication).
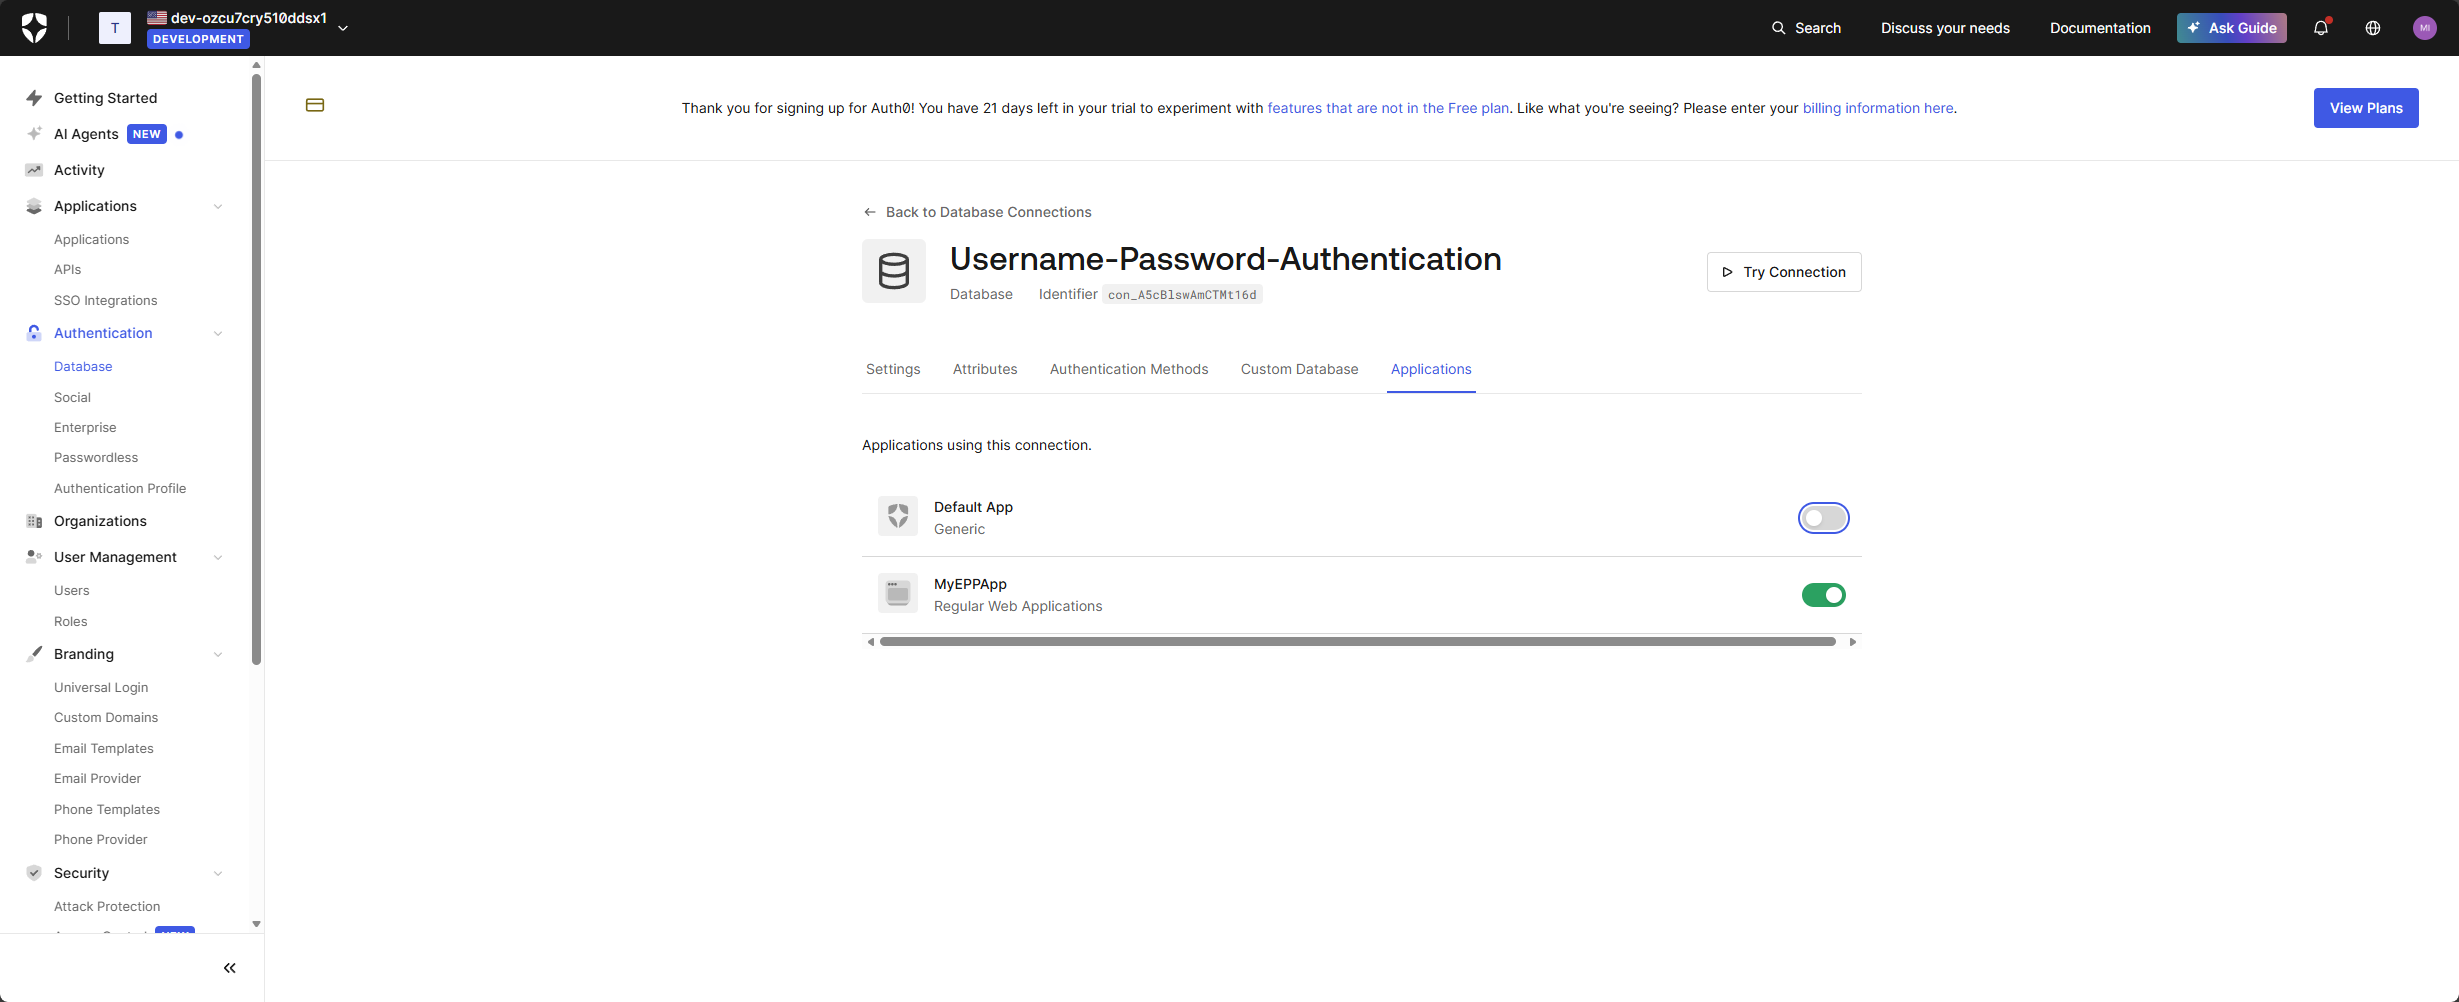
- Open the Applications tab.
- Enable the toggle for your Endpoint Protector application.
All users who authenticate via this connection and have matching accounts in Endpoint Protector will be able to use SSO.
Note For further restriction, use Endpoint Protector’s own user and role management or Auth0 features such as Roles and Organizations. This guide covers only the basic SAML configuration.
Step 7 – Add the individual users you need access for to Users
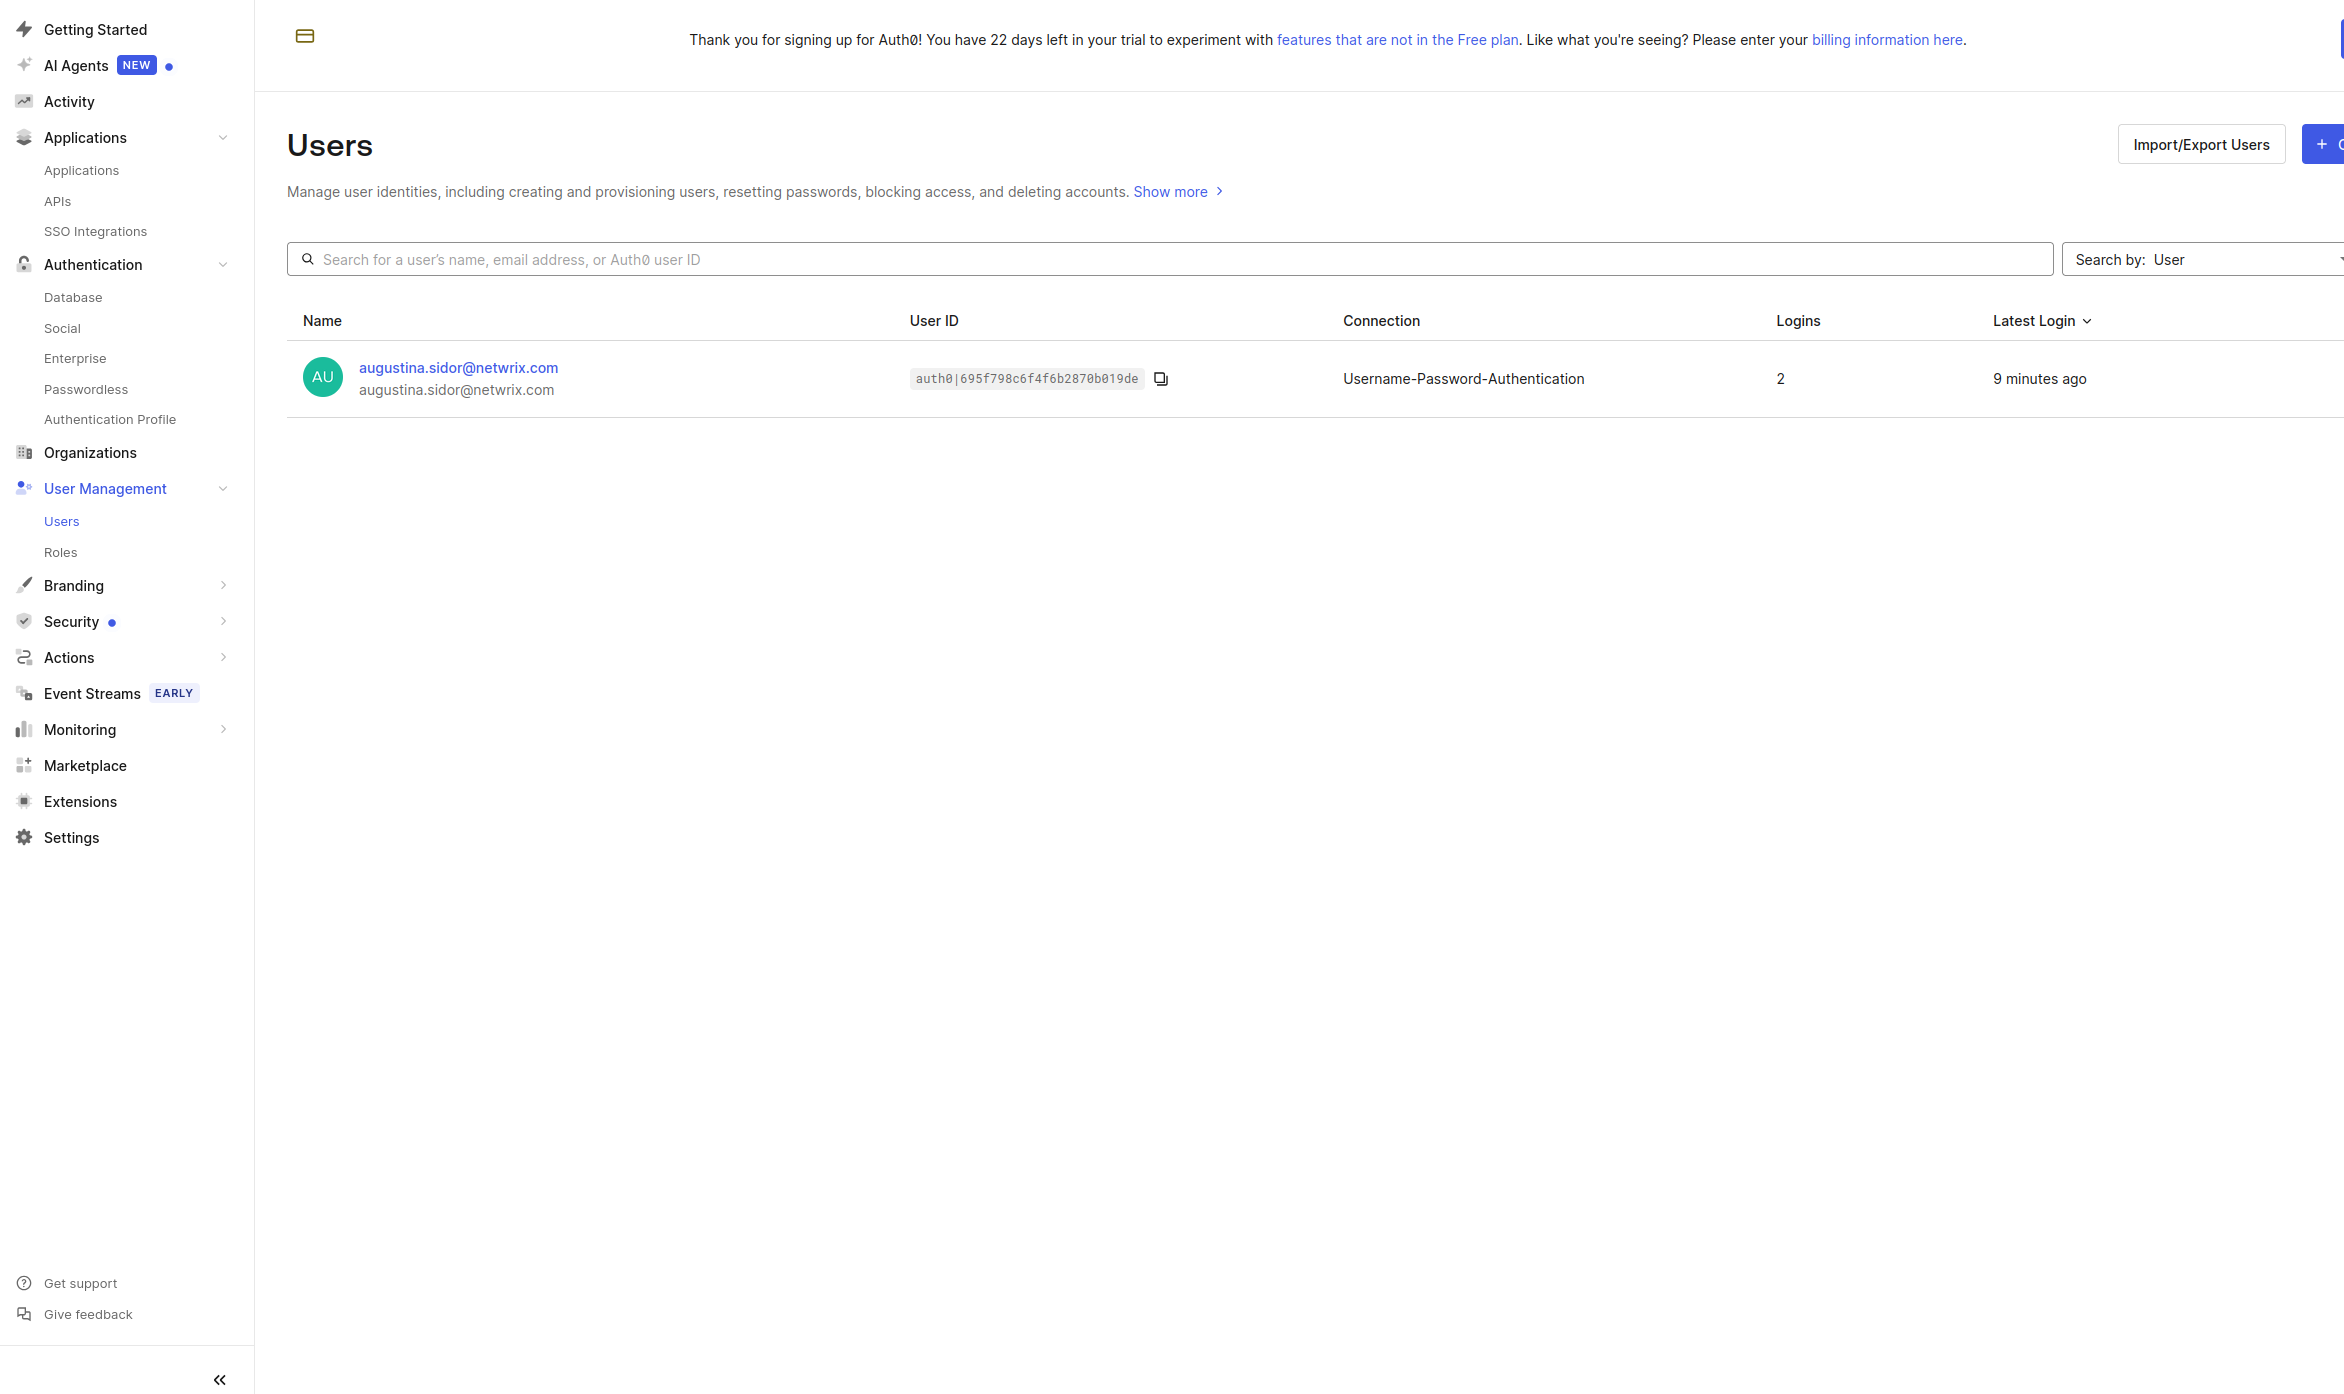
- In the Auth0 Dashboard, navigate to User Management → Users
- Add the individual users you need to give access to (make sure the have access to the connection created at Step 6, Username-Password-Authentication).
Note This is a way to grant direct user access to the application, for enterprise level access based on organizational context please see the next step.
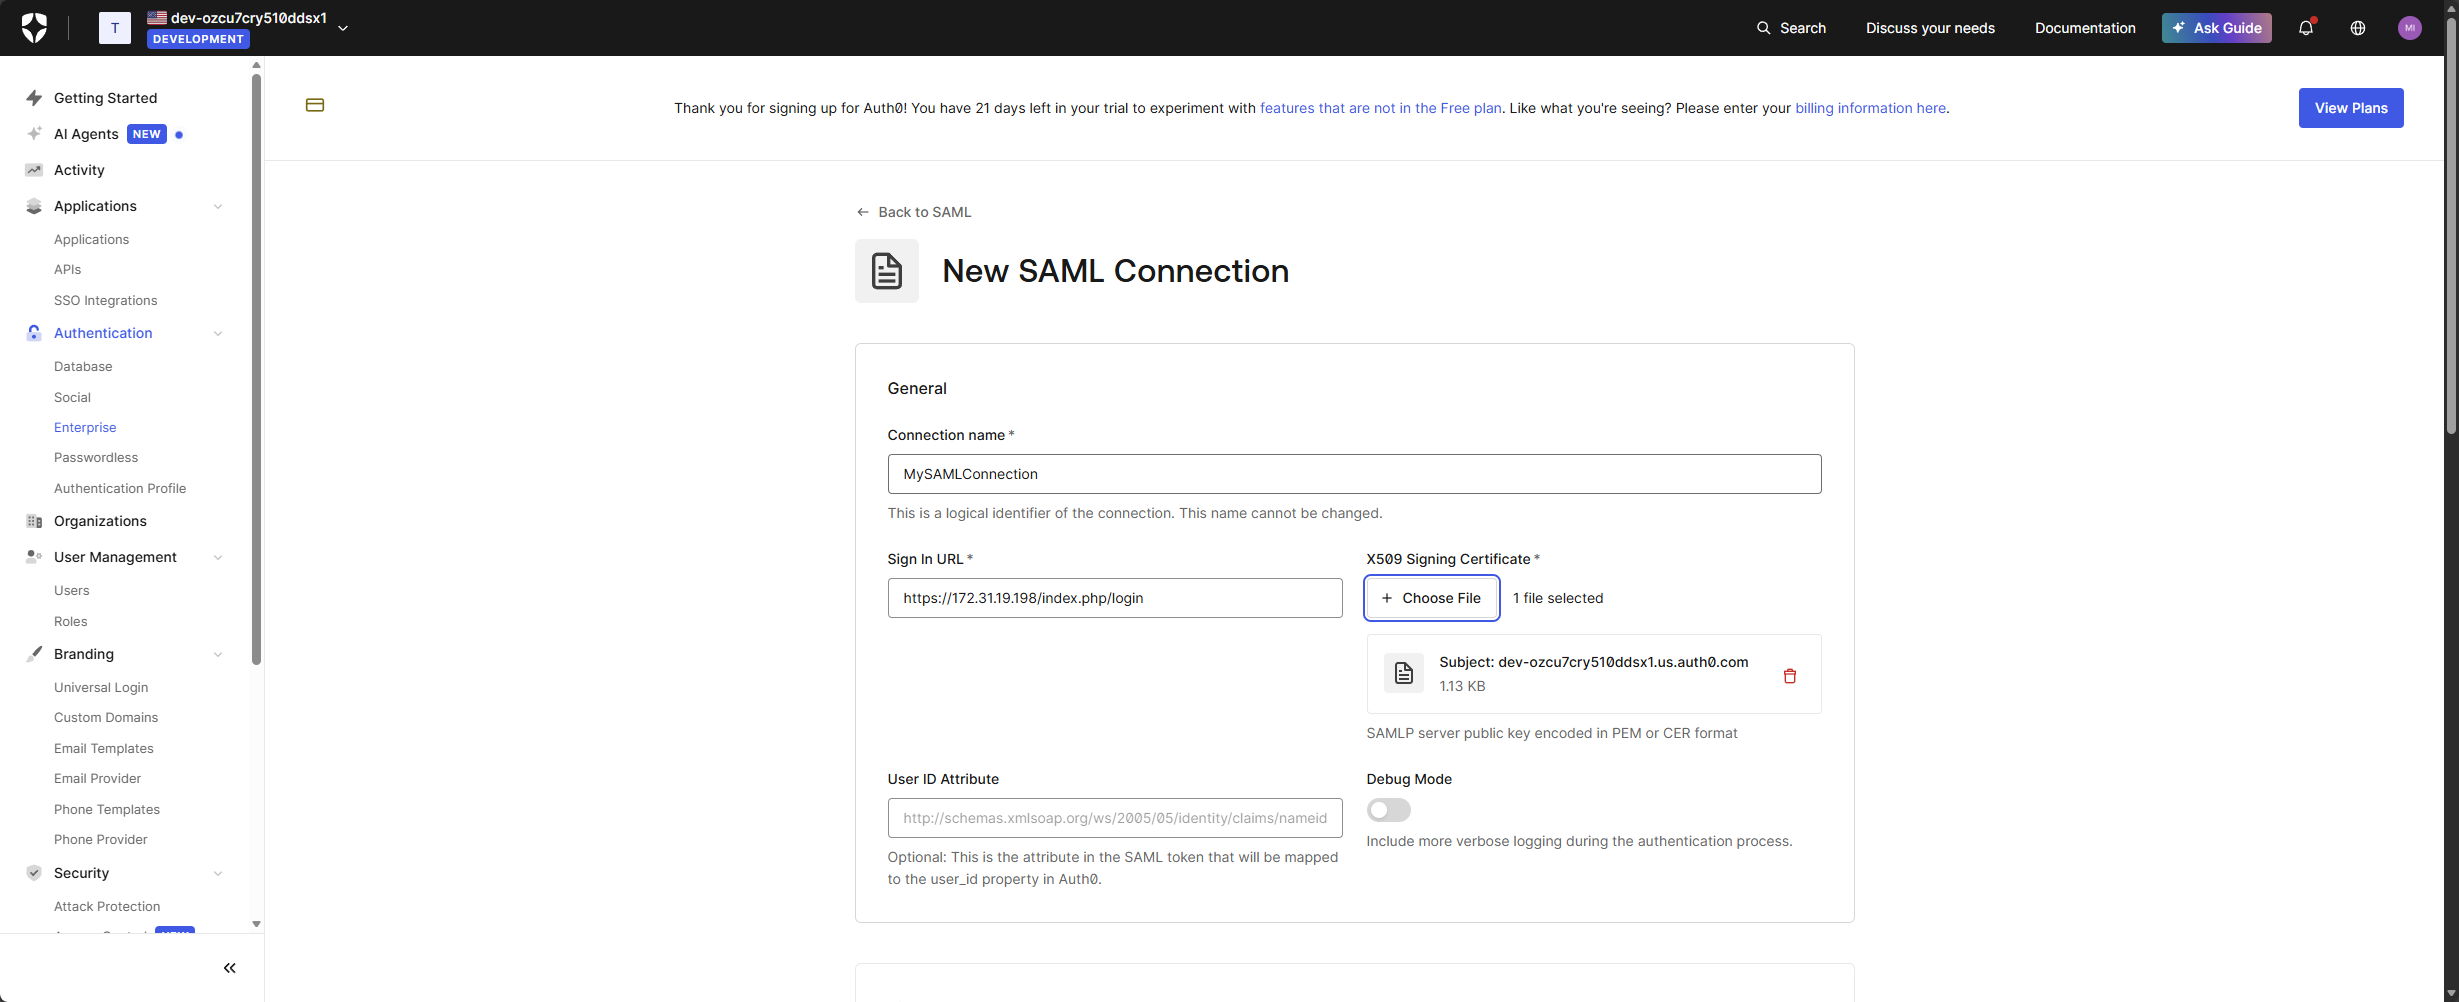
Step 8 – (Optional) Create a SAML Connection under Authentication → Enterprise
If you want Auth0 to act as a broker IdP and authenticate users through an external SAML Identity Provider (for example, Azure AD, Okta, ADFS, Ping, Shibboleth, etc.), you must create an Enterprise SAML Connection.
This step is only needed if Auth0 is not the original IdP, and instead you want EPP → Auth0 → external IdP.
To create a SAML Enterprise connection:
- Go to Authentication → Enterprise in the Auth0 Dashboard.
- Click + Create Connection.
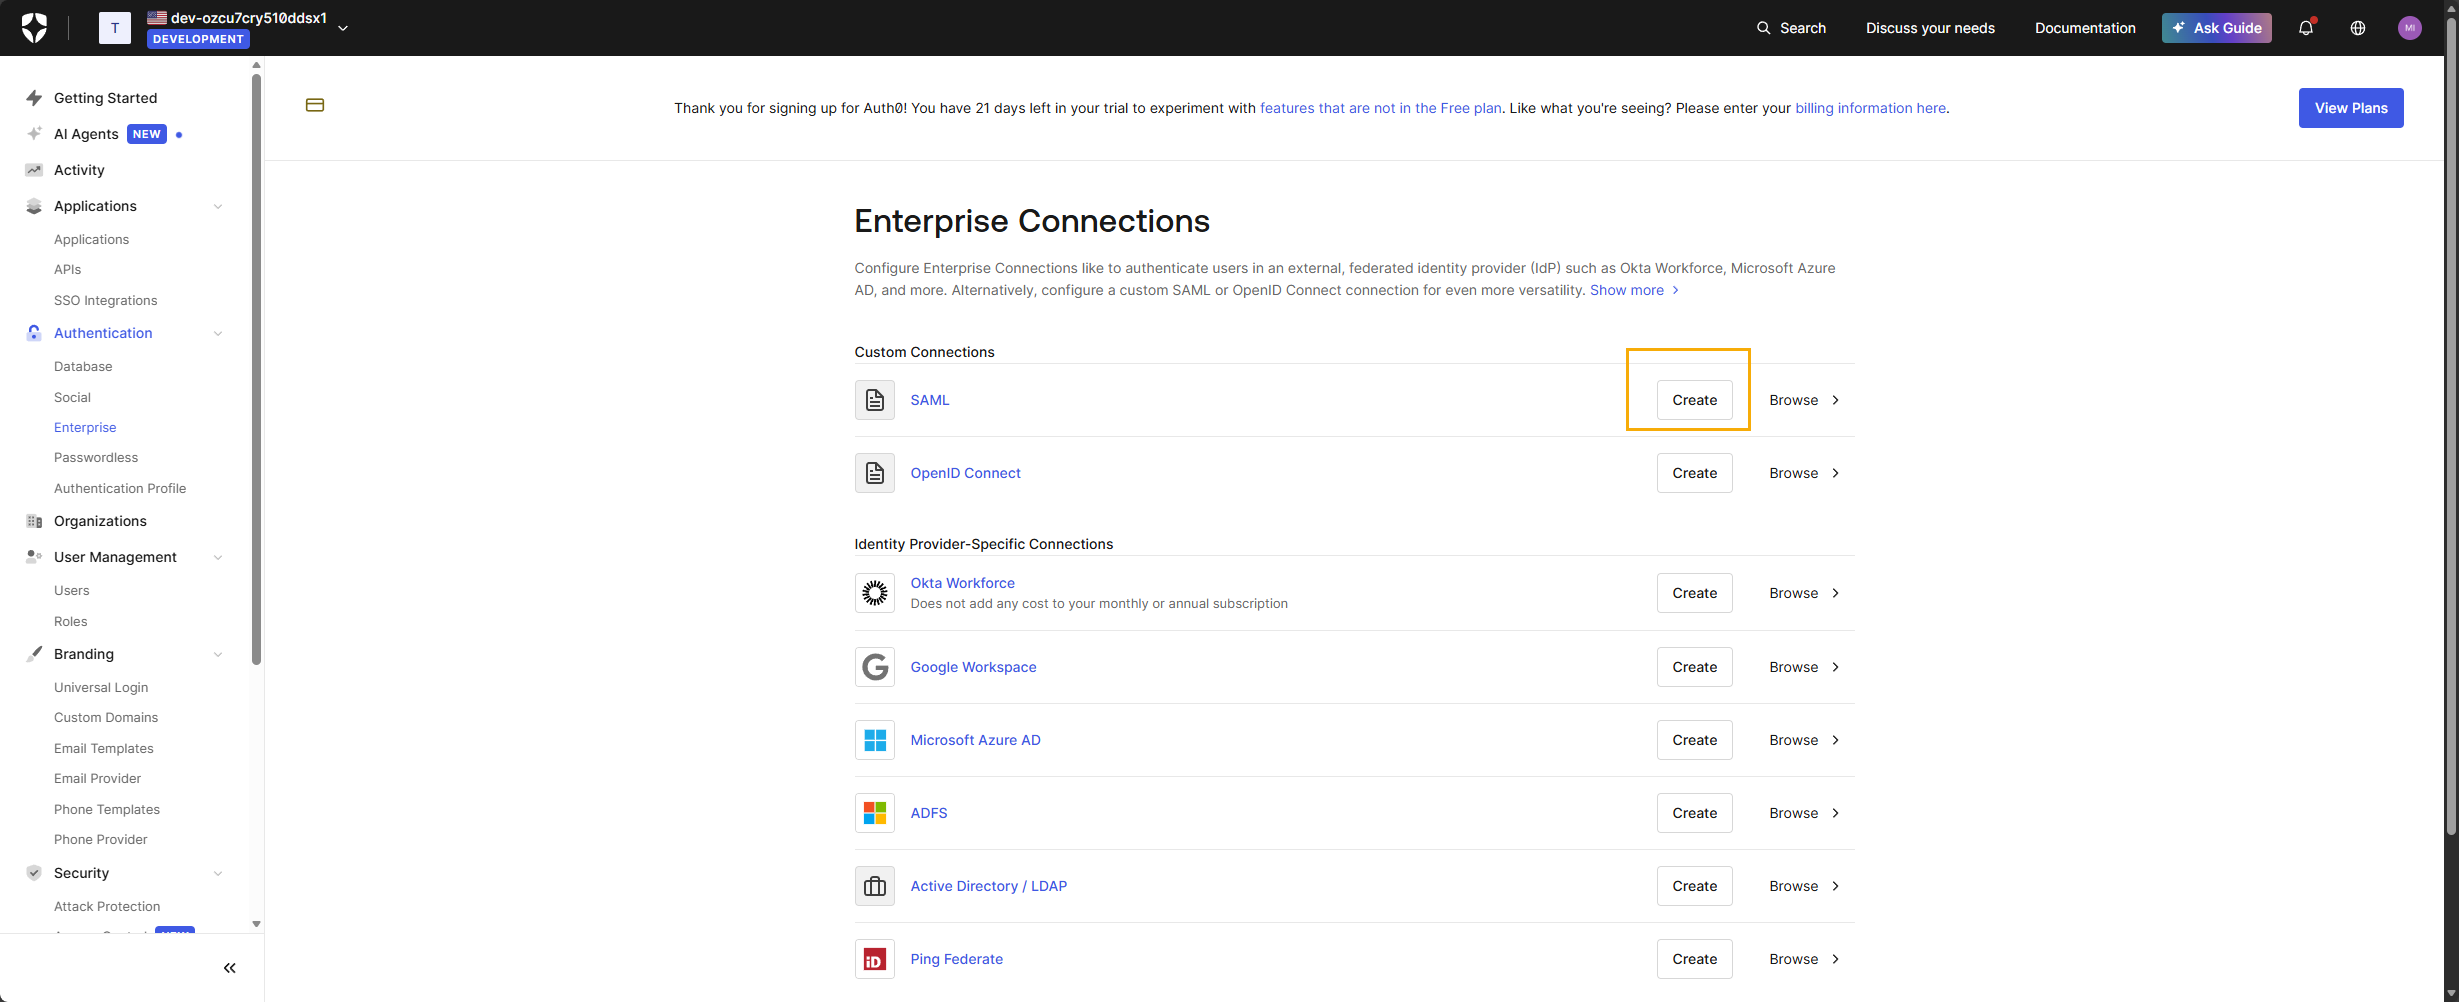
- Select SAML from the list of enterprise providers.
- Enter a Connection Name (for example, company-saml-idp).
- Enter the Sign In URL. You can use the CallBack URL from Step 4
- Upload the Signing Certificate downloaded from the application creation at Step 5
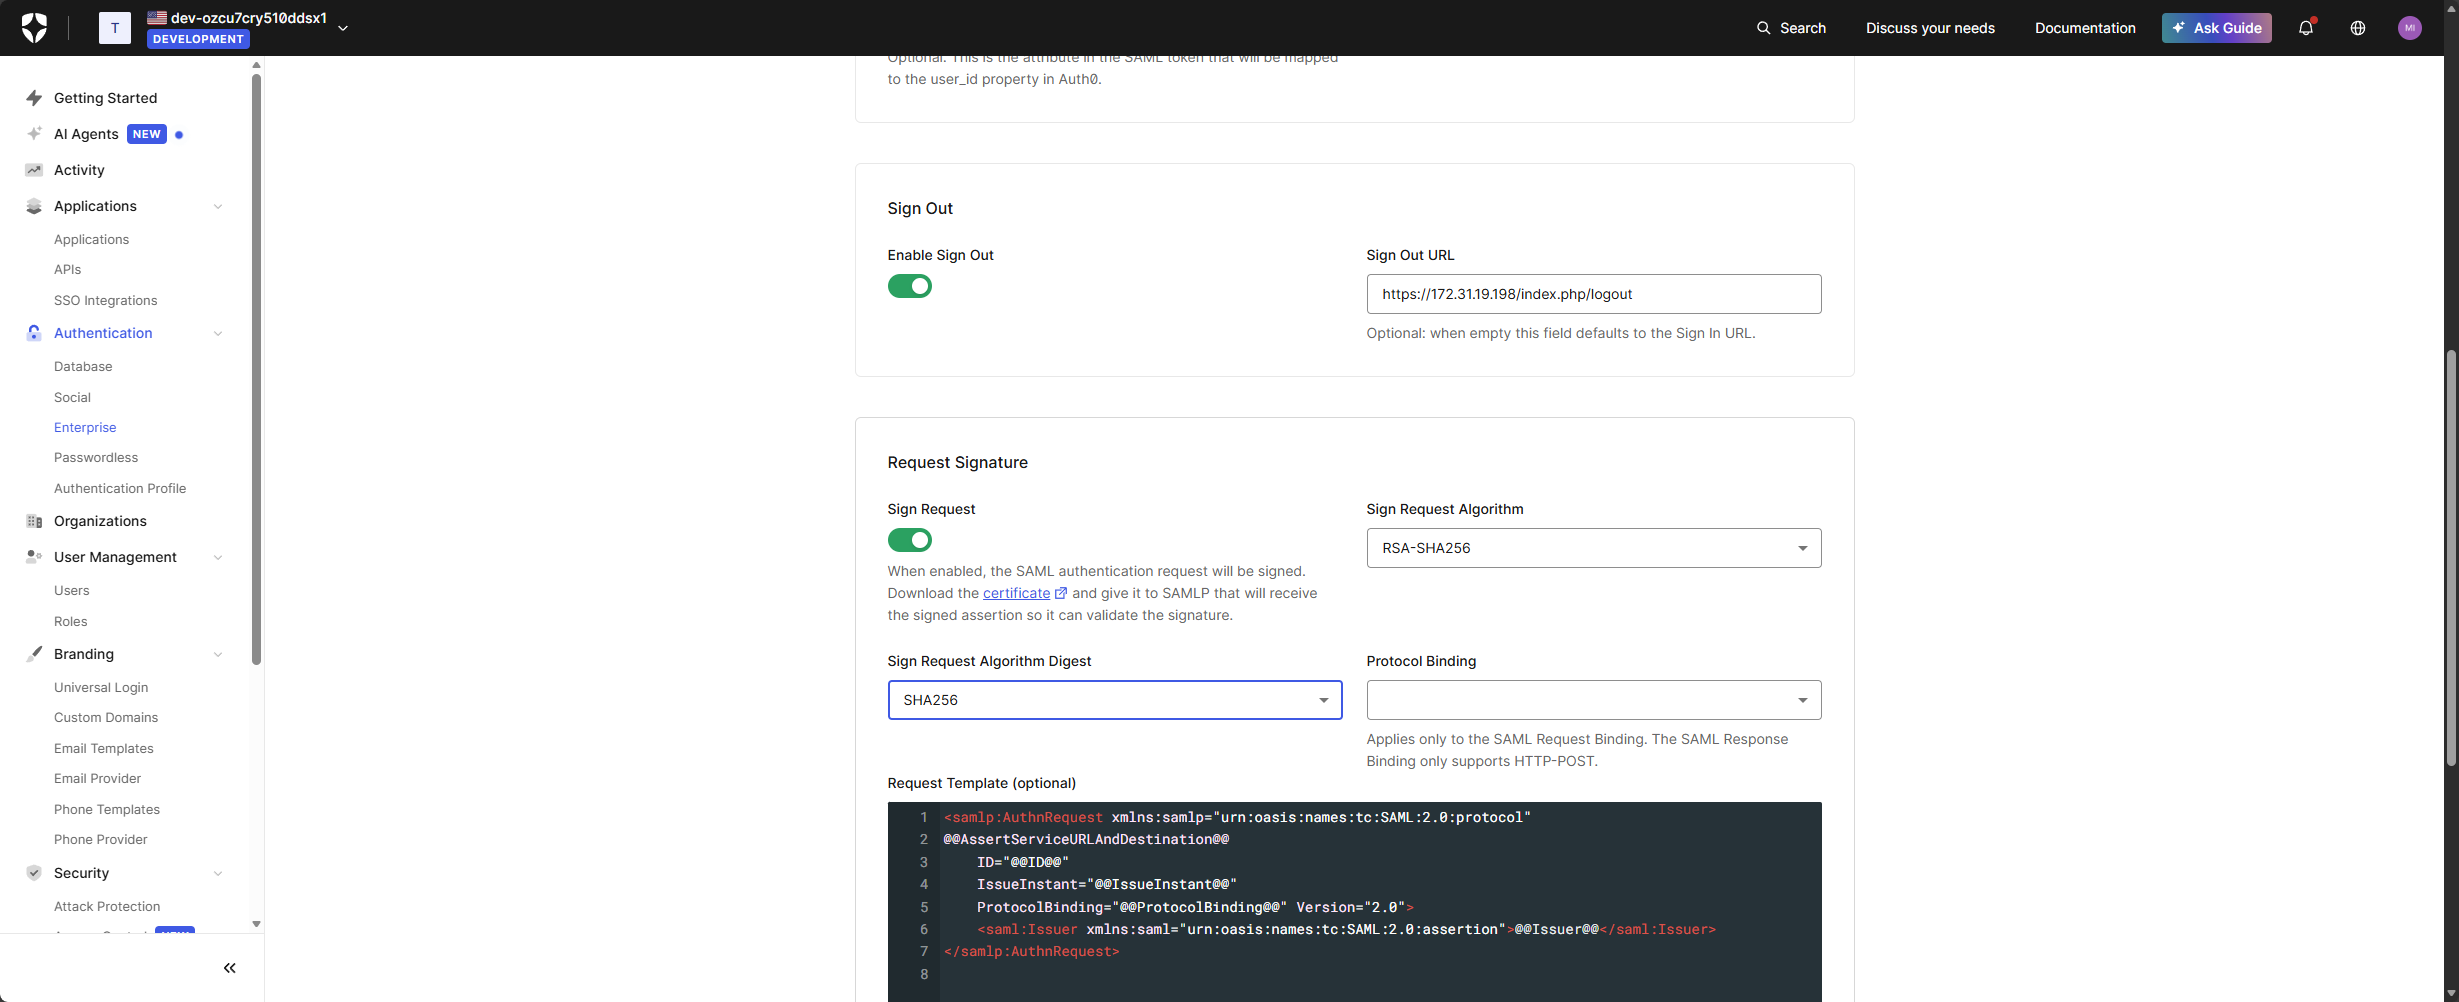
- Configure additional fields as required:
- Sign Request – SHA 256
- Sign Out URL – taken from the Logout URL in Endpoint Protector
- Click Create.
- After saving, go to the Applications tab inside this connection.
- Enable the toggle for the Endpoint Protector application to allow users to authenticate through this SAML connection.

This step allows Auth0 to accept SAML assertions from another IdP and pass them to Endpoint Protector.
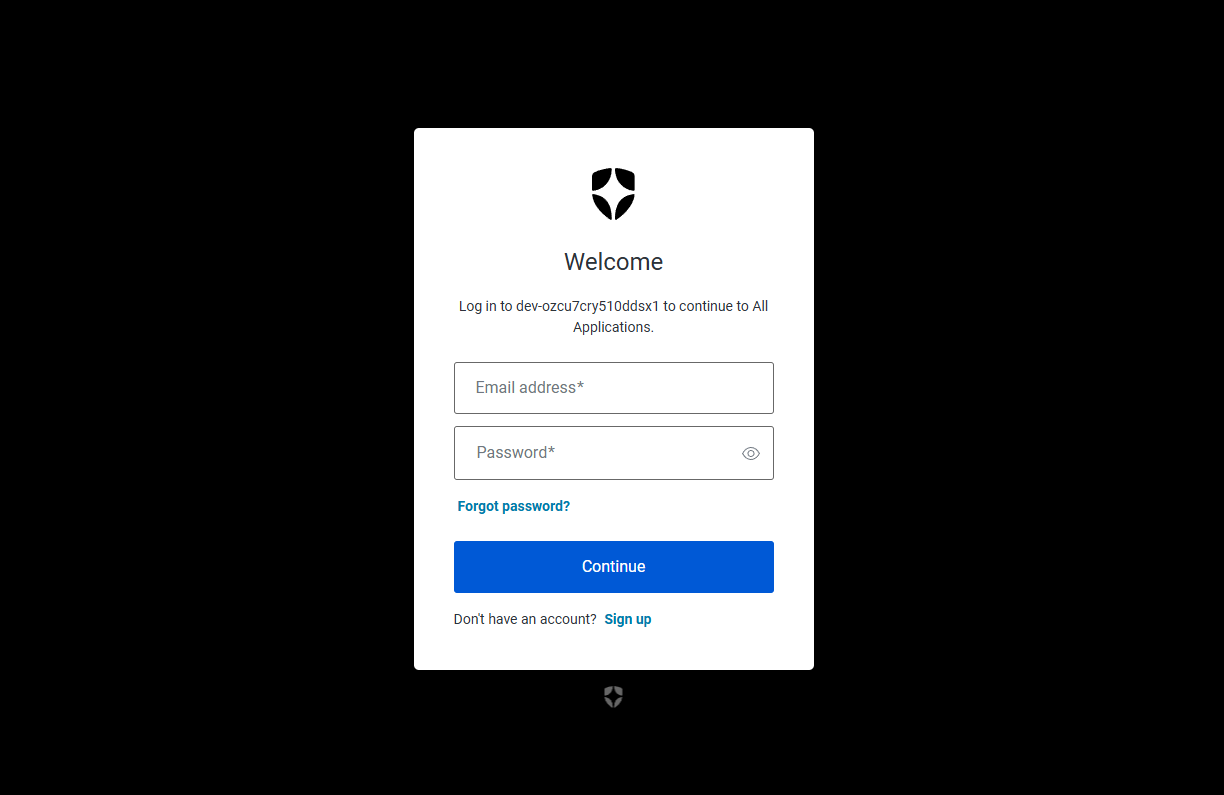
Step 9 – Test the Configuration
- In Endpoint Protector, click Test to validate the configuration.
- You should be redirected to Auth0 for authentication.
- After entering valid credentials, you should be redirected back to Endpoint Protector and logged in as the corresponding user or redirected to the respective IdP if an enterprise connection is active on Auth0.
Disclaimer
The integration steps described in this document are based on the Auth0 platform and user interface as available at the time of writing. Auth0 is a third-party service that is fully independent from Netwrix. Because Auth0 may update or modify its features, user interface, configuration flow, roadmap, service ownership, or platform behavior at any time, Netwrix cannot guarantee that these instructions will remain accurate in future versions of Auth0.
Netwrix is not responsible for any changes made by Auth0 to its portal, APIs, configuration settings, authentication methods, or service availability. If discrepancies arise between this document and the current Auth0 platform, please refer to Auth0’s official documentation or contact Auth0 Support for the most up-to-date guidance.
Netwrix continues to ensure that Endpoint Protector adheres to SAML 2.0 standards and remains compatible with identity providers that follow these protocols.