Create a Portal
Admin Center lets you quickly build and deploy a web-based portal named Directory Manager portal, for end-users to carry out user, group, and entitlement management tasks. Users can also view detailed reports on the current state and health of the directory.
You can create multiple Directory Manager portals as well as create multiple instances for a portal.
You can also create a Self-Service Password Reset portal (SSPR), which is a kind of Directory Manager portal that only facilitates password-related functions.
Host a Portal
A portal is hosted on a web server, with native IIS, remote IIS, and Docker as the supported servers.
-
IIS Deployment - Your Directory Manager portal is hosted within a site in IIS. To launch IIS, see Opening IIS Manager.
-
Docker Deployment - For a Docker deployment, make sure you have a running instance of Docker daemon in your environment. A portal runs within a container in Docker.
Deploy Multiple Instances of a Portal
For load balancing and high availability, Directory Manager facilitates you to create multiple Directory Manager portals, and even create multiple instances of the same portal. You may host different instances on different web servers. For example, you can create two instances of a portal while hosting one in native IIS and another in remote IIS.
Multiple instances of a portal share the same design settings and the same server settings, except that each instance has its own deployment settings. A change to the shared settings propagates to all deployment instances.
As multiple Data services and Security services can be created in Directory Manager, you can bind a different Data service and Security service with each deployment instance of a portal. In this way, different instances use different services for improved response times and load balancing.
What do you want to do?
- Create a Portal in Native IIS
- Create a Portal in Remote IIS
- Create a Portal in Docker
- Create a Self-Service Password Reset Portal
- Deploy Another Instance of a Portal
- Create a Portal by Copying an Existing Portal
- View the Details of a Portal
- Launch a Portal
Create a Portal in Native IIS
When you create a portal in native IIS, Directory Manager does the following:
- It creates a directory with the portal's name at the following physical path on the Directory
Manager server, and copies the portal files from its template directory to the new portal
directory:
X:\Program Files\Imanami\GroupID 11.0\GroupIDPortal\Inetpub\
(X represents the Directory Manager installation drive) - It also creates a virtual directory for the portal in your desired IIS site.
The portal runs within a virtual directory in native IIS while the portal files are physically located on disk.
To create a portal:
-
In Admin Center, click Applications in the left pane.
-
Click Add Application.
-
On the next page, select GroupID Portal and click Next step.
-
On the Create GroupID Application page, make sure the IIS tile is selected.
-
In the Application Name box, enter a unique name for the portal or use the default name. The portal is displayed with this name in Directory Manager.
-
In the Deployment Name box, enter a deployment name for the portal. This name is used to indicate the deployment instance for the portal in Directory Manager.
A portal can have multiple deployments, for example, one in IIS and another in Docker.
The application name and deployment name are displayed on the portal card on the GroupID Portal tab.
-
In the IIS Application Name box, enter an IIS deployment name for the portal. This name should be unique for each portal deployed in IIS.
- The IIS application name is used to name the portal's directory in IIS and its physical
directory under X:\Program Files\Imanami\GroupID 11.0\GroupIDPortal\Inetpub on the
Directory Manager server.
(X represents the Directory Manager installation drive) - This IIS application name is also appended to the web server address to construct the URL that
users click to access this deployment instance of the portal. For example:
https://web-server-name:port/IIS-application-name
Hence, a different URL is constructed for each deployment of a portal in IIS.
- The IIS application name is used to name the portal's directory in IIS and its physical
directory under X:\Program Files\Imanami\GroupID 11.0\GroupIDPortal\Inetpub on the
Directory Manager server.
-
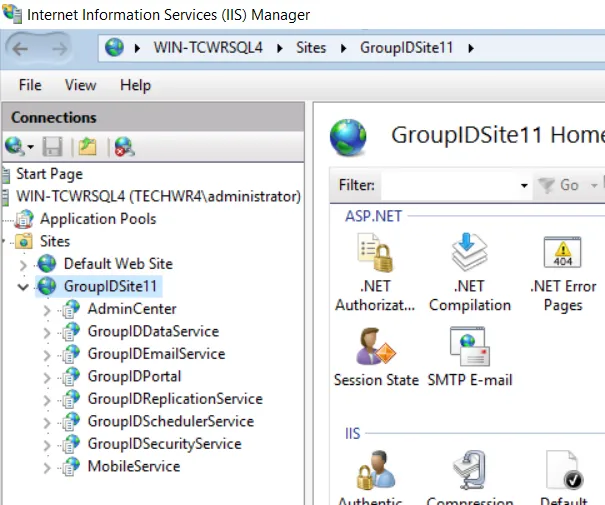
In the IIS Site drop-down list, select a website to host the portal files. The list displays the websites defined on the native IIS server. GroupIDSite11 is the default selection.
-
In the Service Endpoints area, bind a Data service and a Security service with the portal.
- In the Data Service drop-down list, select a Data service for the portal to use. The list contains all Data services defined in Directory Manager.
- In the Security Service drop-down list, select a Security service for the portal to use. Thelist contains all Security services defined in Directory Manager.
-
In the Support Information area, enter internal contact information and resource links for the portal's users to obtain help while using the portal.
A portal includes a Contact link and a Help icon on its web interface. The Contact link launches an email application to send an email to a user or helpdesk for inquiries or support. The Help icon launches the online help for the portal in a new browser window. Both links are customizable, and their target email address or web address is specified in the Support Information area.- In the Support group or administrator's email address box, enter the email address of a group or user to redirect user queries to. This email address is mapped to the Contact link in the portal.
- In the Help URL box, specify the address of your company's internal support website or
the portal's help page, where portal users can find support material or report a problem. By
default, this box displays the URL of the portal's help published by Netwrix.
This URL is mapped to the Help icon in the portal.
-
(Optional) Select the Password Center Mode check box to create this portal as a Self-Service Password Reset portal (SSPR). A SSPR portal does not offer the standard functions of a Directory Manager portal, such as group management, user management, or entitlement management, but is exclusively dedicated to password-relation activities. This portal enables users to manage their directory account passwords, i.e., the password for the account they use to access their workstations and other Microsoft services. Users can change and reset their passwords, as well as unlock their accounts. They can also enroll their accounts in Directory Manager and link accounts in different identity stores.
The SSPR portal does not have design settings and advanced settings, like a standard Directory Manager portal has. For this reason, the following configurations are not available on selecting the Password Center Mode check box:
- The Import Design option for identity stores in the Select Identity Stores area
- The Advanced Settings area
NOTE: Directory Manager does not support the upgrade of a Password Center portal (from a previous version) to an SSPR portal. You have to create the SSPR portal as a new portal.
-
In the Select Identity Stores area, select the check boxes for the identity stores you want to associate with the portal. Users in the associated identity stores can sign into the portal to manage directory objects, their directory profiles, and more.
While associating identity store(s), you may get the following message:
This relates to the scenario when identity stores in Directory Manager have been linked, as discussed in the Linked Identity Stores and the Directory Manager Portal topic. Hence, when two identity stores, IdentityStoreA and IdentityStoreB, are linked and you associate IdentityStoreA with the portal, this message is displayed. It alerts you to associate the second identity store in the linked pair (dentityStoreB) with the portal too, in order to benefit from the linking.
-
Each identity store associated with a portal has its own set of design settings, as listed in the Design a Portal with Display Types topic.
If you are upgrading to Directory Manager 11 from GroupID 9 or GroupID 10, you can import the design settings for an identity store from a Self-Service portal in a previous version - as an alternate to defining these settings from scratch. Following are the details of the file containing identity store design settings for a Self-Service portal in GroupID 9 and 10:
Design file name:
<Identity store name>..xml.For example: ADStore.xml
A separate design file exists for each identity store linked with a Self-Service portal.File location in GroupID 9/10: [GroupID installation drive]:\Program Files\Imanami\GroupID
version\SelfService\Inetpub<portal name>\Design\
For example: C:\Program Files\Imanami\GroupID 10.0\SelfService\Inetpub\TestPortal\Design\Similarly, a separate file exists for each linked combo created in the Self-Service portal.
Linked combo file name: The file has the same name as that of the linked combo in the portal.for example, Country-State.xml
File location in GroupID 9/10: All linked combo files, regardless of the identity store they are used for, are available at the following path:
[GroupID installation drive]:\Program Files\Imanami\GroupIDversion\SelfService\Inetpub<portal name>\Web\LinkedCombo\
For example: C:\Program Files\Imanami\GroupID 10.0\SelfService\Inetpub\TestPortal\Web\LinkedCombo\To import the design file and linked combo file(s), do the following:
- As a prerequisite to Directory Manager 11 upgrade, the folder structure for the source version was copied to the Directory Manager 11 server. In this case, the design and linked combo files for all portals in the previous version are already available on the machine. Else copy the above mentioned files for the respective identity stores associated with the Self-Service portal, and place them on your local machine or a shared network location.
- In he Select Identity Stores area, click Import Design next to an identity store name to import the design file for it.
- Browse for the file to select and import it. The import process takes a while.
Each identity store associated with a Self-Service portal has its own design file, so make sure you import the correct file. For example, if Identity Store A is associated with two Self-Service portals, then these will be two different design files for the same identity store, though at different locations. - After the file is uploaded, a message is displayed, showing the number of linked combos
defined in the imported design settings and prompting you to import the respective linked
combo files.
Browse to the location of the linked combo files and import those that represent the linked combos defined in the design settings.
-
A portal has certain advanced settings defined for it, as discussed in the Manage Advanced Settings topic.
If you are upgrading to Directory Manager 11 from GroupID 9 or GroupID 10, you can import the advanced settings of a Self-Service portal from a previous version as an alternate to defining settings from scratch. Following are the details of the file containing advanced settings for a Self-Service portal in GroupID 9 and 10:File name: server.xml. A separate file exists for each Self-Service portal.
File location in GroupID 9/10: [GroupID installation drive]:\Program Files\Imanami\GroupIDversion\SelfService\Inetpub<portal name>\
For example: C:\Program Files\Imanami\GroupID 10.0\SelfService\Inetpub\TestPortal\To import the file, do the following:
- As a prerequisite to Directory Manager 11 upgrade, the folder structure for the source version was copied to the Directory Manager 11 server. In this case, the server.xml file for all portals in the previous version is already available on the machine. Else copy the server.xml file for the Self-Service portal whose advanced settings you want to import, and place it on your local machine or a shared network location.
- On the Create GroupID Application page, click Import Settings in the Advanced Settings area.
- Browse for the file to select and import it. The import process takes a while.
-
Click Create Application.
The new portal is displayed on the GroupID Portal tab. You can differentiate between a standard Directory Manager portal and a SSPR portal from the portal logo, as each portal type has its own logo.
Create a Portal in Remote IIS
You can host a portal within a site in remote IIS. For this, you need to connect with the Microsoft IIS Administration API running on the remote IIS machine.
When you create a portal in remote IIS, Directory Manager does the following:
- It creates a virtual directory for the portal in a preconfigured site in remote IIS.
- It creates a physical directory for the portal in the folder that is mapped to this preconfigured site.
The portal runs within a virtual directory in remote IIS while the portal files are physically located on disk.
To learn about the remote IIS settings and configurations before hosting a portal, see thePrerequisites for Deployments in Remote IIS topic.
To create a portal:
-
In Admin Center, click Applications in the left pane.
-
Click Add Application.
-
On the next page, select GroupID Portal and click Next step.
-
On the Create GroupID Application page, select the Remote IIS tile.
-
In the Application Name box, enter a unique name for the portal or use the default name. The portal is displayed in Directory Manager with this name.
-
In the Deployment Name box, enter a deployment name for the portal. This name is used to indicate the deployment instance for the portal in Directory Manager. A portal can have multiple deployments, for example, one in IIS and another in Docker.
The application name and deployment name are displayed on the portal card on the GroupID Portal tab. -
In the API URL box, enter the URL of the API to use for communicating with the remote IIS server.
Make sure the Microsoft IIS Administration API is installed as a Windows service on the remote IIS machine. Fetch the URL of this API from remote IIS and provide it here to enable communication. -
In the Access Token box, enter the access token to allow Admin Center to access the Microsoft IIS Administration API. This access token is generated from the Microsoft IIS Administration API's interface.
-
In the Username and Password boxes, enter the credentials of a Windows account to communicate with the API. This account must have access to the remote IIS machine, with sufficient permissions to enable you to create and manipulate objects in IIS.
-
In the IIS Application Name box, enter an IIS deployment name for the portal. This name should be unique for each portal deployed within the same site in remote IIS.
- The IIS application name is used to name the portal's directory in the IIS site and its physical directory on the remote IIS machine. The physical directory is created within the folder that is mapped to the preconfigured site, and portal files are copied to it.
- This IIS application name is also appended to the web server address to construct the URL that
users click to access this deployment instance of the portal. For example:
https://web-server-name:port/IIS-application-name
Hence, a different URL is constructed for each deployment of a portal in remote IIS.
-
On providing the above information, the Website drop-down list displays the sites defined on the remote IIS server. Select the site that you have configured with the appropriate permissions for Directory Manager.
-
To enter information in the Service Endpoints, Support Information, Password Center Mode, Select Identity Stores, and Advanced Settings areas and create the portal, follow the steps in the Create a Portal in Native IIS topic, starting at step 9.
Create a Portal in Docker
Directory Manager enables you to host a portal in Docker. For this, you need to connect with the API running on a Docker deamon in your environment, so that Directory Manager can create a container for the portal there and run the portal from within that container.
For an overview on application deployment in Docker, see the Prerequisites for Deployments in Docker topic.
NOTE: To host the portal, Docker daemon should be configured to run Windows containers.
To create a portal:
- In Admin Center, click Applications in the left pane.
- Click Add Application.
- On the next page, select GroupID Portal and click Next step.
- On the Create GroupID Application page, select the Docker tile.
- In the Application Name box, enter a unique name for the portal or use the default name. The portal is displayed in Directory Manager with this name.
- In the Deployment Name box, enter a deployment name for the portal. This name is used to
indicate the deployment instance for the portal in Directory Manager. A portal can have multiple
deployments, for example, one in IIS and another in Docker.
The application name and deployment name are displayed on the portal card on the GroupID Portal tab. - In the Port box, enter the port for the host machine to map the container to host ports. By
default, the container port is 443.
This enables network access to the portal in Docker over this port. - In the Service URL box, enter the API URL to use for accessing and communicating with Docker
Engine.
On installing Docker Engine, you must expose an API over TCP on the same machine to enable communication with Directory Manager.
The URL you provide in the Service URL box identifies the Docker deamon where you want to host the portal. - In the Container Name box, enter a name for the container that is created in Docker for deploying the portal.
- For entering information in the Service Endpoints, Support Information, Password Center Mode, Select Identity Stores, and Advanced Settings areas and create the portal, follow the steps in the Create a Portal in Native IIS topic, starting at step 9.
Create a Self-Service Password Reset Portal
A Directory Manager portal can be created as a Self-Service Password Reset portal (SSPR in native IIS, remote IIS, and Docker. A SSPR portal only provides password management functions to end-users.
Creating an SSPR portal is similar to creating a standard Directory Manager portal; you only have to select the Password Center Mode check box on the Create GroupID Application page. For details, see Step 11 in the he Create a Portal in Native IIS topic.
NOTE: Directory Manager does not support the upgrade of a Password Center portal (from a previous version) to an SSPR portal. You have to create the SSPR portal as a new portal.
Deploy Another Instance of a Portal
You can deploy more than one instance of a portal. Instances can be deployed in different web servers, for example, one in IIS, another in remote IIS, and yet another in Docker. For more on how instances work, see the Deploy Multiple Instances of a Portal topic.
To deploy a new instance, you have to provide deployment details only. All instances share the same server and design configurations, while only deployment details differ. For example, all instances serve the same identity stores and have the same display and search-related configurations. Changing a shared setting propagates to all deployment instances of the portal.
NOTE: A SSPR portal does not have design settings. Hence, only server settings are shared across multiple instances.
To deploy an instance:
-
In Admin Center, select Applications in the left pane.
-
On the GroupID Portal tab, click the ellipsis button for a portal and select Deploy Another Instance.
-
On the Deploy Another Instance page, select the IIS, Remote IIS, or Docker tile to indicate the web server where you want to deploy the instance.
The Application Name field displays the name of the portal as read-only. -
Fields on the page vary, depending on the web server selected. In any case, the Support Information, Select Identity Stores, and Advanced Settings areas are not available, as they remain the same for all instances.
- To deploy an instance in native IIS, follow steps 6-9 in the Create a Portal in Native IIS topic.
- To deploy an instance in remote IIS, follow steps 6-12 in the Create a Portal in Remote IIS topic.
- To deploy an instance in Docker, follow steps 6-10 in the Create a Portal in Docker topic.
-
After entering the required information, click Deploy Instance.
The new instance is displayed on the portal's card.
Create a Portal by Copying an Existing Portal
You can create a new portal by copying an existing portal. All server and design configurations of the template portal are duplicated to the new portal. Deployment details are not duplicated, so you can choose to deploy the new portal in any of the supported web servers. Consider the following:
- You can create a SSPR portal by copying a standard Directory Manager portal. In this case, the design settings of the base portal are not duplicated as the SSPR portal does not have design settings.
- You can create a standard Directory Manager portal by copying a SSPR portal. As the SSPR portal does not have design settings, the new portal is created with the default design settings. You can modify them as needed.
To create a portal:
-
In Admin Center, select Applications in the left pane.
-
On the GroupID Portal tab, click the ellipsis button for a portal and select Copy.
The Copy GroupID Application page is displayed; populated with the following settings of the copied portal:- The Data service and Security service linked to the portal
- The support information for the portal, i.e., the admin/helpdesk contact email address and the portal's help URL
- The identity store(s) associated with the portal
-
You can deploy the new portal in native IIS, remote IIS, or Docker.
- To specify settings for a native IIS deployment, follow the instructions in the Create a Portal in Native IIS topic, beginning at step 4.
- To specify settings for a remote IIS deployment, follow the instructions in the Create a Portal in Remote IIS topic, beginning at step 4.
- To specify settings for a Docker deployment, follow the instructions in the Create a Portal in Docker topic, beginning at step 4.
View the Details of a Portal
-
In Admin Center, click Applications in the left pane.
The GroupID Portal tab displays the portals that you have created. -
The card for a portal displays the following information:
Info Description Name The name given to the portal. Next to the portal name is the portal logo, which enables you to differentiate between a standard Directory Manager portal and a SSPR portal, as each portal type has its own logo. Identity Stores The names of the identity stores the portal serves. Deployment Instances Displays the deployment instance(s) of the portal as tiles. A tile shows the deployment name of the instance and the web server where it is deployed. Status A portal has one of the following statuses: - Running: Indicates that the portal is up and running. - Stopped: Indicates that Directory Manager is unable to communicate with the portal. To troubleshoot, go to the web server where the portal is deployed and make sure the portal is running. - Error: Any issue other than stopped is categorized as error. In this case, contact your system administrator. Launch Application Click this link to launch the portal. When multiple deployments of a portal are available, select the tile for a deployment instance and click this link to launch that instance. Ellipsis Click it to launch a shortcut menu with the following options: - Settings: Launches the portal settings page, where you can manage server and design settings. - Server Settings: Includes the deployment details of each portal instance, the help URL for the portal, the identity stores linked with the portal, and more. - Design settings: These settings relate to the portal's user interface. - Deploy Another Instance: Enables you to deploy another instance of the portal. - Copy: Enables you to create a new portal by copying the settings of this portal. - Delete: Deletes the portal.
You may notice a portal with an orange card and an orange icon on the card. On hovering the mouse over the icon, the tooltip says that linked mode will not be allowed. This relates to the scenario when identity stores in Directory Manager have been linked, as discussed in the Linked Identity Stores and the Directory Manager Portal topic. Hence, when two identity stores, IdentityStoreA and IdentityStoreB, are linked and you associate IdentityStoreA with the portal, the portal card appears in orange. It informs you to associate the second identity store in the linked pair (dentityStoreB) with the portal too, in order to benefit from the linking.
Launch a Portal
-
In Admin Center, select Applications in the left pane.
-
On the GroupID Portal tab, click Launch Application on a portal's card to launch it.
When multiple deployments of a portal are available, select a deployment instance on the card and click Launch Application to launch that instance.
Provide the URL of an instance to your users so they can access the portal. You can either copy the URL from the address bar or from a portal's deployment settings. See the View the Launch URL for an Instance topic.
See Also