Registration and Permissions Assignment
This section discusses the Directory Manager application registration and permission assignment procedure.
Step 1 – Login to Microsoft Entra Admin Center (https://portal.azure.com/) with a user that is part of the “Global Administrator” role or any role that has rights to register an app, such as the “Application administrator” role. This is required in order to give consent to certain permissions in the application.
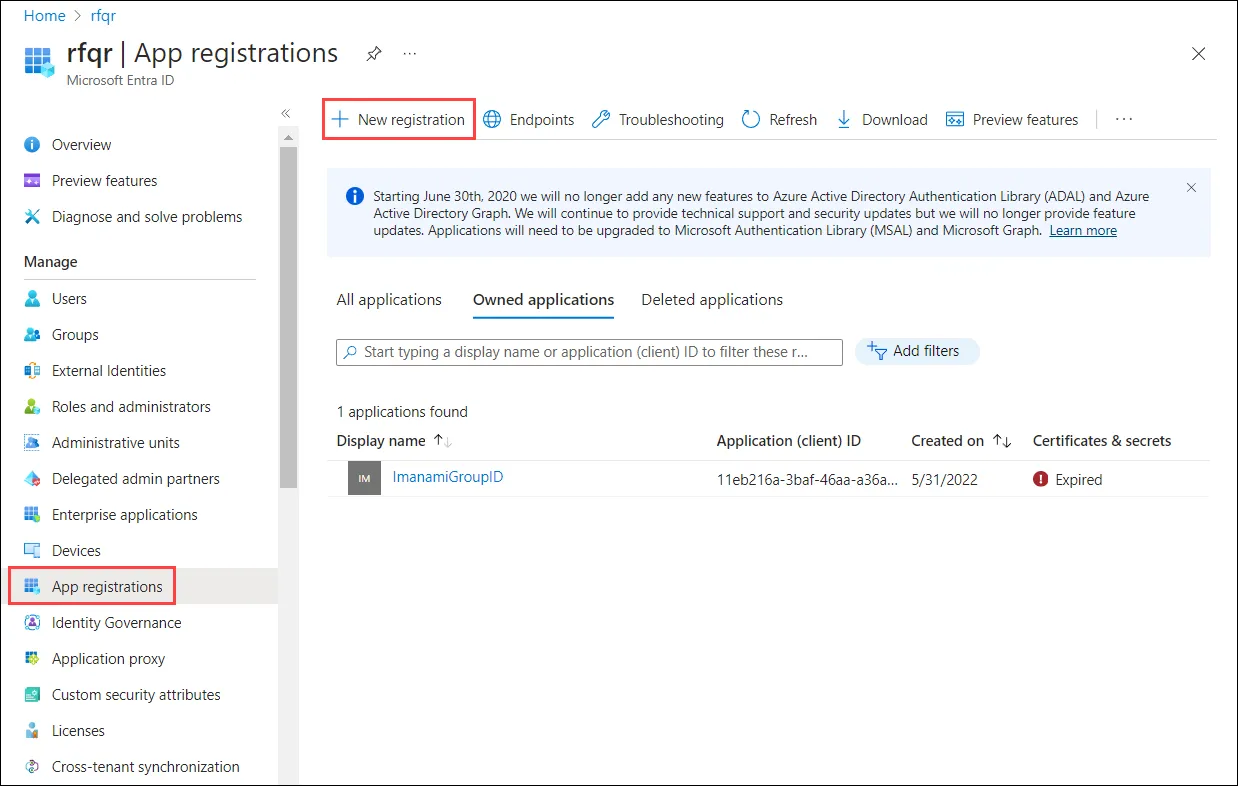
Step 2 – In the Microsoft Entra Admin Center, go to Microsoft Entra ID > App registration and click New registration.
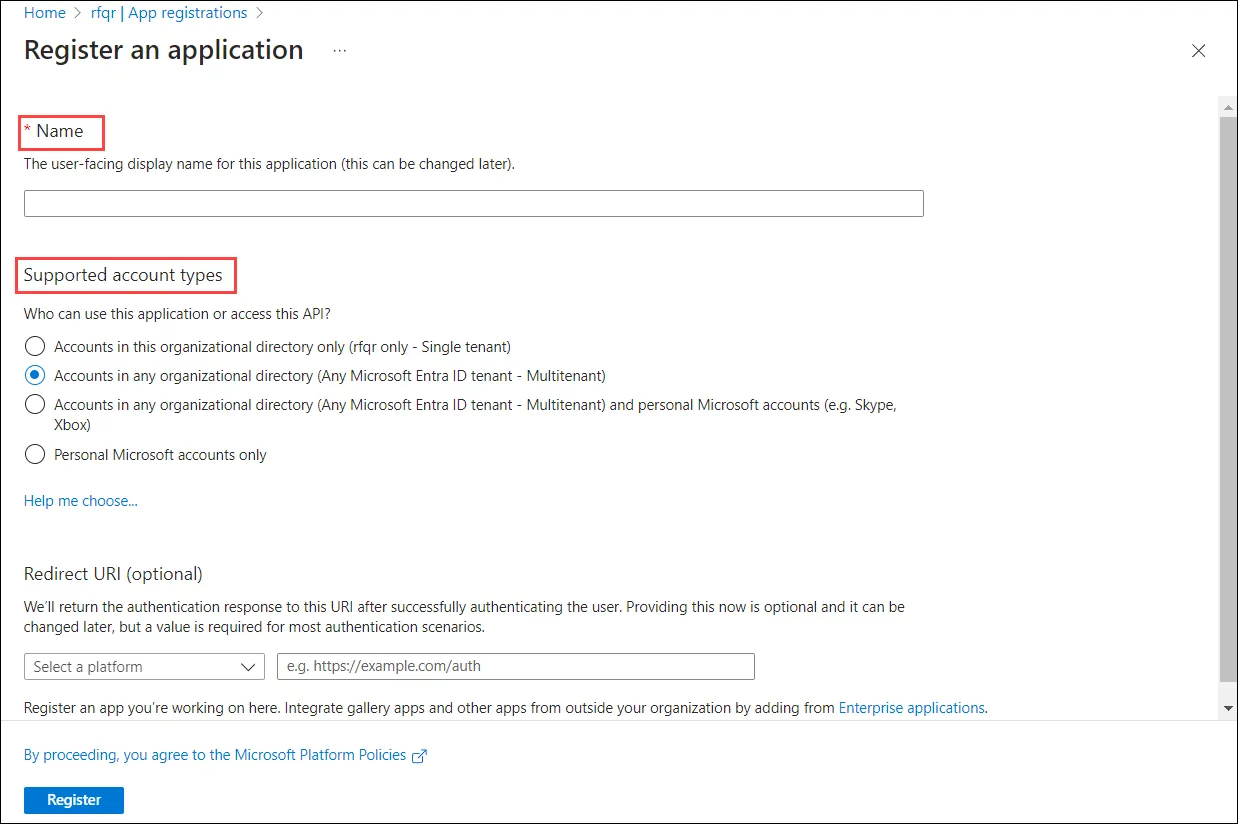
Step 3 – On the Register an application page, specify a name for the app. Select Supported account types as Accounts in any organizational directory (Any Microsoft Entra ID – Multitenant). Leave the Redirect URI as is and click Register.
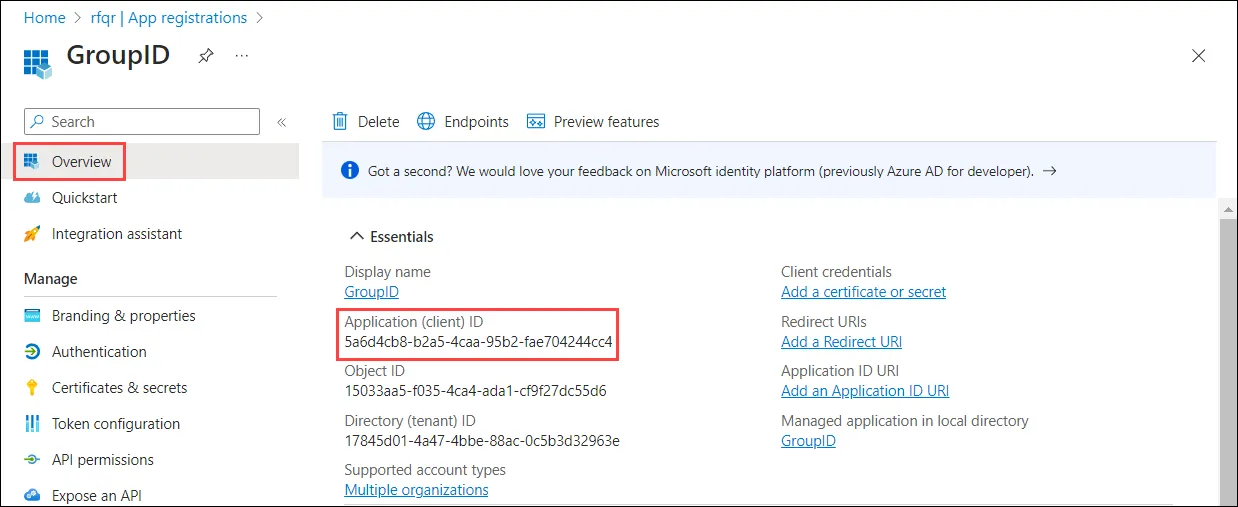
Step 4 – The Overview page is displayed. Copy the Application (client) ID and keep it safe.
Step 5 – Go to the Authentication node and set it as follows:
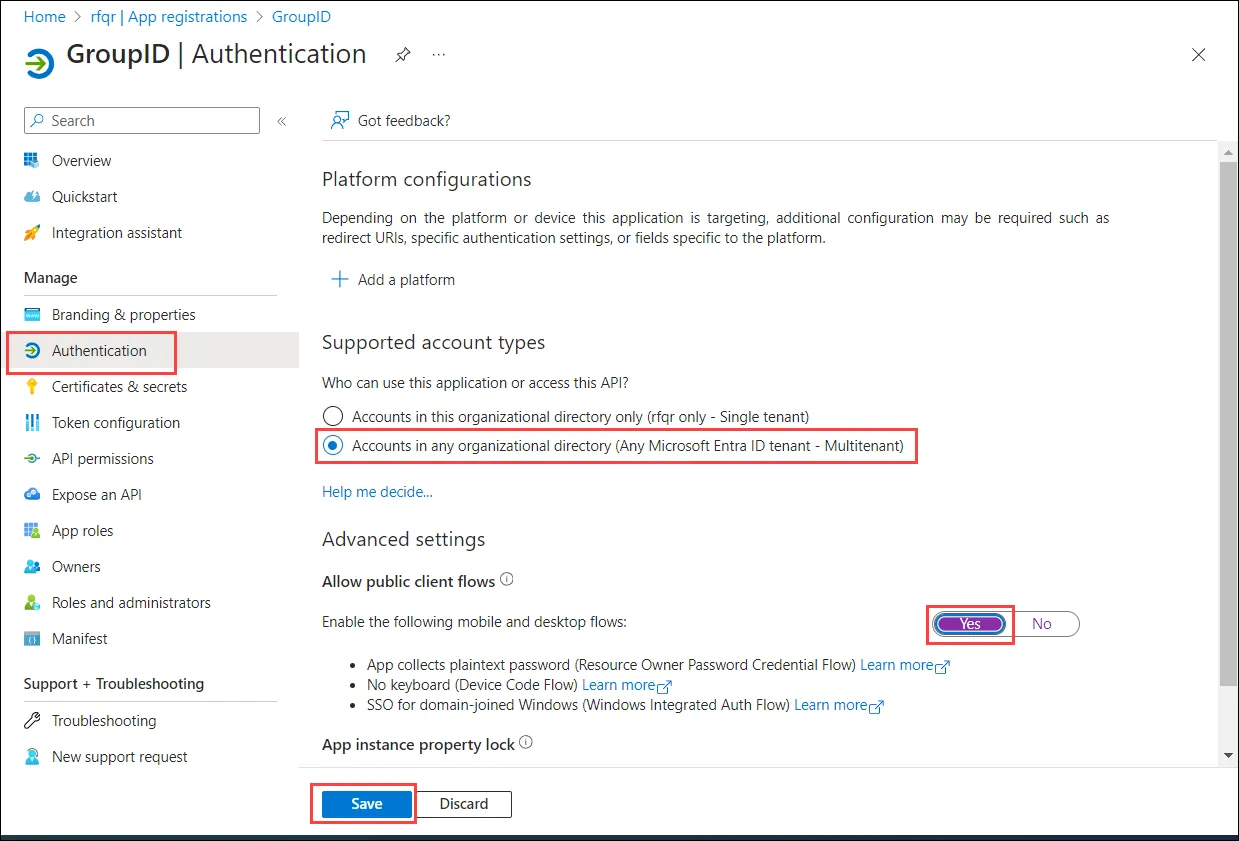
Step 6 – Click Save.
Step 7 – Select the Certificates & secrets node in the left pane to uploaded a certificate for secure authentication in Microsoft Entra ID. See the Generate a certificate section of the Certificate for Entra ID Authentication topic for additional information.
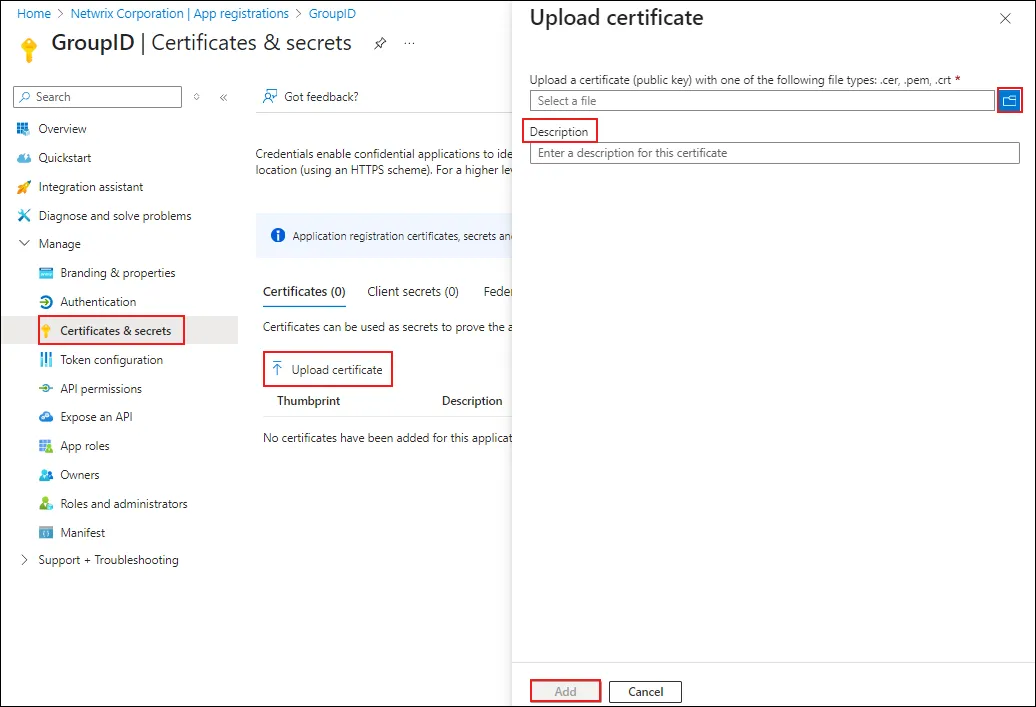
Step 8 – To upload the certificate:
- Select Upload certificate.
- On the Upload certificate page, click browse to browse to the location where you have saved the generated certificate in .cer format.
- Provide a brief description for the certificate in the Description box.
- Click Add.
Step 9 – Click Roles and administrators node.
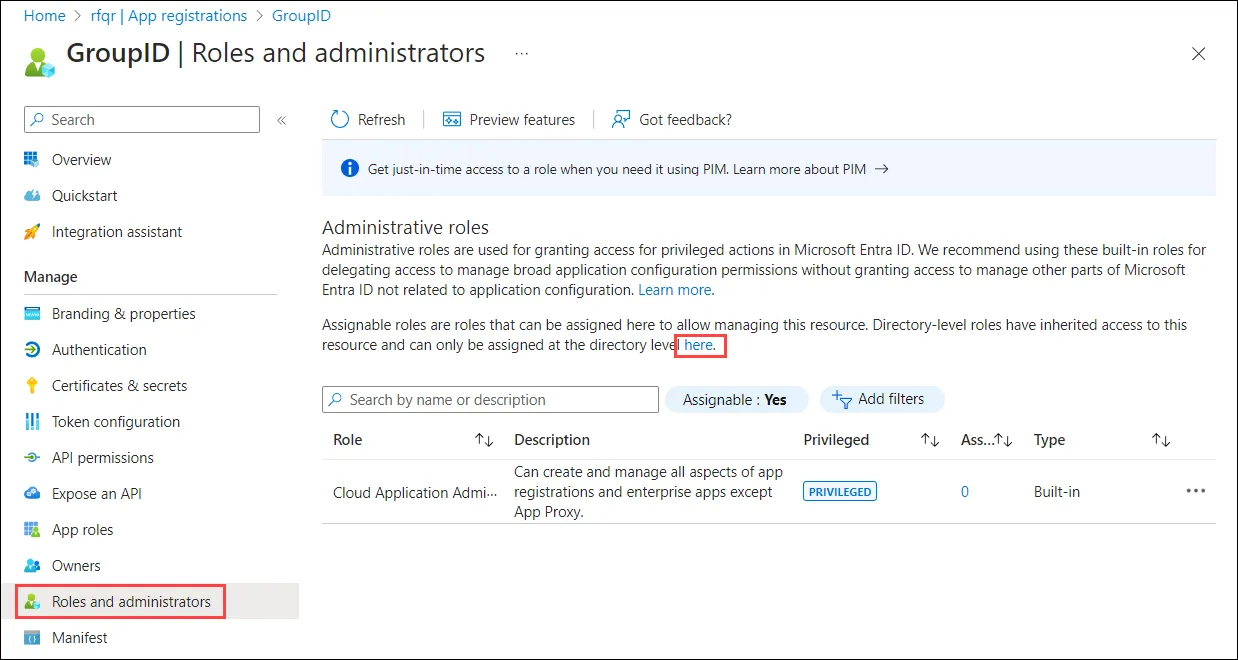
Step 10 – On the All roles page, add your registered application to a directory role.
-
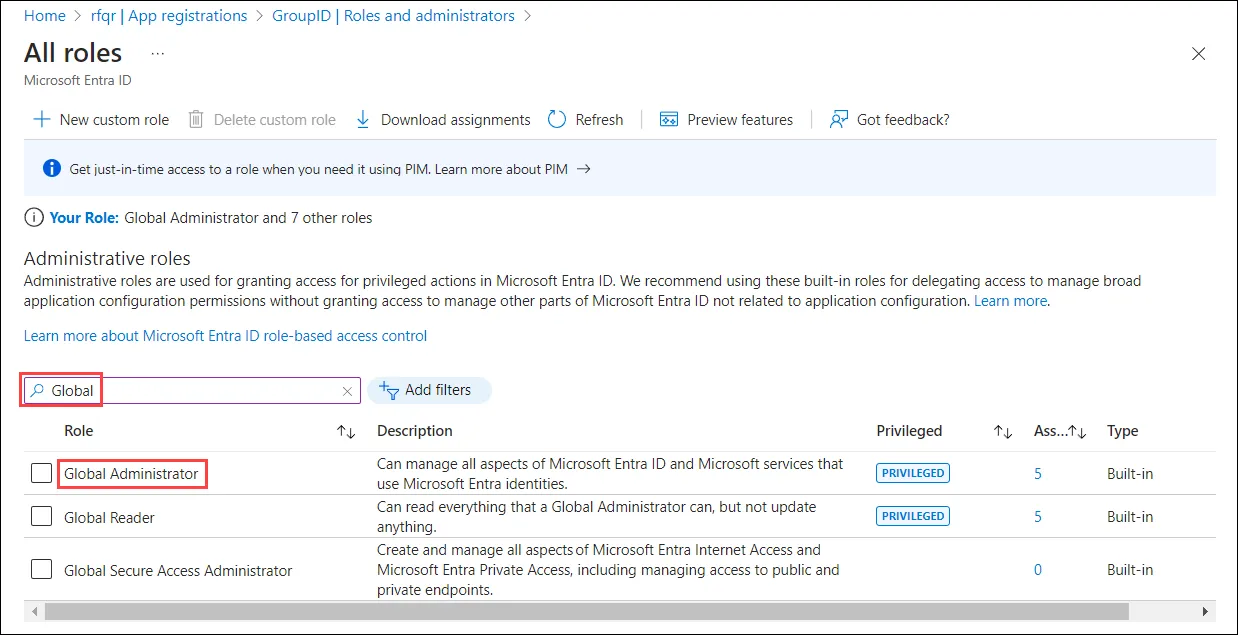
Global administrator: For Global administrator, type global to filter out the Global administrator role. Click Global administrator.
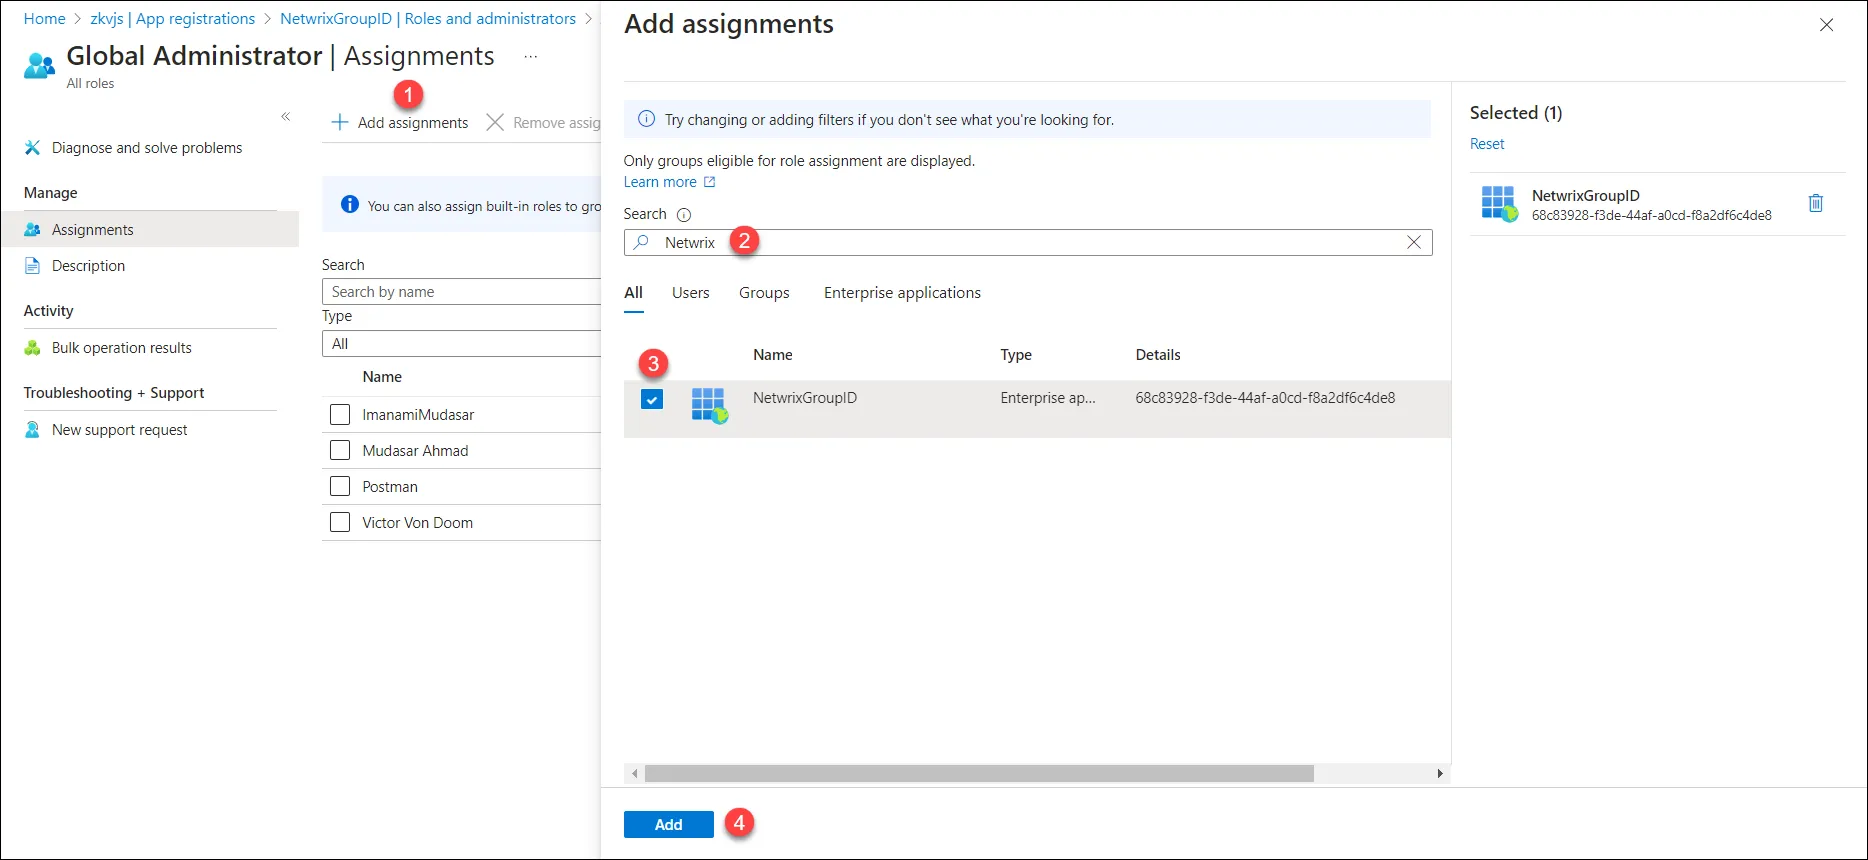
Click Add assignments. On the Add assignment page, search your application and select it. Click the Add button. The application will be listed on the Assignments page.
-
For any role other than Global administrator, add the registered application to the following two directory roles:
-
Exchange administrators: can manage all aspects of the Exchange product
-
User administrators: (User Account Administrator) can manage all aspects of users and groups, including resetting passwords for limited administrators.
For example, this role does not allow deleting a global administrator. User Account Administrators can change passwords for users, Helpdesk administrators, and other User Account Administrators only.
noteBy default, the Directory Manager Administrator security role in a Microsoft Entra IDidentity store binds to Global Administrator. If minimum role assignment for the service account is used, the default Admin Security role criteria should also be changed to the User Account Administrators group.
-
Step 11 – Click Add.
Step 12 – Go to the API permissions node and select Add a permission.
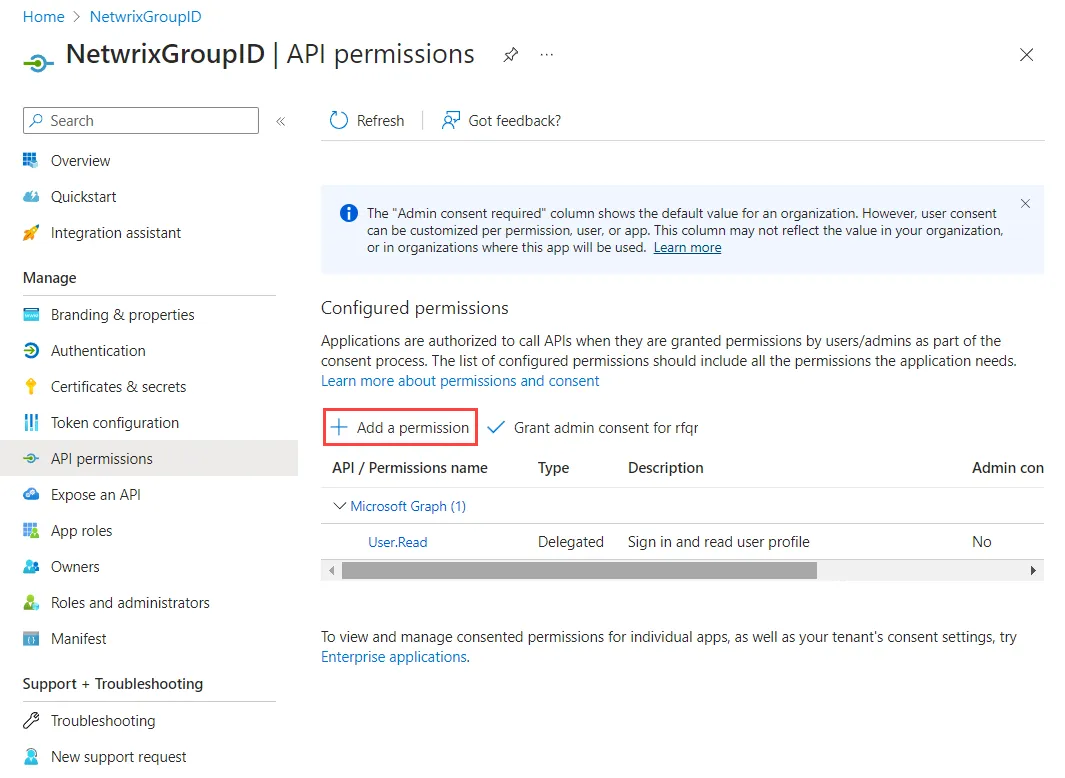
Step 13 – The Request API permissions page opens. Click the Microsoft Graph API tab.
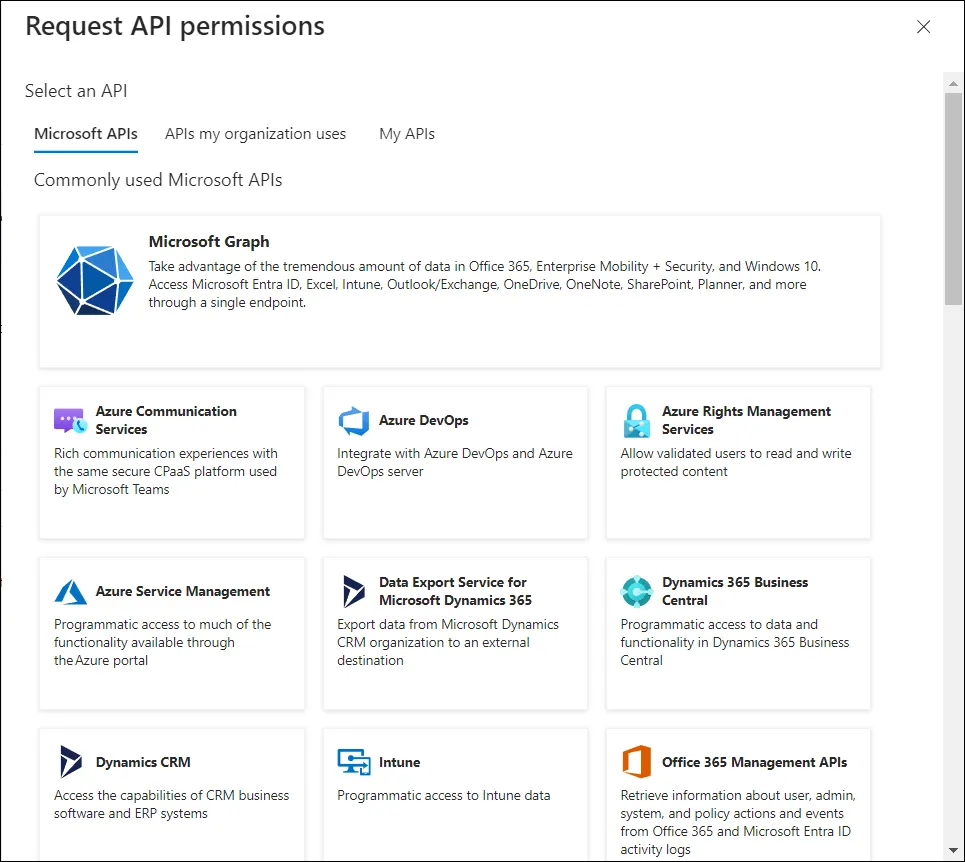
Step 14 – Click the Application permissions tab:
Permissions get listed on the page. See the Microsoft Entra ID Permissions topic for the mandatory permissions that are required for creating the desired directory object.
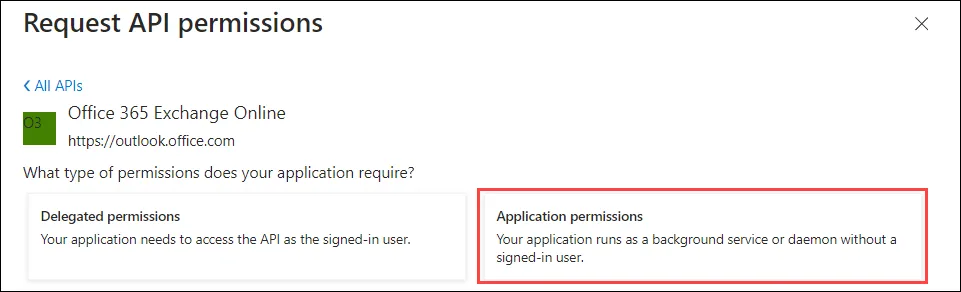
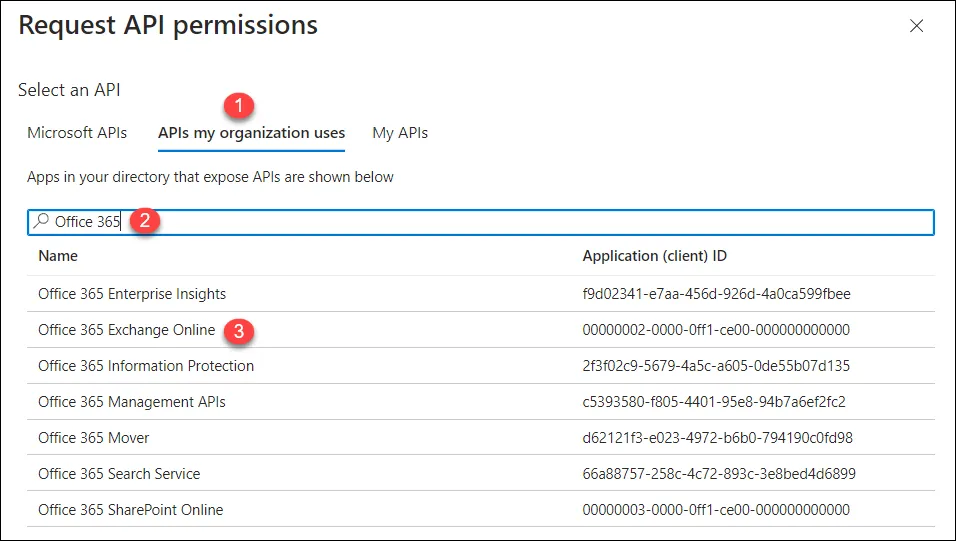
Step 15 – [Optional] To add a permission from Office 365 Exchange Online API, click the Add a
permission button (before the Grant admin consent for username button in the snapshot given in
point # 14.
Follow the steps shown on the following snapshot:
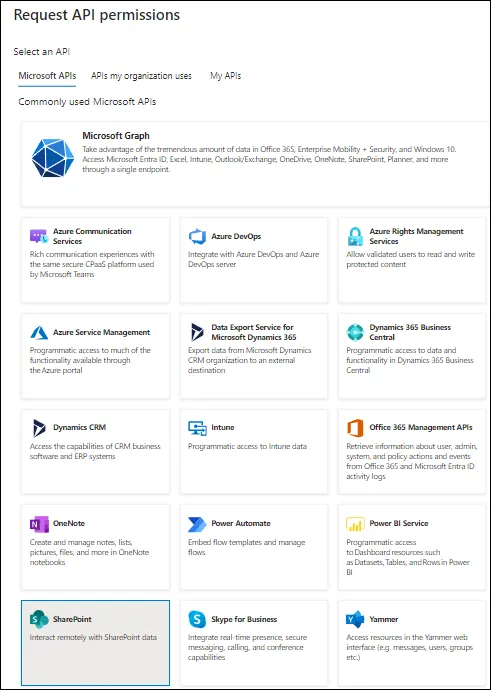
Step 16 – [Optional] To access the SharePoint API for Entitlement management, click the Add a
permission button (before the Grant admin consent for username button in the snapshot given in
point # 14). Select the SharePoint API:
Step 17 – Select the Delegated permissions tab:
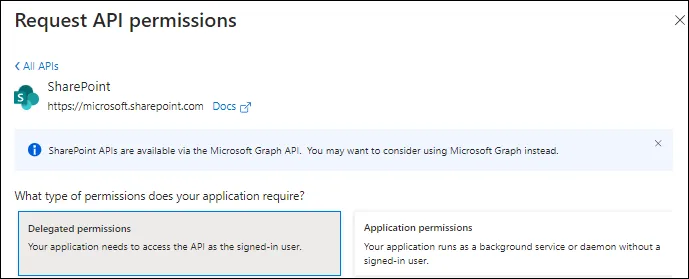
See SharePoint Delegated Permissions section of the Microsoft Entra ID Permissions topic for the required permission name.
This completes the registration process of Directory Manager in Microsoft Entra ID.