Configure a New Directory Manager Server with a New or an Existing Database
This option configures the Directory Managerserver and the Directory Manager Data Service on the machine where Directory Manageris being installed. It also configures the Directory Manager Elasticsearch Service as a master node for the Elasticsearch service cluster to support load balancing.
To configure Directory Manager server on the machine where the Configuration Tool is being run:
Step 1 – Select the Configure a new GroupID server with new or existing database option on the Select to create new server or use existing server page of the Configuration Tool and select Next.

Step 2 – In the SQL Server list, select the SQL Server to use with Directory Manager. If the required server does not appear in the list, make sure that the SQL Server Browser service is running on the SQL Server machine and then click the Refresh button.
Step 3 – In the Authentication list, select an authentication mode to be used when connecting to the SQL Server database. Modes are:
- SQL Server Authentication - To set SQL Server to work with Directory Managerusing an SQL Server account. See SQL Authentication in Authentication Modes topic.
- Windows Authentication - To set SQL Server to work with Directory Managerusing a Windows user account. See Windows Authentication in in Authentication Modes topic.
Step 4 – Depending on the authentication mode selected, do the following:
- For SQL Server Authentication: enter the user name and password of the selected SQL Server in the SQL Username and SQL Password boxes.
- For Windows Authentication: provide the credentials of a domain account or a Windows local account that Directory Managerwill use to connect with SQL Server. On clicking OK, the system authenticates with that account on SQL Server via Windows authentication.
Step 5 – In the SQL Database box, either specify name of a new SQL database to use for Directory Manager or continue using your existing database.
Step 6 – Click Next.
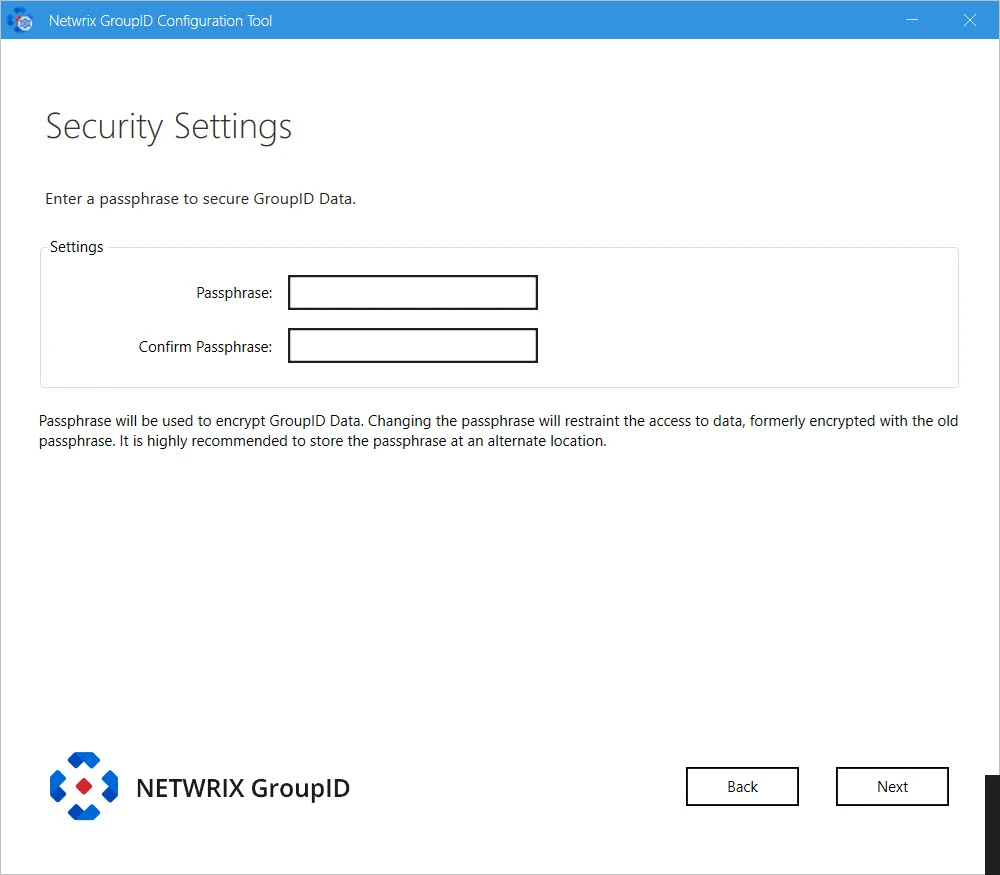
Step 7 – On the Security Settings page, enter an encryption key in the Passphrase and Confirm Passphrase boxes to secure Directory Manager data.
Directory Manager Data Service uses this key to encrypt and decrypt the data that it stores in, and retrieves from, the SQL Server database.
- The passphrase must have at least eight characters.
- Be sure to save this passphrase with you. Providing an incorrect passphrase at any later point will result in the loss of Directory Managerdata.
Step 8 – Click Next.
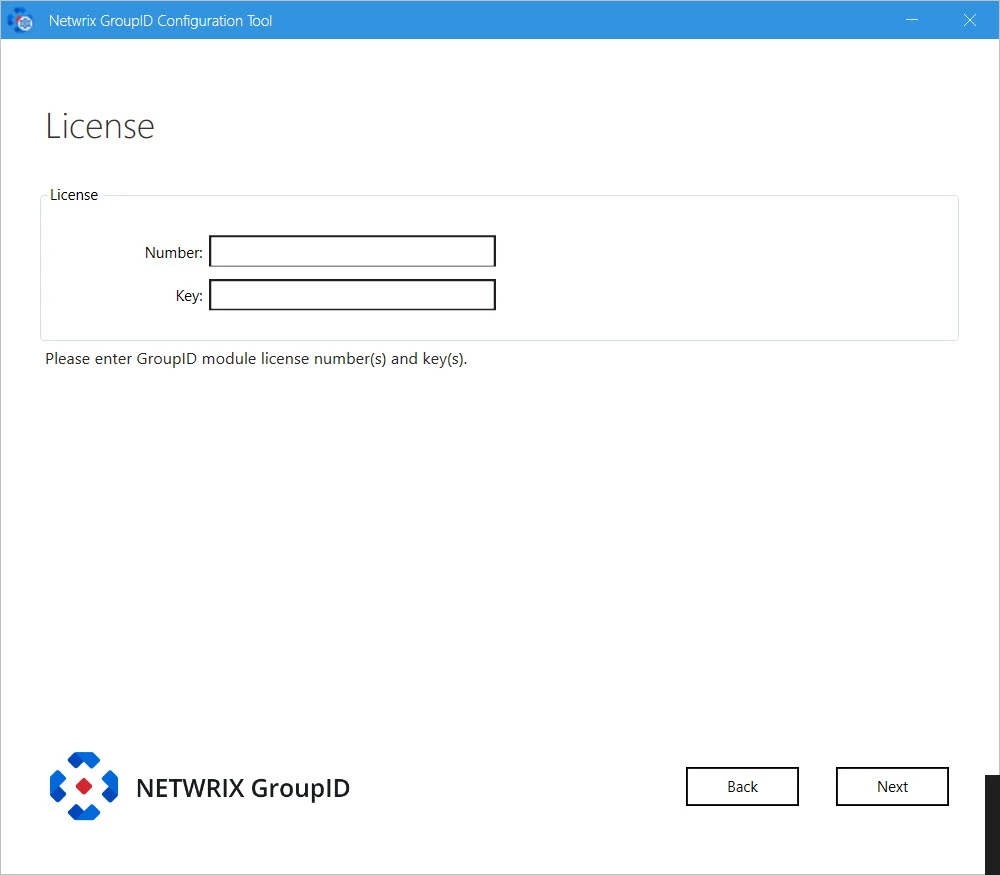
Step 9 – On the License page, enter a valid license number and key in the respective boxes. A valid license and key enable the Next button. If the Next button remains disabled, check your entries for errors.
Step 10 – Click Next.
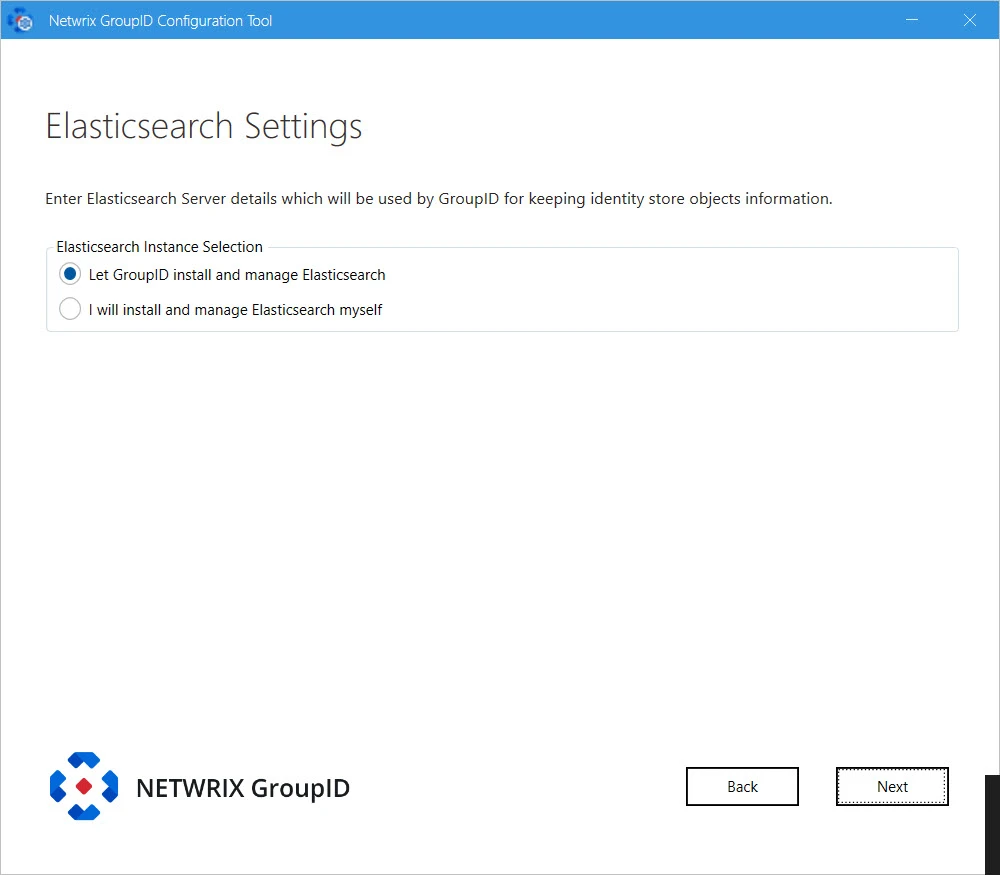
Step 11 – Directory Manager provides the following two options for Elasticsearch configuration. Select the relevant option:
-
Let GroupID install and manage Elasticsearch: If you select this option, Directory Manager Configuration Tool will install Elasticsearch. It presents you default configuration of Elasticsearch cluster it will create:

-
Cluster Name: for Elasticsearch node(s) within the cluster. You can modify the name.
-
Port: the default port for Elasticsearch API communication. Modify the port number if the mentioned default port is not available.
-
TCP Port: the default port for communication between nodes within the cluster. Modify the port number if the mentioned default port is not available.
NOTE: Make sure that the specified ports are available and unblocked.
I will install and manage Elasticsearch myself: If you select this option, the following page is displayed:
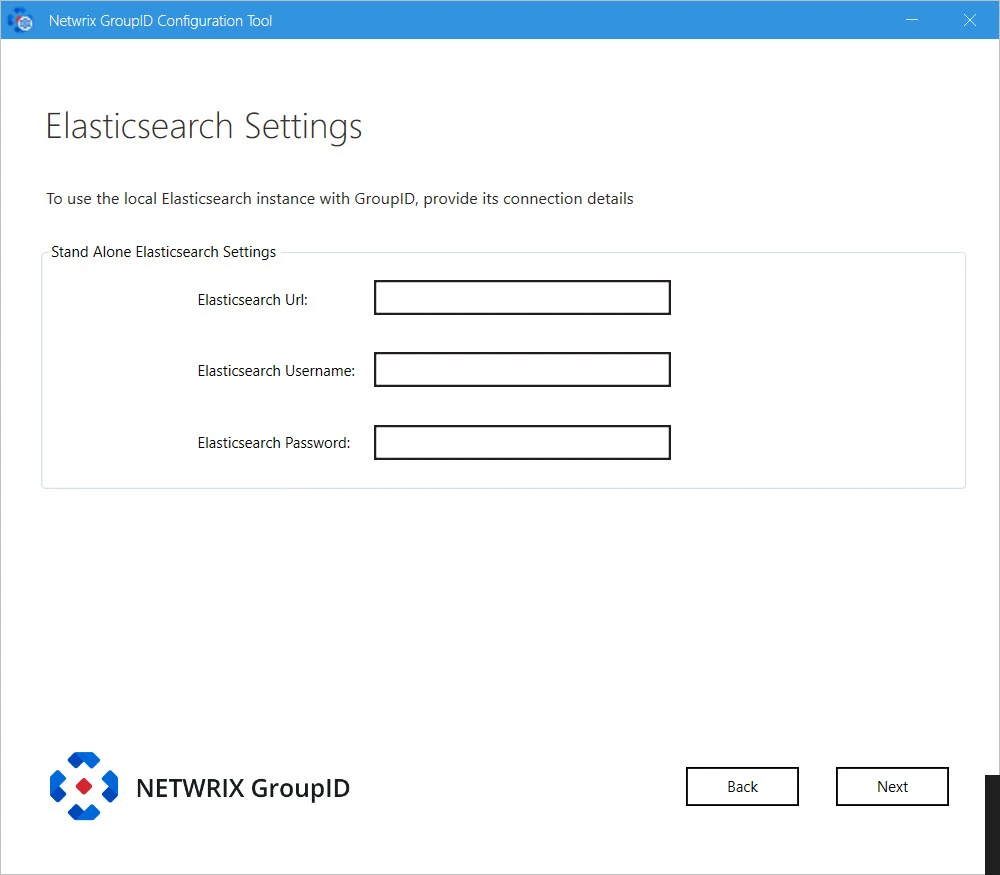
Provide configurations of Elasticsearch you want to use with Directory Manager:
- Elasticsearch URL: URL for accessing the Elasticsearch.
- Elasticsearch Username: service account for Elasticsearch.
- Elasticsearch Password: password of the Elasticsearch service account.
Step 12 – Click Next.

Step 13 – At this point, Directory Manager configures the following:
-
Directory Manager Data Service: This is a web-based service that Directory Manager uses to communicate with Microsoft SQL Server for storing and fetching data in the database.
-
Directory Manager Security Service: This is also a web-based service that Directory Manager uses to:
- Authenticate and authorize users on different Directory Manager functionalities in accordance with their roles.
- Encrypt and decrypt data that Directory Manager Data Service stores and fetches from the SQL database.
To deploy these services, the Configuration Tool creates and configures a new website in IIS with the name GroupIDSite11. By default, it binds this site to any of the available ports. However, if you have a different preference, you can change the port.
Click Advanced Options and enter the port in the Port Number box.
-
Replication service: This service replicates object attributes from the provider (such as Active Directory) to Elasticsearch.
-
Admin Center: Admin Center is a web-based application that can be accessed over the Internet and Intranet.
-
Email service: It maintains a queue of all notification requests generated by identity stores, and sends them one by one. This service is deployed for each cluster.
-
Scheduler service: This service initiates schedule runs for scheduled jobs defined in Directory Manager. Directory Manager configures this service for each cluster.
Step 14 – Click Next.
NOTE: If you configure a Group Managed Service Account (gMSA) as an App Pool service account then the Directory Manager Configuration tool will add this account in the local administrators and IIS_IUSRS groups.
NOTE: If you configure a normal user account as an App Pool service account and an AD identity store is created with a gMSA service account, then the App Pool service account must have the PrincipalsAllowedToRetrieveManagedPassword property. The App Pool service account also must be a member of Backup Operators and IIS_IUSRS groups.
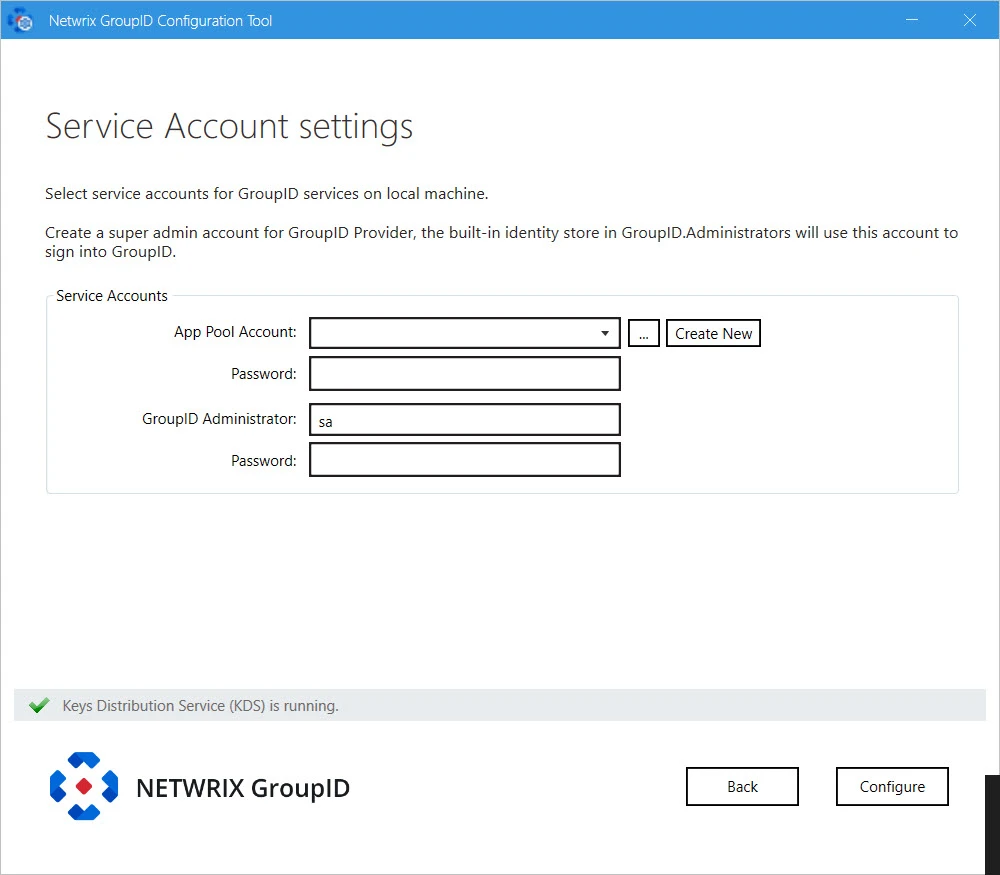
Step 15 – Directory Manager enables you to specify the service accounts to use for the Directory Manager App Pool and a default Administrative account for Directory Manager Admin Center.
Service Service Account Description Directory Manager App Pool Use a domain account or a Group Managed Service Account (gMSA). The account must be a member of the Administrators group or both the Backup Operators and IIS_IUSRS groups. The account you specify will be used to manage the Directory Manager app pool in IIS. Directory Manager Data Service, Security Service, and the portals run under the app pool. By default, a local account, GroupIDSSuser, is set for the Directory Manager app pool, but you cannot proceed unless you change it to a domain account or gMSA. You can specify a local account (with local administrator rights) in app pool for a machine that is not joined to any domain (this applies to an Microsoft Entra ID identity store only). Directory Manager Administrator Use this account as default Administrative account for first time login to Directory Manager Admin Center. This account is not associated with any identity store, but one that is specific to Directory Manager. This account works as an Admin of all Admin accounts of defined identity stores in Admin Center. NOTE: For Directory Manager App Pool, a domain account can be used for a machine joined to a domain.
NOTE: Before you use a Group Managed Service Account, make sure that:
- Key Distribution Service (KDS) is enabled on the Directory Manager machine.
- Microsoft AD module for PowerShell is installed on the machine.
Step 16 – You can specify a service accounts for the app pool in any of the following ways:
-
Use an existing account: Click Browse.
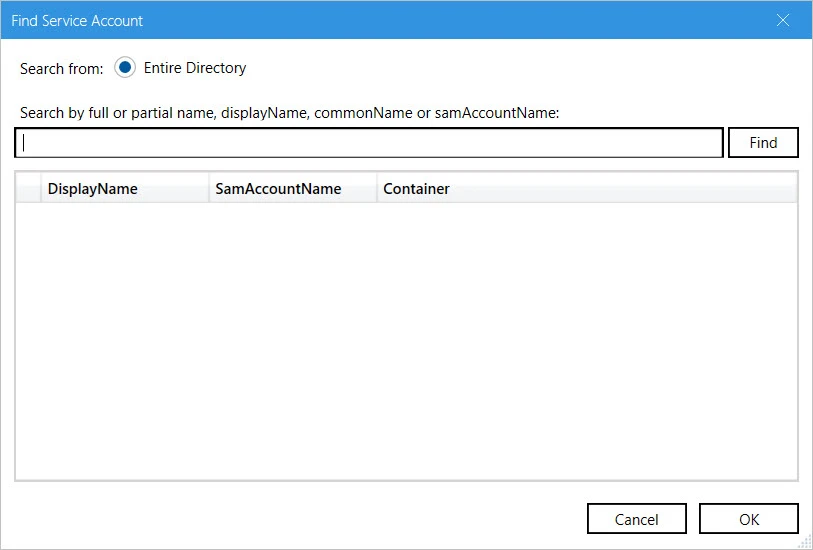
On the Find Service Account dialog box, search and select the required account and click OK.
-
Create a new service account: Click the Create New button on the Service Account Setting page.
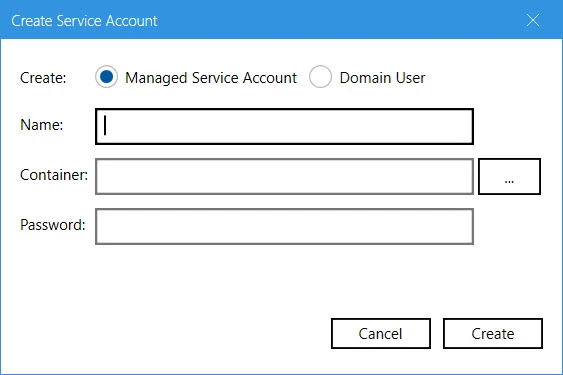
On the Create Service Account dialog box, select the kind of account you want to create. Enter a name, container and password for the account. Click Create.
NOTE: The logged-in user must have appropriate rights to create a new account.
NOTE: If Key Distribution Service (KDS) is not configured in the environment, a warning will be displayed that you cannot use a Group Managed Service Account.
Step 17 – Provide password for the App Pool service account (except for a Group Managed Service Account) in the Password box.
Step 18 – Provide password for the Directory Manager Administrator account in the Password box.
Step 19 – Click Configure.
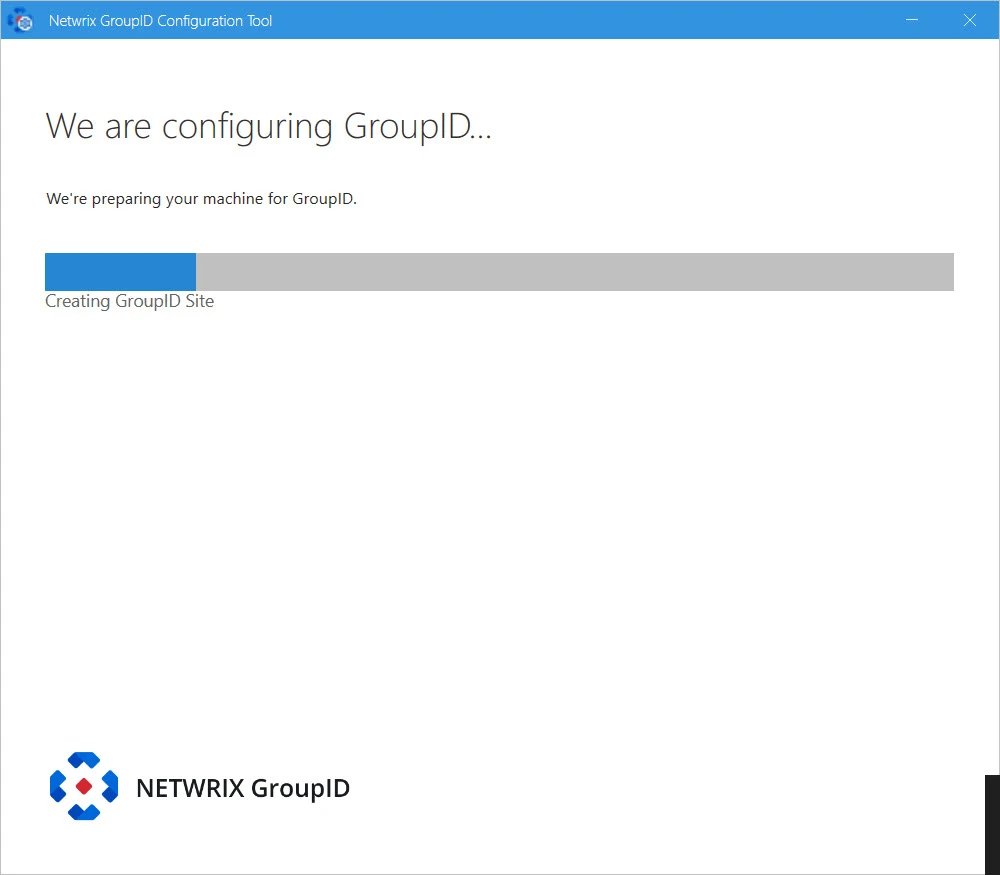
We are configuring Directory Manager page displays the progress while a Directory Manager server is configured on the machine.
While configuring the machine, the Configuration Tool checks the application’s signing key status and update it according to your Directory Manager environment. See the Update Signing Key topic for information how Configuration Tool will update Directory Manager's Signing Key.
On successful configuration, the Directory Manager is successfully configured page is displayed and Directory Manager is configured on your machine.
Step 20 – Click Launch GroupID on the Directory Manager is successfully configured page to start using Directory Manager. The Sign In page opens:
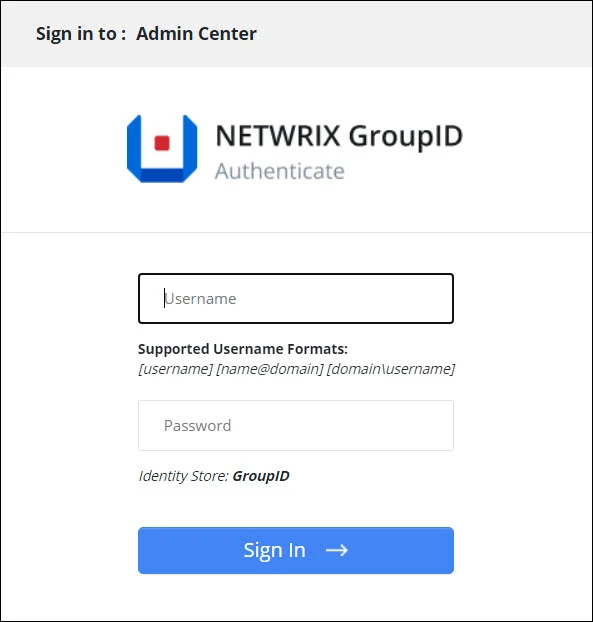
To login in to Directory Manager Admin Center for the first time, provide Directory Manager Administrator user name and password.
or
click Next to launch the Upgrade wizard for upgrading Directory Manager.