The ‘Send on Behalf’ and ‘Send As’ Permissions
Using the portal, a user can delegate the Send on Behalf and Send As permissions to other objects.
The Send on Behalf Permission
The Send on Behalf permission in Microsoft Exchange and Office 365 allows a user to send an email as another user, while showing the recipient that it was sent from a user on behalf of another user.
For example, when User A grants Send on Behalf permissions to User B, then User B can send email on behalf of User A. User B will be able to choose User A’s email address in the ‘From’ field when composing a message in Outlook. Message recipients will see both User A’s address and User B’s address, as the ‘From’ address will read as:
From: Mailbox <User B's address> on behalf of Mailbox <User A’s address>.
The Send As Permission
The Send As permission in Microsoft Exchange and Office 365 enables a user to send a message as another user. For example, when User A grants Send As permissions to User B, User B will be able to choose User A’s email address in the ‘From’ field when composing a message in Outlook. This message, while sent by User B, will appear as sent by User A.
Prerequisites for the Send As and Send on Behalf Permissions
In the following content, a ‘target object’ refers to the object that can add other objects to its Send As and Send on Behalf lists using the portal.
- The target object can be a mailbox or a mail-enabled group.
- Microsoft Exchange or Office 365 must be configured as the messaging provider for the identity store.
- An SMTP server must be configured for the identity store.
- The user logged in the portal must have the “Manage any Profile” permission for its respective role in the identity store.
- The XAdPermissionExtendedRights attribute should be available for Send As and the publicDelegates attribute should be available for Send on Behalf.
- The ExchangeTrustedsubsystem object should have modify permissions on the target objects in Active Directory for the Send As permission to be set using the portal. For more information, see Access denied when you try to give user "send-as" or "receive as" permission for a Distribution Group in Exchange Server.
What do you want to do?
Set up the Send As Feature
You can provide the Send As setting on any tab of an object’s properties page in the portal. This would enable the object to delegate the Send As permission to users.
-
In Admin Center, select Applications in the left pane.
On the GroupID Portal tab, a portal's card displays its info. -
Click the ellipsis button for a portal and select Settings.
-
Select an identity store under Design Settings to customize the portal for it.
All identity stores linked with the portal are listed under Design Settings. You can design a different portal for each of these. -
Click Properties in the left pane. The Properties page is displayed.
-
In the Select Directory Object drop-down list, select a Mailbox or Group object to add the Send As setting to its properties page. The Name list displays the tabs on the object’s properties page.
-
Click Edit for a tab (for example, the Email tab).
The Edit Design Category pane is displayed, with the Fields area displaying the fields on the tab. -
Click Add Field to add the Send As field. The Add Field pane is displayed.
-
In the Field drop-down list, select the XAdPermissionExtendedRights attribute.
-
In the Display Name box, provide a label for the field, such as ‘Send As Permissions’. The Send As field will be displayed with this name in the portal.
-
In the Display Type drop-down list, select ‘DNs’.
-
In the Visibility Level drop-down list, select a security role. The Send As field would be visible to users of this role and roles with a priority value higher than this role. It would not even be visible to group owners (for their respective groups) and user managers (for their direct reports) if they fall in a lower priority role. See Priority.
- Select Never to hide the field from all users.
- Select Manager and Owner to make the field visible only to the owner (in case of a group) or manager (in case of a mailbox). It would be hidden from other users, such as group members or the mailbox itself. In other words, the field would be visible to group owners for their respective groups and to managers for their respective direct reports in the portal.
- If you have selected ‘Mailbox’ in the Select Directory Object list, the Self option is also available in the Visibility Level drop-down list. Select Self to make the field visible only to the mailbox on his or her properties page. It would not be visible to any other user, such as a role with a higher priority value or a role with the ‘Manage any profile’ permission in the identity store.
-
In the Access Level drop-down list, select a security role. Users of this role and roles with a priority value higher than this role can add and update the value of the Send As field, i.e., add and remove objects in the Send As list. If group owners/user managers fall in a lower priority role, they would not be able to update the value of the field for their respective groups/direct reports.
- Select Never to make the field read-only for all users.
- Select Manager and Owner to enable only the owner (in case of a group) or manager (in case
of a mailbox) to specify or modify the value of this field. It would be read-only for other
users, such as group members or the mailbox itself.
In other words, only group owners can specify or modify the value of this field for their respective groups in the portal. A role with a higher priority value cannot change the value; group members cannot change the value; and even a role with the ‘Manage any Group’ permission in the identity store cannot change the value.
Similarly, only mailbox managers can specify or modify the value of this field for their respective direct reports in the portal. A role with a higher priority value cannot change the value; and even a role with the ‘Manage any profile’ permission in the identity store cannot change the value. - If you have selected ‘Mailbox’ in the Select Directory Object drop-down list, the Self option is available in the Access Level drop-down list. Select Self to enable the mailbox to specify or modify the value of the field. It would be read-only for other users, such as the mailbox’s manager or a role with a higher priority value or even a role with the ‘Manage any profile’ permission in the identity store.
-
As mentioned for access level and visibility level, the field is editable and visible to members of the selected role and roles with a priority value higher than the selected role.
In the Exclude Roles area, select the check boxes for the higher priority role(s) to deny them access and visibility on the field. -
Use the Search Object Types area to specify the object types that can be searched on the portal’s Find dialog box, to set as value for the Send As field.
The following display types support the Find dialog box:- DN
- DNs
- Custom display types created with the Grid type
When you select any of these display types, GroupID identifies that the value for the Send As field has to be searched using the Find dialog box. The Search Object Types area is displayed, where you can select the required object type(s). For example, if you select User, only user objects can be searched and selected as value for the field.
-
Select the Is Required check box to make it mandatory for users to add at least one object to the Send As list.
-
Select the Is Read Only check box to make the Send As field read-only.
-
Click OK on the Add Field pane and the Edit Design Category pane.
-
Click Save on the Properties page.
The Send As Field in the Portal
Launch the portal and go to the properties of the target object (group or mailbox) you defined the Send As field for, then click the respective tab. The Send As field is displayed as follows:
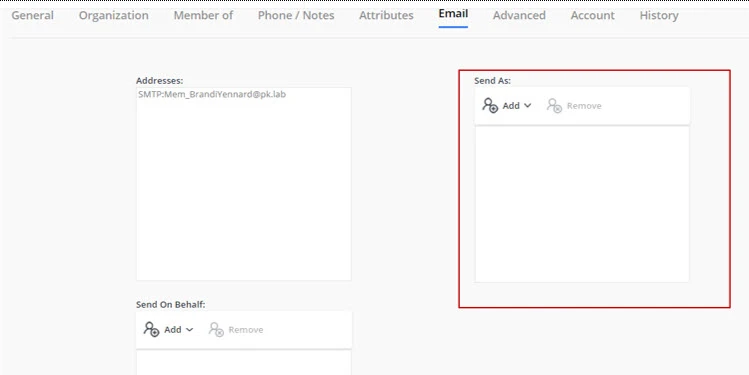
Use the Add and Remove buttons to add and remove objects in the Send As list. The added objects can send email for the target object in accordance with the Send As functionality.
Set up the Send on Behalf Feature
You can provide the Send on Behalf setting on any tab of an object’s properties page in the portal. This would enable the object to delegate the Send on Behalf permission to users.
-
In Admin Center, select Applications in the left pane.
On the GroupID Portal tab, a portal's card displays its info. -
Click the ellipsis button for a portal and select Settings.
-
Select an identity store under Design Settings to customize the portal for it.
All identity stores linked with the portal are listed under Design Settings. You can design a different portal for each of these. -
Click Properties in the left pane. The Properties page is displayed.
-
In the Select Directory Object list, select a Mailbox or Group object to add the Send on Behalf setting to its properties page. The Name list displays the tabs on the object’s properties page.
-
Click Edit for a tab (for example, the Email tab).
The Edit Design Category pane is displayed, with the Fields area displaying the fields on the tab. -
Click Add Field to add the Send on Behalf field. The Add Field pane is displayed.
-
In the Field drop-down list, select the publicDelegates attribute.
-
In the Display Name provide a label for the field, such as ‘Send on Behalf Permissions’. The Send on Behalf field will be displayed with this name on the portal.
-
In the Display Type drop-down list, select ‘DNs’.
-
In the Visibility Level drop-down list, select a security role. The Send on Behalf field would be visible to users of this role and roles with a priority value higher than this role. It would not be visible to group owners (for their groups) and user managers (for their direct reports) if they fall in a lower priority role. See Priority.
- Select Never to hide the field from all users.
- Select Manager and Owner to make the field visible only to the owner (in case of a group) or manager (in case of a mailbox). It would be hidden from other users, such as group members or the mailbox itself. In other words, the field would be visible to group owners for their respective groups and to managers for their respective direct reports in the portal.
- If you have selected ‘Mailbox’ in the Select Directory Object list, the Self option is also available in the Visibility Level drop-down list. Select Self to make the field visible only to the mailbox on his or her properties page. It would not be visible to any other user, such as a role with a higher priority value or a role with the ‘Manage any profile’ permission in the identity store.
-
In the Access Level drop-down list, select a security role. Users of this role and roles with a priority value higher than this role can add and update the value of the Send on Behalf field, i.e., add and remove objects in the Send on Behalf list. If group owners/user managers fall in a lower priority role, they would not be able to update the value of the field for their respective groups/direct reports.
- Select Never to make the field read-only for all users.
- Select Manager and Owner to enable only the owner (in case of a group) or manager (in case
of a mailbox) to specify or modify the value of this field. It would be read-only for other
users, such as group members or the mailbox itself.
In other words, only group owners can specify or modify the value of this field for their respective groups in the portal. A role with a higher priority value, group members, or a role with the ‘Manage any Group’ permission in the identity store cannot change the value.
Similarly, only mailbox managers can specify or modify the value of this field for their respective direct reports in the portal. A role with a higher priority value or a role with the ‘Manage any profile’ permission in the identity store cannot change the value. - If you have selected ‘Mailbox’ in the Select Directory Object drop-down list, the Self option is available in the Access Level drop-down list. Select Self to enable the mailbox to specify or modify the value of the field. It would be read-only for other users, such as the mailbox’s manager or a role with a higher priority value or even a role with the ‘Manage any profile’ permission in the identity store.
-
As mentioned for access level and visibility level, the field is editable and visible to members of the selected role and roles with a priority value higher than the selected role.
In the Exclude Roles area, select the check boxes for the higher priority role(s) to deny them access and visibility on the field. -
Use the Search Object Types area to specify the object types that can be searched on the portal’s Find dialog box, to set as value for the Send on Behalf field.
The following display types support the Find dialog box:- DN
- DNs
- Custom display types created with the Grid type
When you select any of these display types, GroupID identifies that the value for the Send on Behalf field has to be searched using the Find dialog box. The Search Object Types area is displayed, where you can select the required object type(s). For example, if you select User, only user objects can be searched and selected as value for the field.
-
Select the Is Required check box to make it mandatory for users to add at least one object to the Send on Behalf list.
-
Select the Is Read Only check box to make the Send on Behalf field read-only.
-
Click OK on the Add Field pane and the Edit Design Category pane.
-
Click Save on the Properties page.
The Send on Behalf Field in the Portal
Launch the portal and go to the properties of the target object (group or mailbox) you defined the Send on Behalf field for, then click the respective tab. The Send on Behalf field is displayed as follows:

Use the Add and Remove buttons to add and remove objects in the Send on Behalf list. The added objects can send email on behalf of the target object in accordance with the Send on Behalf functionality.
See Also