Service Account for Active Directory and Exchange
You must have a service account to connect an identity store to an Active Directory domain. GroupID uses the account to access objects in Active Directory. If Microsoft Exchange is configured as the messaging provider for the identity store, you can also delegate permissions to this account to access Exchange objects.
You can use an existing account, provided it has the required permissions, or you can create a new one. Instructions for both options are discussed in the following sections, although it is recommended that you create a new service account rather than using an existing account.
NOTE: You must add the service account to the membership of the Local Administrator group of the member server on which GroupID is installed.
What do you want to do?
- Use an Existing Account as a Service Account
- Create a New Service Account
- SQL Server Account and Database Permissions
Use an Existing Account as a Service Account
Verify that the account that you want to use as a service account has the following Active Directory and Exchange permissions:
Exchange permissions are required if Microsoft Exchange is configured as the messaging provider for the identity store.
| Active Directory | Recommended: Domain Admins Minimum permissions: - Grant Permissions to Create and Delete Users, Contacts, and Groups - Grant Permissions to Modify Users, Contacts, and Groups See the Create a New Service Account topic for instructions on modifying the service account to grant the required permissions. |
| Exchange 2013/2016/2019 | Recipient Management |
Create a New Service Account
If you do not have a service account, you need to create one. Follow the three sets of instructions in this section to:
-
Create a Service Account:
-
Delegate Active Directory Permissions to the New Account:
-
Delegate Exchange Permissions to the New Account:
f Exchange is configured as the messaging provider for the identity store)
Create a Service Account:
-
Select either:
-
Server Manager from the Windows Start screen.
Or
-
Server Manager from the Quick Launch toolbar available by default on the Windows taskbar.
Or
-
Administrative Tools from the Windows Start screen.
-
-
In case of Server Manager selection, select Tools > Active Directory Users and Computers.
In case of Administrative Tools selection, select the Active Directory Users and Computers option in the Name column. -
In the directory tree, select the required container, point to New, and then click User. The New User dialog box is displayed.
-
Enter the required information for the user.
After creating the user, you can click the container to view the newly created user.
Delegate Active Directory Permissions to the New Account:
In the Active Directory Users and Computers console:
-
Select Advanced Features from the View menu.
-
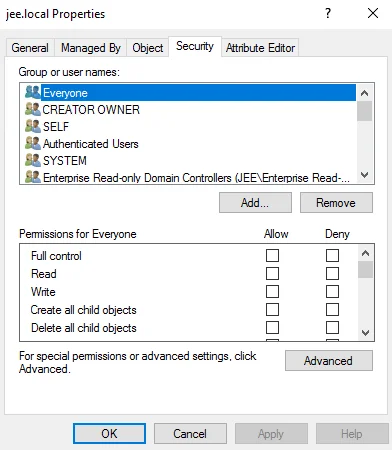
In the left pane, right-click the domain name or organizational unit and select the Properties option. On the Properties window, select the Security tab.
-
Click the Advanced button; the Advanced Security Settings window is displayed.

-
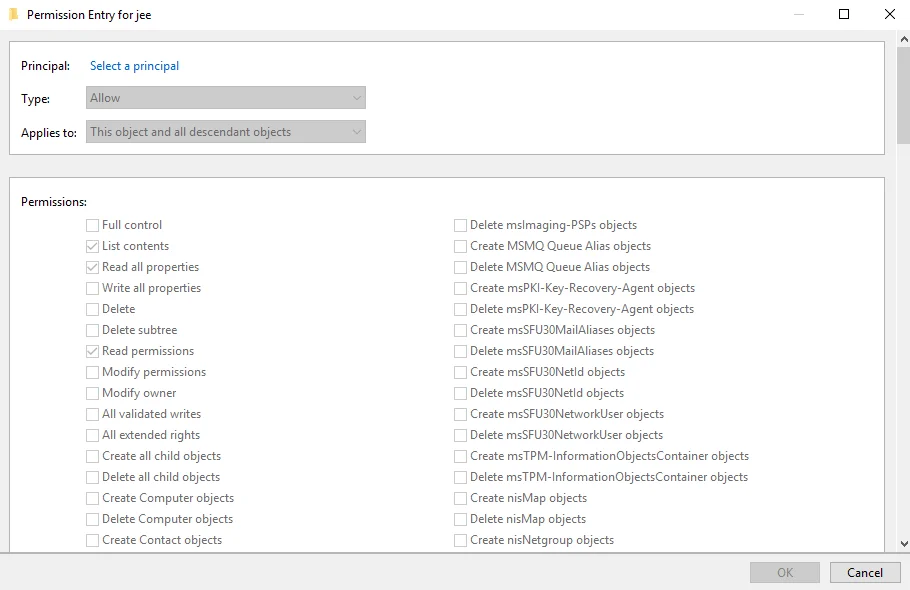
Click the Add button. The Permission Entry window is displayed.
-
Click the Select a principal link next to Principal. The Select User, Computer, Service Account, or Group dialog box is displayed.
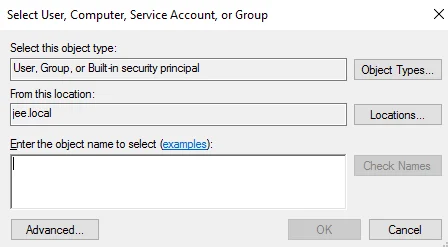
Type the name of the service account in the Enter the object name to select box. Click OK. The Permissions Entry window is displayed with all fields enabled (see step 4).
-
In the Applies to box, select This object and all descendant objects.
-
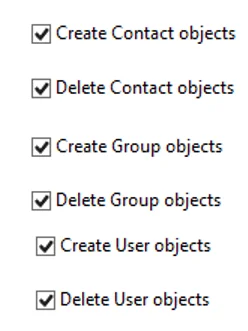
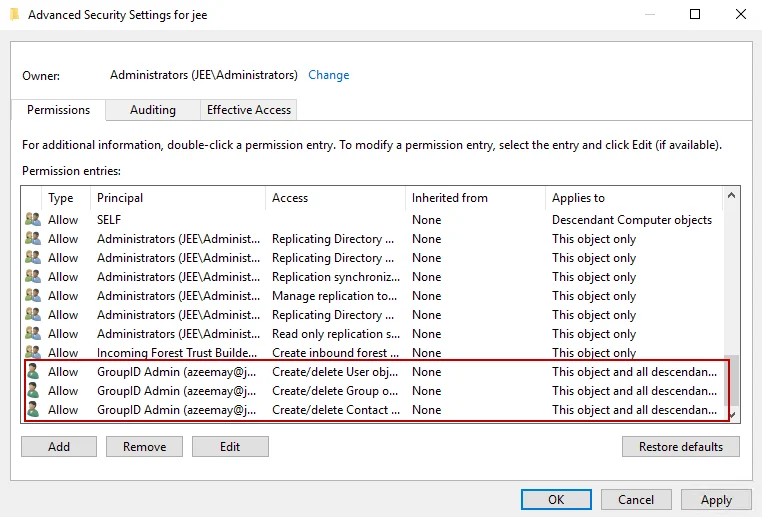
Grant Permissions to Create and Delete Users, Contacts, and Groups.
-
Scroll down the list of permissions in the Permissions box and select the check boxes for the options shown below:
-
Click OK. The granted permissions appear in the Advanced Security Settings window as shown below:
-
-
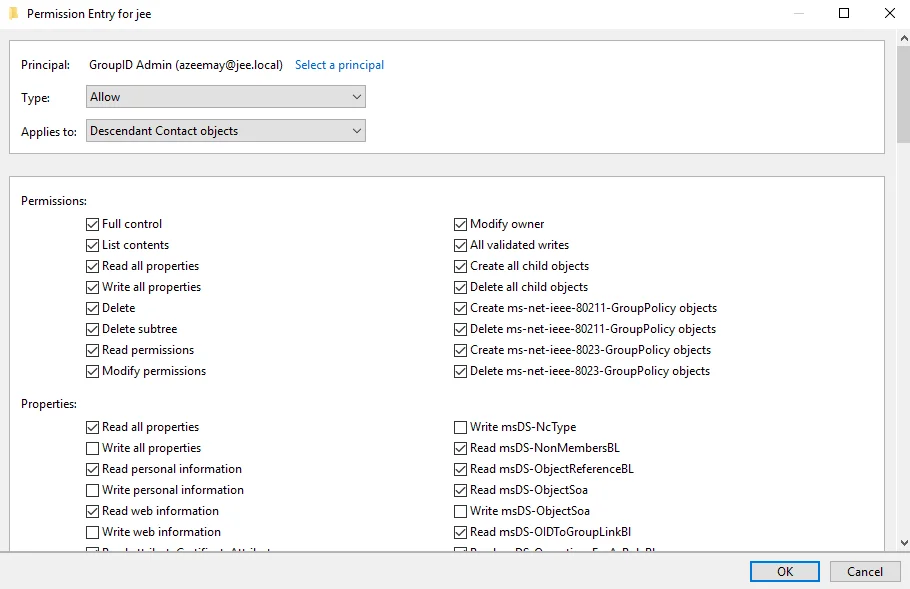
Grant Permissions to Modify Users, Contacts, and Groups.
-
Click the Add button on the Advanced Security Settings window. The Permission Entry window is displayed (see step 4).
-
Click the Select a principal link next to Principal. The Select User, Computer, Service Account, or Group dialog box is displayed. Type the name of the service account in the Enter the object name to select box and click OK. The Permissions Entry window is displayed.
-
In the Applies to box, select the Descendant Contact objects option and select the Full control check box in the Permissions area. It is as follows:
-
Click OK. The granted permissions appear in the Advanced Security Settings window as shown below:
-
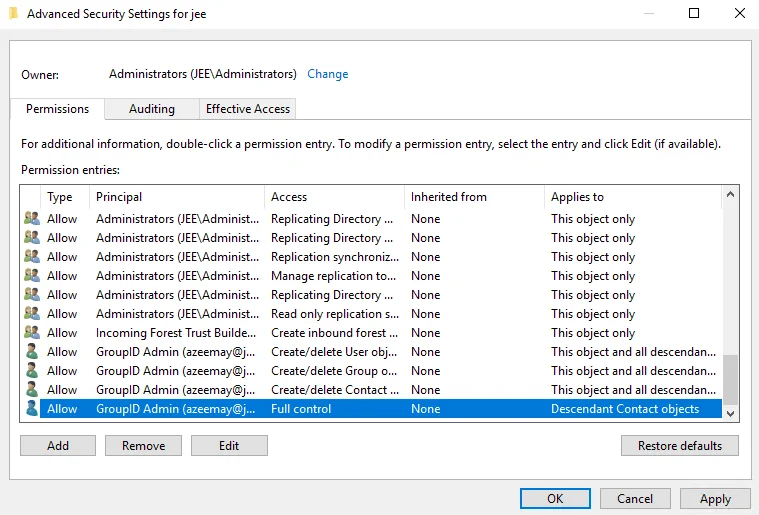
Repeat steps a – d for Descendant Group objects and Descendant User objects on the Permission Entry window.
The service account now has permissions to modify users, contacts, and groups. These permissions appear in the Advanced Security Settings window. It is as shown below:
-
-
Click OK.
Delegate Exchange Permissions to the New Account:
In addition to Active Directory permissions, the service account also needs access permissions for Exchange, when Exchange is configured as the messaging provider for the identity store.
Instructions for delegating permissions for each supported Exchange Server version are as follows.
For Exchange Server 2013/2016/2019:
Launch Exchange Management Shell and type the following command:
Add-RoleGroupMember "Recipient Management" -Member domain name\user
SQL Server Account and Database Permissions
See the Authentication Modes topic for information about the roles and permissions the SQL server and database accounts must have for SQL Server Authentication mode and for Windows Authentication mode.
See Also