Migrate Document
This action copies or moves a document between content sources (from 'source' to 'destination'). Simple migration copies the file and any document properties. All content source types support simple migration. The following table lists the migration action properties specific to different content source types.
| Type | As 'source' | As 'destination' | Migration Config Type | Supports structured migration? | Move? | Update source item? | Mark source 'read-only'? |
|---|---|---|---|---|---|---|---|
| Exchange | Yes | No | Yes | No | No | No | |
| File System | Yes | Yes | Custom -File Share | Yes | Yes | Yes | Yes |
| Google Drive | Yes | Yes | Source (Google Drive account) | Yes | No | No | No |
| SharePoint | Yes | Yes | Custom -SharePoint Site Collection | Yes | Yes | Yes | No |
| SQL and other databases | Yes | No | Yes | No | No | No |
IMPORTANT! Before you add the Migration action to your workflow, you should configure migration destinations. See Configure destinations for Migration action.
When you run the Workflow wizard and select Migration as an action, the wizard prompts you to configure related settings.
To configure migration using Workflow wizard:
On the What do you want to do step, select the Migrate Document action, then do the following:
-
Specify migration source and folder:
-
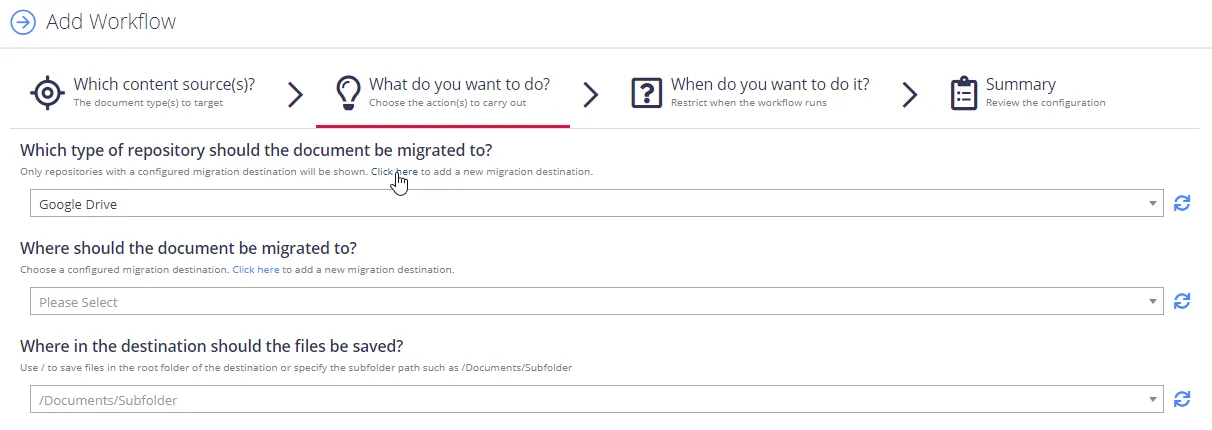
Select the migration destination type under Which type of repository do you want to migrate the document to? You can add a migration destination directly from the wizard:
-
If you created several sources for migration destinations, select one under Where should the document be migrated to?
-
For Google Drive, you need to specify subfolder to save your files in the Where in the destination should the files be saved? field.
-
-
Configure migration options:
Option Description Replicate folder structure If the source system supports it, the product creates subfolders in the migration destination to match the relative path in the source. For Exchange, this also includes a folder for the mailbox name (i.e., \MigrationDestination\User@domain.com\Inbox\HR). Copy or Move the document Select one of the following: - Copy - Move Mark Source as Read-only You can mark the original item as read only. What action should be taken if the document already exists at the destination Select action to perform: - Replace - Append Counter - Append Migration Date Create a stub file? - Don't create - Create a stub file What should the stub file contain? When you move a file, you can optionally create a stub file in its original location showing the file's new location. You can configure the content of that file. Redact the document If the source system supports updating the source item, you can use this option to apply the redaction plan to the source document after successful migration. NOTE: This option is only available when performing a copy.
Creating a stub file
In Netwrix Data Classification (NDC), when you move a file from one storage to another, the product creates a stub file in .txt format. The stub file notes that the product transferred the file to a certain location.
While creating a stub file, you can leave a message describing where the product migrated the document and why. You can use the dropdown list to add metadata from the document to the stub file message, as shown in the following image:

Applying the redaction
When you configure a workflow to migrate content from one location to another, you can opt to redact specific content from those documents. Your security policy or a compliance regulation might require redaction. For example, you may need to remove SSN from your file.
To use redaction in a workflow, you need to set up one or more redaction plans. You can choose to redact the predefined entities by selecting the plans from the dropdown list on the following screenshot, or create custom groups of entities first.

If redaction fails for files such as PDFs that had OCR with images and that the product can't fully recognize, the product quarantines these files, leaving a stub file instead of a redacted file.
To modify action settings for the certain workflow, select the workflow and use the Advanced UI window. See Modify Migration action settings for more information.