Exchange Mailbox
Use the Exchange Mailbox source to enable the crawling and classification of content stored in a single Exchange mailbox on the on-premises Exchange server or Exchange Online.
- In Netwrix Data Classification management console, open the Sources view and click Add.
- Select Exchange Mailbox source type and in the properties window specify the necessary settings.
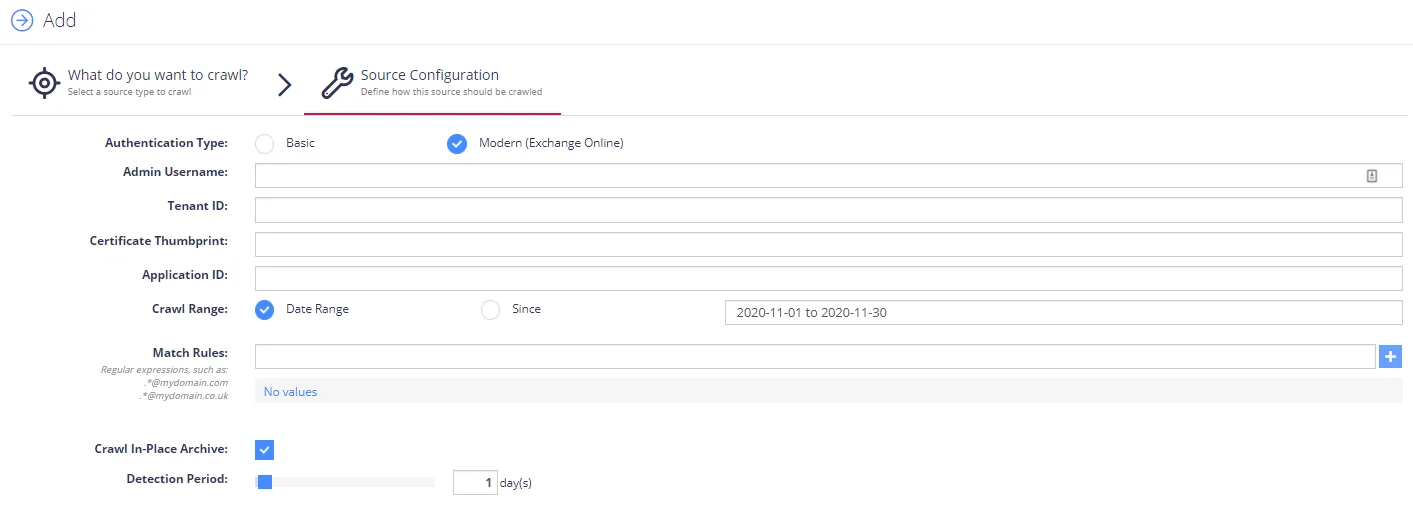
Authentication type: Modern authentication
If you plan to use this authentication type (available only for Exchange Online mailbox processing), specify the following:
| Option | Description |
|---|---|
| Authentication type | Select Modern (Exchange Online) |
| Admin Username | Specify the administrative account for the required Exchange Online organization. |
| Tenant ID | Enter the Tenant ID you obtained at Step 5: Obtain Tenant ID. |
| Certificate thumbprint | Enter the certificate thumbprint you prepared at Step 4: Configure Certificates & secrets. |
| Application ID | Enter the app ID you got at application registration at Step 2: Create and Register a new app in Azure AD (it can be found in the Azure AD app properties >Overview). |
Authentication type: Basic
If you plan to use this authentication type, you will need to specify the following:
| Option | Description | Comments |
|---|---|---|
| Email Address / Password | Administrator account that has been assigned both: 1. Impersonation right 2. Discovery Management role | See Configure Microsoft Exchange for Crawling and Classification for details on the rights assignment. |
Other configuration settings
By default, only basic settings are displayed. To view advanced options, click the "wrench" icon at Settings in the bottom.
| Option | Description | Comments |
|---|---|---|
| Basic settings | ||
| Mailbox | Mailbox to be crawled. | When using impersonation, the settings can be like the following example: - Email Address - administrative account granted Impersonation right, e.g. administrator@cs.com - Mailbox - target mailbox, e.g. test@cs.com. |
| Crawl Range | Define what portions of data should be retrieved from the Exchange server: - Select Date Range to crawl a static set of data within the required interval. - Select Since if you want to periodically re-crawl content from the specified date, taking into account the last crawl date for each object. | |
| Crawl In-Place Archive | Select this option if you want to crawl Exchange Online in-place archive mailboxes. | Applies to Exchange Online. |
| OCR Processing Mode | Set the processing mode for document images: - Disabled - document images will not be processed - Default - defaults to the source setting (if configuring a path) or the global setting (if configured on a source) - Normal - process the images with normal quality settings - Enhanced - upscale the images further to allow more accurate results. | The Enhanced mode will provide better accuracy but can lead to longer processing time if the images do not contain text. |
| Source Group | Select the source group (if any). | |
| Pause source on creation | Select if you want to make other configuration changes before data collection occurs. | |
| Advanced settings | ||
| Build Search Index | Select if you want search index to be created. | |
| Re-Index Period | Specify how often the source should be checked for changes. Default is 7 days. | Netwrix recommends using default values. |
| Priority | Set priority for this data source to be crawled. Select the priority level from the list values: - Highest - High - Normal - Low - Lowest | |
| Document Type | Specify a value which can be used to restrict queries when utilizing the Netwrix Data Classification search index. |