Sync Service Installation
The Sync Service runs as a Windows service. Change Tracker supports only a single instance of the service. Run the installer executable, following the installer wizard steps in order.
Requirements
- Windows Server 2022
- Change Tracker 8
Upgrading Existing Installations
Normally, the upgrade process involves running the new installer and clicking Next through the wizard. Previously configured values become the new defaults (existing passwords aren't visible).
Version 2.2 is the exception. When upgrading to 2.2 or later, uninstall installations before 2.2
first, using the unins000 application in
C:\Program Files\NNT Change Tracker Suite\Gen7SyncService.
Make a copy of the Gen7SyncService.exe.config file as this will contain all the settings for the
Sync Service.
Then remove the following folders:
C:\Program Files\NNT Change Tracker Suite\Gen7SyncServiceC:\Program Data\NNT\syncservice
You can then proceed with a normal install.
Replace the contents of the Gen7SyncService.dll.config file with the contents of the config file
backed up earlier. If no backup is available then enter new configuration during the install wizard.
Select Components
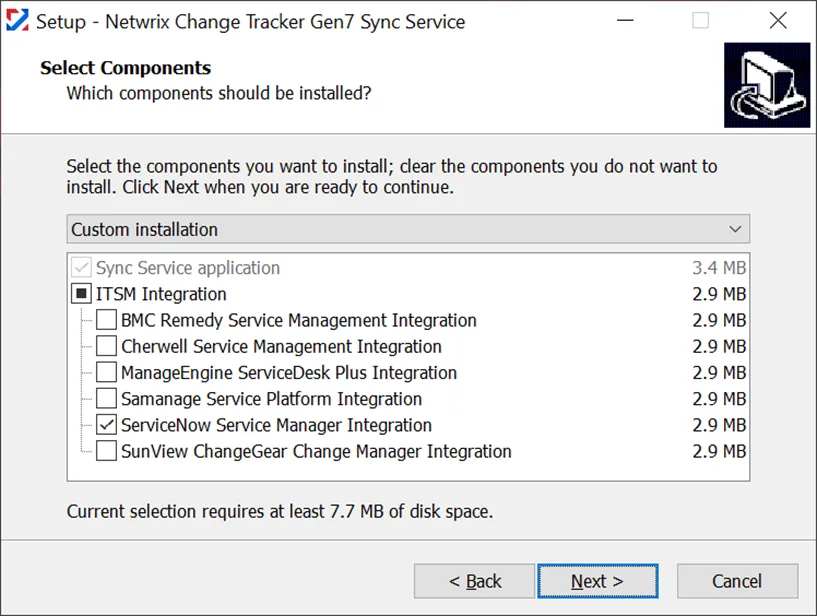
Under the “ITSM Integration” option, select one ITSM system to integrate with. For brevity this document describes the steps for a ServiceNow setup, but the steps vary little between ITSMs.
Change Tracker Hub Connection
Enter the required configuration values:
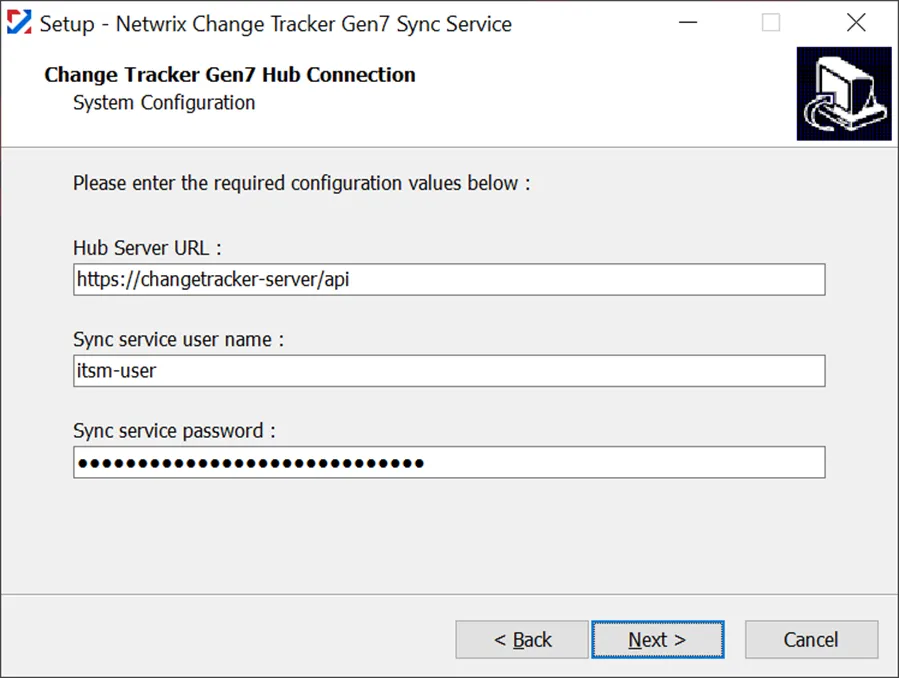
- In the “Hub Server URL” field, specify the URL for your Change Tracker REST API endpoint, e.g. https://changetracker-server/api
- In the “Sync service username” and “Sync service password” fields, enter the credentials for the Change Tracker user account which the service should use to connect to Change Tracker. Netwrix recommends creating a user account specifically for this purpose. Note: Change Tracker includes an “ITSM” role that already has the necessary permissions.
Authentication
Select which type of authorization to use:
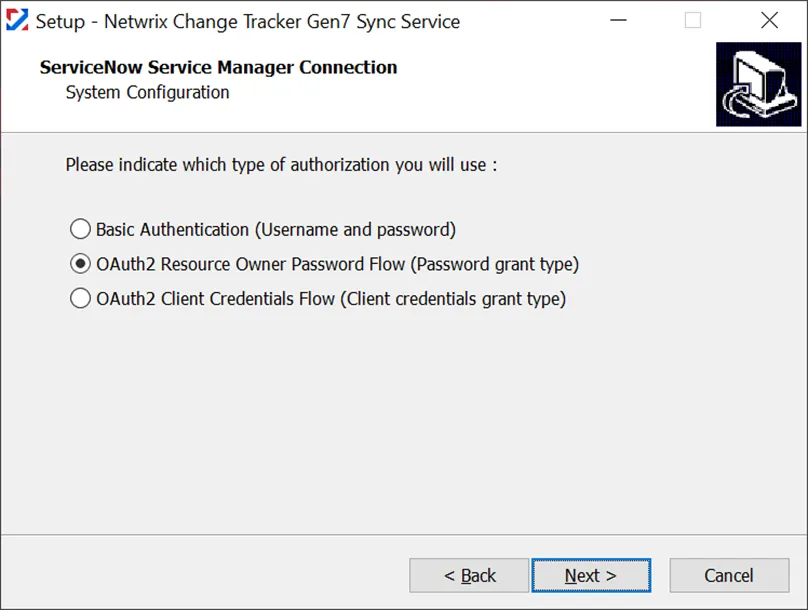
- Basic (provide Username / Password of a ServiceNow user account only). Use when OAuth authorization isn't available. The Sync Service sends the encoded credentials in the headers of every HTTP request.
- OAuth2 Resource Owner Password Flow (provide Username / Password of a ServiceNow user account, and Client ID / Client Secret of a ServiceNow OAuth application). Use with an OAuth application registration native to ServiceNow.
- OAuth2 Client Credentials Flow (provide Client ID / Client Secret of an OAuth application). Use if an OAuth application not registered with ServiceNow (e.g., Apigee) requires it.
ITSM URLs
Enter the required configuration values:
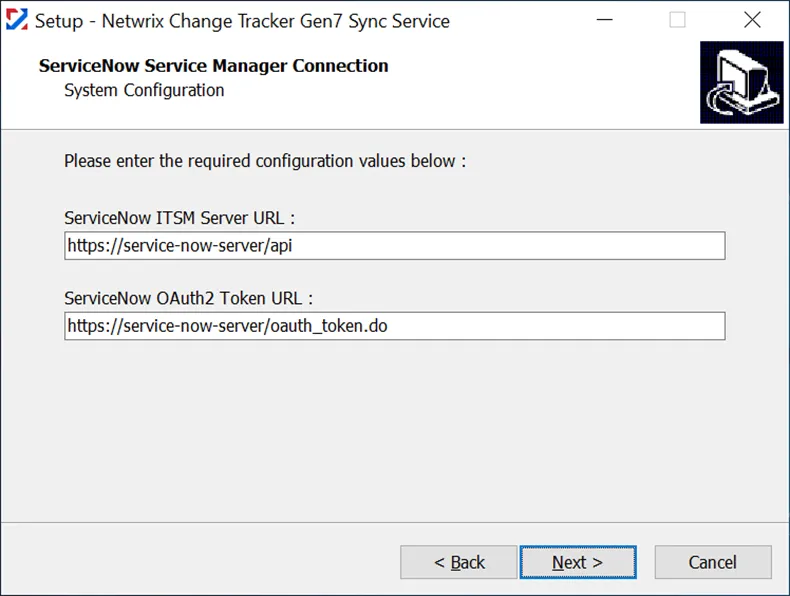
- In the “ServiceNow ITSM Server URL” field, specify the URL for your ServiceNow REST API endpoint, e.g. https://service-now-server/api
- In the “ServiceNow OAuth2 Token URL” field (not applicable if using Basic Authentication), specify the URL for your OAuth2 token endpoint, e.g. https://service-now-server/oauth_token.do
ITSM Account
Create a ServiceNow account specifically for the Sync Service to connect with. Configure the Sync Service to use the same time zone as this ServiceNow account. Because UTC isn't an option for a user's time zone in ServiceNow, the Sync Service defaults to GMT. The only requirement here is for the time zones to match, so the easiest approach is to use GMT for the ServiceNow user. However, you can configure the Sync Service to use a different time zone instead by setting the serviceNow.timeZone element in the Sync Service configuration file (see the administration page for instructions).
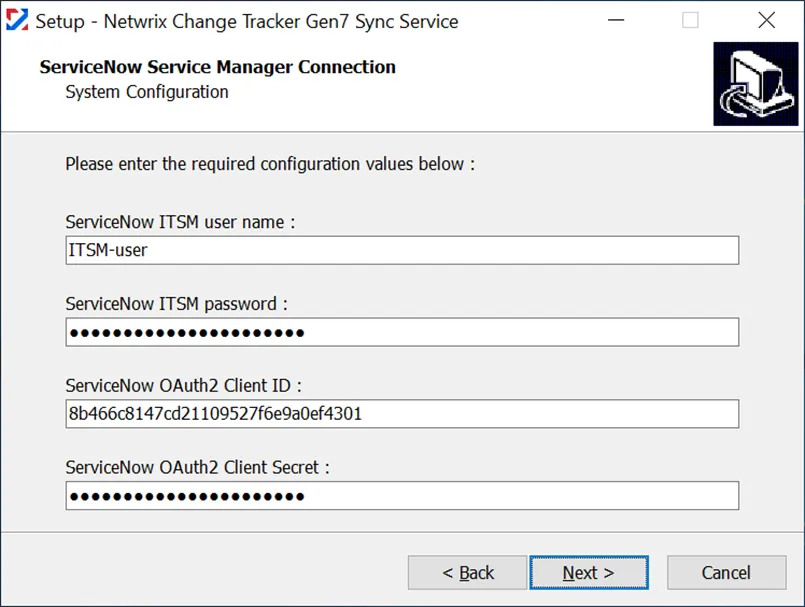
- In the “ServiceNow ITSM username” and “ServiceNow ITSM password” fields (not applicable if using OAuth2 Client Credentials), enter the credentials for the ServiceNow user account which the service should use to connect to ServiceNow.
- In the “ServiceNow OAuth2 Client ID” and “ServiceNow OAuth2 Client Secret” fields (not applicable if using Basic Authentication), enter the Client ID and Client Secret associated with the OAuth application registration.