Hub
Ensure the Hub's requirements are met and that the server has had any OS updates applied and has been restarted. See the Hub Installation for Windows topic for additional information.
Before installing Change Tracker, decide how Change Tracker stores its data. Change Tracker uses the MongoDB database to store all of its event data and configuration. The most common approach (and the default) is to run the installer and let it install the version of MongoDB shipped with it. This is the latest patch to the latest Long Term Support (LTS) version of the community edition of MongoDB. This edition of MongoDB lacks many of the features available in the Enterprise edition as described in MongoDB's Upgrade MongoDB Community to MongoDB Enterprise article.
You can also configure Change Tracker to use an existing instance of MongoDB instead of the bundled community edition. This is useful if you need or want any of the following:
- MongoDB Enterprise Edition
- A clustered install of MongoDB
- Full control of the MongoDB installation
No matter the MongoDB edition or install location, you should plan and manage regular patching and backups.
Installation
Download the installer from the customer portal. The installer uses a wizard to configure the installation. Running a later version of the installer on a server that already has a Change Tracker Hub installed updates the installation.
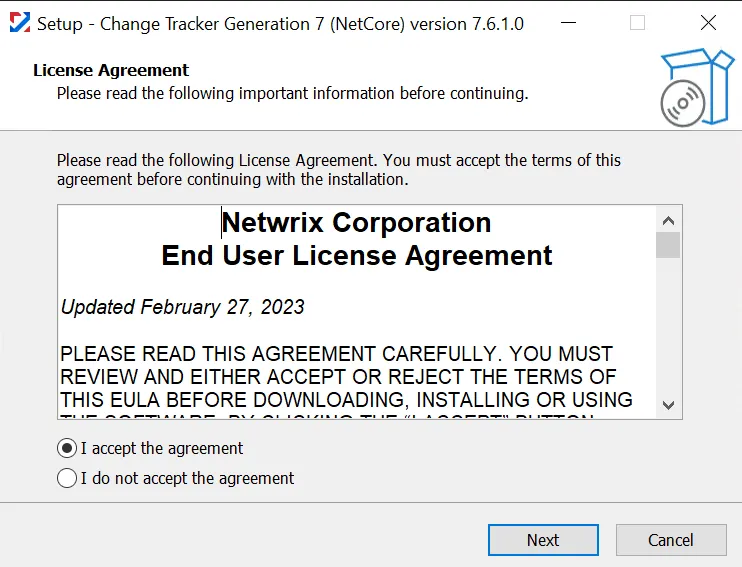
Step 1 – Accept the End User License Agreement to start the installation.
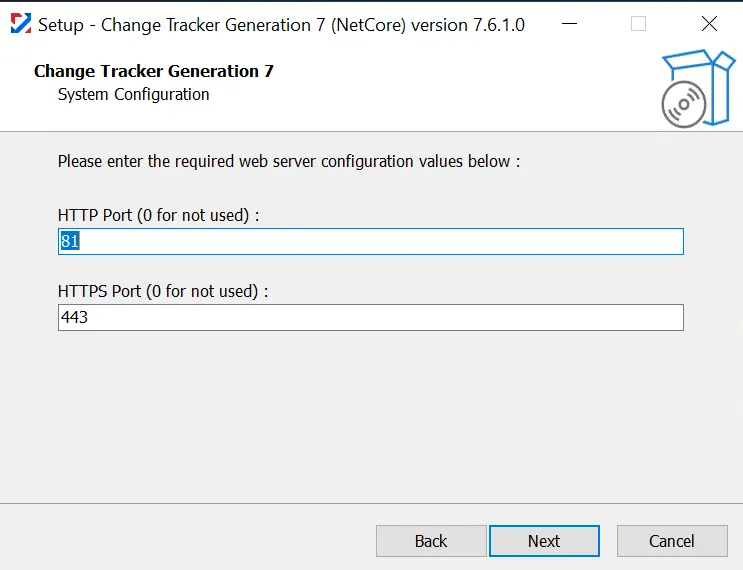
Step 2 – Enter the web server ports.
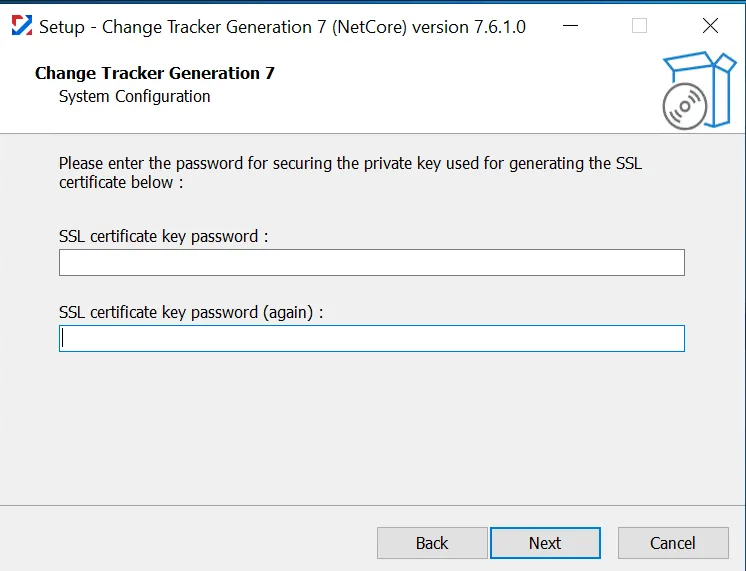
Step 3 – Enter a password for the SSL certificate's private key.
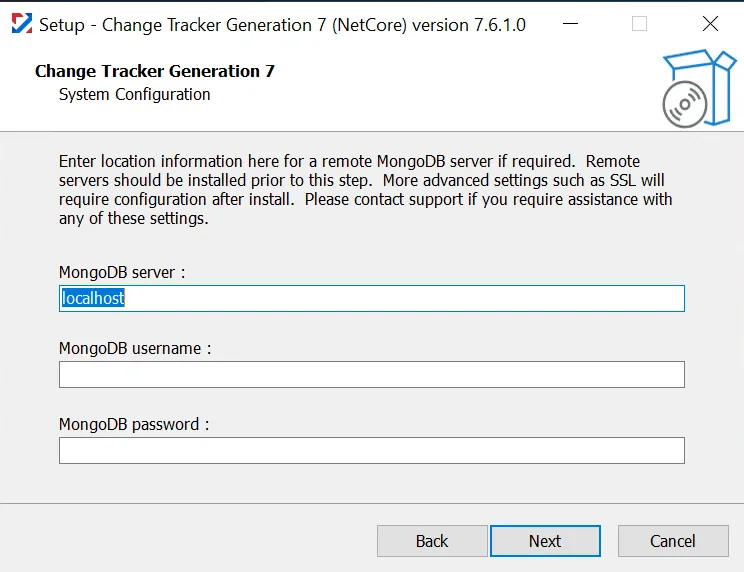
Step 4 – Define an existing MongoDB instance to use or leave the MongoDB server field as localhost to have the installer deploy its built-in version of MongoDB Community edition.
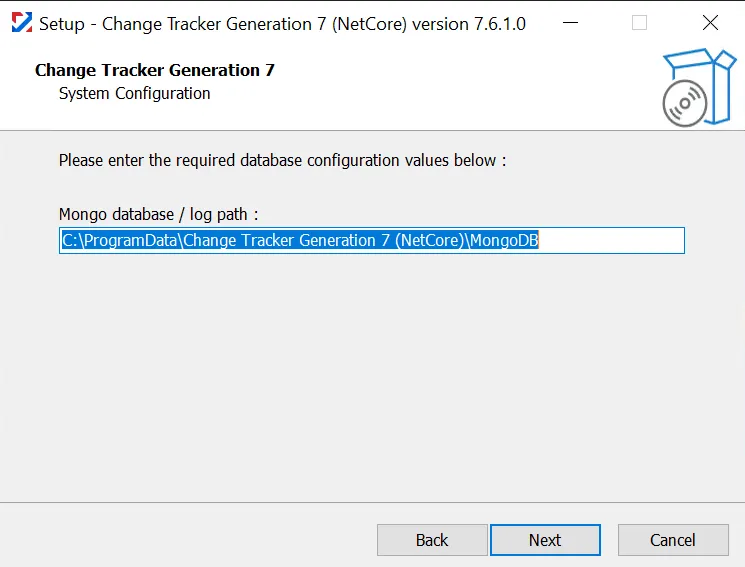
Step 5 – Define the path to store the MongoDB log.
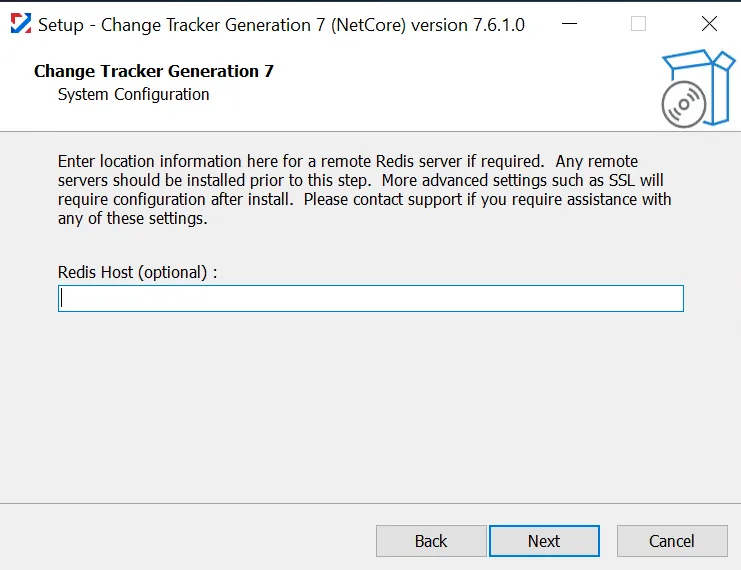
Step 6 – Most installations can leave this blank, but if you're planning a clustered installation, enter the address of the required Redis server.
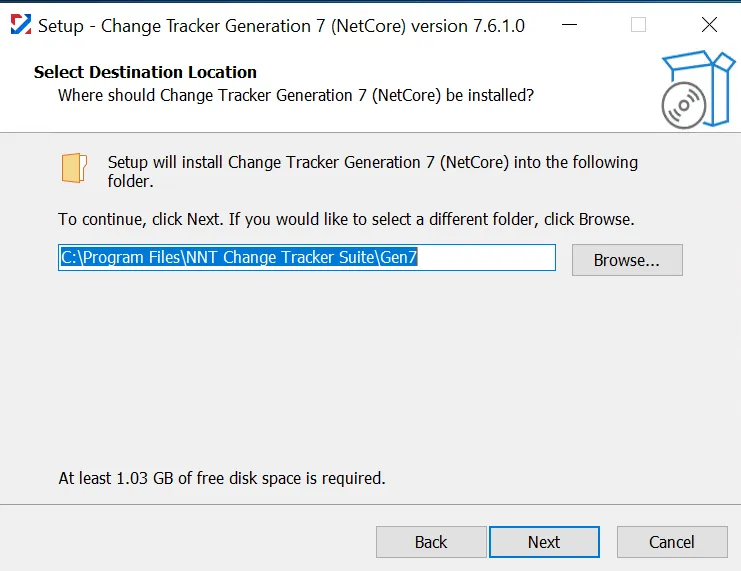
Step 7 – Select the installation path for Change Tracker.
Only change this for advanced installations.
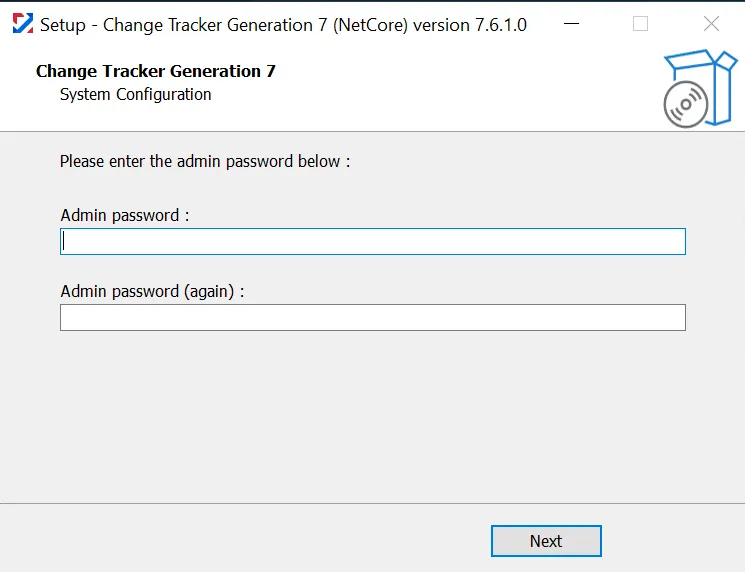
Step 8 – After the installation is complete, set a strong password for the Admin user.
You can now log in to the console from a browser.