Netwrix Privilege Secure
Starting with version 10.7, you can implement the integration between Netwrix Auditor and Netwrix Privilege Secure.
The integration can be configured for the following Auditor data sources:
-
Active Directory.
See the Use Netwrix Privilege Secure as a Data Collecting Account topic for additional information.
-
Group Policy.
See the Use Netwrix Privilege Secure as a Data Collecting Account topic for additional information.
-
Logon Activity.
See the Use Netwrix Privilege Secure as a Data Collecting Account topic for additional information.
-
Microsoft Entra ID.
See the How to Add Microsoft Entra ID Monitoring Plan Using Netwrix Privilege Secure topic for additional information.
-
Windows File Server.
See the Use Netwrix Privilege Secure as a Data Collecting Account topic for additional information.
-
Windows Server.
See the Use Netwrix Privilege Secure as a Data Collecting Account topic for additional information.
Software Requirements
| Component | Version |
|---|---|
| Netwrix Auditor | 10.7+ |
| Netwrix Privilege Secure | 4.2+ |
Enable and Configure Netwrix Privilege Secure Integration
Follow the steps to enable and configure Netwrix Privilege Secure integration.
Step 1 – In Netwrix Auditor, navigate to Settings in the upper right corner.
Step 2 – Select Netwrix Privilege Secure.
Step 3 – Click Set up Integration.
Step 4 – Specify the Privilege Secure URL.
Step 5 – Specify the application name and Netwrix Auditor client certificate. The following two options are available:
- New/Generate certificate – Create a new certificate.
- Select an existing certificate – Select an available certificate from the drop-down list.
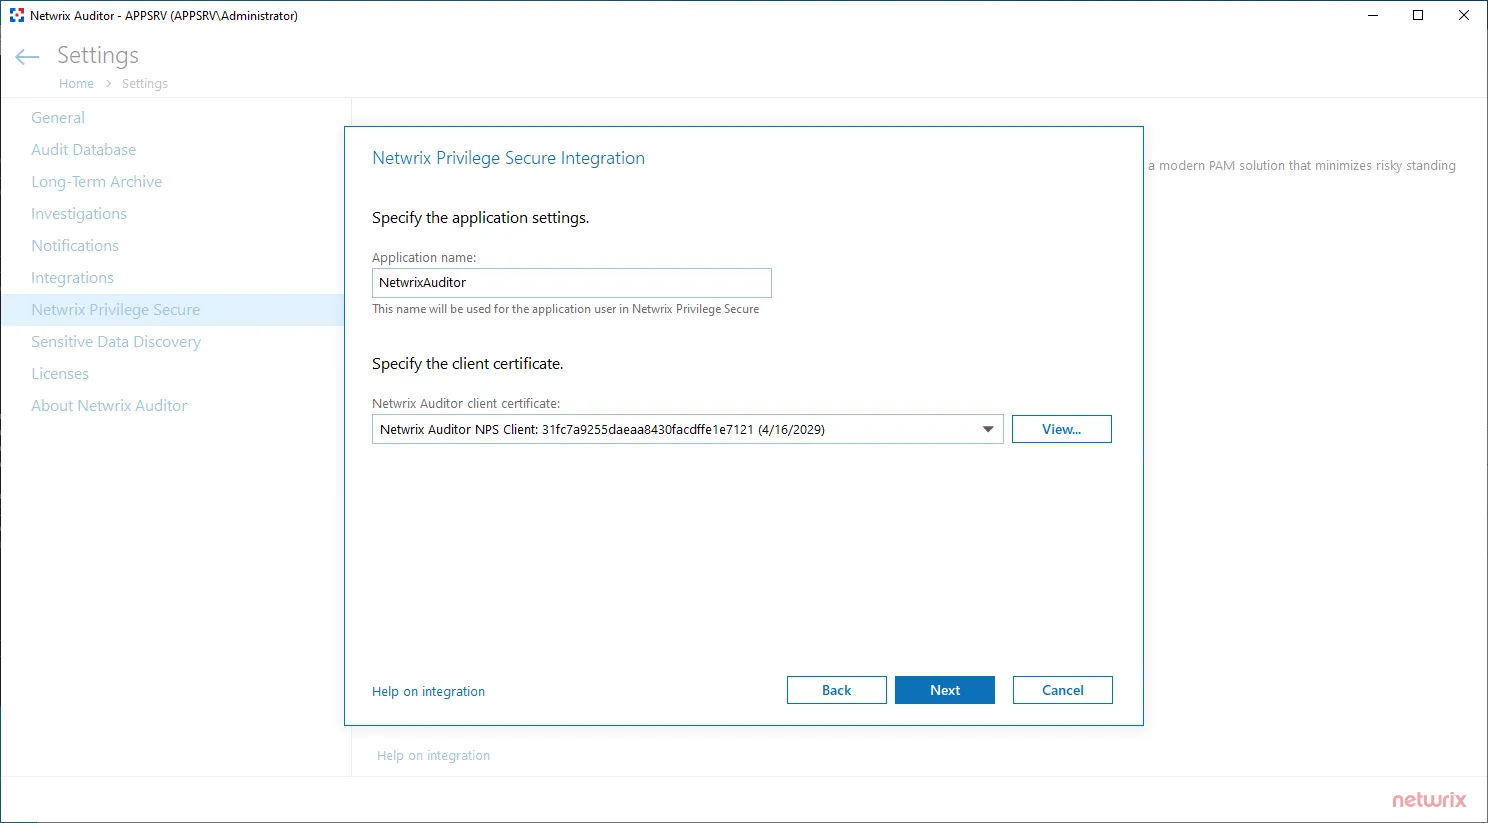
Step 6 – Click Next.
Step 7 – You need to manually export the Netwrix Auditor server certificate. To do so, follow the steps below:
- On the machine where Netwrix Auditor is installed, press the Windows key + R to open the Run dialog box. Type "mmc" in the box and click OK. This will open MMC (Microsoft Management Console).
- Click File > Add/Remove Snap-in... and locate Certificates icon.
- In the pop-up window, select the Computer account and click Next.
- Make sure that the Local Computer option is selected in the next window, then click Finish. The Certificates menu will appear.
- Go to Certificates (Local Computer) > Personal > Certificates >
{Certificate Name}and click Export. - After successful export, copy the certificate to the machine where Netwrix Privilege Secure is installed.
Step 8 – Install the certificate on the machine where Netwrix Privilege Secure is installed. To do so, follow the steps below:
- Right-click the imported certificate and select Install Certificate option.
- In the Certificate Import Wizard, select Local Machine as a Store Location and click Next.
- In the next menu, select Paste all certificates in the following store option, click Browse and select Trusted Root Certification Authorities folder in the pop-up menu.
- Click Finish.
Step 9 – Launch Netwrix Privilege Secure to create an application user for Netwrix Auditor with the Application name and Certificate Serial Number that you received. Refer to the Netwrix Privilege Secure documentation for additional instructions.
Step 10 – Provide the security key you got in Netwrix Privilege Secure.

Step 11 – Click Next.
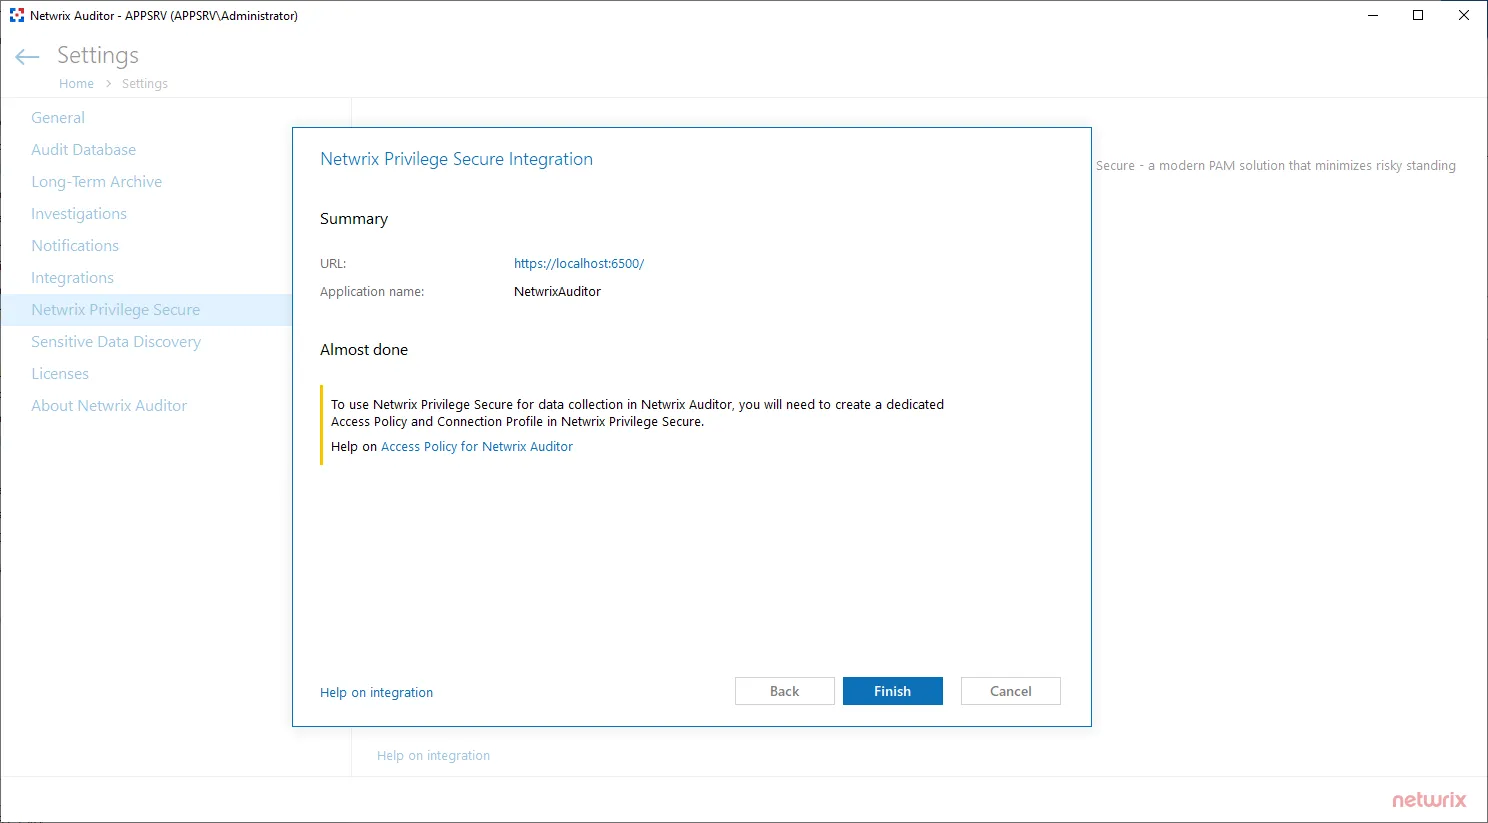
Step 12 – After the validation, click Finish.
Integration between Netwrix Auditor and Netwrix Privilege Secure is established. Before using the Netwrix Privilege Secure for data collection in Netwrix Auditor, make sure that you created a dedicated Access Policy and Connection Profile in Netwrix Privilege Secure. Refer to the Netwrix Privilege Secure documentation for additional information.