Active Directory Agent Deployment
Before deploying the Active Directory (AD) agent, ensure all AD Agent Server Requirements have been met. To effectively monitor Active Directory, it is necessary to deploy an AD agent to every domain controller, including the read only domain controllers. However, it is possible to deploy the agents in batches. Follow the steps to deploy the AD agents to the domain controllers in the target domain.
These steps are specific to deploying AD agents for monitoring Active Directory.
Step 1 – On the Agents tab, click Add agent to open the Add New Agent(s) window.
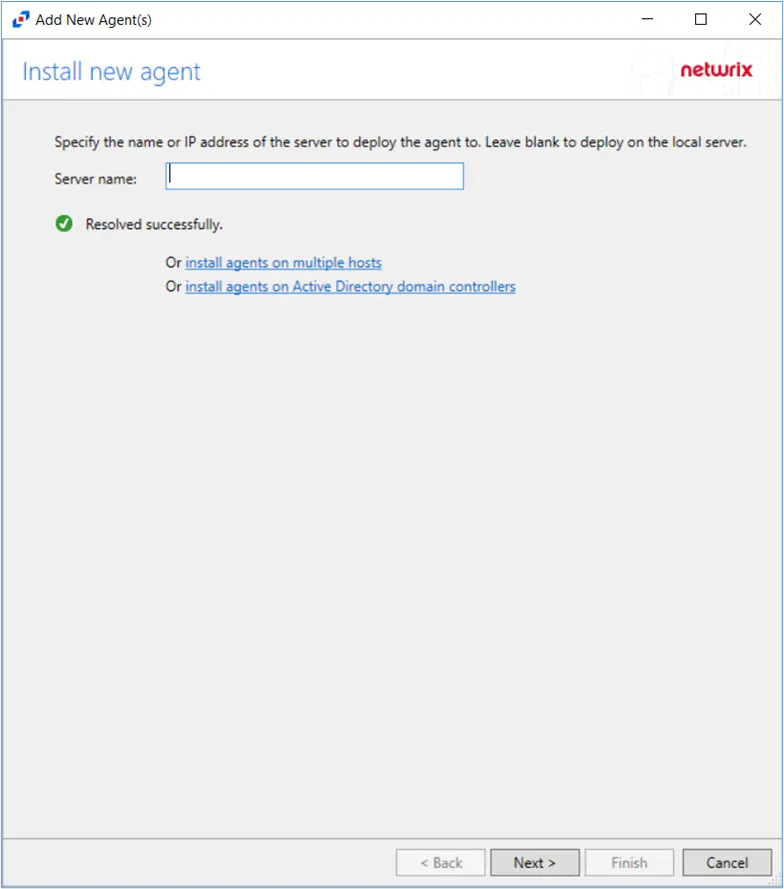
Step 2 – Click on the Install agents on Active Directory domain controllers link to deploy activity agents to multiple domain controllers.
The Activity Monitor will validate the entered Host Name or IP Address entered in the Server Name text box.
Step 3 – Specify the port that should be used by the new agent(s).
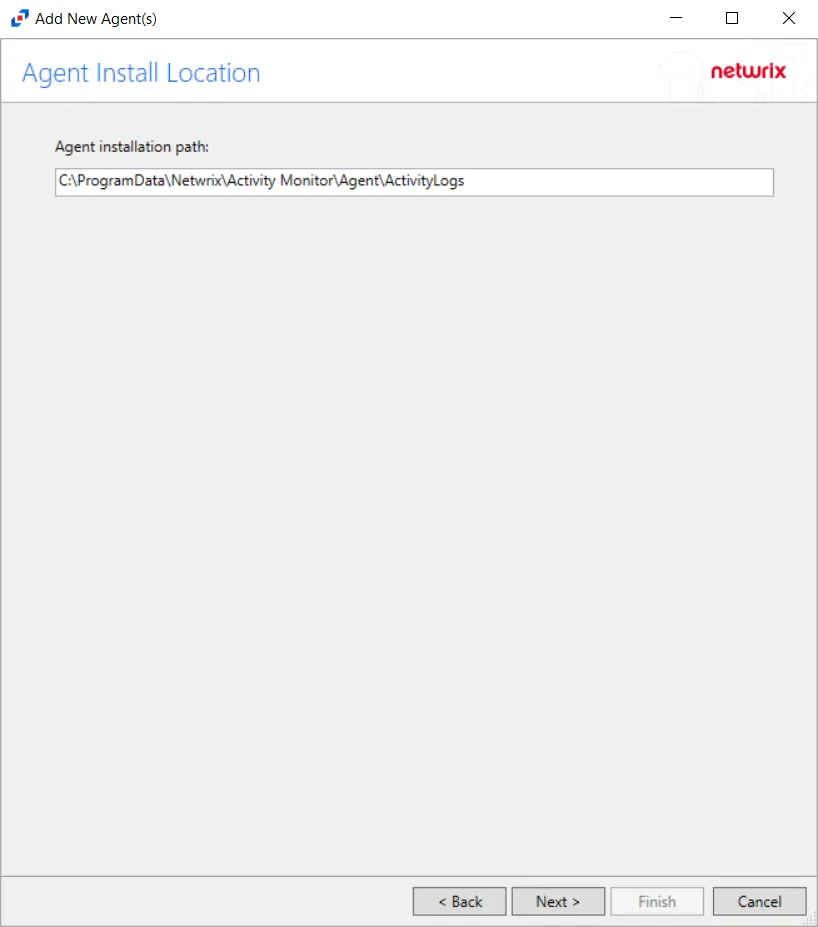
Step 4 – Select the agent installation path.
Use the default installation path.
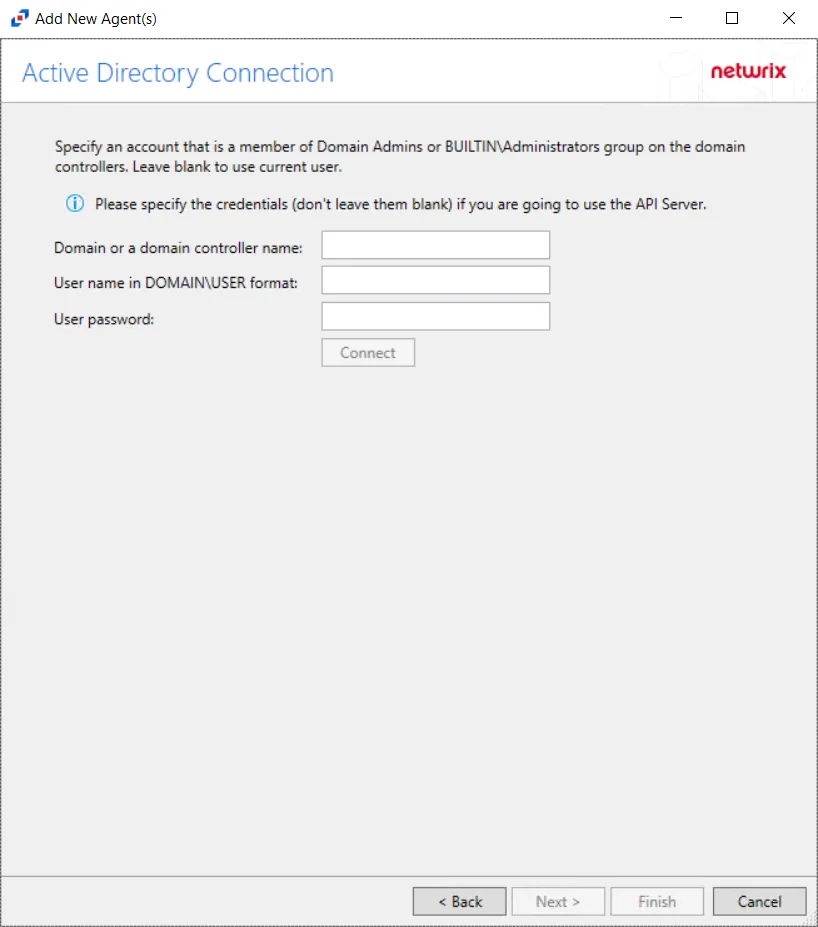
Step 5 – On the Active Directory Connection page, enter the domain, and specify an account that is a member of BUILTIN\Administrators group on the domain. Then, click Connect.
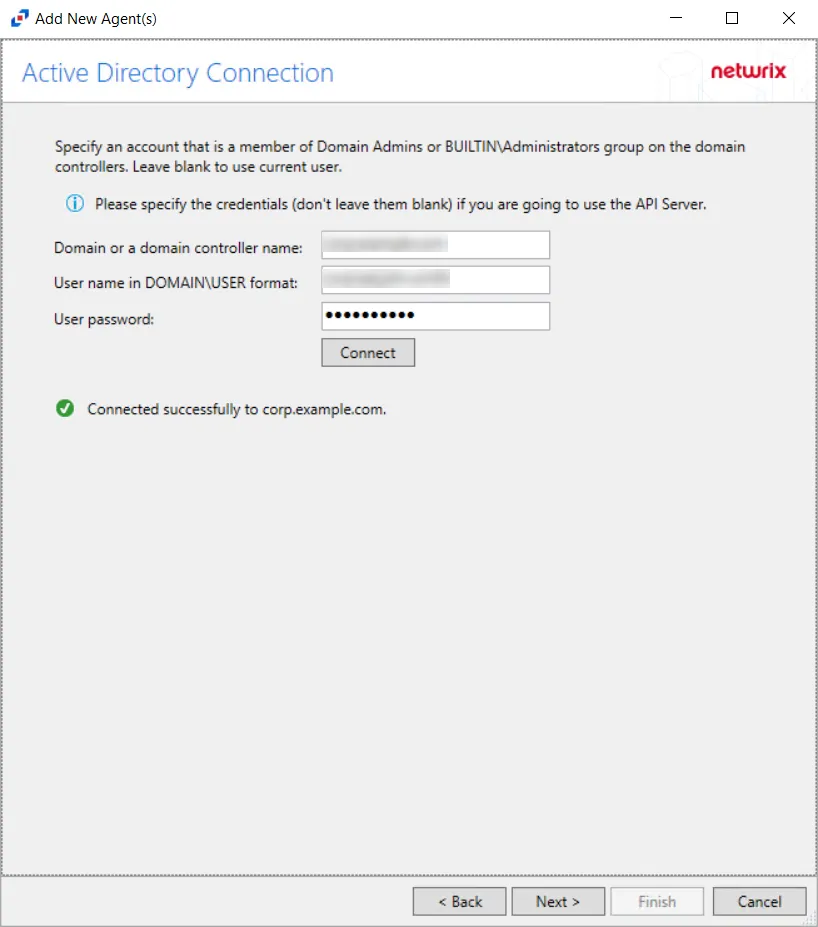
When the connection is successful, the Next button is enabled. Click Next to continue.
An Administrator’s credentials are required to test the connection to the server. This is the only way to enable the Next button.
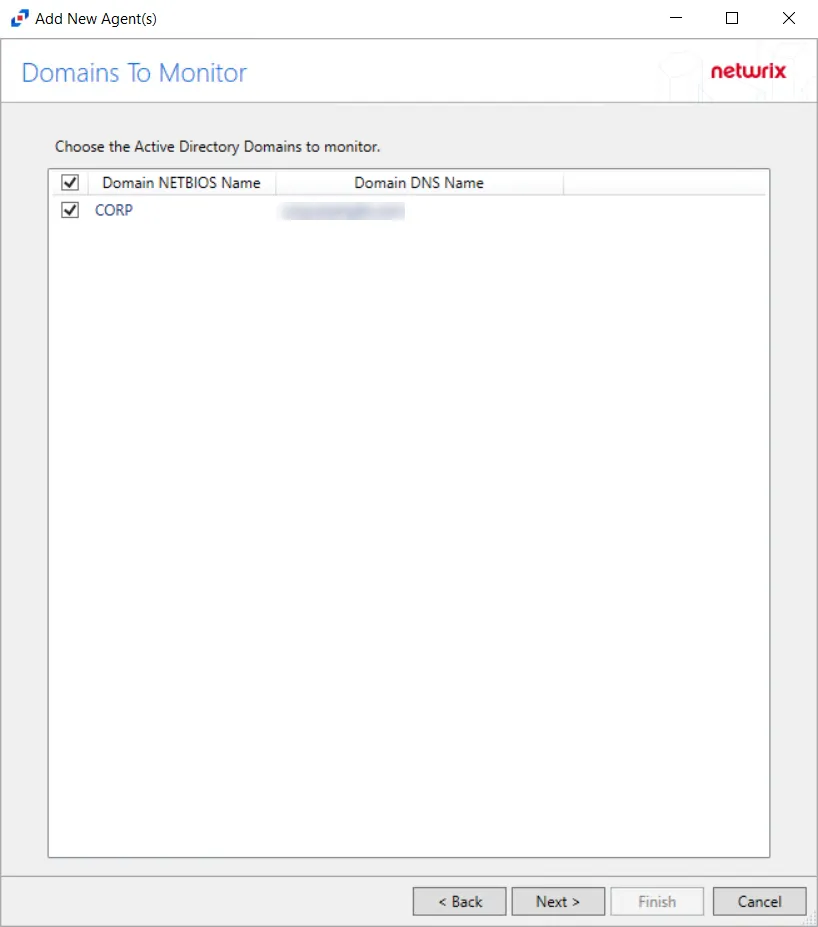
Step 6 – On the Domains To Monitor page, available domains display in a list, checked by default. Check/uncheck the boxes as desired to identify the domains to monitor, then click Next.
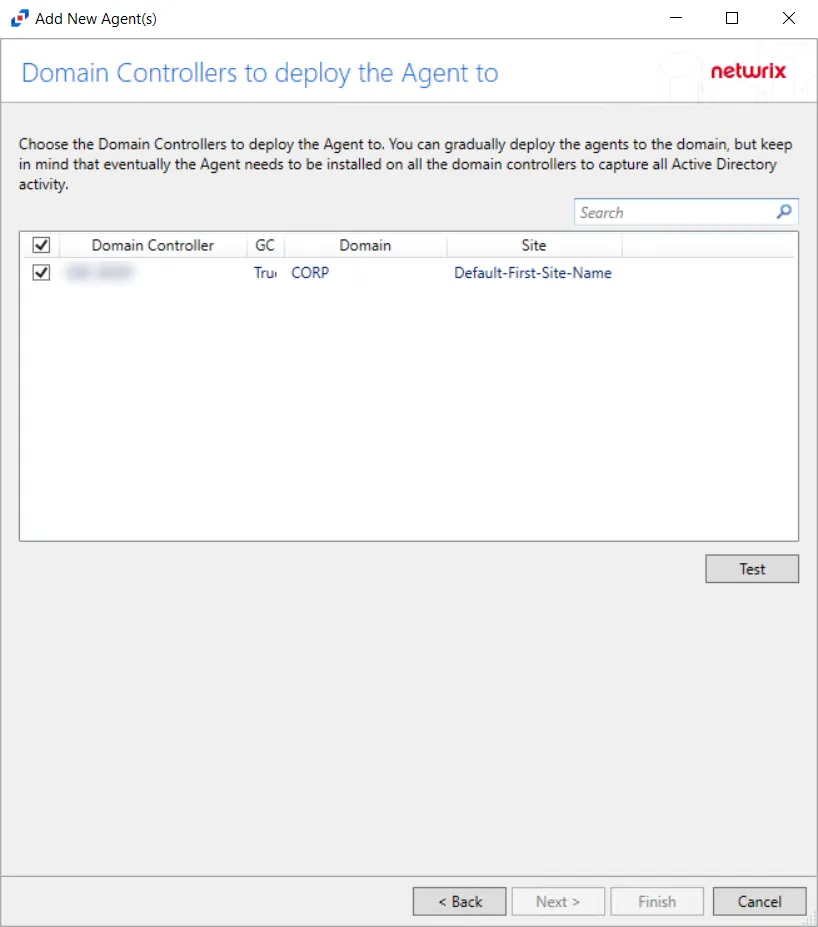
Step 7 – On the Domain Controllers to deploy the Agent to page, available domain controllers display in a list, checked by default. Check/uncheck the boxes as desired to identify the domain controllers where the AD agent is to be deployed.
Agents can be gradually deployed, but the AD agent needs to be installed on all domain controllers to monitor all activity of the domain.
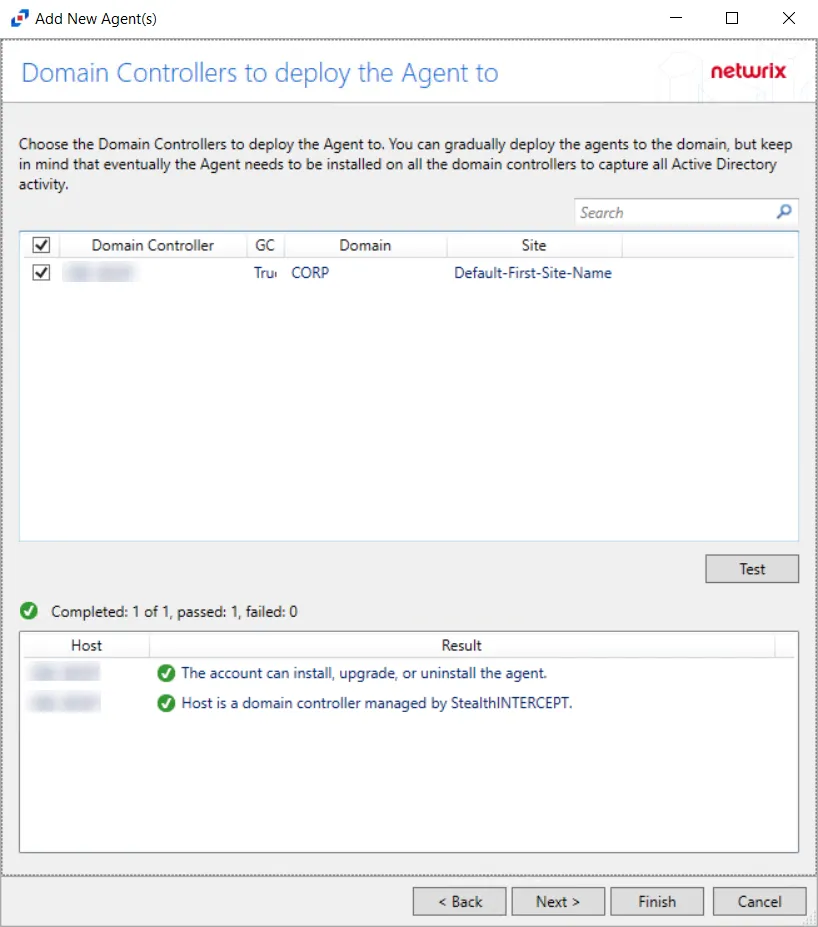
Step 8 – Click the Test button to verify the connection to the domains selected. Once the connection is verified, click Next to continue.
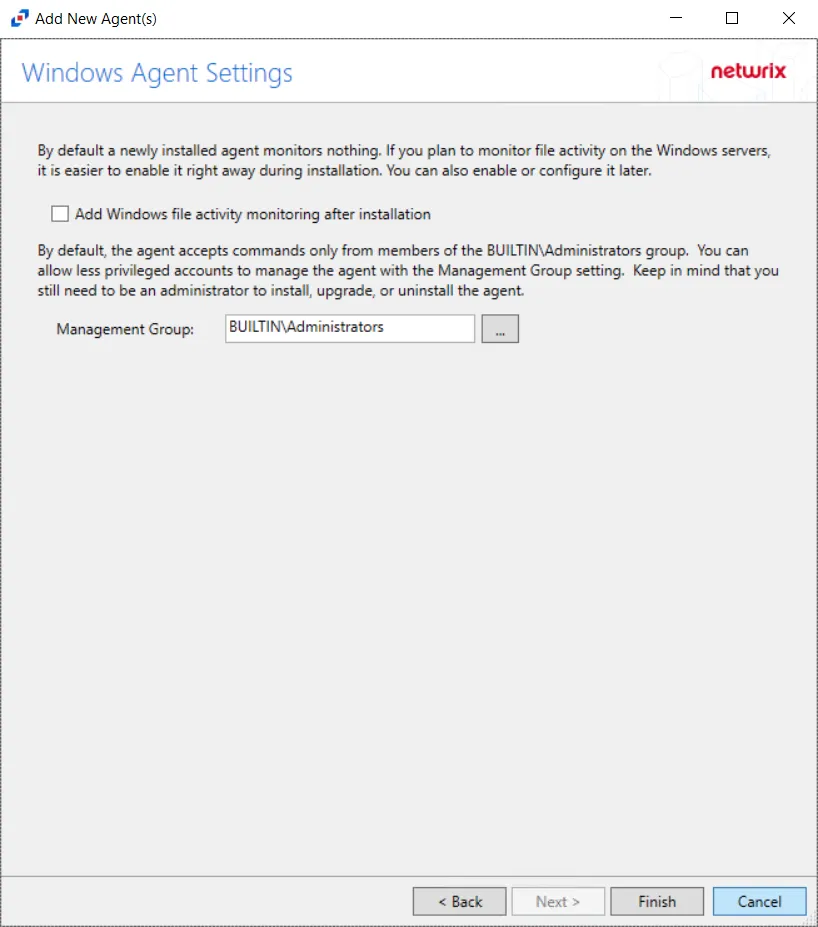
Step 9 – On the Windows Agent Settings page, there are two settings to configure.
- Add Windows file activity monitoring – Select the check box to add Windows file activity monitoring after installing the agent. By default a new agent install monitors nothing. If administrators want to monitor file activity on Windows servers, it is easier to enable it after installation of the agent. Windows file activity monitoring can be enabled and configured later in the console.
- Management Group – By default, the agent only accepts commands form members of the BUILTIN\Administrators group. Less privilege accounts can be configured to manage the agent with the Management Group setting. Keep in mind that only administrators can install, update and uninstall the agent.
Step 10 – Click Finish. The Add New Agent(s) window closes, and the activity agent is deployed to and installed on the target host.
During the installation process, the status will be Installing. If there are any errors, the Activity Monitor stops the installation and lists the errors in the Agent messages box.
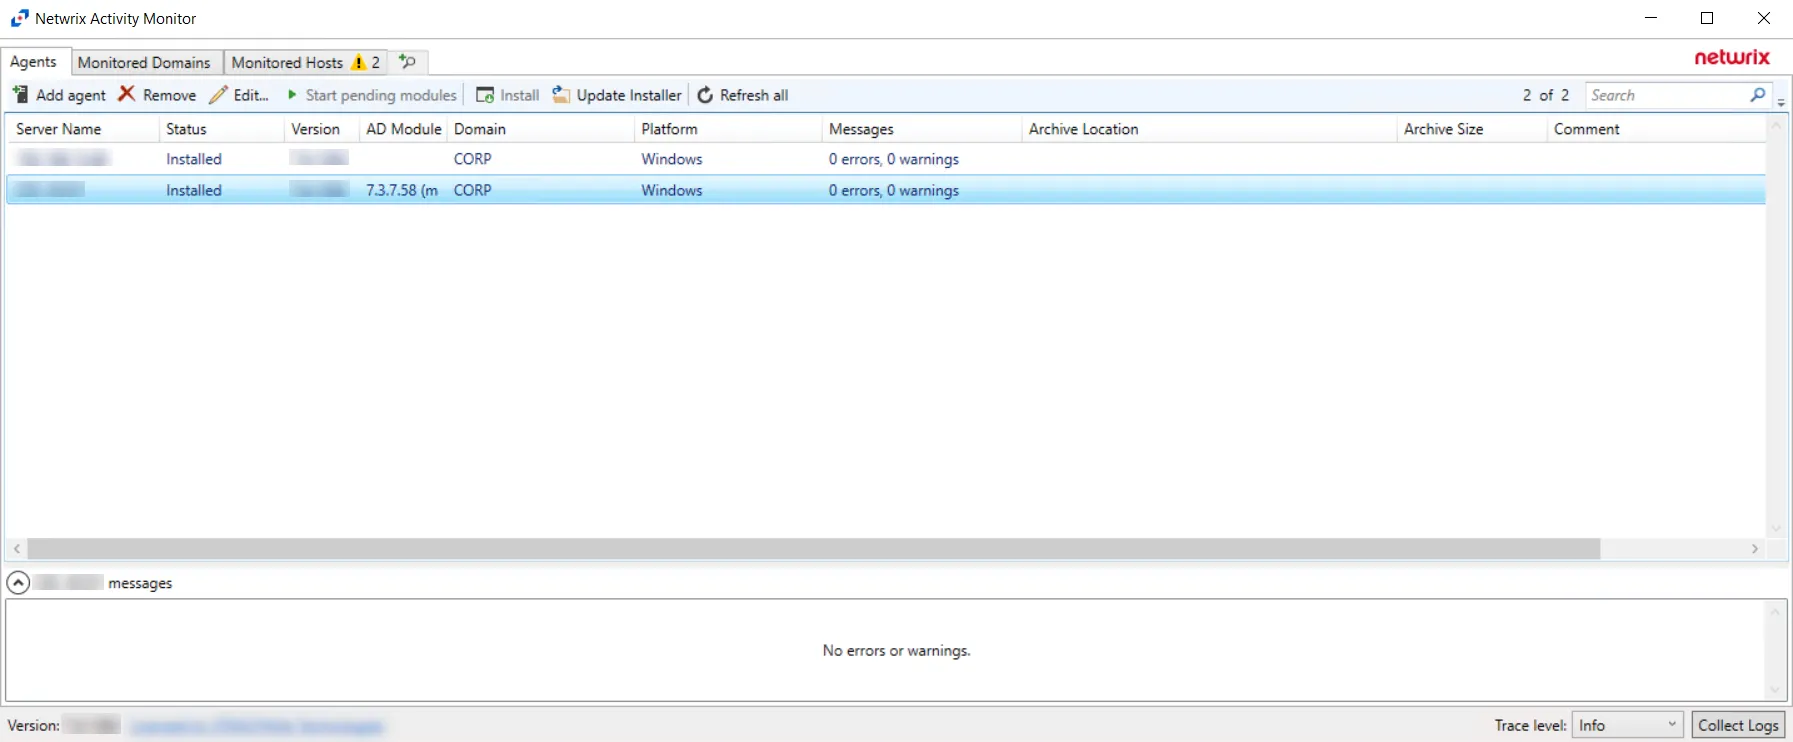
When the AD agent installation is complete, the status changes to Installed and the agent version populates in the AD Module column. The next step is to configure the domains to be monitored. See the Monitored Domains Tab section for additional information.