Manually Install the Linux Agent
Follow the steps to manually install the agent.
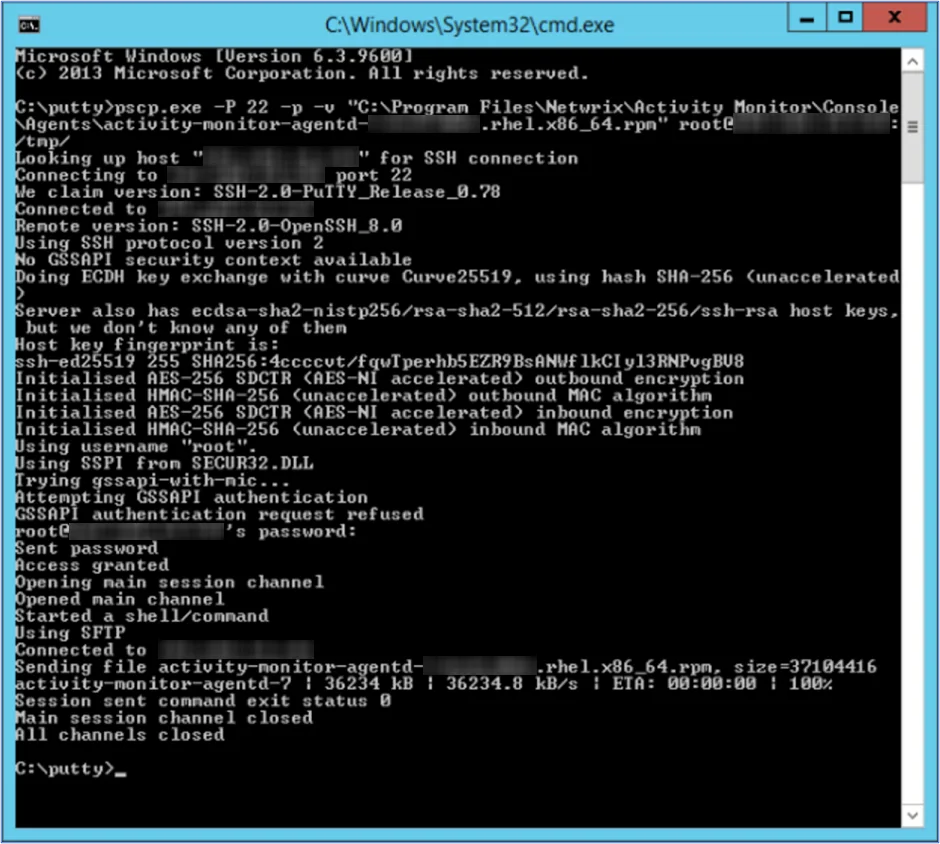
Step 1 – Transfer the rpm package to the Linux server.
For example, following is a pscp command:
pscp.exe -P 22 -p -v "C:\Program Files\Netwrix\Activity Monitor\Console\Agents\activity-monitor-agentd-7.0.0-1234.rhel.x86_64.rpm" root@123.456.789.123:/tmp/
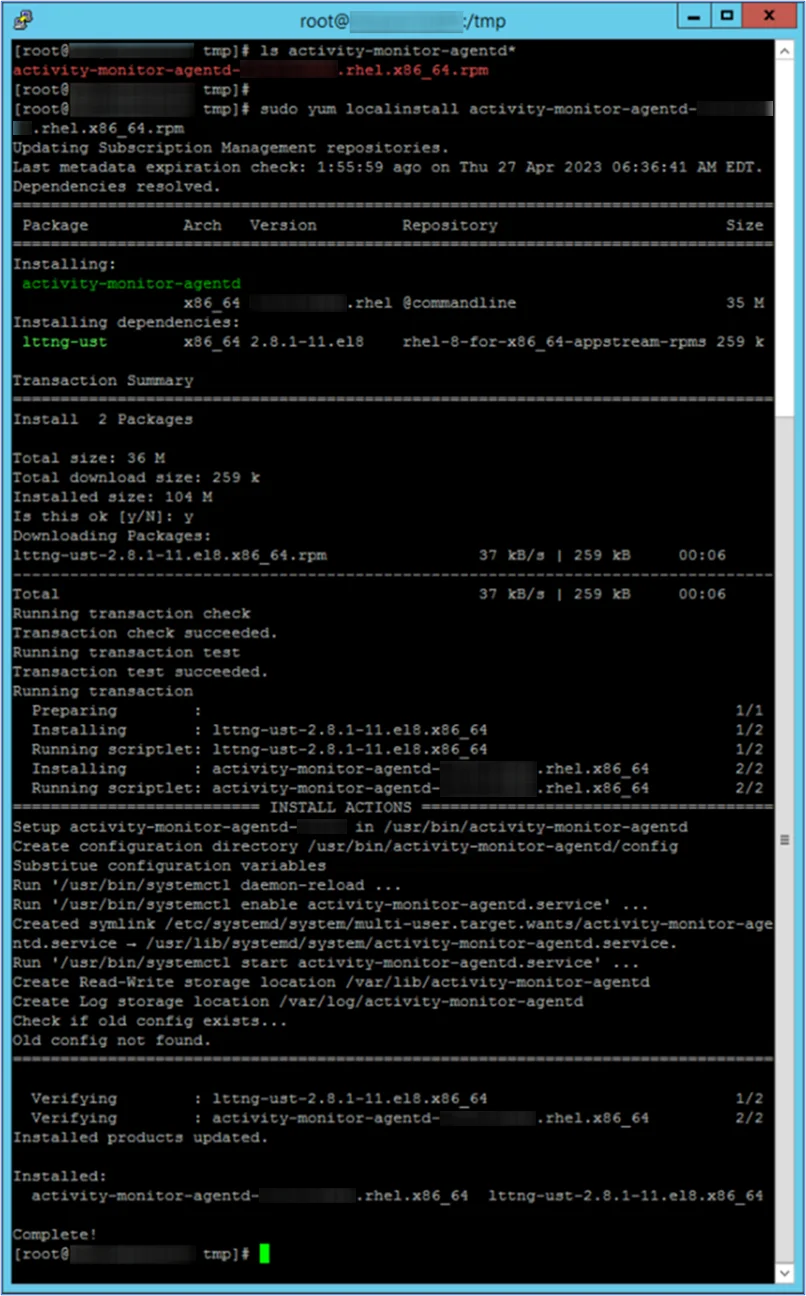
Step 2 – Install the Activity Monitor Linux Agent RPM Package on the Linux server.
For example, the following command can be used:
sudo yum localinstall activity-monitor-agentd-7.0.0-1234.rhel.x86_64.rpm
Step 3 – Add firewall rules to the Linux server, and restart firewall service.
NOTE: This should be the same port number specified in the Activity Monitor console for the Linux agent. Default port is 4498.
For example, the following commands can be used:
sudo firewall-cmd --zone=public --add-port=4498/tcp --permanent
sudo systemctl restart firewalld
sudo firewall-cmd --list-all
Step 4 – Generate the Activity Monitor Agent client certificate on Linux server from the Activity Monitor Agent install directory.
The following commands can be used:
cd /usr/bin/activity-monitor-agentd/
sudo ./activity-monitor-agentd create-client-certificate --name amagent
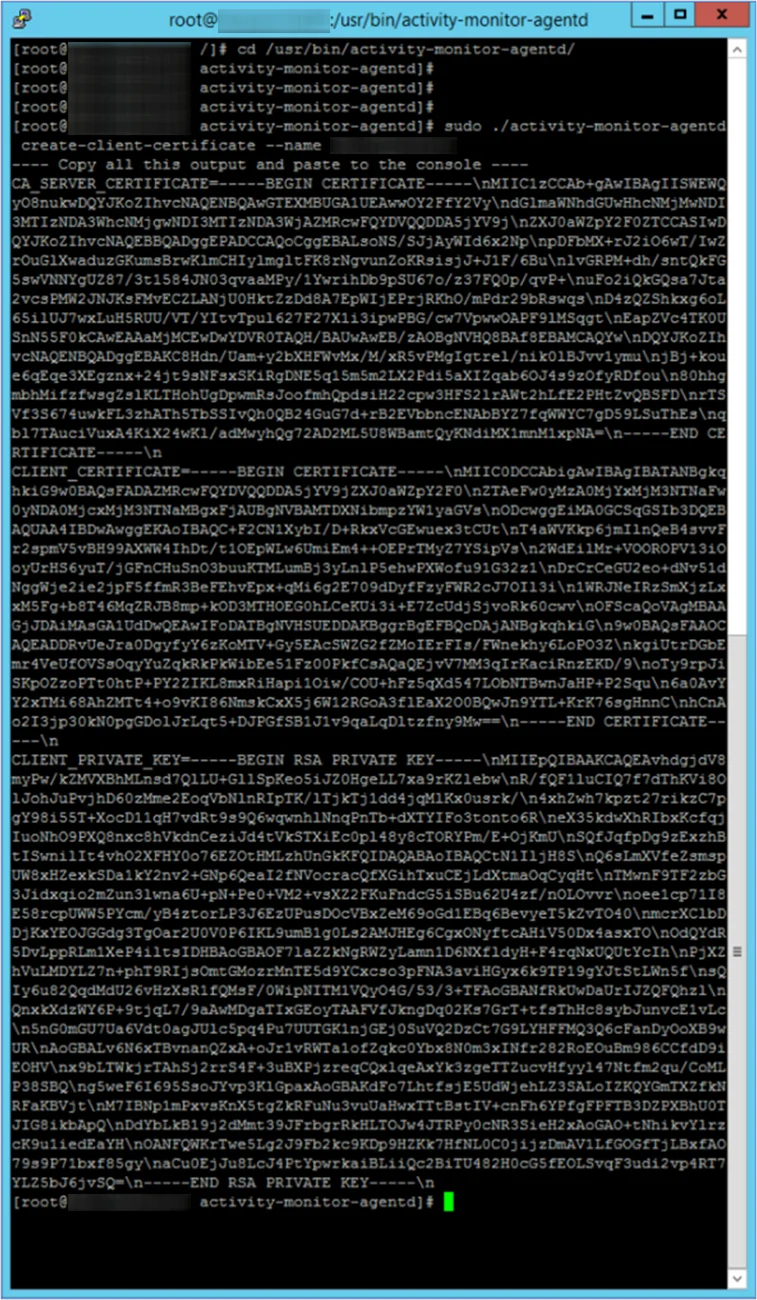
Step 5 – Copy full certificate output from previous command on the Linux server.
NOTE: This will be needed to add the agent to the console.
Add the Linux Agent to the Console
Before deploying the Activity agent in a Linux environment, ensure all Prerequisites have been met. To effectively monitor activity on a Linux host, it is necessary to deploy an agent to the host. Follow the steps to deploy the agent to the Linux host. See the Linux Agent Server Requirements topic for additional information.
Follow the steps to add the agent to the console.
Step 1 – Open the Activity Monitor Console.
Step 2 – On the Agents tab, click Add Agent. The Add New Agent(s) window opens.
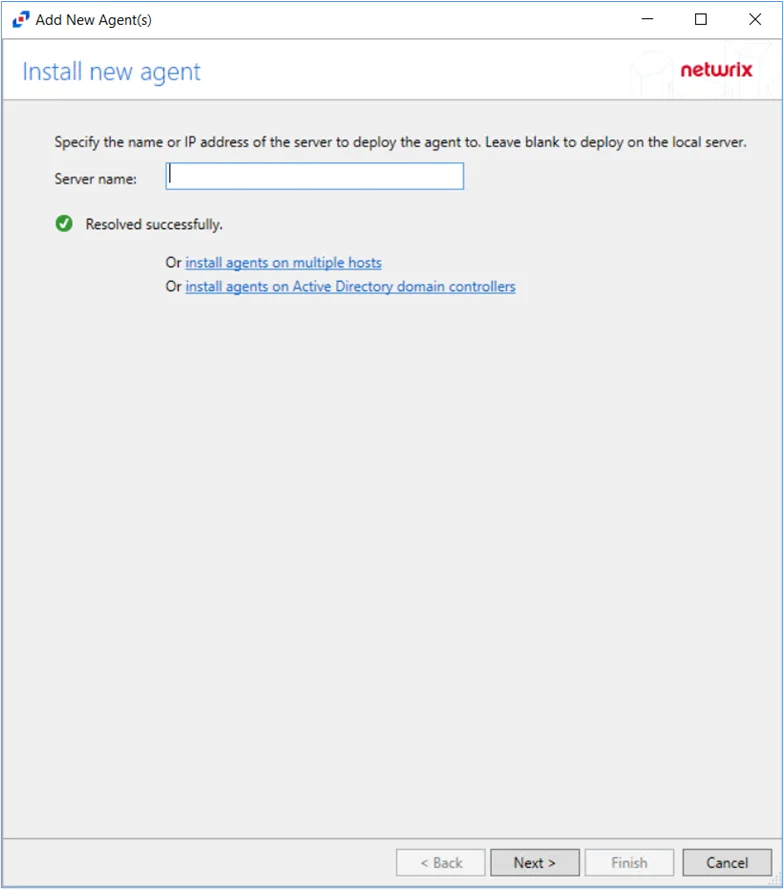
Step 3 – Specify the server name or IP Address that already has the Linux agent installed. To add multiple server names, see the Multiple Activity Agents Deployment topic for additional information. Click Next.
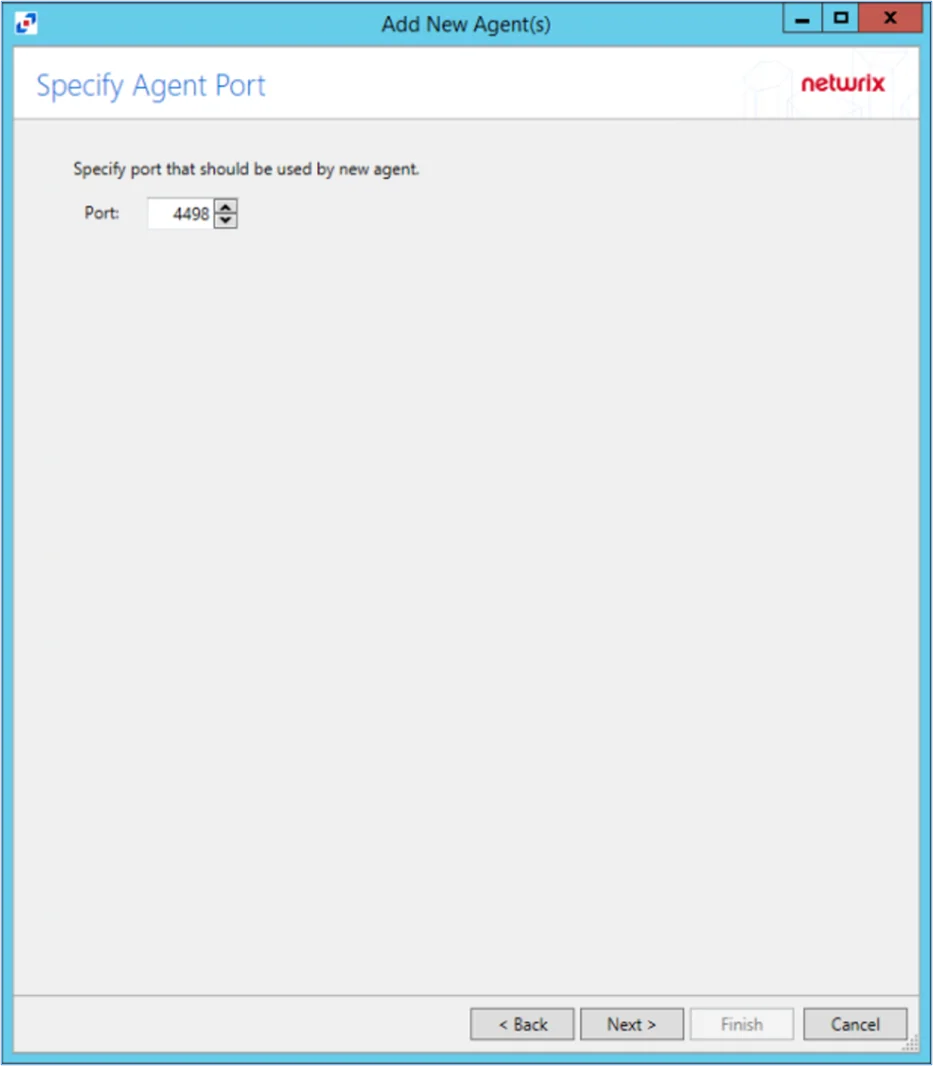
Step 4 – Specify the port to be used for the agent. Click Next.
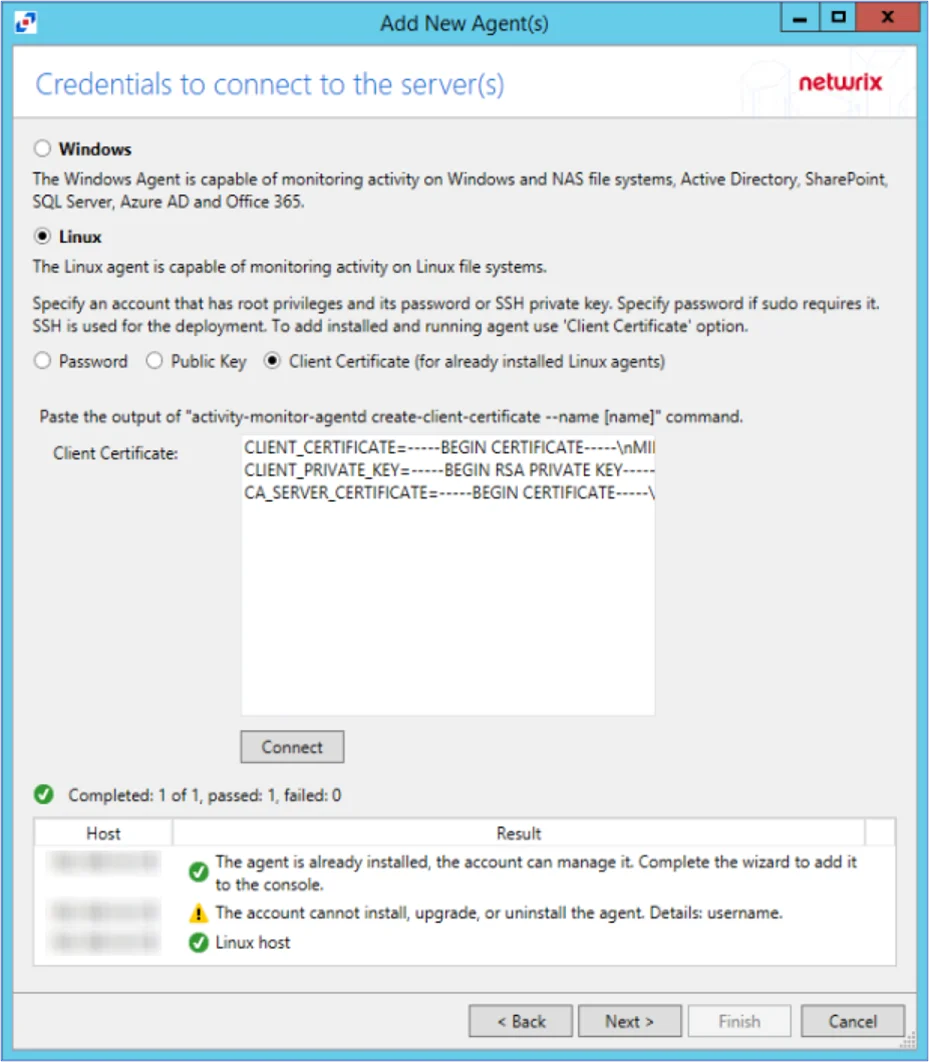
Step 5 – In Activity Monitor console add the Linux agent using the client certificate option, and paste the full output of the client certificate information (from Step 3 of ‘Manually Installing Activity Monitor Linux Agent’) into the client certificate field. Click Connect. Then click Next.
NOTE: When clicking Connect while adding the Agent to the Console, the connection may fail. When clicking Connect, the Activity Monitor verifies not only its ability to manage the agent but the console's ability to deploy the agent as well. Errors can be ignored if the agent was manually installed.
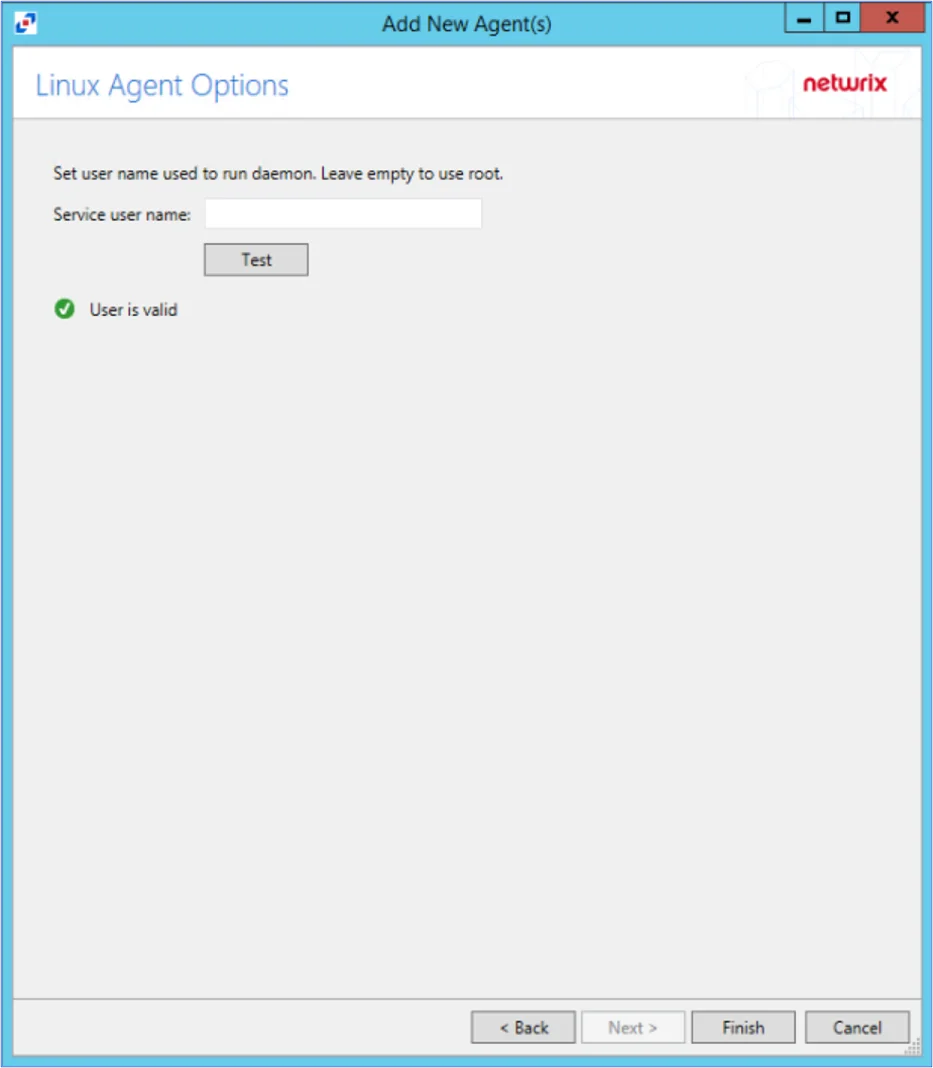
Step 6 – On the Linux Agent Options page, select which user name to use to run the daemon. To use root, leave the Service user name field blank. Click Test to test the connection.
Step 7 – Click Finish. The Add New Agent(s) window closes, and the activity agent is deployed to and installed on the target host.
NOTE: The console will automatically detect the agent as it is already installed.
The Agent is now added to the Activity Monitor Console.
Step 8 – On the Agents tab of the console, select the newly added agent. Click Edit to view Agent Properties.
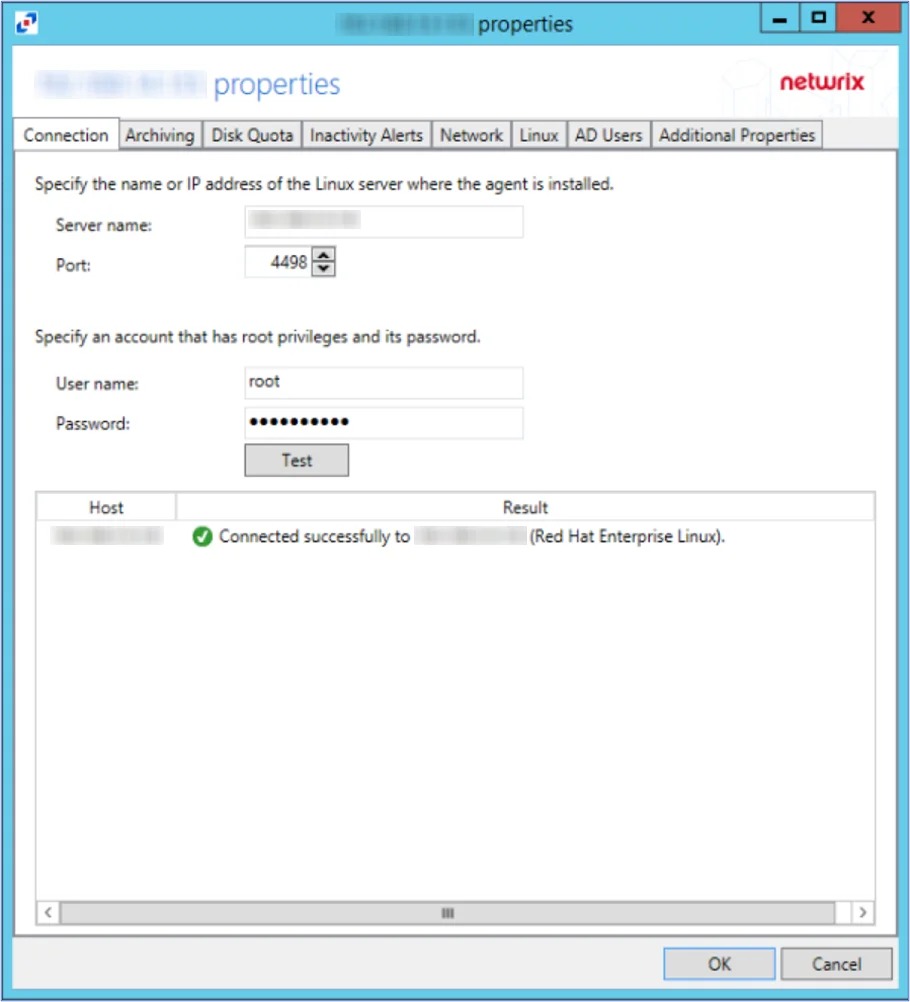
Step 9 – Specify Linux account credentials (to be able to install, upgrade, and uninstall agent). Click Test to verify. Then press OK to save changes.