Add New Resource Wizard
The Add new resource wizard is opened with the Add button in the Resource Owners interface.

It contains five pages:
-
- Select Resource — Select the resource or group to be managed by the owner
-
- Select Owners — Select Owners from Active Directory
-
- Description — Optionally enter a note describing the resource
-
- Access Groups — Optionally enable Access Requests and Owner Ad Hoc changes for this resource. When File System or SharePoint resources will be managed through the AIC, it is necessary to configure access groups for those resources in the target environment. An access group provides one of the following access levels to a specific resource: Read, Modify, or Full Control.
NOTE: This feature requires the Access Information Center is to be configured to commit changes in Active Directory. Additionally, resource based groups must be set up on the resource. See the Commit Active Directory Changes topic for additional information.
-
- Summary — This page provides a preview of the settings selected within the wizard
See the Add a Resource topic for additional information.
Add a Resource
Follow the steps to add resources one at a time and assign owners.
Step 1 – In the Resource Owners interface, click Add. The Add new resource wizard opens.
Step 2 – On the Select Resource page, select the resource to be managed. Then click Next.
- Search field – Begin typing the name of the resource:
- For File System, enter a share UNC path starting with “\”
- For example, \example\share
- For SharePoint, enter the site URL starting with “http://”
- For example, http://farm.corp.com
- For groups, enter the group name in NTAccount format [DOMAIN\GROUP]
- For example, acme\app.group
- For File System, enter a share UNC path starting with “\”
- Browse option – Navigate through the resource tree to select the desired File System or SharePoint resource.
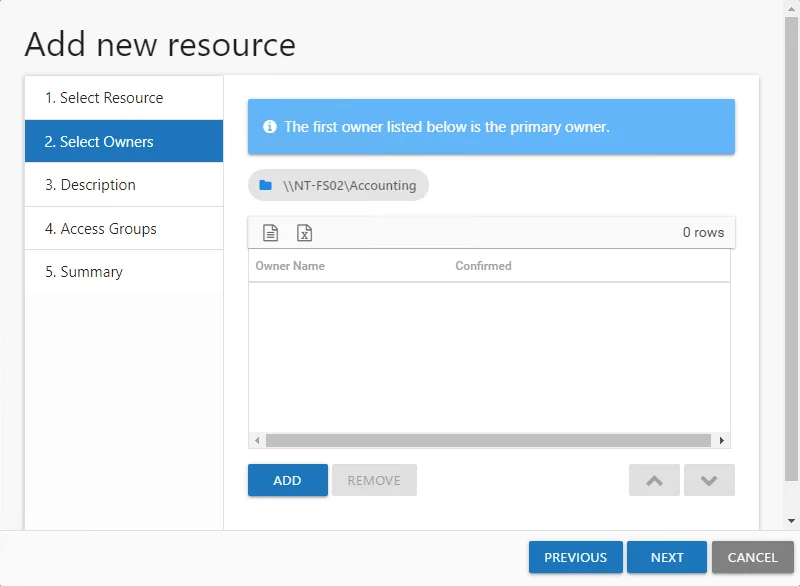
Step 3 – On the Select Owners page, click Add to browse for an owner. Repeat this Step to add multiple owners. See the Add Owner Window topic for additional information.
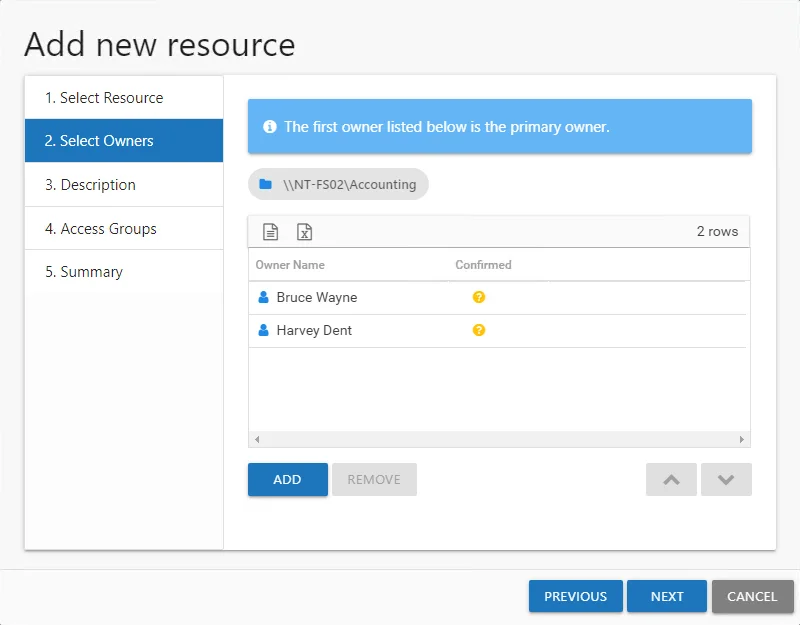
Step 4 – When only one owner is assigned, the owner will be the Primary by default. When multiple owners are assigned, the first owner in the list is the Primary owner. Use the arrow buttons to order the owners. Use the Add and Remove buttons to modify the list of owners. When the owners list is complete, click Next.The table has several columns with information on the owners:
- Owner Name — Name of the assigned owner
- Owner Account — sAMAccountName associated with the owner, as read from Active Directory
- Owner Title — Trustee's title as read from Active Directory
- Owner Mail — Trustee's email address as read from Active Directory
- Owner Department — Trustee's department as read from Active Directory
- Confirmed — Indicates whether or not the assigned owner has confirmed ownership of that resource. Tool-tips display when hovering over the icons indicating whether the resource ownership has been confirmed, declined, pending response, or that a confirmation has not been requested.
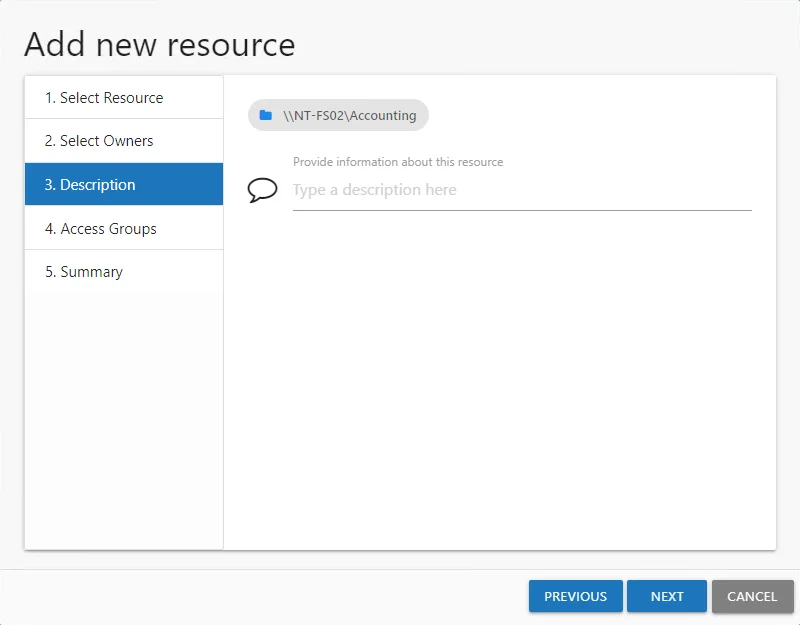
Step 5 – On the Description page, optionally add a description for the resource in the textbox. Then click Next.
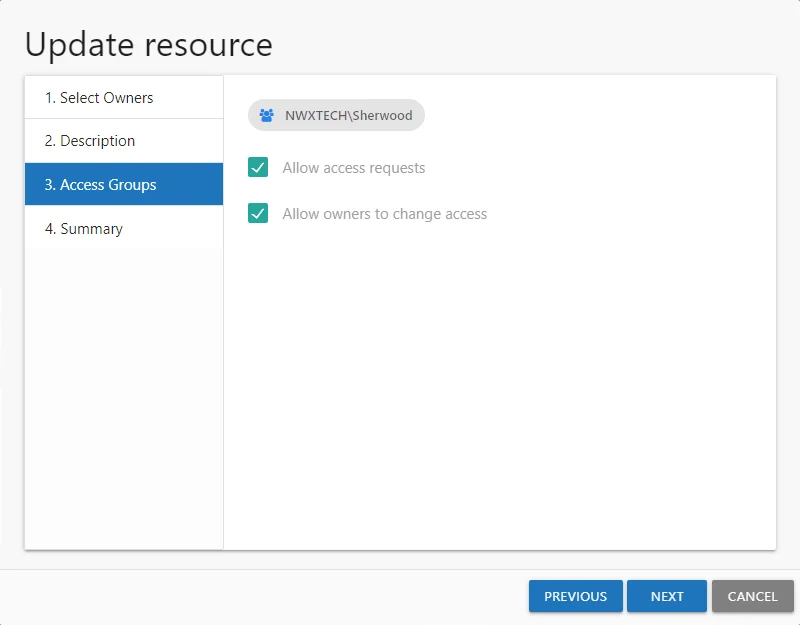
Step 6 – On the Access Groups page, optionally enable Access Requests and Owner Ad Hoc changes for this resource:
- Allow access requests — Check this option to enable your domain users to make self-service access requests for this resource
- Allow owners to change access — Check this option to enable the owner to make ad hoc access changes for this resource
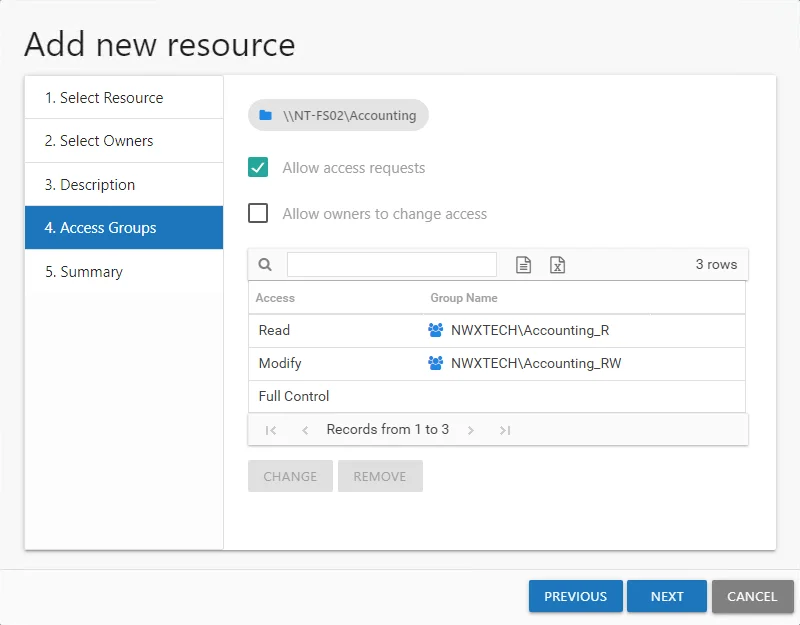
Step 7 – When File System or SharePoint resources will be managed through the AIC, it is necessary to configure access groups for those resources in the target environment. An access group provides one of the following access levels to a specific resource: Read, Modify, or Full Control. If either option in Step 6 is selected for this resource, it is necessary to set a group for at least one access level. Select the desired access level and click Change. The Select Group Window opens. Select the desired group and click OK. The Select Group window closes and the group appears in the table. Repeat this step for each access level desired. See the Select Group Window topic for additional information.
Step 8 – Click Next to continue.
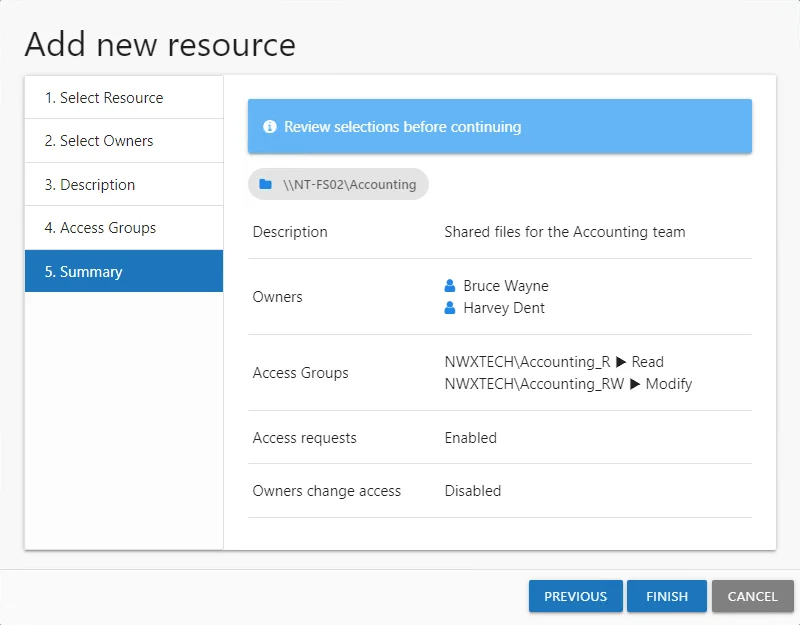
Step 9 – On the Summary page, review the settings and click Next. The Access Information Center begins to process the ownership configuration.

Step 10 – The action status displays on the page. When the task has completed (100%), click Close. The Add new resource wizard closes.
This resource is now being managed through the Access Information Center.