Custom Patterns
The built-in library covers regulated identifiers and secrets, not the identifiers specific to your organization: employee numbers, customer account codes, project codenames, and internal hostnames. A custom pattern is a regular expression you write for one of those, with a name, a confidence level, and the pattern groups it belongs to.
After you save it, a custom pattern behaves like any other: it appears in the patterns table with its regular expression and a Copy regex button, it runs in every Sensitive data scan that classifies one of its groups, and its matches appear in reports under its name. Changes reach scans within about a minute. At scan time, a custom pattern records at most 10 matches per file.
You need the Admin role to create, edit, or delete patterns.
Regular Expression Dialect
Access Analyzer compiles custom patterns with a linear-time engine that uses the RE2 dialect. Linear-time matching means a pattern can't stall a scan on a pathological input, but it also means the engine rejects a few constructs from other regex engines:
| Construct | Tokens |
|---|---|
| Lookahead | (?= and (?! |
| Lookbehind | (?<= and (?<! |
| Backreferences | \1, \2, and so on |
| Atomic groups | (?> |
| Conditional patterns | (?( |
The Regex Pattern field checks your expression on the server as you type. For lookarounds, atomic groups, and conditionals, the error names the construct and where it sits, ending in a message like:
unsupported syntax: positive lookahead `(?=` at byte offset 12: the linear engine does not support it
Rewrite the expression without the construct. You can usually replace a lookaround by matching the surrounding text as part of the pattern, and a word boundary (\b) at each end stops a pattern from matching inside a longer token.
Create a Custom Pattern
- Go to Configuration > Sensitive data patterns.
- Click Create Pattern.
- In Name, enter a name for the pattern.
- In Description, describe what the pattern detects.
- In Regex Pattern, enter the regular expression.
- In Confidence, select Low, Medium, or High.
- In Groups, select the pattern groups the pattern should belong to.
- Under Test before saving, replace the sample text with values that should match and values that shouldn't, one per line.
- Click Test.
- Adjust the expression until the results are right.
- Click Create Pattern.
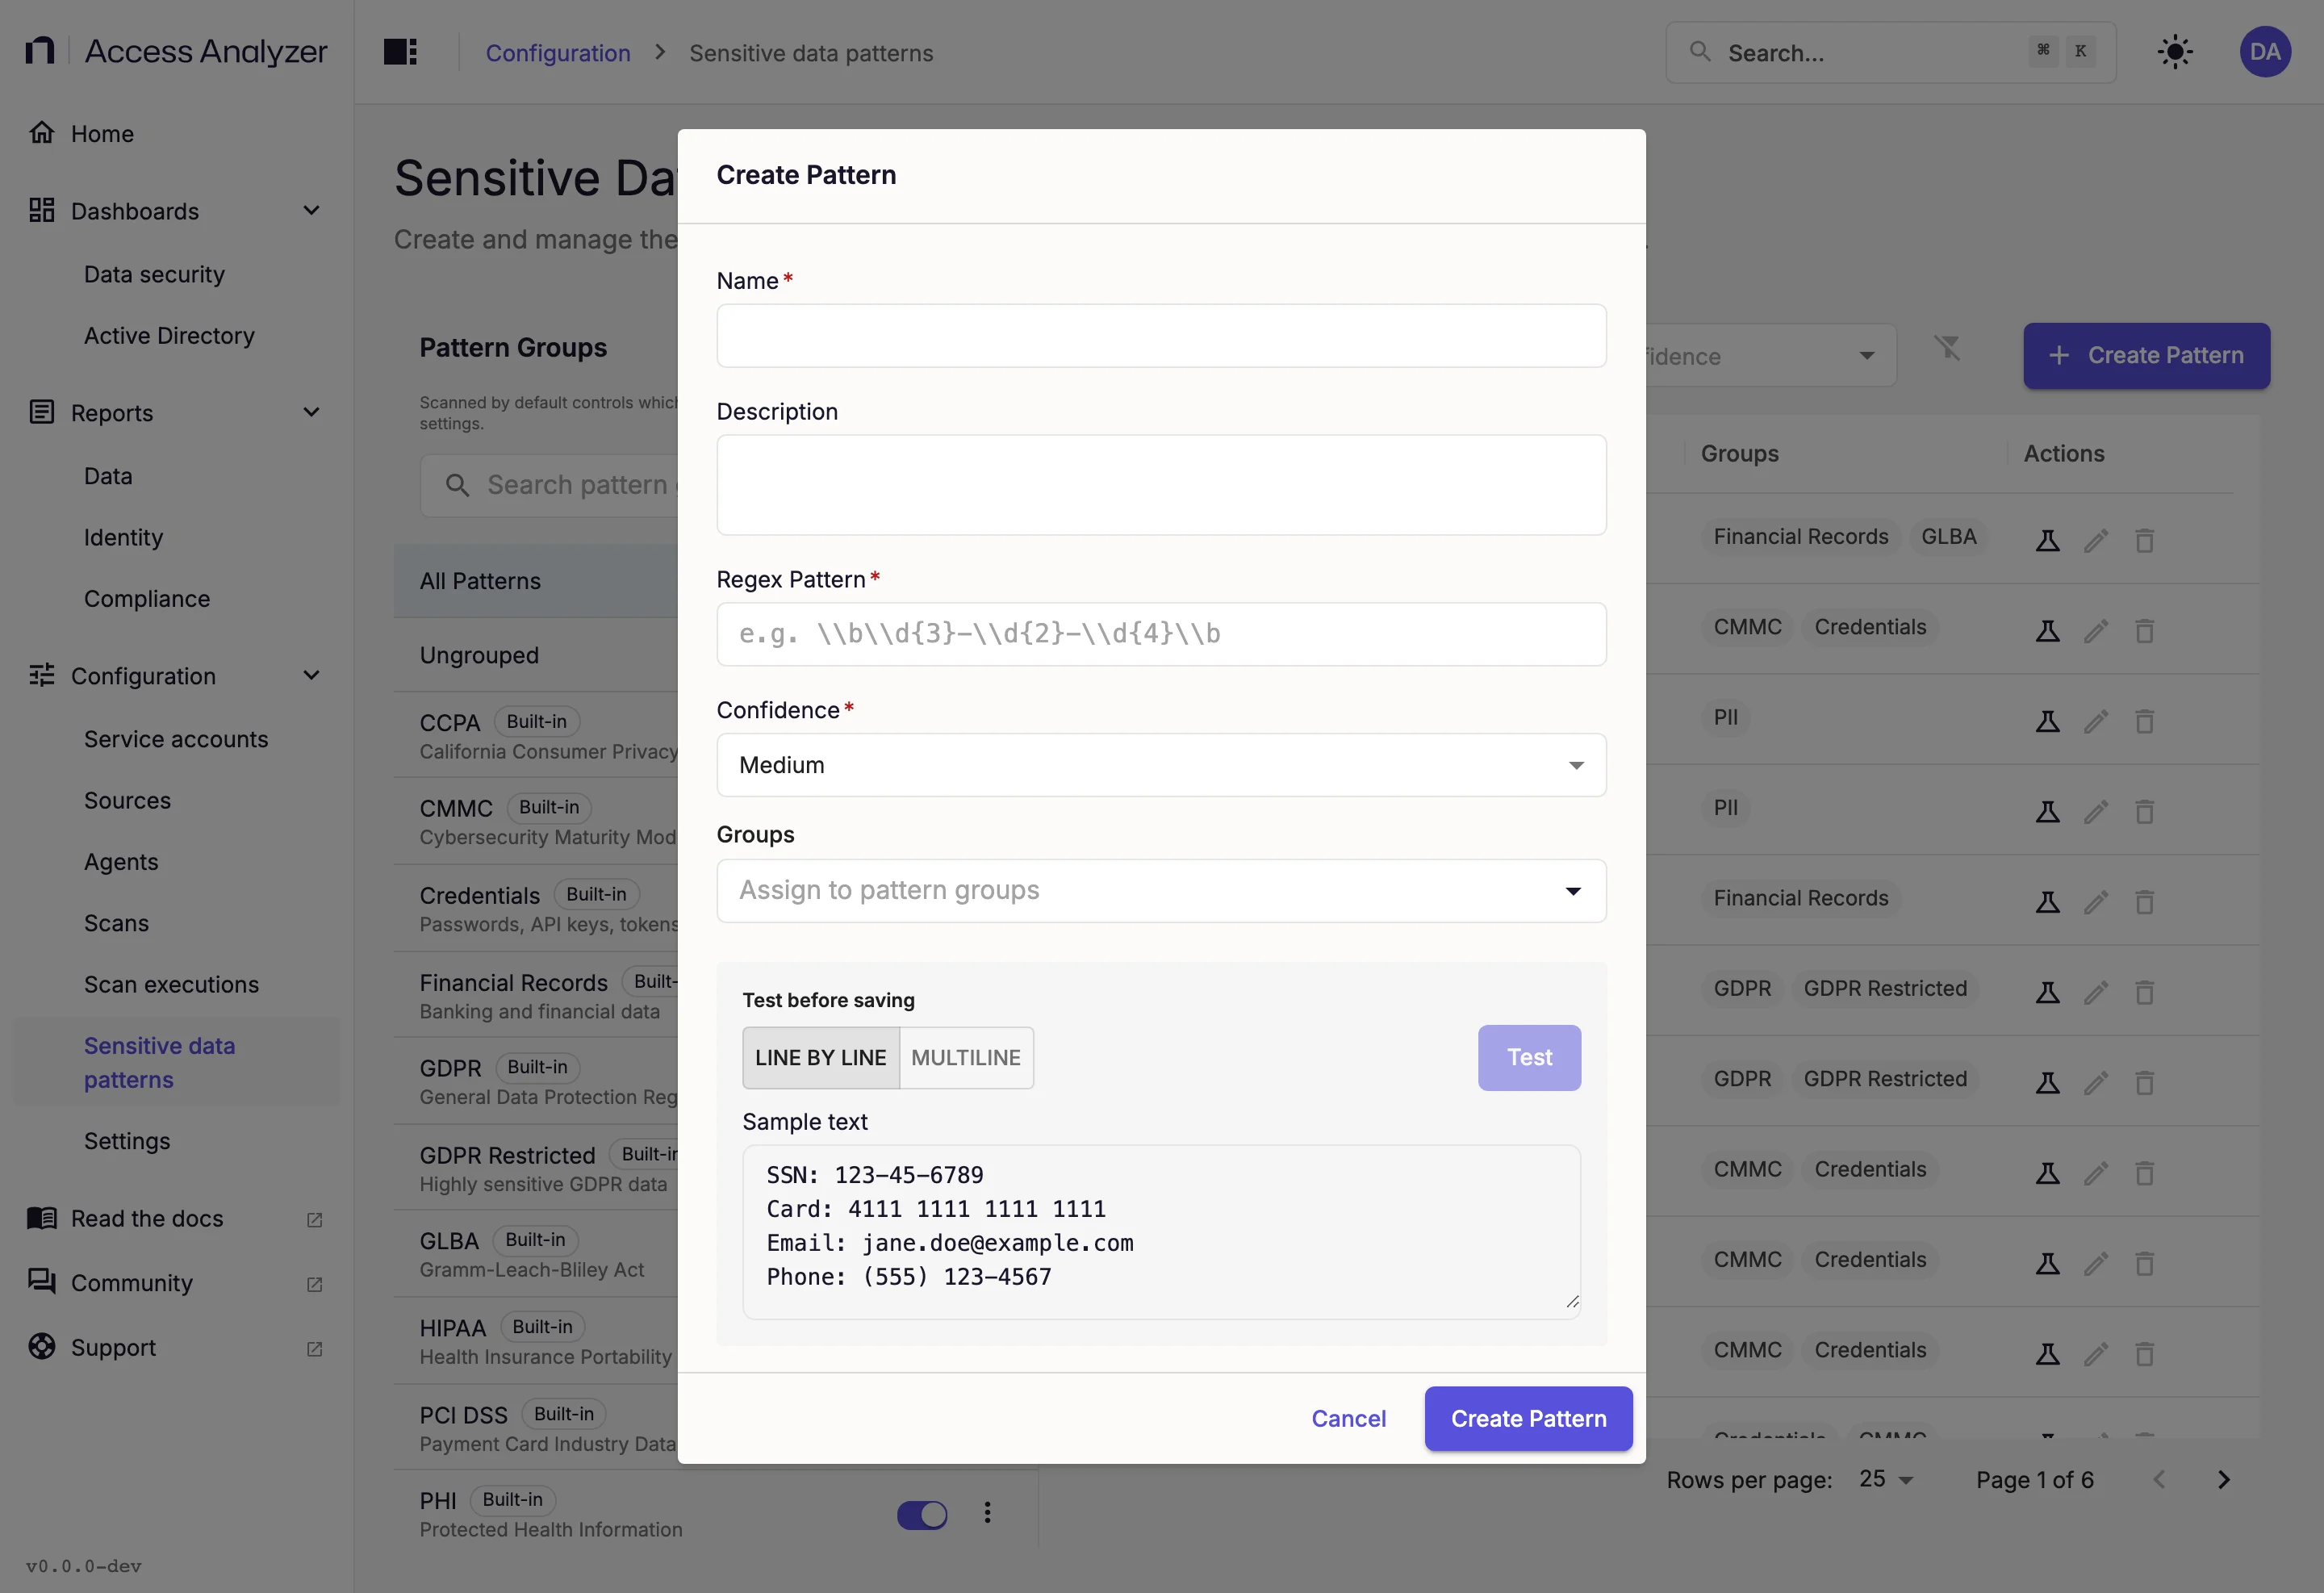
The pattern appears in the table, and a message confirms the save: Pattern "<name>" created successfully.
| Field | Required | Details |
|---|---|---|
| Name | Yes | 1 to 255 characters. Shown in the patterns table, in group listings, and in reports. |
| Description | No | Up to 2,000 characters. |
| Regex Pattern | Yes | The regular expression, in the dialect described in Regular expression dialect. Access Analyzer validates it on the server as you type. |
| Confidence | Yes | Low, Medium, or High. Defaults to Medium. See Confidence levels. |
| Groups | No | Any combination of built-in and custom groups. A pattern in no group appears under Ungrouped. |
Scans select groups, not individual patterns, so no scan can target a pattern that belongs to no group. Put it in at least one group. See Pattern groups.
Example: An Internal Employee ID
Suppose employee IDs at your organization are the letters EMP, a hyphen, and six digits, and you want scans to flag documents that contain them.
Fill in the Create Pattern dialog like this:
| Field | Value |
|---|---|
| Name | Employee ID |
| Description | Internal employee identifiers in the form EMP- followed by six digits. |
| Regex Pattern | \bEMP-\d{6}\b |
| Confidence | Medium |
| Groups | PII (personally identifiable information) |
The word boundaries keep the pattern from matching inside longer tokens such as TEMP-123456 or EMP-1234567. Medium confidence is the right fit: the prefix is distinctive, but there is no checksum to rule out a made-up number. Putting the pattern in PII, a built-in group, means any scan that classifies that group picks it up without further configuration. Scans that inherit the global default set pick it up too, as long as PII is scanned by default.
Paste this into Sample text with Line by line selected and click Test:
Employee: EMP-004821
Manager: EMP-000317
Badge: 4821
Cost center: CC-004821
The tester tints the first two lines green and the last two red, and the status reads 2 of 4 lines matched. Click Create Pattern.
Edit a Custom Pattern
- Go to Configuration > Sensitive data patterns.
- Find the pattern in the table, or type its name in the search box to filter the list.
- In Actions, click Edit pattern.
- Change the fields you need, including Groups.
- Use Test before saving to confirm the new expression.
- Click Save Changes.
A message confirms the change: Pattern "<name>" updated successfully.
If the pattern saves but its group changes fail, the message Pattern "<name>" was saved, but its group memberships couldn't be updated. appears, followed by the error. Click Save Changes again (or Create Pattern, when you're creating the pattern). The retry updates the saved pattern instead of creating a duplicate.
Delete a Custom Pattern
Scans and groups that use a pattern don't block its deletion, and there is no in-use warning. The pattern stops running in scans within about a minute.
- Go to Configuration > Sensitive data patterns.
- Find the pattern.
- In Actions, click Delete pattern.
- Confirm the deletion.
A message confirms the deletion: Pattern "<name>" was deleted successfully. Deleting a pattern also removes it from every group. Findings already recorded keep the pattern's name, so historical reports don't change.
Manage a Pattern's Groups
You can change a custom pattern's groups in two places:
- In the pattern's Edit Pattern dialog, through the Groups field, where you set all of the pattern's groups at once.
- From a group's Manage patterns action, which adds or removes custom patterns for that one group. See Pattern groups.
Neither path changes a built-in pattern: you can't open Edit pattern for a built-in, and Manage patterns rejects adding or removing one. Their group membership is fixed.