Schedules
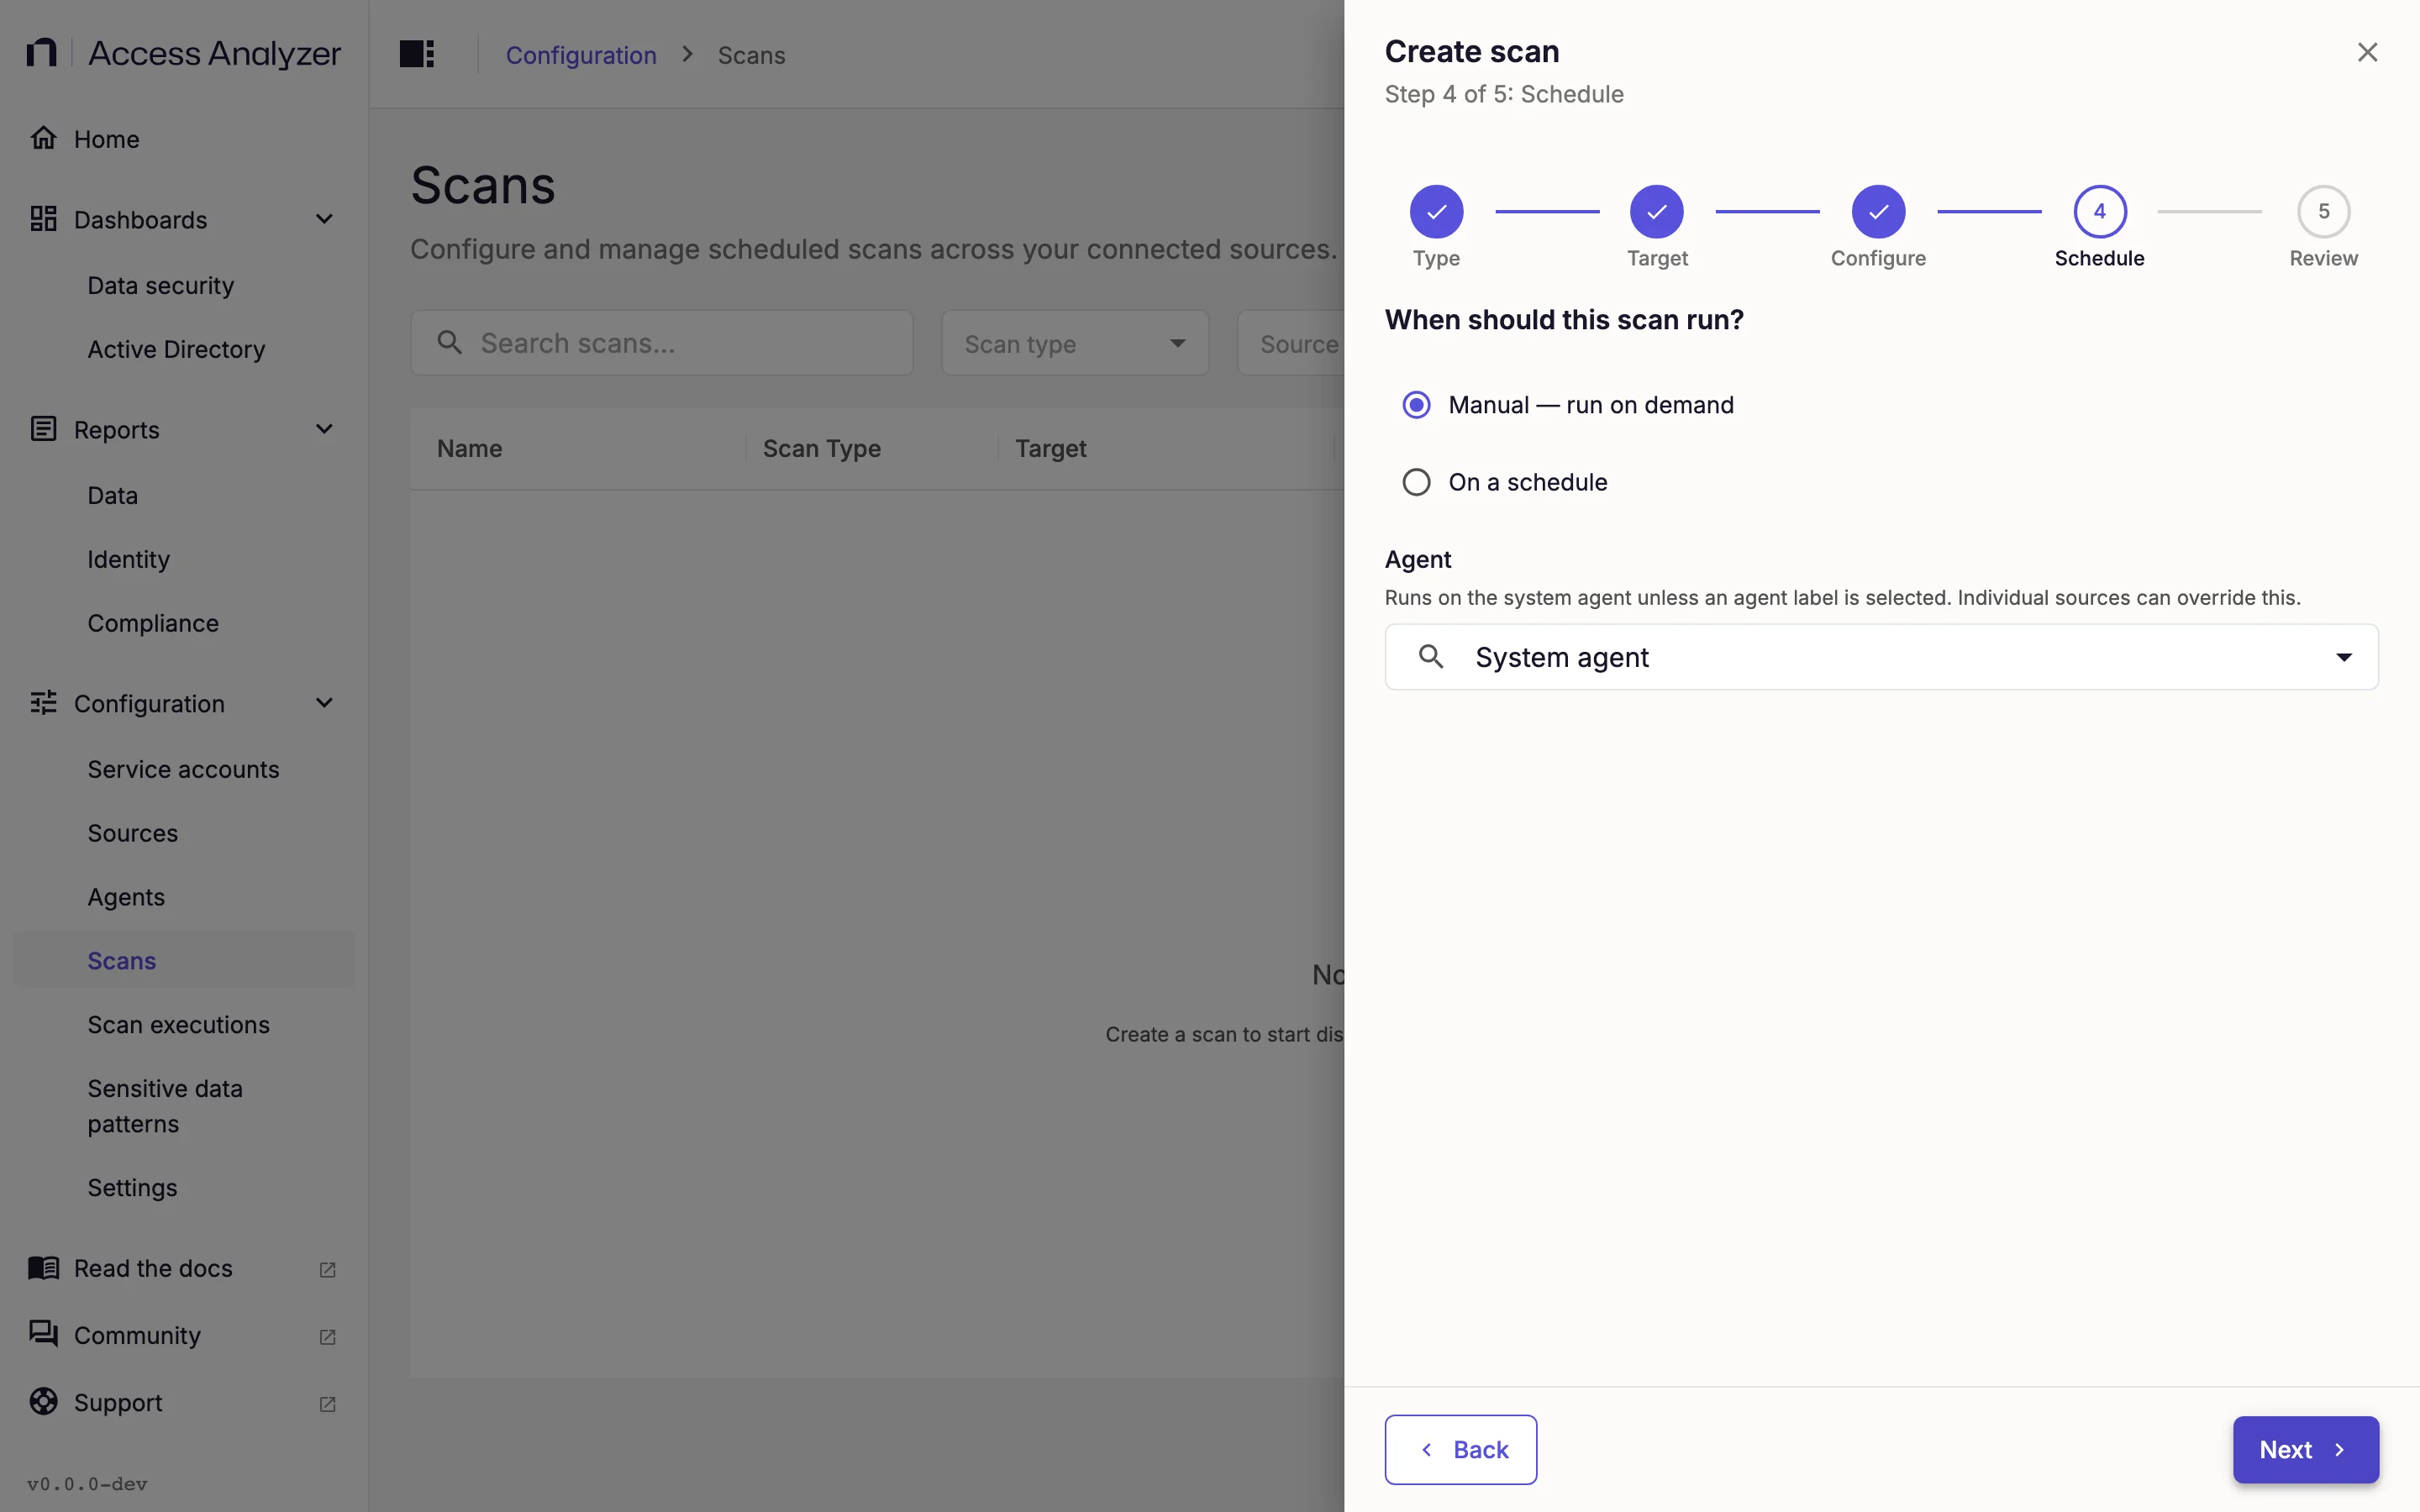
Every scan is either manual or scheduled. You set this on the Schedule step when you create a scan and can change it at any time by editing the scan. On the same step you also pick the agent the scan runs on.
Manual and Scheduled Scans
Manual — run on demand is the default. A manual scan runs only when someone starts it: Run on the Scans page, or Create & run now when you create it. Its Schedule column reads Manual and its Schedule Status badge reads Disabled.
On a schedule makes the scan run itself. Its Schedule column summarizes the timing, such as Daily 2AM, and its Schedule Status badge reads Active. A scheduled run is identical to clicking Run. Access Analyzer resolves the target again, so label-targeted scans pick up any newly matching sources, and each target source gets its own execution. It skips a source that still has an execution in progress from the previous run and resumes a paused one.
Frequency Options
Select a Frequency, and its controls appear below it.
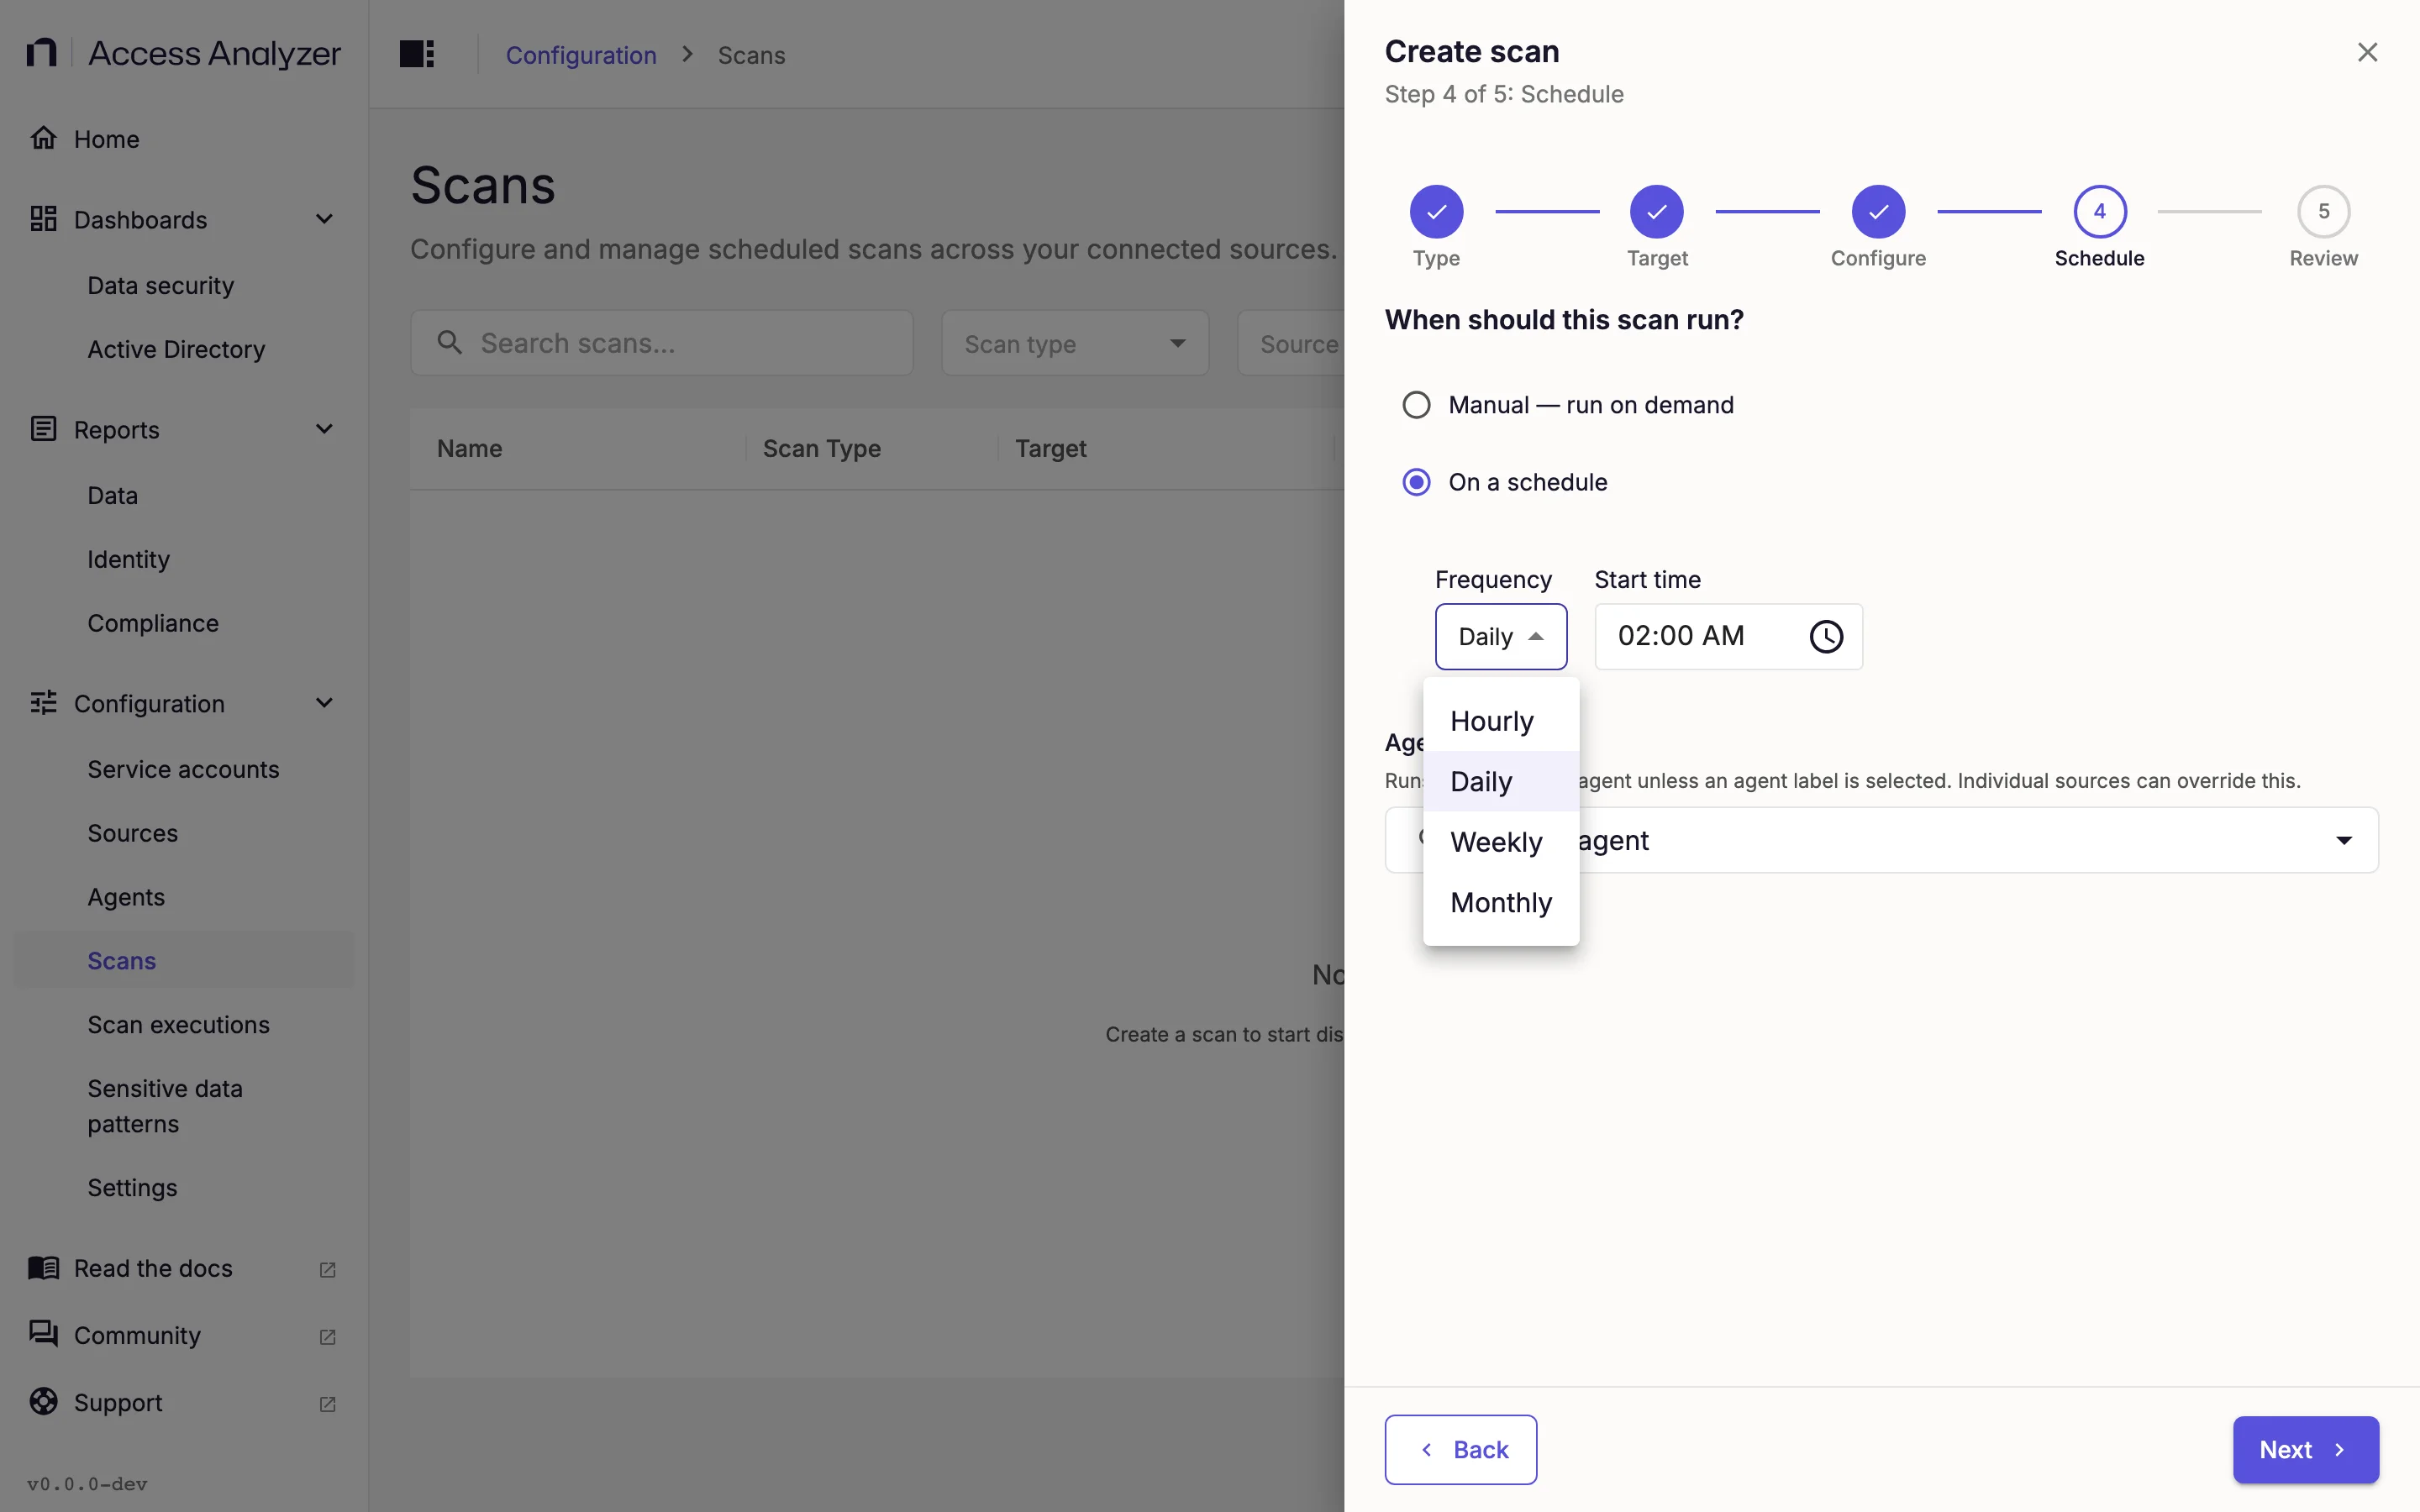
| Frequency | Controls | Default | Runs |
|---|---|---|---|
| Hourly | None | — | At the top of every hour |
| Daily | Start time | 02:00 | Once a day at the start time |
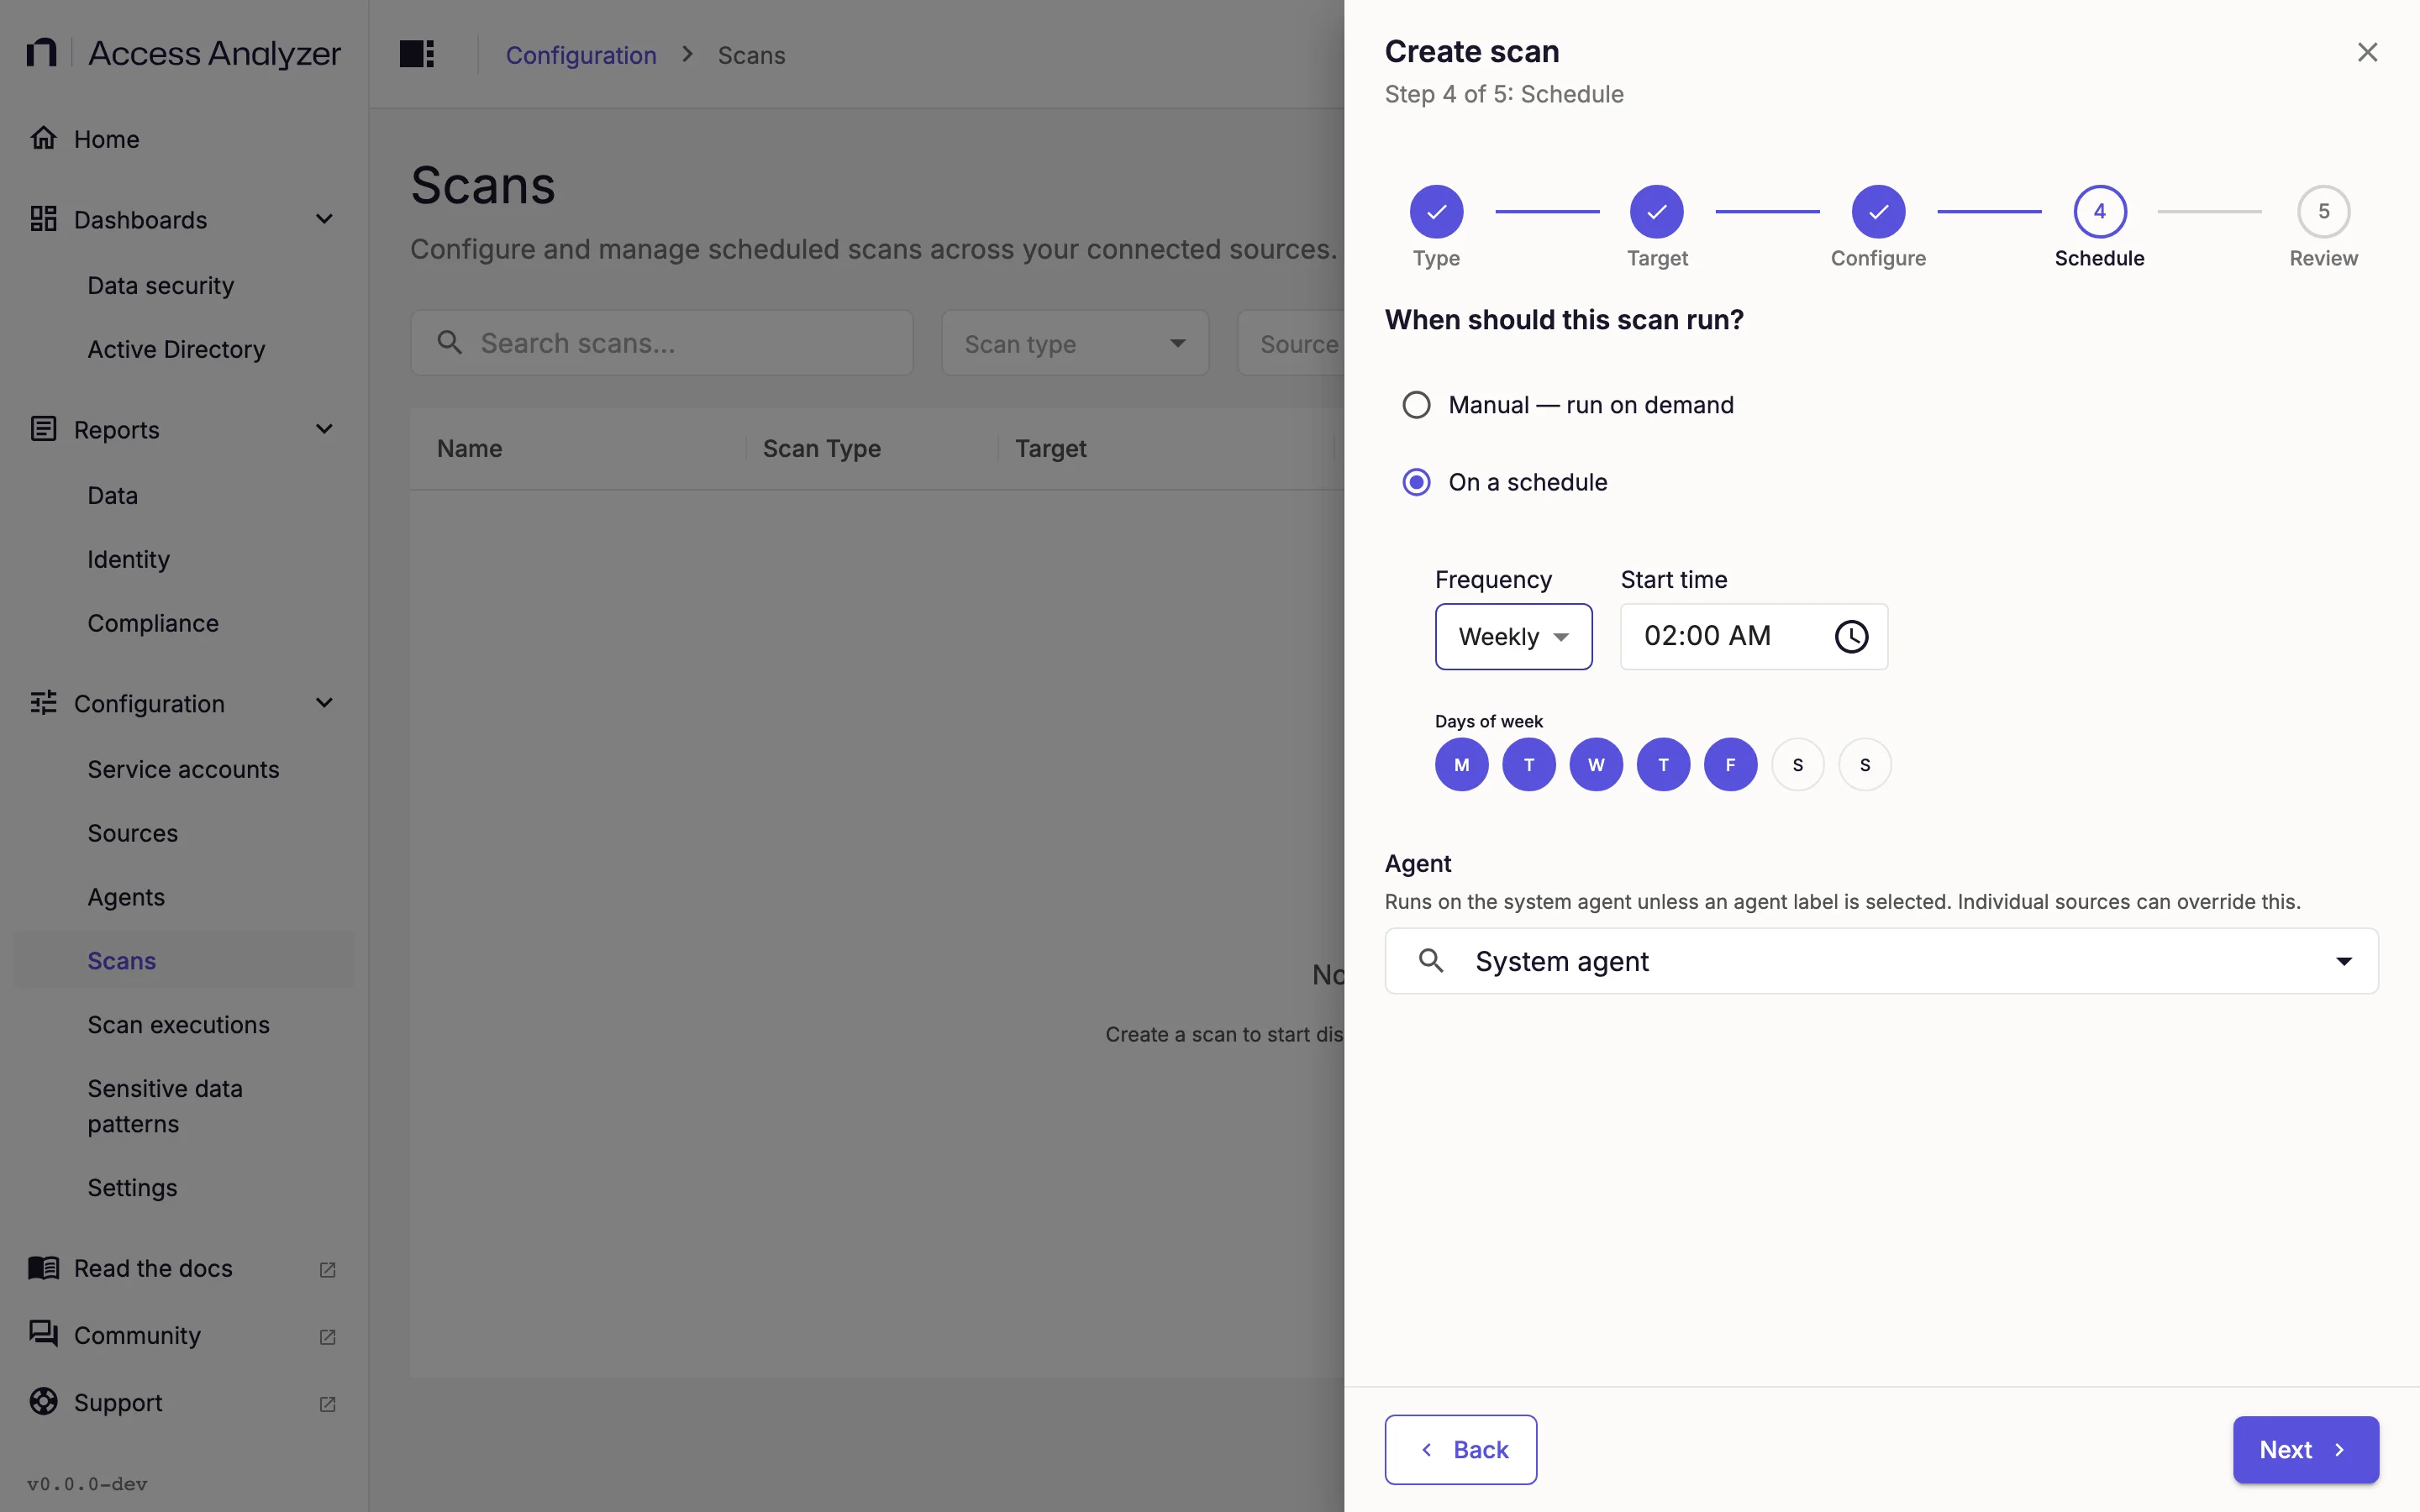
| Weekly | Start time, Days of week | 02:00, Mon to Fri | At the start time on each selected day |
| Monthly | Start time, Day of Month | 02:00, 1st | At the start time on that day of each month |
Days of week is a row of day buttons from Mon to Sun. Click a day to toggle it; at least one day must stay selected, so you can't turn off the last one. Day of Month offers 1st through 31st.
A monthly schedule set to the 29th, 30th, or 31st doesn't run in months that are shorter than that. Pick the 28th or earlier if the scan must run every month.
There is no one-time schedule. To run a scan once, leave it manual and click Run.
Access Analyzer checks schedules every minute and queues a scheduled run within a minute of its start time.
Time Zone
Access Analyzer saves start times in the time zone of the browser you save the scan from. A scan with Start time 02:00 saved from a browser in Berlin runs at 02:00 Berlin time, whoever views it later. To move the scan to a different time zone, edit it from a browser set to that zone and save it again.
Saving a scheduled scan from a browser in another time zone moves the schedule to that zone, even if you changed nothing on the Schedule step.
Set a Schedule
Start on the Schedule step of the Create scan flow. For an existing scan, click Edit scan in the scan's Actions menu on the Scans page. On the Review step, click Edit next to Schedule.
- Select On a schedule.
- In Frequency, select Hourly, Daily, Weekly, or Monthly.
- For anything other than Hourly, set Start time.
- For Weekly, select the days in Days of week.
- For Monthly, select a Day of Month.
- Click Next.
- On the Review step, enter a Name if the scan is new, then click Create scan or Save changes.
The Schedule row of the Summary card shows the schedule as it appears on the Scans page, and the Calendar view shows the upcoming runs of every scheduled scan together.
Turn a Schedule Off and On
There is no separate pause for a schedule. To stop a scan from running on its own:
- On the Scans page, click Edit scan in the scan's Actions menu.
- On the Review step, click Edit next to Schedule.
- On the Schedule step, select Manual — run on demand.
- Click Next.
- On the Review step, click Save changes.
The Schedule Status badge changes to Disabled. The scan keeps its settings and target, so you can still run it manually. To resume the schedule, repeat the steps and select On a schedule instead.
Pause and Stop on the Scans page act on the scan's running executions, not on its schedule. The schedule keeps firing, and when the next run comes due, Access Analyzer resumes a paused execution rather than leaving it waiting. Scan executions describes what Pause and Stop do to a running execution.
Agent
The Agent field sits under the schedule controls. Open its dropdown to see two groups: System, with the single option System agent, and Agent labels, with one key=value entry for each label your deployed agents carry. Enter text in Search labels… to filter a long list.
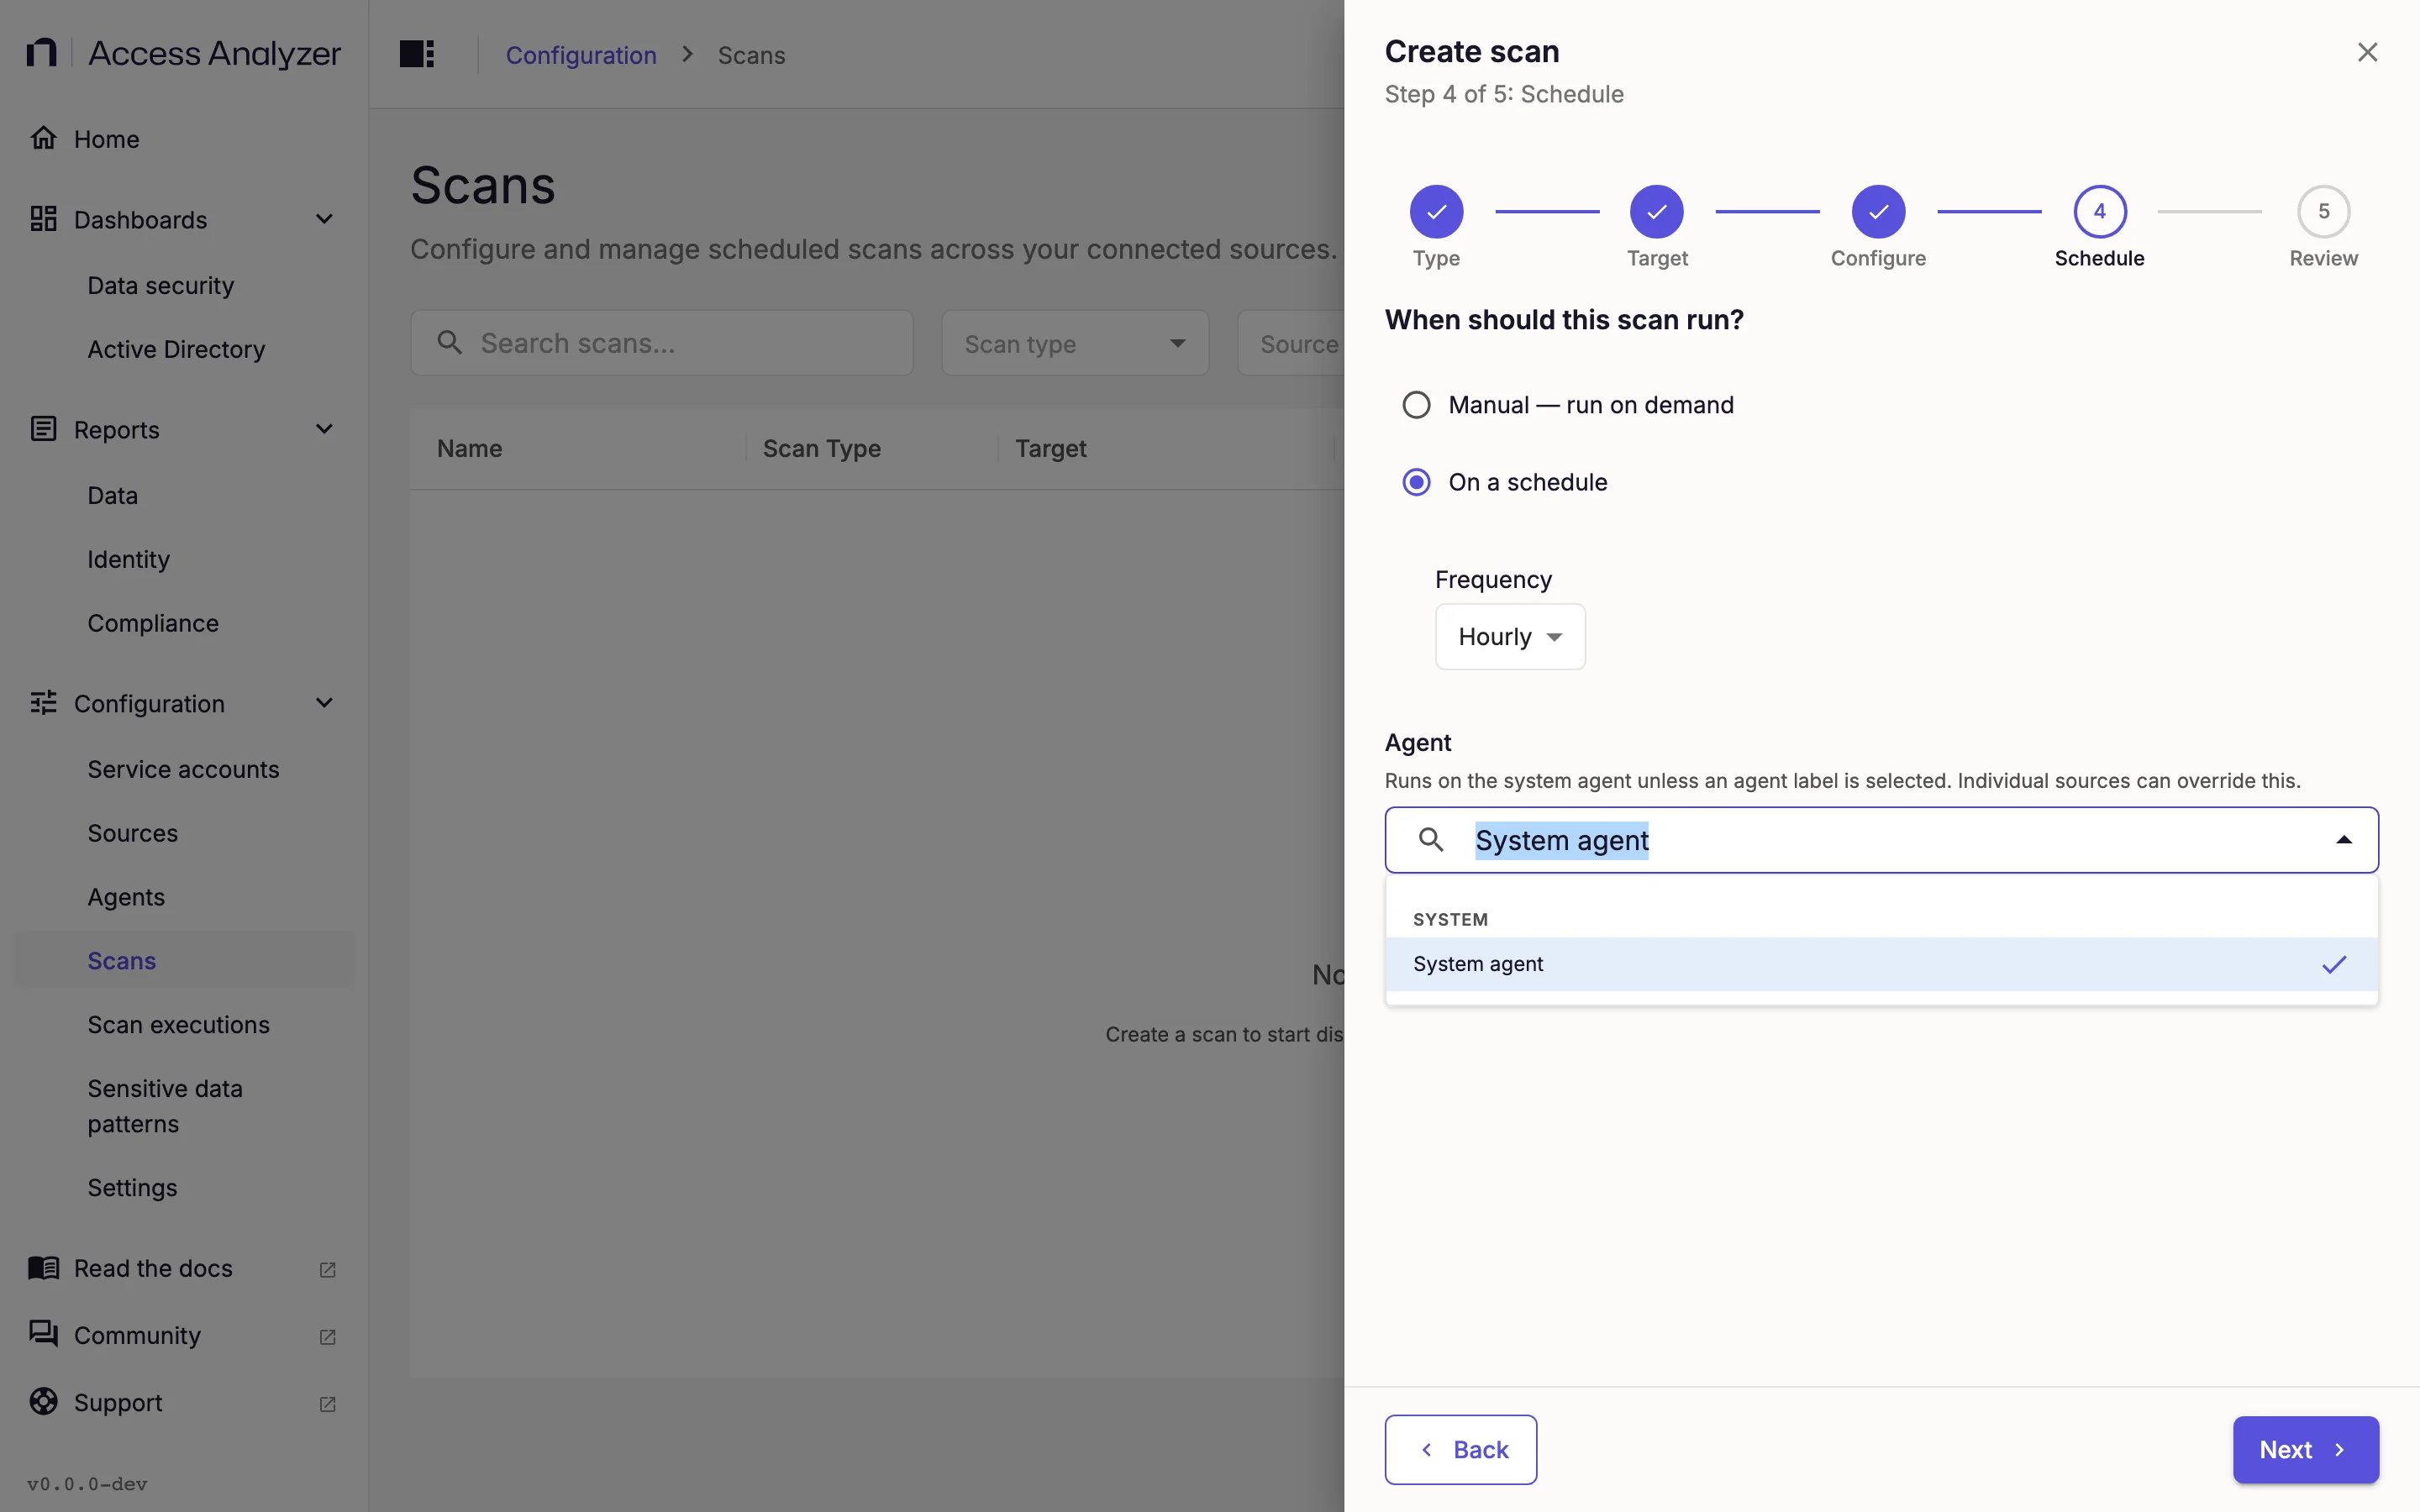
With System agent selected, the scan runs on the Access Analyzer server. If you select a label, each execution runs on an agent that carries it. If no agent carries the label when a run starts, the execution doesn't fall back to the System agent. It waits for a matching agent and eventually fails if none becomes available. To send a single source to a different agent, use its Source overrides entry on the Configure step. Agent labels and scan routing has the full rules and worked examples.