Redshift_SensitiveDataScan Job
This job discovers sensitive data in PostgreSQL databases on pre-defined or user-defined criteria.
Queries for the Redshift_SensitiveData Scan Job
The Redshift_SensitiveDataScan Job uses the SQL Data Collector for queries.
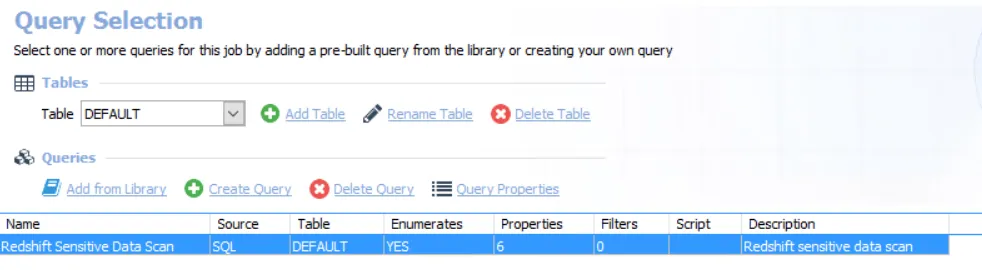
The query is:
- Redshift Sensitive Data Scan — Provides information on all the sensitive data that was discovered in the targeted Redshift servers based on the selected scan criteria.
Recommended Configuration for the SensitiveDataScan Query
The Redshift_SensitiveDataScan Job is preconfigured to run using the default settings for the Sensitive Data Collection category. You only need to set up the connection for the Redshift_SensitiveDataScan Job once. After you establish the connection, it applies to any other 0.Collection job query. To customize configurations, complete the following steps.
Step 1 – Navigate to the Databases > 0.Collection > Redshift > Redshift_SensitiveDataScan > Configure node and select Queries.
Step 2 – In the Query Selection view, select the Redshift Sensitive Data Scan query click Query Properties. The Query Properties window appears.
Step 3 – Select the Data Source tab, and click Configure. The SQL Data Collector Wizard opens with Sensitive Data Collection category selected.
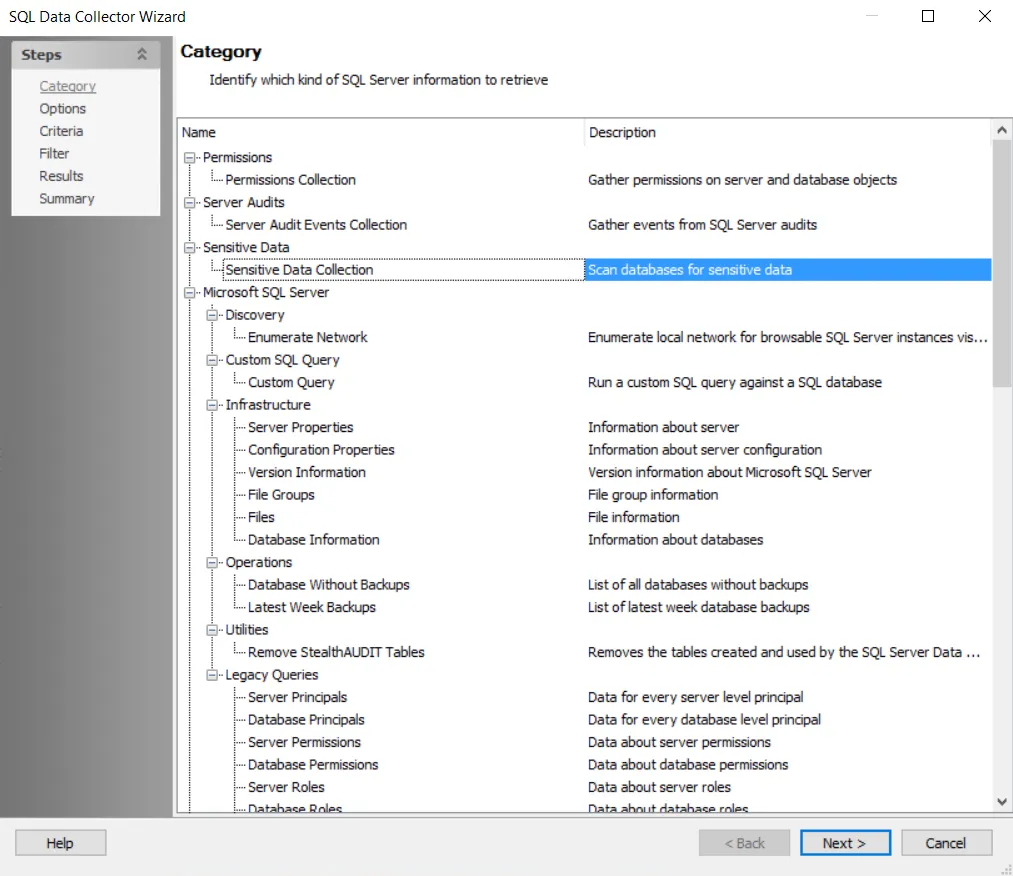
Step 4 – Click Next. The Sensitive Data Scan Settings view appears.
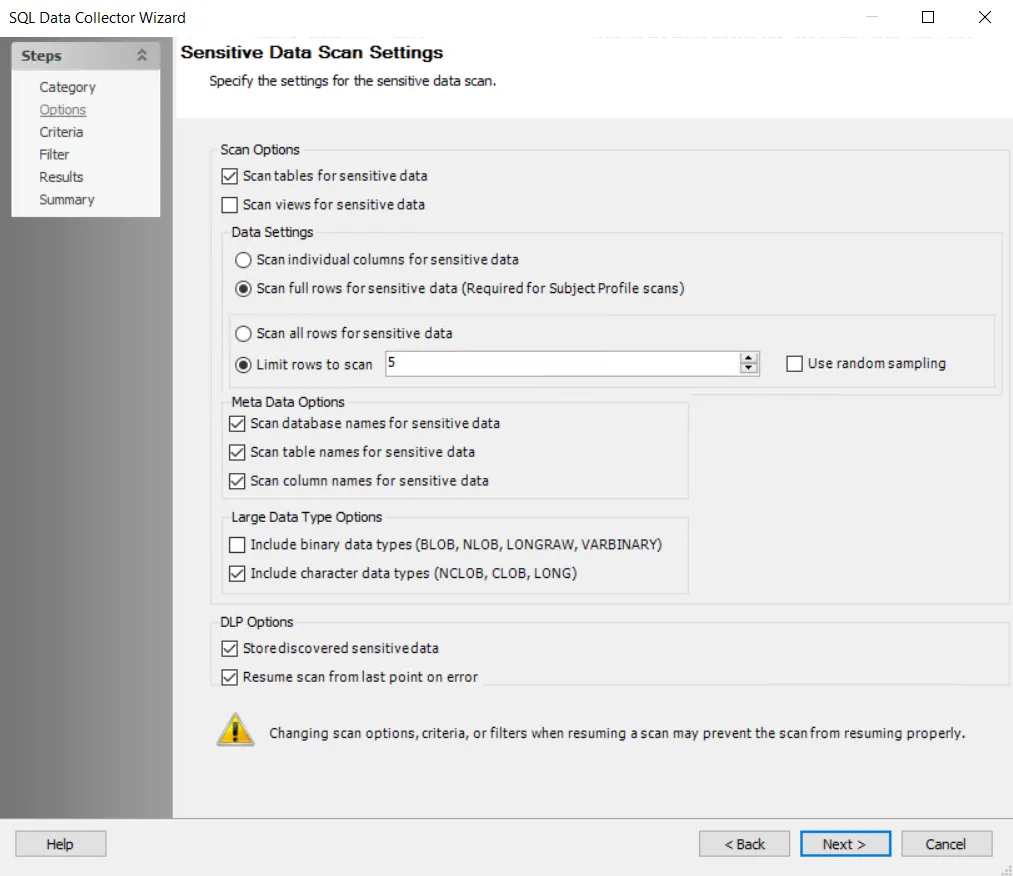
Step 5 – To modify sensitive data scan options, select the scan options you want. See the SQL: Options page for additional information.
The Sensitive Data Scan Settings are preconfigured for optimal performance for a high-level table scan. Configuring these settings to increase the scope of the sensitive data scan may significantly increase scan time.
Step 6 – Click Next. The Select Criteria view appears.
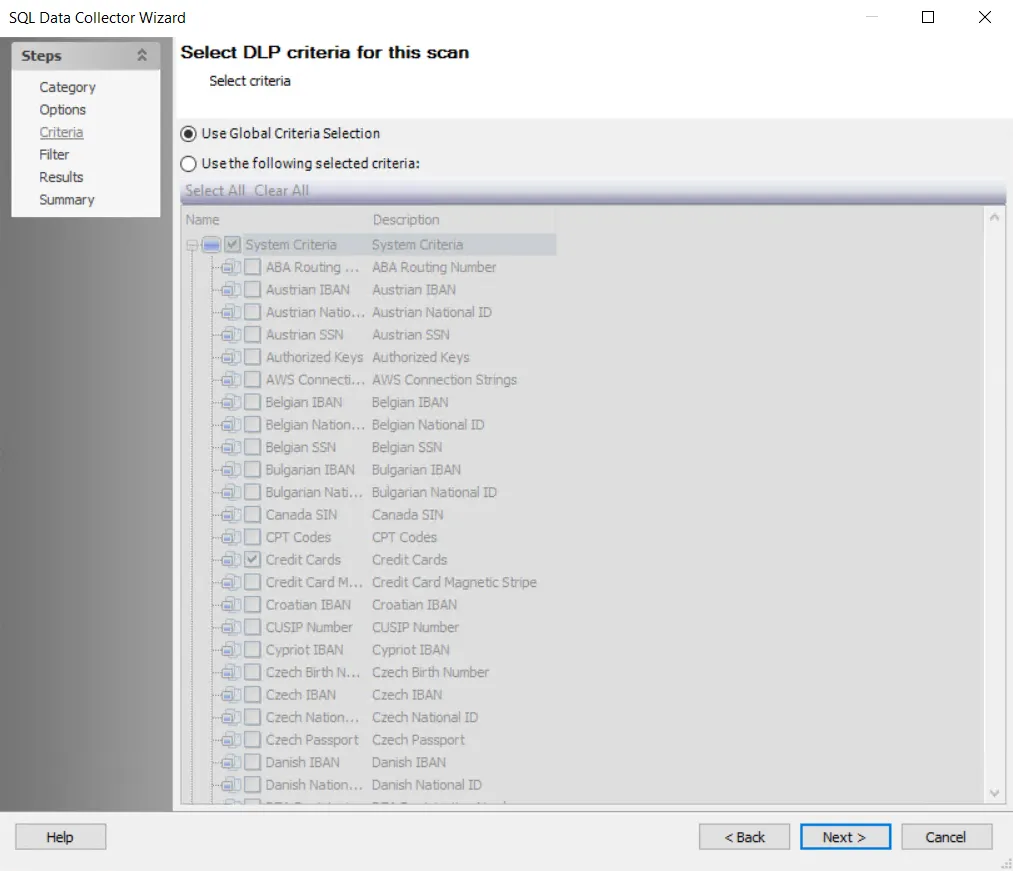
Step 7 – To modify criteria, click Use the following selected criteria: and select your choices. By default, the Sensitive Data Scan job is set to Use Global Criteria. Also by default, the following System Criteria have been selected:
- Credit Cards
- Tax Forms
- US SSN
- User ID
- Password
For more information on adding or deleting criteria, navigate to the SQL: Criteria page or See the Sensitive Data Criteria Editor topic for additional information.
Step 8 – Click Next. The Filters view appears.
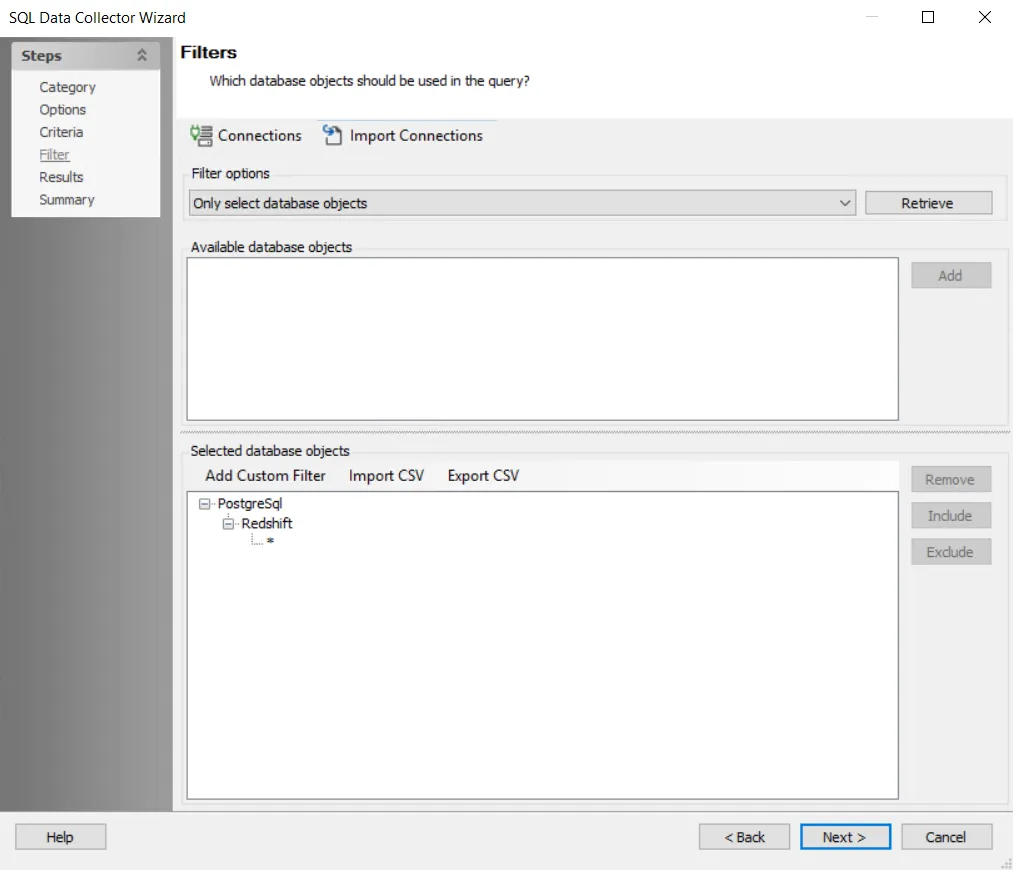
Step 9 – Click Connections to open the Manage Connections window.
Add SQL databases to the query before you scan them. Before you add a query, establish a connection to the database.
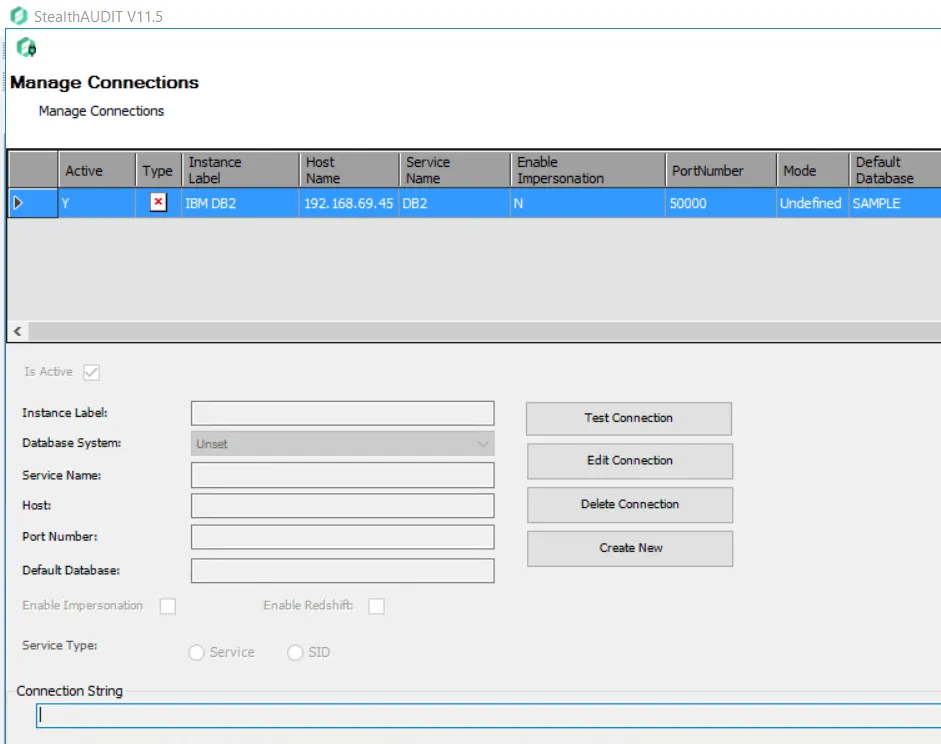
Step 10 – In the Manage Connections window, click Create New Connection and add the following information:
- Instance Label — The name of the instance
- Database System — Unique identifier for the database. Select the server to connect to from the dropdown list.
- Service Name — Unique identifier for the service. Enter a Service Name.
- Host — Name or IP address of the host where the database is located
- Port Number — Port number for the selected database
- Default Database — Default Database
Step 11 – Exit the Manage Connections window to return to the Filter page.
Step 12 – Select Only select database objects. or All database objects. The query is configured by default to target Only select database objects.
For more information on filtering, see the SQL: Filter page.
Step 13 – Click Retrieve. The Available database objects box will populate.
Step 14 – Add the databases and instances to audit, using any of the following methods:
- Select the database objects you want and click Add.
- Use the Import CSV button to import a list from a CSV file, if desired.
- Optionally use the Add Custom Filter button to create and apply a custom filter.
The selected database objects to be audited display.
Step 15 – Click Next and navigate to the Summary page, click Finish to save any setting modifications or click Cancel if no changes were made. Then click OK to close the Query Properties window.
The 1-Db2_SensitsveDataScan Job is now ready to run with the customized settings.
Analysis Tasks for the Redshift_SensitiveDataScan
Navigate to the _**_Databases > 0.Collection >**Redshift >__ Redshift_SensitiveDataScan > Configure node and select Analysis to view the Analysis Tasks. The Analysis tasks don't require any configuration as they just populate the reports with the collected information and do not collect data themselves.
Don't modify or deselect the selected analysis tasks. The analysis tasks are preconfigured for this job.
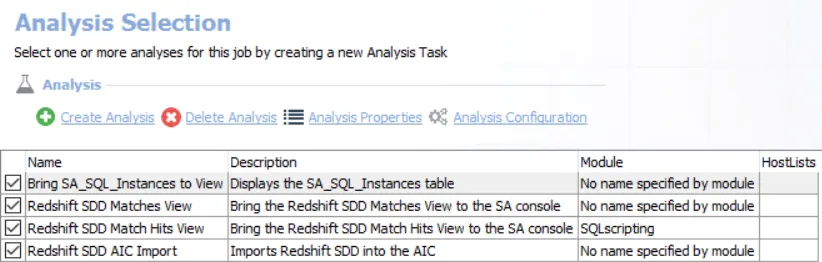
The default analysis tasks are:
- Bring SA_SQL_Instances to View — Displays the SA_SQL_Instances table
- Redshift SDD Matches View — Brings the Redshift SDD Matches View to the Access Analyzer console
- Redshift SDD Matches Hits View — Brings the SA_SQL Match Hits View to the Access Analyzer console
- Redshift ADD AIC Import —Imports Redshift SDD into the AIC