Configure AWS for Scans
To scan multiple AWS accounts using one account, create a role in each target account so it can grant the designated scanning account permission to scan the resources it controls. Complete the following steps using a user with administrative access to each target account:
Step 1 – Create a Managed Policy in each target account that will be used to allow access to account (S3, Org, and IAM).
Step 2 – Create a Role in each target account that will be used to allow access to listing IAM users.
Step 3 – Create a Managed Policy in the designated scanning account that will be used to allow the service account to assume the configured role in each target account.
Step 4 – Add the role created in the scanning account to Access Analyzer's 1-AWS_OrgScan, 2-AWS_S3Scan, and 3-AWS_IAMScan job query configurations. See the AWS: Login Roles topic for additional information.
After you complete these steps, add the role to the AWS queries within Access Analyzer.
Create a Managed Policy in Each Target Account
Complete the following steps in each target account.
Step 1 – Sign into the Identity and Access Management Console (IAM) as an administrator of the Trusting account.
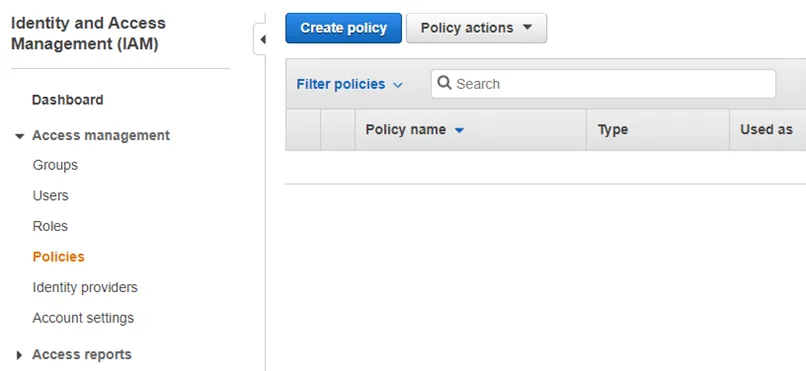
Step 2 – Browse to the Identity and Access Management (IAM) Console. Navigate to Policies and click Create policy.

Step 3 – Select the JSON tab.
Step 4 – Paste the following:
{
    "Version": "2012-10-17",
    "Statement": [
        {
            "Sid": "CapabilityIamScan",
            "Effect": "Allow",
            "Action": [
                "iam:GenerateCredentialReport",
                "iam:GenerateServiceLastAccessedDetails",
                "iam:Get*",
                "iam:List*",
                "iam:Simulate*",
        "sts:GetAccessKeyInfo"
            ],
            "Resource": "*"
        },
        {
            "Sid": "CapabilityS3Scan",
            "Effect": "Allow",
            "Action": [
                "s3:Describe*",
                "s3:Get*",
                "s3:HeadBucket",
                "s3:List*"
            ],
            "Resource": "*"
        }
    ]
}
Step 5 – Click Review Policy.
Step 6 – Enter a name for the policy in the Name box.

Step 7 – Click Create Policy.
If the designated scanning account isn't in Root (Master Account), create a second policy in the Master Account with the following JSON definition:
{
    "Version": "2012-10-17",
    "Statement": [
        {
            "Sid": "RequiredCapabilityOrgScan",
            "Effect": "Allow",
            "Action": [
                "iam:GenerateOrganizationsAccessReport",
                "organizations:Describe*",
                "organizations:List*"
            ],
            "Resource": "*"
        }
    ]
}
The next step is to create a role in each target account that allows access to list IAM users.
Create a Role in Each Target Account
Complete the following steps in each target account. For this, you need the Account ID of the designating scanning account.
If the scanning account is also a target account, be sure to complete these steps for the scanning account as well.
Step 1 – Sign into the Identity and Access Management Console (IAM) as an administrator of the target account.
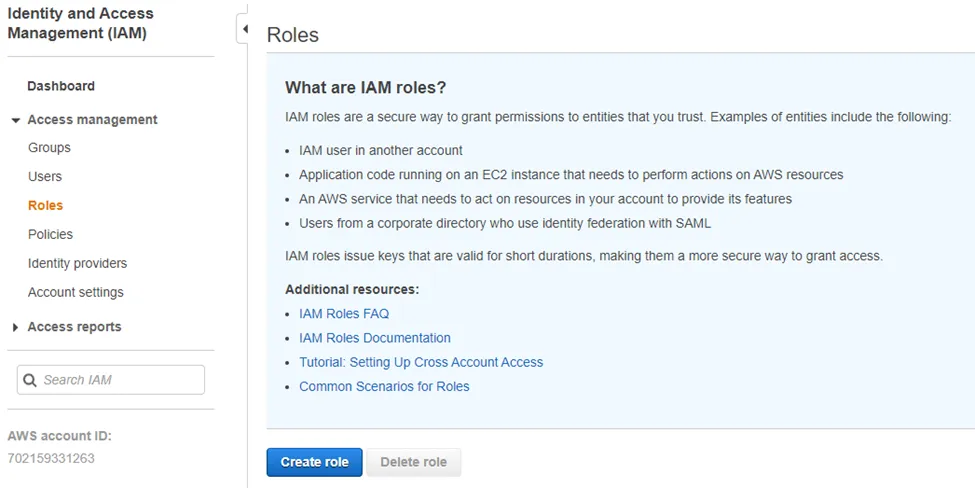
Step 2 – Navigate to Access management > Roles and click Create role.
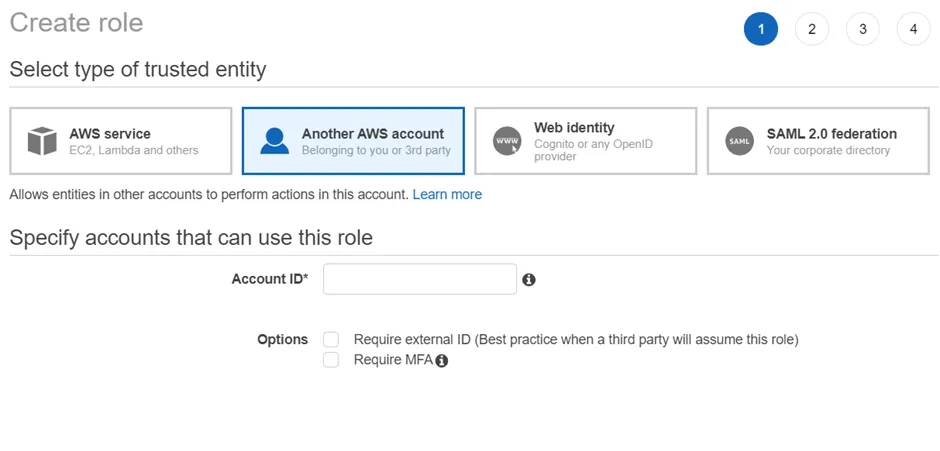
Step 3 – Select the Another AWS Account option and add the Account ID of the scanning account that Access Analyzer uses.
Step 4 – Click Next: Permissions.

Step 5 – Add the policy or policies created earlier in this topic to this role.
Step 6 – Click Next: Tags.
Step 7 – Click Next: Review.
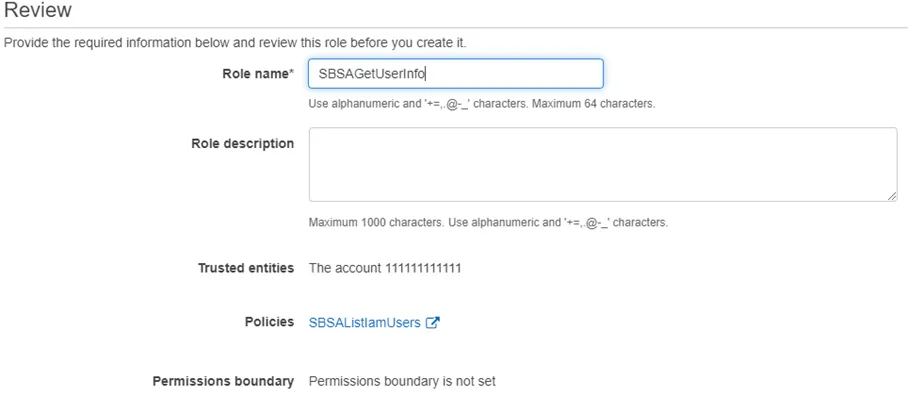
Step 8 – Enter a Role name.
Step 9 – Click Create Role.
The next step is to create a Managed Policy in the designated scanning account that lets the service account assume the configured role in each target account.
Configure the Scanning Account
Create a Managed Policy in the scanning account that lets the user assume the roles configured in each target account.
Step 1 – Sign into the Identity and Access Management Console (IAM) as an administrator of the scanning account.
Step 2 – Navigate to Access Management > Policies and click Create policy.
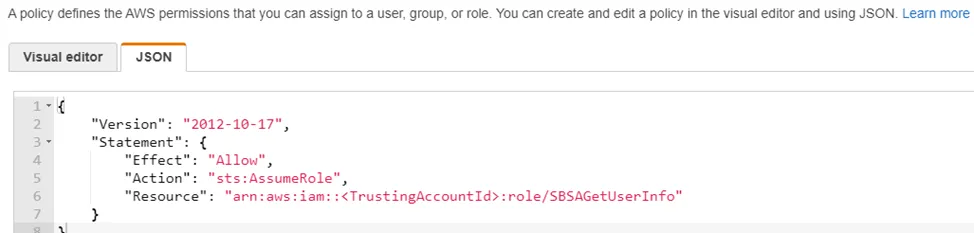
Step 3 – Select the JSON tab.
Step 4 – Paste the following:
{
    "Version": "2012-10-17",
    "Statement": [
        {
            "Sid": "RequiredCapabilityOrgScan",
            "Effect": "Allow",
            "Action": [
                "iam:GenerateOrganizationsAccessReport",
                "organizations:Describe*",
                "organizations:List*"
            ],
            "Resource": "*"
        },
        {
            "Sid": "RequiredCapabilityMemberAccountAccess",
            "Effect": "Allow",
            "Action": "sts:AssumeRole",
            "Resource": "arn:aws:iam::*:role/ROLENAME"
        }
    ]
}
Replace ROLENAME with the name of the role you created. If ROLENAME differs across
accounts, create a policy for each distinct role name.
Step 5 – Click Review Policy.

Step 6 – Enter a Policy Name.
Step 7 – Click Create Policy.
Step 8 – Create a group with the service account user and assign both policies to this group.
Step 9 – Under Access Management > Users, select the service account user.
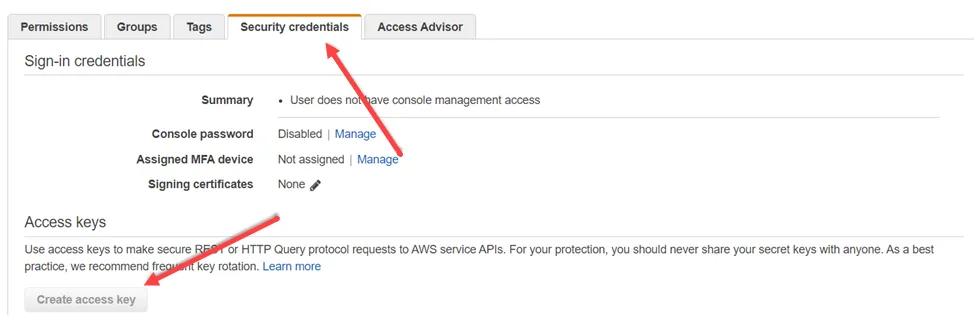
Step 10 – In the Security credentials tab, click Create access key, and note the Access key ID and Secret access key. Enter both into Access Analyzer.
You can now create the Connection Profile for the AWS Solution. See the Amazon Web Services for User Credentials topic for additional information.