Set a Default Storage Profile
While multiple Storage Profiles can exist, you can set only one profile as the default. A green checkmark next to the profile name indicates the default Storage Profile. Change the default Storage Profile at the global level:
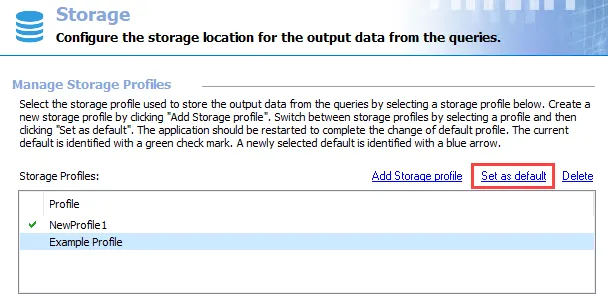
Step 1 – Select the profile to be the new default, and click Set as default. The Change storage profile window opens.
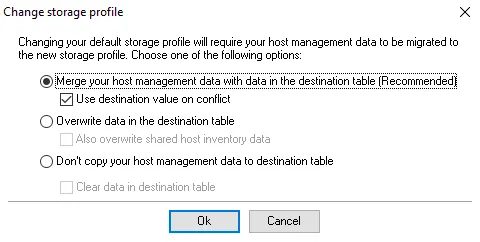
Step 2 – There are three options for host management data migration. Select the option you want, choose whether to apply the secondary option, and click OK.
-
Merge your host management data with data in the destination table (Recommended) – This option keeps existing hosts and host discovery tasks in the destination and updates the tasks based on the information found in the source database
- Use destination value on conflict – If selected, this option resolves any conflicting information between the destination table and the source database in favor of the destination table
-
Overwrite data in the destination table – This option replaces existing hosts and host discovery tasks with ones found in the source database
- Also overwrite shared host inventory data – If selected, this option also replaces host inventory data with data found in the source database
-
Don’t copy your host management data to destination table – This option doesn't copy, update, or overwrite information between databases
- Clear data in destination table – If selected, this option deletes all host management data in the destination table

Step 3 – When the host management data migration has completed, click Finish.
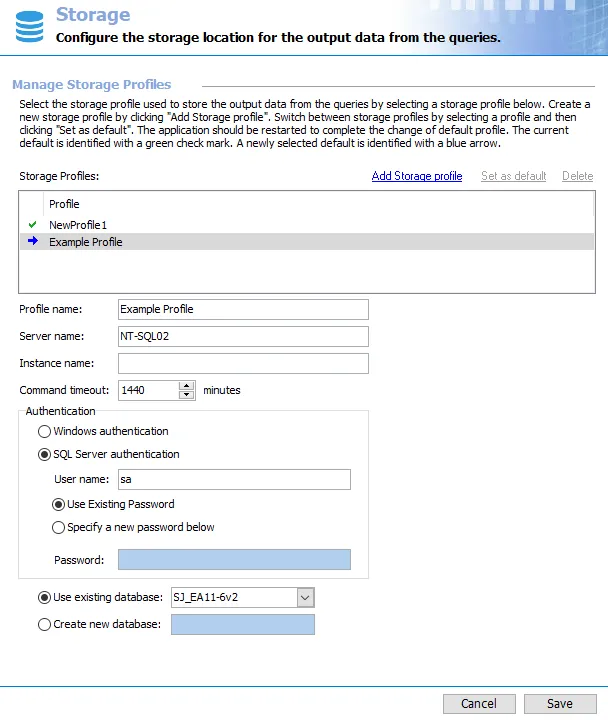
Step 4 – A blue arrow now points to the new default Storage Profile. However, the arrow is also an indication that Access Analyzer doesn't yet fully recognize the new default. Click Save and then OK to confirm the changes.
Step 5 – Finally, to ensure these changes take effect, exit the Access Analyzer application and relaunch it.
The green checkmark replaces the blue arrow, indicating that Access Analyzer now recognizes the new default Storage Profile.