Adding False Positive Exclusion Filters
To add a False Positive Exclusion Filter:

Step 1 – Click Add Filter to open the Add False Positive Exclusion Filter window.
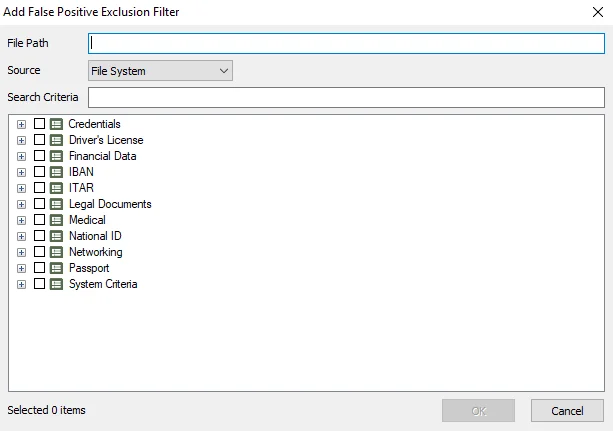
Step 2 – Enter the File Path according to the type of format for the repository.
Step 3 – Indicate the type of repository by selecting either File System or SharePoint from the Source dropdown menu.
Step 4 – Select the required criteria from the list by selecting the relevant checkboxes. You can use the Search Criteria textbox to filter the list by keywords.
Step 5 – Click OK to add the filter to the False Criteria list. The Add False Positive Exclusion Filter window closes.
Step 6 – Click Save on the Sensitive Data view to save changes.
Enterprise Auditor now applies the false positive exclusion filter to Sensitive Data reports.