Authoring Page
On the Authoring page of the Report Configuration wizard, you can configure the name, header information, and publish settings for the report.
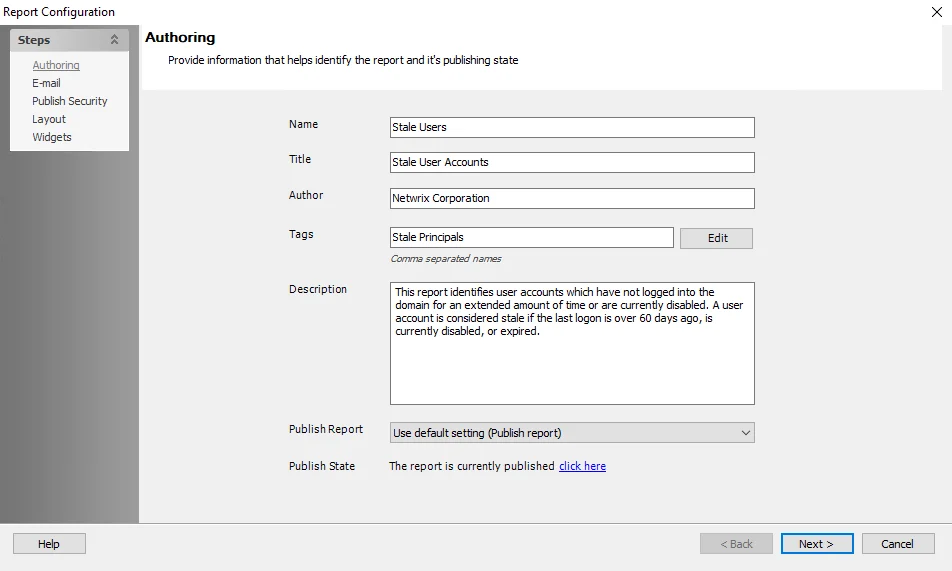
Configure the following settings as required:
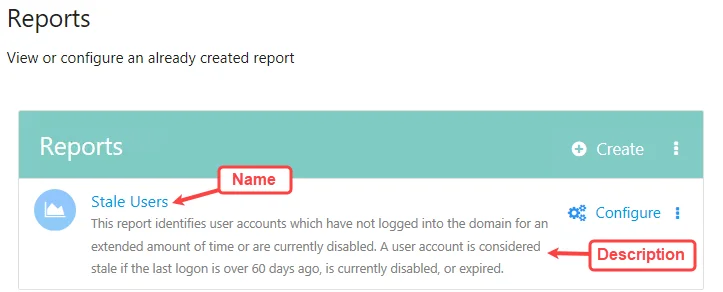
- Name – The name used for the report in the Enterprise Auditor console and Web Console.
Header Options
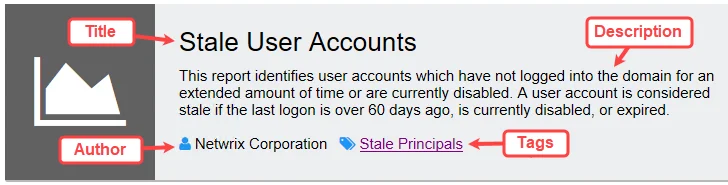
- Title – The title of the report as displayed at the top of the generated report
- Author – Name of the person or group who created the report. This is displayed at the top of the generated report.
- Tags – Use the tag editor to add and remove tags, see the Add Tags to a Report topic for more information. Tags are displayed in the header of the generated reported.
- Description – A description of the report content. It is displayed beneath the report Title in the generated report.
Publish Options
- Publish Report – Select an option to configure if the report should be published to the Web
Console when it is generated.
- Use default setting – Applies the Global report settings, or the settings configured at the job group or job levels if inheritance has been broken. (See the Publish Option, Reporting Node, and Report Settings Tab topics for additional information.)
- Publish report – Select this option to publish the report
- Don't publish report – Select this option to not publish the report
- Publish State – Shows the current publish state of the report. If the report is already published, you can click the link to open the report in the Web Console.
Add Tags to a Report
You can add tags to reports to describe the content and use cases of the report (see the Tags topic for additional information). Use the Tag Editor to select the tags for a report, including creating new ones to select.
To select tags using the Tag Editor:
Step 1 – On the Authoring page of the Report Configuration wizard, click the Edit button located next to the Tags text box.
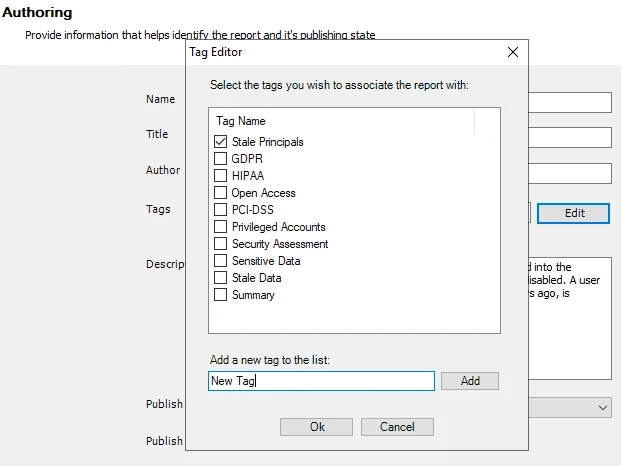
Step 2 – In the Tag editor, select the checkbox next to the tags you want to apply to the report.
- In addition to selecting existing tags, you can also add new tags to select. To create a tag, enter the tag name you want in the text box and click Add.
Step 3 – Click OK.
The Tags field now shows the selected tags as a comma separated list.