Special Features & Functions
There are several special features and functions available for jobs and job components with which Enterprise Auditor users should be familiar.
View XML Files
Job, query, analysis, and action property windows all have the View XML option. These let you edit through an XML text window.
Open Explore Folder
Enterprise Auditor users can directly open a selected job or job group folder from the Jobs tree using the Explore Folder option in the right-click menu.
Publish Reports after Report Generation
Send reports that have been generated but not published to the Web Console using the Publish option in the right-click menu from the selected Jobs tree, job group, or job node. See the Publish Reports Window topic for additional information.
Job Configuration Change Tracking
Track job configuration changes using the Changes option in the right-click menu from the selected Jobs tree, job group, or job node. See the Changes Window topic for additional information.
Job Export
Export jobs to a ZIP file using the Export option in the right-click menu from the selected job group or job node. See the Export Job to Zip Archive Window topic for additional information.
See the Jobs Tree Right-click Menus section for additional features.
Export Job to Zip Archive Window
The Export Job to Zip Archive window opens from the Export option in the right-click menu from the selected job group or job node.
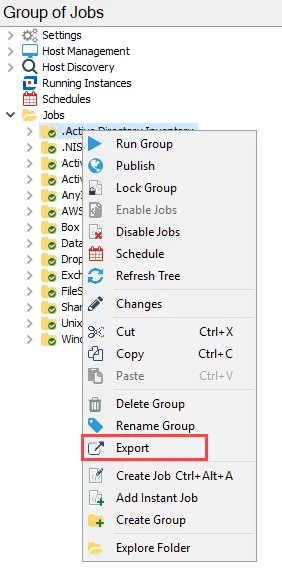
Select Export from the right-click menu to open the Export Group to Zip Archive window.
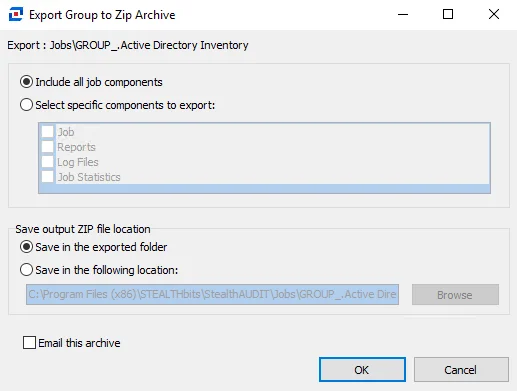
The Include all job components option will zip the job’s directory, the reports, the job log, and the SA_Debug log. The Select specific components to export option allows Enterprise Auditor users to select which components to include in the ZIP file.
There are two options for where to save the ZIP file:
- Save in the exported folder – Saves the file in the job’s directory, for example
%sainstalldir%Jobs\GROUP_.Active Directory Inventory\.Active Directory Inventory.zip - Save in the following location – Enter or browse to the save location you want
The Email this archivecheckbox lets you send an email notification with the attached ZIP file.

When the archive has been created, the Enterprise Auditor Support Email window opens. By default, the recipient is set to Netwrix Support but you can modify it before sending. You can also add additional recipients and modify the Subject and email body.
Publish Reports Window
Use the Publish Reports wizard to better manage the list of reports published to the Web Console.
When you right-click a job group or job and select Publish, the Publish Reports wizard opens. You can choose the list of reports to be published or removed from the Web Console.
To publish the reports:
Step 1 – Right-click a job group or job and select Publish from the dropdown list.
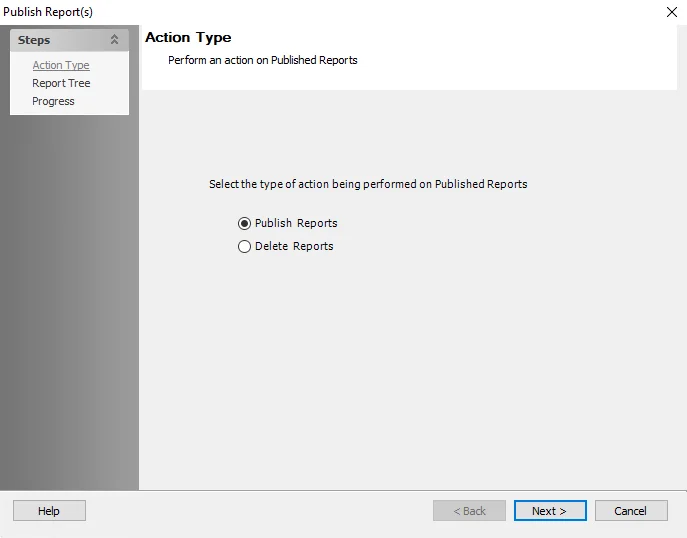
Step 2 – On the Action Type page, select the type of action to perform on the reports and click Next:
- Publish Reports
- Delete Reports
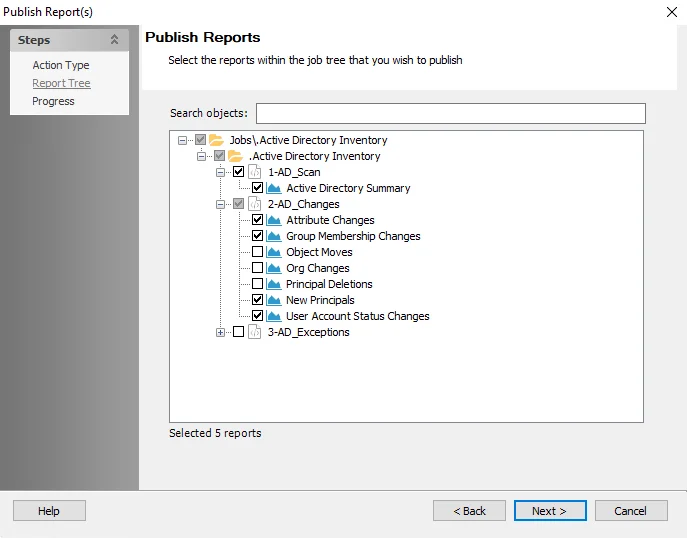
Step 3 – On the Report Tree page, select the reports to publish or remove (depending on the Action Type you selected in the previous step). Click Next to proceed with the action.
Step 4 – The Progress page shows you the status of the action. When it has completed, click Finish to exit the wizard.
You can view published reports under the [Job] > Results node or through the Web Console. See the Reporting topic for additional information.